The terminal is a Mac utility that is often overlooked because some users find it arcane. But it provides an opportunity to customize elements of your Mac by using command line prompts. This way, you can perform tasks that would otherwise require additional software.
One advantage of using Terminal is that you can quickly create a new admin account, replace an admin, or add new users on your Mac. In this article, we’ll go over all the details regarding how to use Terminal as a Mac administrator, and we’ll answer a few commonly asked questions.
How to Create an Admin Account on a Mac Using Terminal
Creating a new admin account using Mac’s graphical interface is often the fastest option, but there are times when using Terminal is a preferable option.
For example, if you’re troubleshooting an issue remotely via the Screen Sharing feature, you’ll need to open Terminal. Before diving into the steps you’ll need to take to create an administrator account using Terminal, let’s find out where you can find this utility:
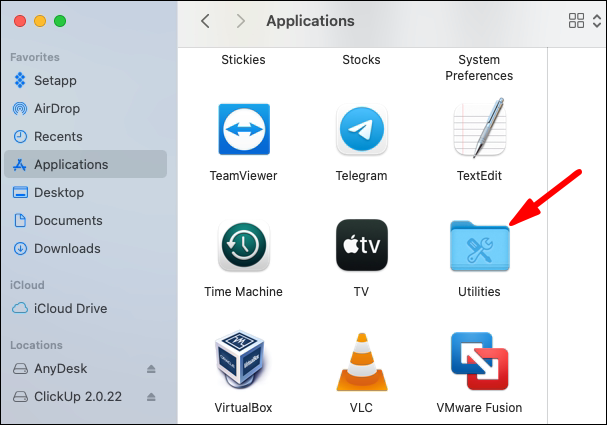
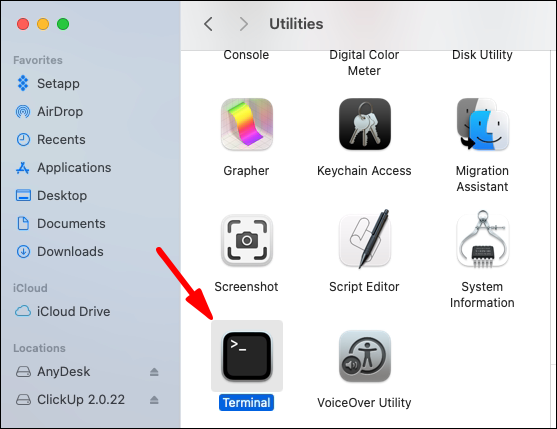
- Go to the “Finder” app and then select “Applications.”

- Scroll down and double-click on the “Utilities” folder.

- Find Terminal and open it.
Now, follow these steps to make a new administrator account:
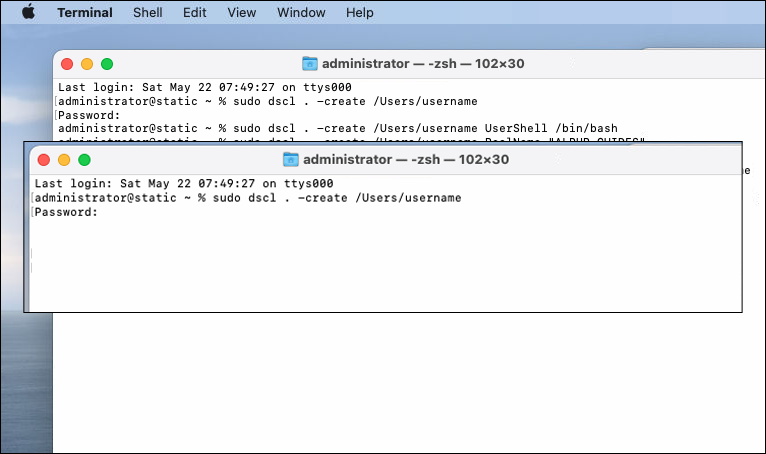
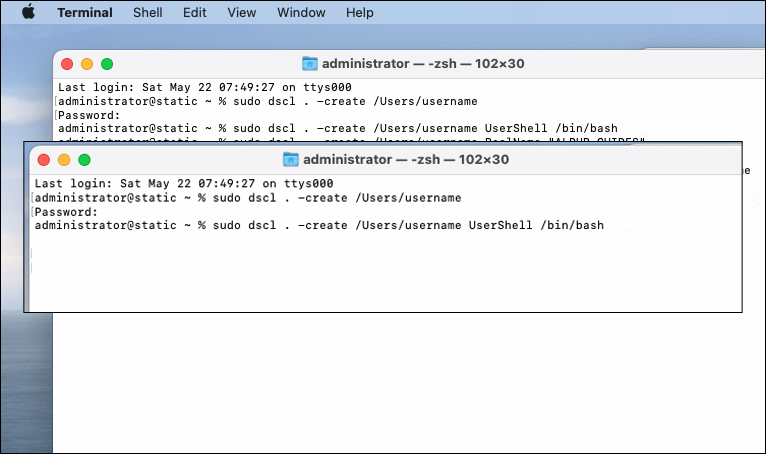
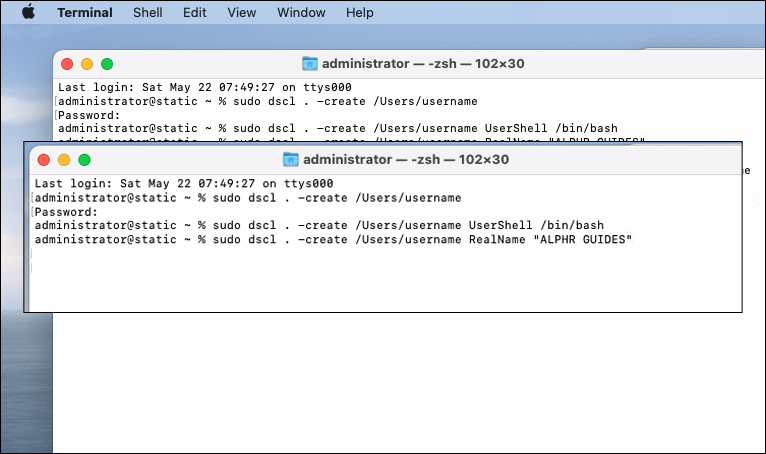
- Type in sudo dscl . -create /Users/username and then hit enter. Then change the “username” part with one word of your choosing. Type in a new password and hit “enter” again.
- Type in sudo dscl . -create /Users/username UserShell /bin/bash and hit “enter “again.
- Now add the following command: sudo dscl . -create /Users/username RealName “Jane Smith” and hit “enter.”
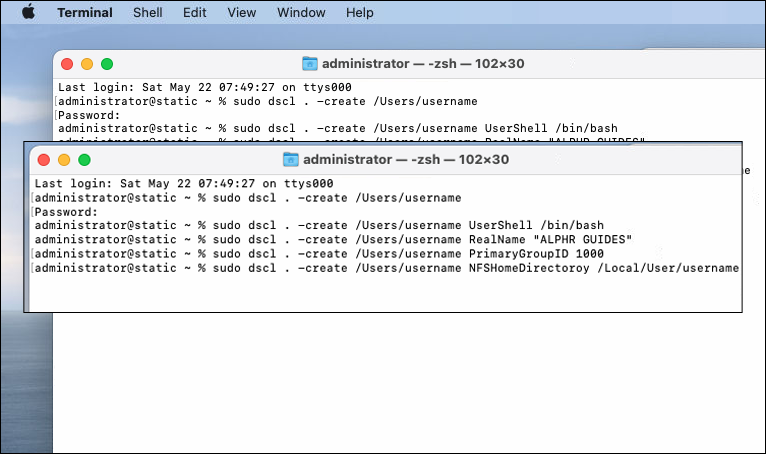
- The next step is to type in sudo dscl . -create /Users/username PrimaryGroupID 1000 followed by “enter.”
- Continue by typing in sudo dscl . -create /Users/username NFSHomeDirectory /Local/Users/username and hitting “enter.” This prompt creates a new user folder.
- To replace the password, type in sudo dscl . -passwd /Users/username password followed by “enter.” Choose a new password you’ll use every time you log in.
- To give the user administrative privileges, type in “sudo dscl . -append /Groups/admin GroupMembership username” and hit “enter.”


How to Make Yourself an Administrator From the Terminal on Mac
If you’re using a Mac on which you don’t have an administrative role, you can change that by entering specific commands in Terminal.
That will give you permission to change important settings, as well as other privileges such as installing new programs. Here’s how you can change an existing user account to an administrative account via Terminal:
- Open the Terminal app following the same steps listed above.
- Type in sudo dscl / -append /Groups/admin GroupMembership USERNAME and replace “username” with your name.
- Now enter the administrative password.
You will get an administrative function upon executing that command. Keep in mind that you must have the administrative password to make this change in the first place.
How to Change Your Username on Mac
You can easily change your username on macOS, but you need to change the name of the home folder as well for it to work. So, here is how to change the name of the home folder:
- Log in to the administrative account on your Mac.
- Open the Users folder on the account you want to rename.
- Rename the home folder, but make sure there are no spaces in the name. You’ll need to enter the administrator’s name and password.
The next step is renaming the Mac user account:
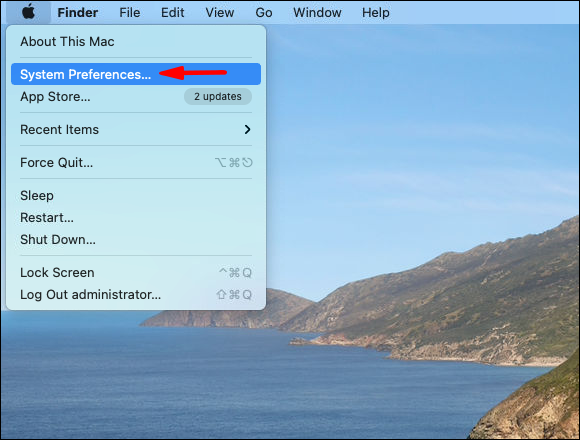
- From the admin account on Mac, follow the path Menu>System Preferences.
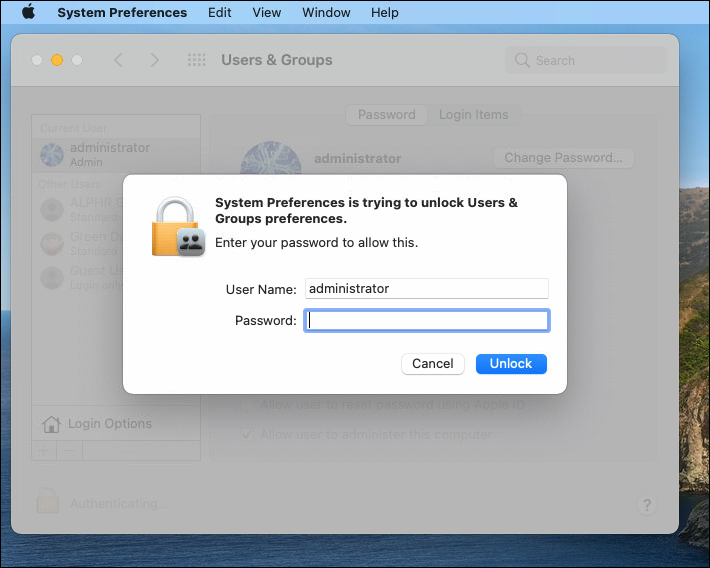
- Select “Users & Groups” and click on the lock icon. Then enter the admin name and password.
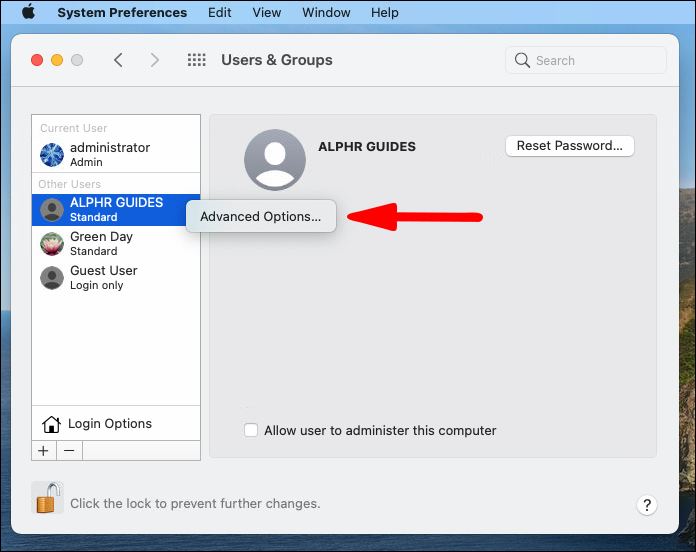
- Click on the user you want to rename and select “Advanced Options.”
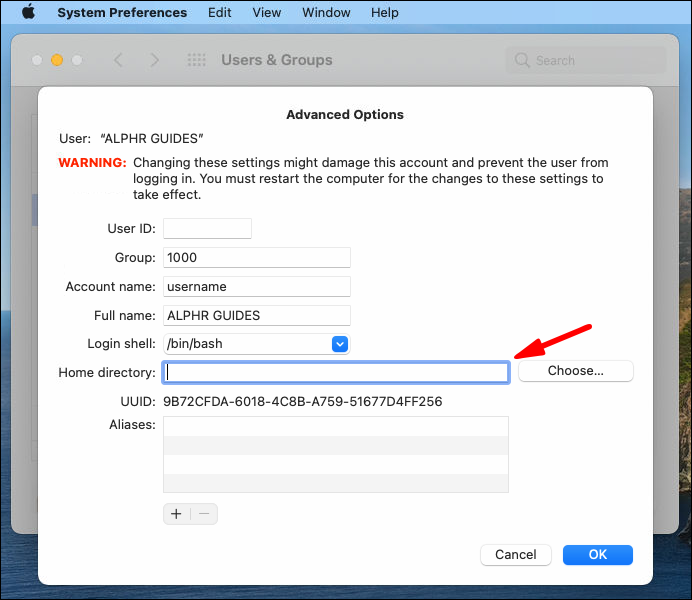
- Enter the same name you used for the home folder.
- Go to “Home directory” and change the account name to match the home folder as well.
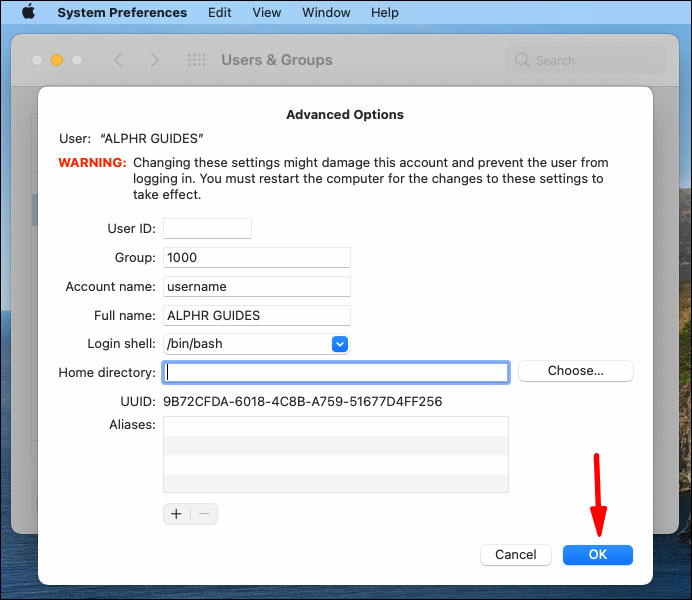
- Select “Ok” and then restart your computer.
- Next time you log into the newly renamed account, make sure all the files and folders are visible.

How to Create an Admin Account in a Single User Mode
The first thing you need to do to create an admin account from a Single User Mode is shut down your Mac. Then restart it in a Single User Mode by turning it on while pressing and holding “Command + R.” Then follow these steps:
- Enter /sbin/mount -uw / command when prompted and press “enter.”
- Next, type in rm /var/db/.applesetupdone and hit “enter.” This will remove the file that tells the OS the setup process has been performed before.
- When this file is removed, you need to restart your Mac again.
- Next time the Mac reboots, you’ll see a “Welcome to Mac” window on the screen. You can follow the prompts to make a new admin account.

Frequently Asked Questions
We’ve included some more information for you in this section.
How Does Terminal Work on Mac?
The terminal is an app found in the Utilities folder inside all Mac devices. It has a Unix command-line system, which some users prefer.u003cbru003eu003cbru003eEvery command you use in Terminal contains three elements. The first is the command itself. The second is the argument that provides the information about the resource on which the command operates. And the third is having the option for modifications of the output.
Can I Have Multiple Administrator Accounts on My Mac?
The answer is yes. Your Mac can have more than one administrator account. You can also change standard or share-only user accounts to administrator accounts.
How Do I Create User Accounts From the Terminal in macOS?
To create a user account from Terminal in Mac, follow steps 1-6 in this article under u0022How to Create an Admin Account on a Mac Using Terminal.” All you need to do is skip the final step, and you’ll have the standard user account.
Managing Your Mac Admin Accounts
The macOS graphic interface allows users to create new admin accounts and add and remove admin privileges as well. But in some instances, accessing this feature via the Terminal app is faster and simpler.
It’s also a great way to get acquainted with the basics of how macOS works. Follow the steps we’ve provided to add new admin accounts via Terminal.
Have you used Terminal on Mac before? What was the main reason? Let us know in the comments section below.
Disclaimer: Some pages on this site may include an affiliate link. This does not effect our editorial in any way.


