These days, there are plenty of free tools available for creating customized ringtones using a computer or mobile device. Unique ringtones are great for entertainment and self-expression, as well as differentiating between callers. If you want to create a ringtone for your Android device we’ve outlined the steps in this article.
We’ll be showing you how to create your ringtone using popular free software: AVCWare Ringtone Maker for Windows, GarageBand for macOS, and RingDroid for Android OS. Plus, how to set your ringtone for WhatsApp notifications and calls.
How to Create Custom Ringtones for an Android Device?
Creating customized ringtones from your favorite audio or video clips is a pretty straight-forward process:
- Import your clip to the ringtone creation software.
- Find the section of the clip you want for your ringtone and trim it down to around 30 seconds if possible. Shorter clips will be looped, and longer clips won’t be played in their entirety.
- Transfer the clip to your phone’s ringtones folder either by USB or by uploading it to a cloud-based account.
- Locate the new ringtone then set it as a default ringtone on your phone.
Now for the specific steps…
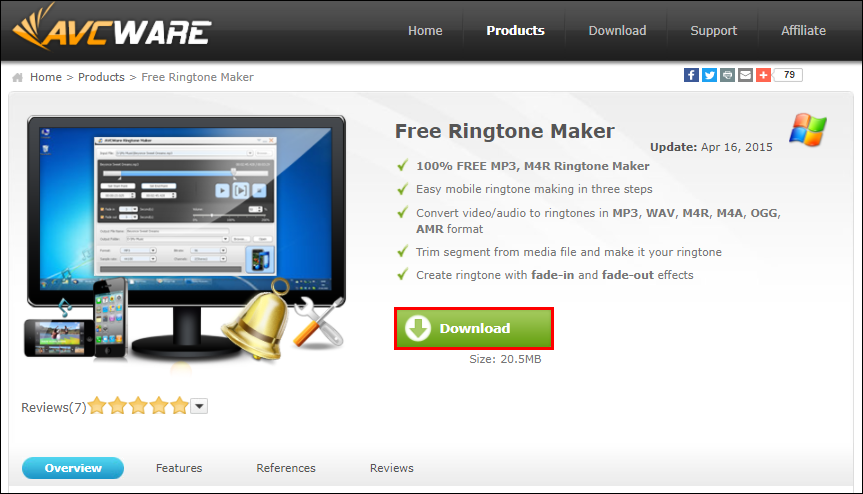
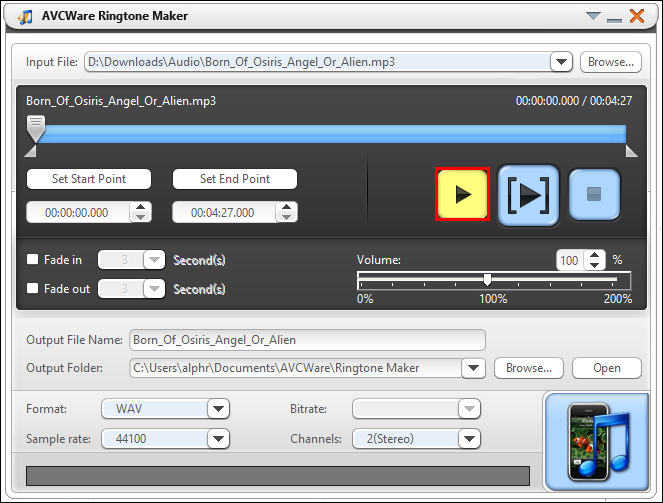
AVCWare Ringtone Maker (Windows)
AVCWare Ringtone Maker converts sound and audiovisual files to ringtone format supported by most phone models:
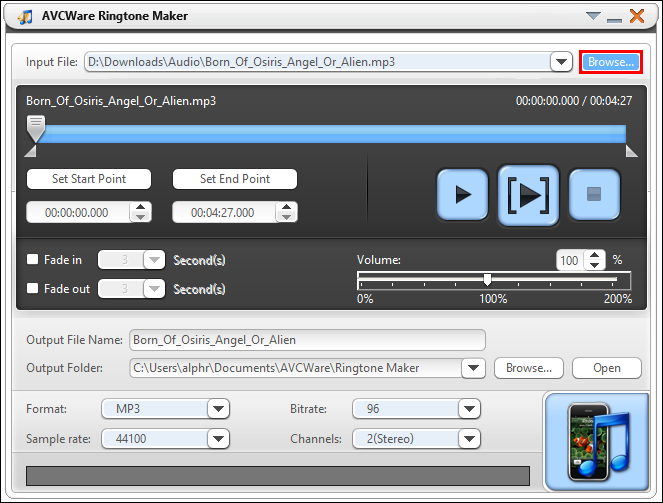
- Via your computer, download and install AVCWare Ringtone Maker.

- Open the program, then find and select the file you wish to convert by either:
- Selecting “Browse” from the top-right to go through your computer files, or

- Moving the file onto the blue button towards the bottom-right corner.
- Selecting “Browse” from the top-right to go through your computer files, or
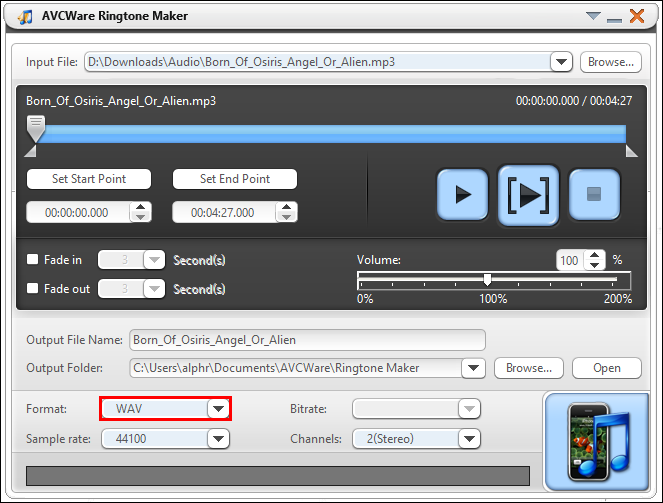
- At the “Format” drop-down, select the format you want e.g., MP3 or WAV.
- The other settings will be automatically adjusted to ensure high quality.
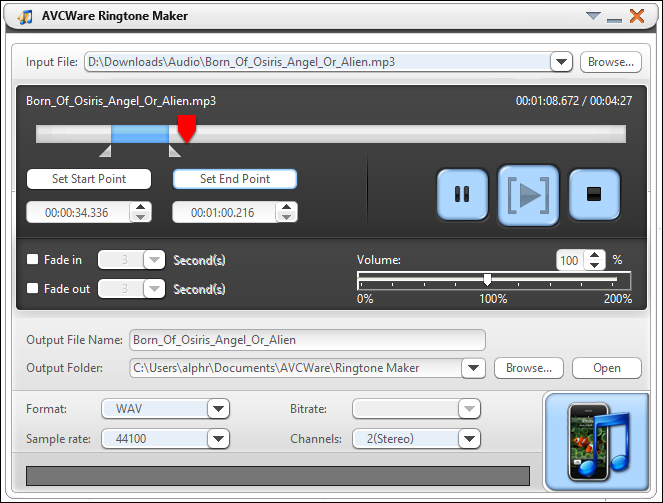
- Click on the “Play” button to hear your file and decide which section you’d like to create your ringtone from.
- Use the slider to move your preferred start and endpoints.
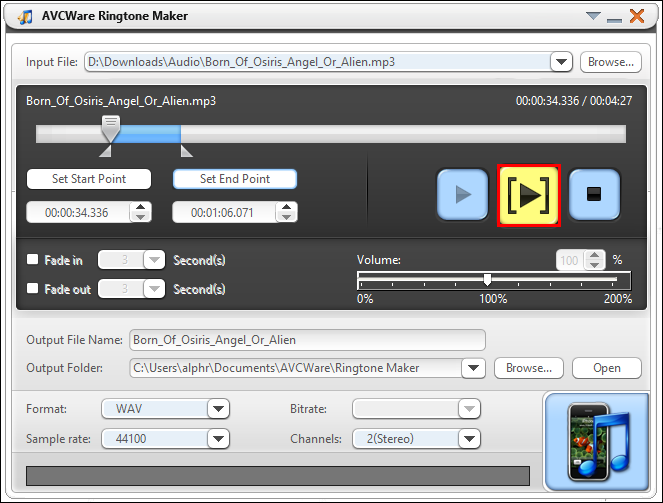
- To listen to your edited section hit the “Play” button.
- You can move the slider to new points if you wish to edit it.
- To convert the file, select the button towards the bottom-right corner. The progress bar will display 100% once the file is ready.


Then transfer your ringtone to your phone:
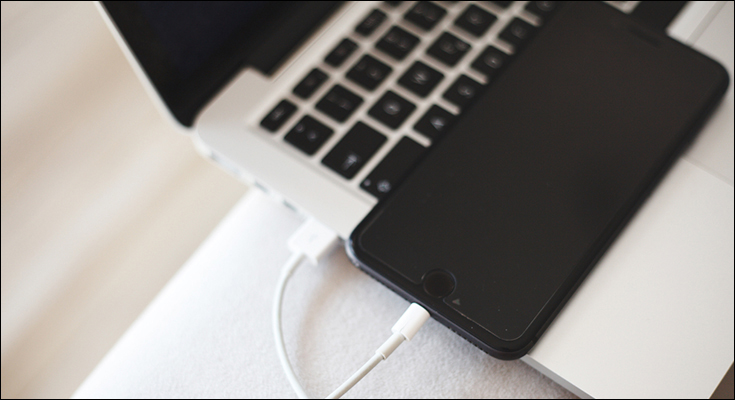
- Connect your phone to your computer using a USB cable.
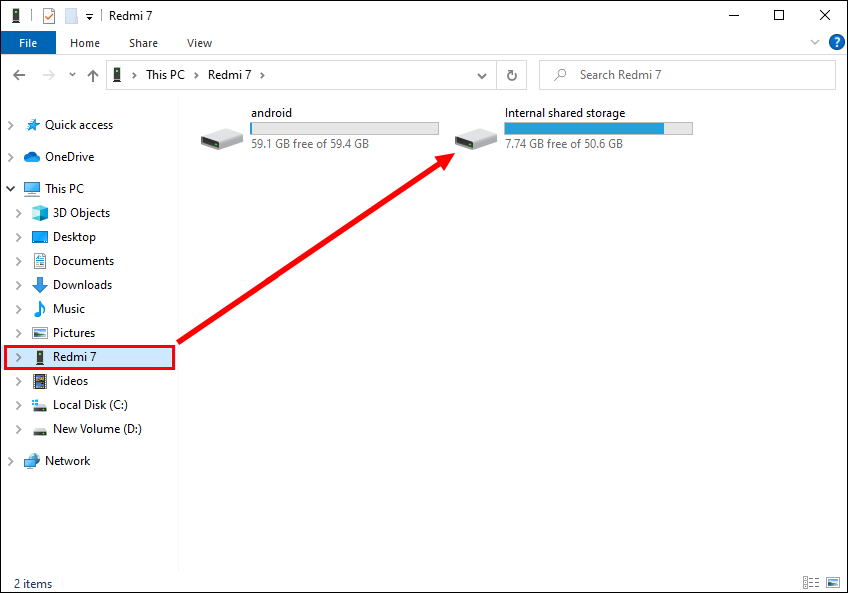
- Once your computer picks up your phone, navigate to your phone’s internal storage.
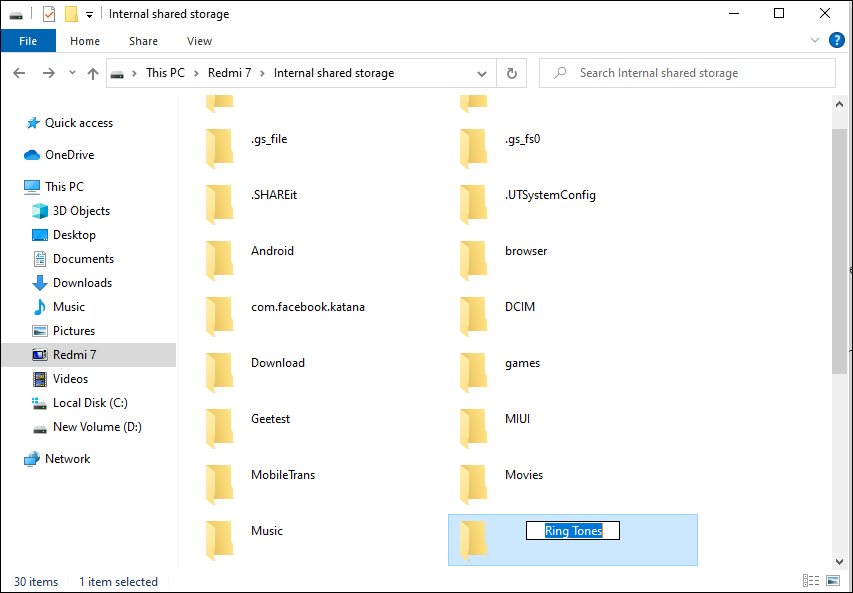
- Access your “Ringtones” folder. If there isn’t a dedicated ringtones folder, you’ll need to create one.
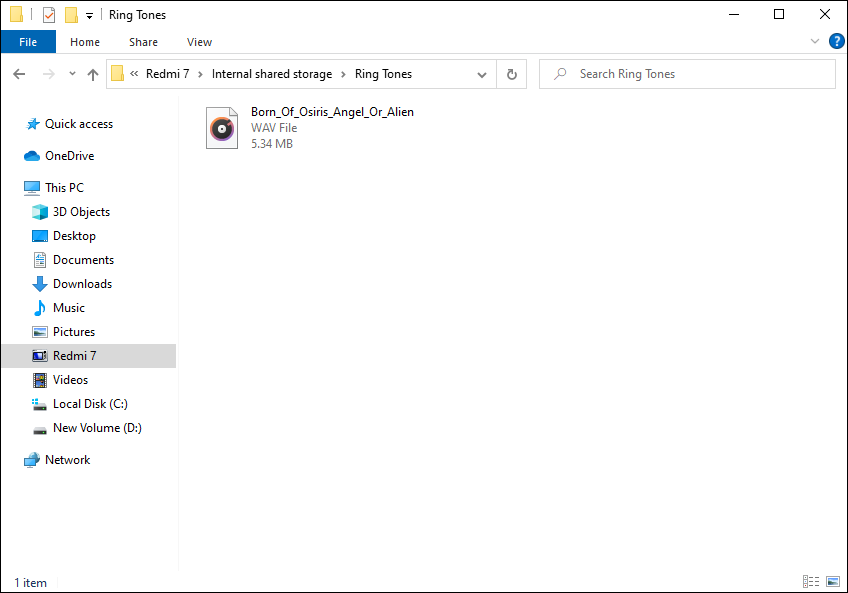
- Save your newly created ringtone to the “Ringtones” folder on your phone.
Note: Alternatively, you could upload your ringtone to a cloud-based account if you have one like OneDrive or Google Drive, then download it to your Android device.
Then set your new ringtone as default:
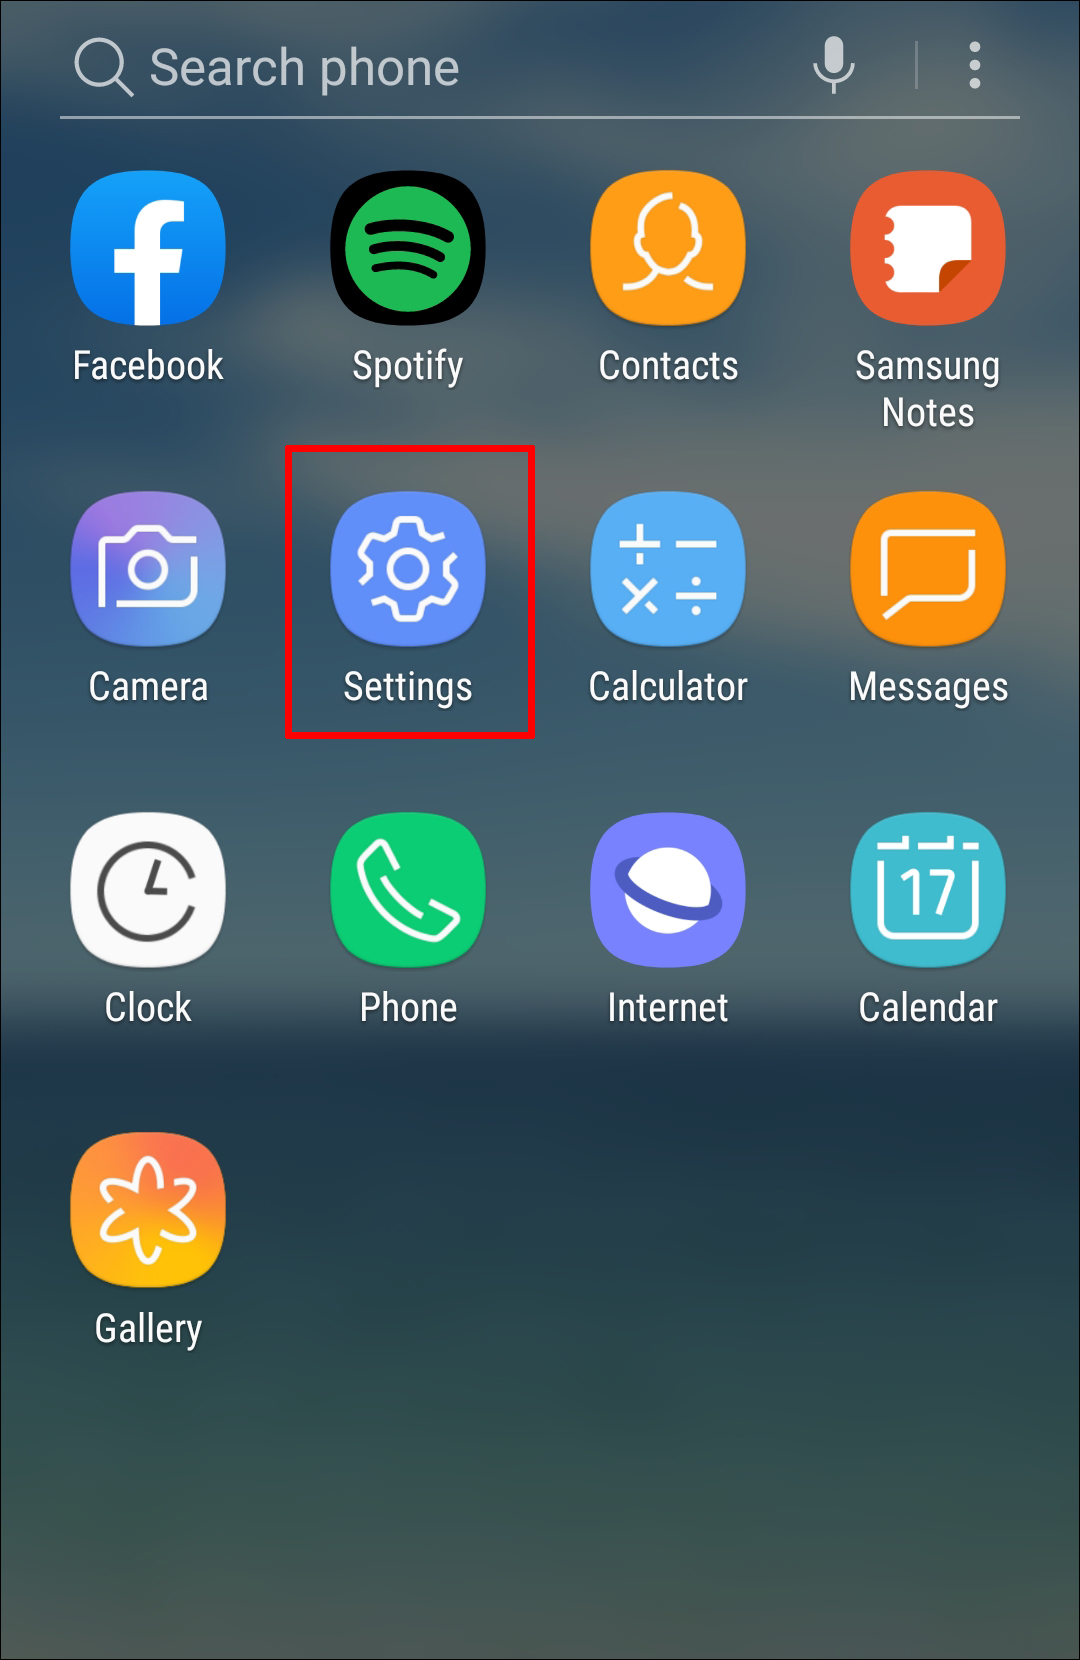
- Launch the “Settings” app via your Android device.
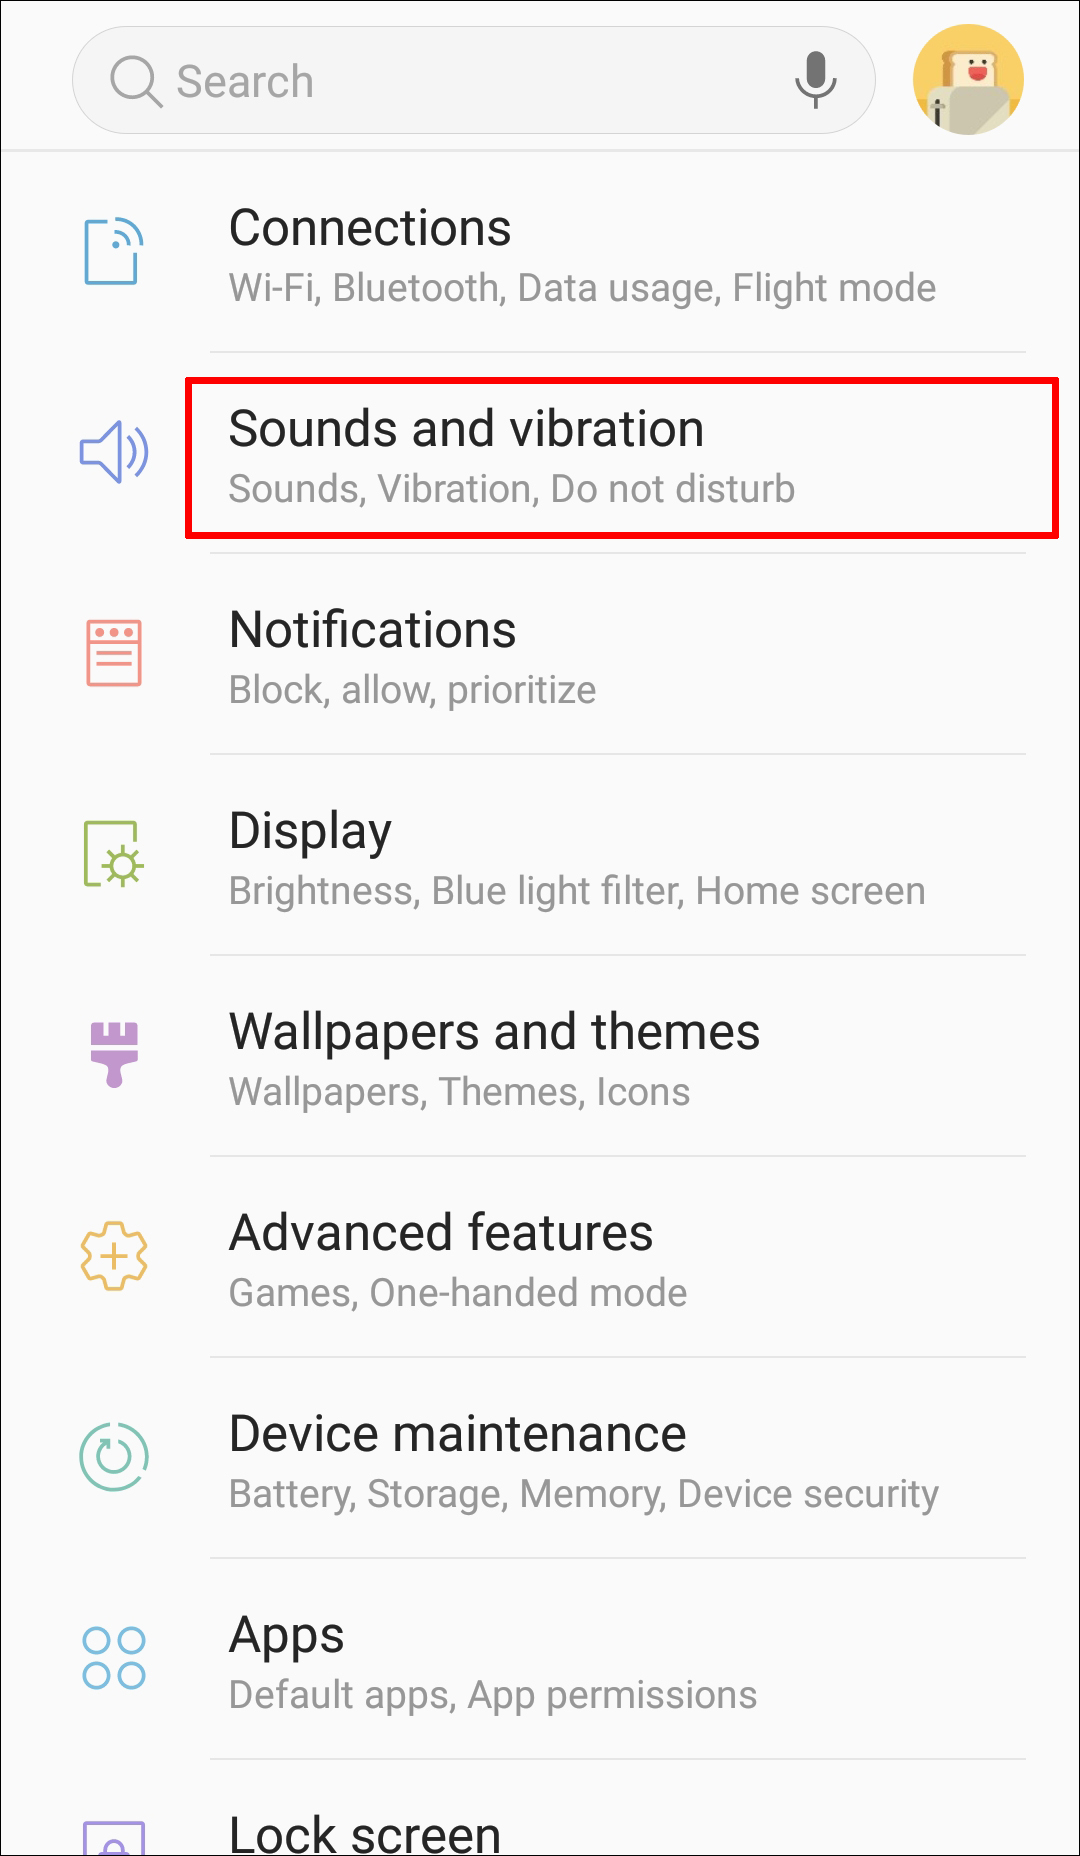
- Navigate to “Sound & vibration.”
- Click on “Advanced” > “Phone ringtone.”
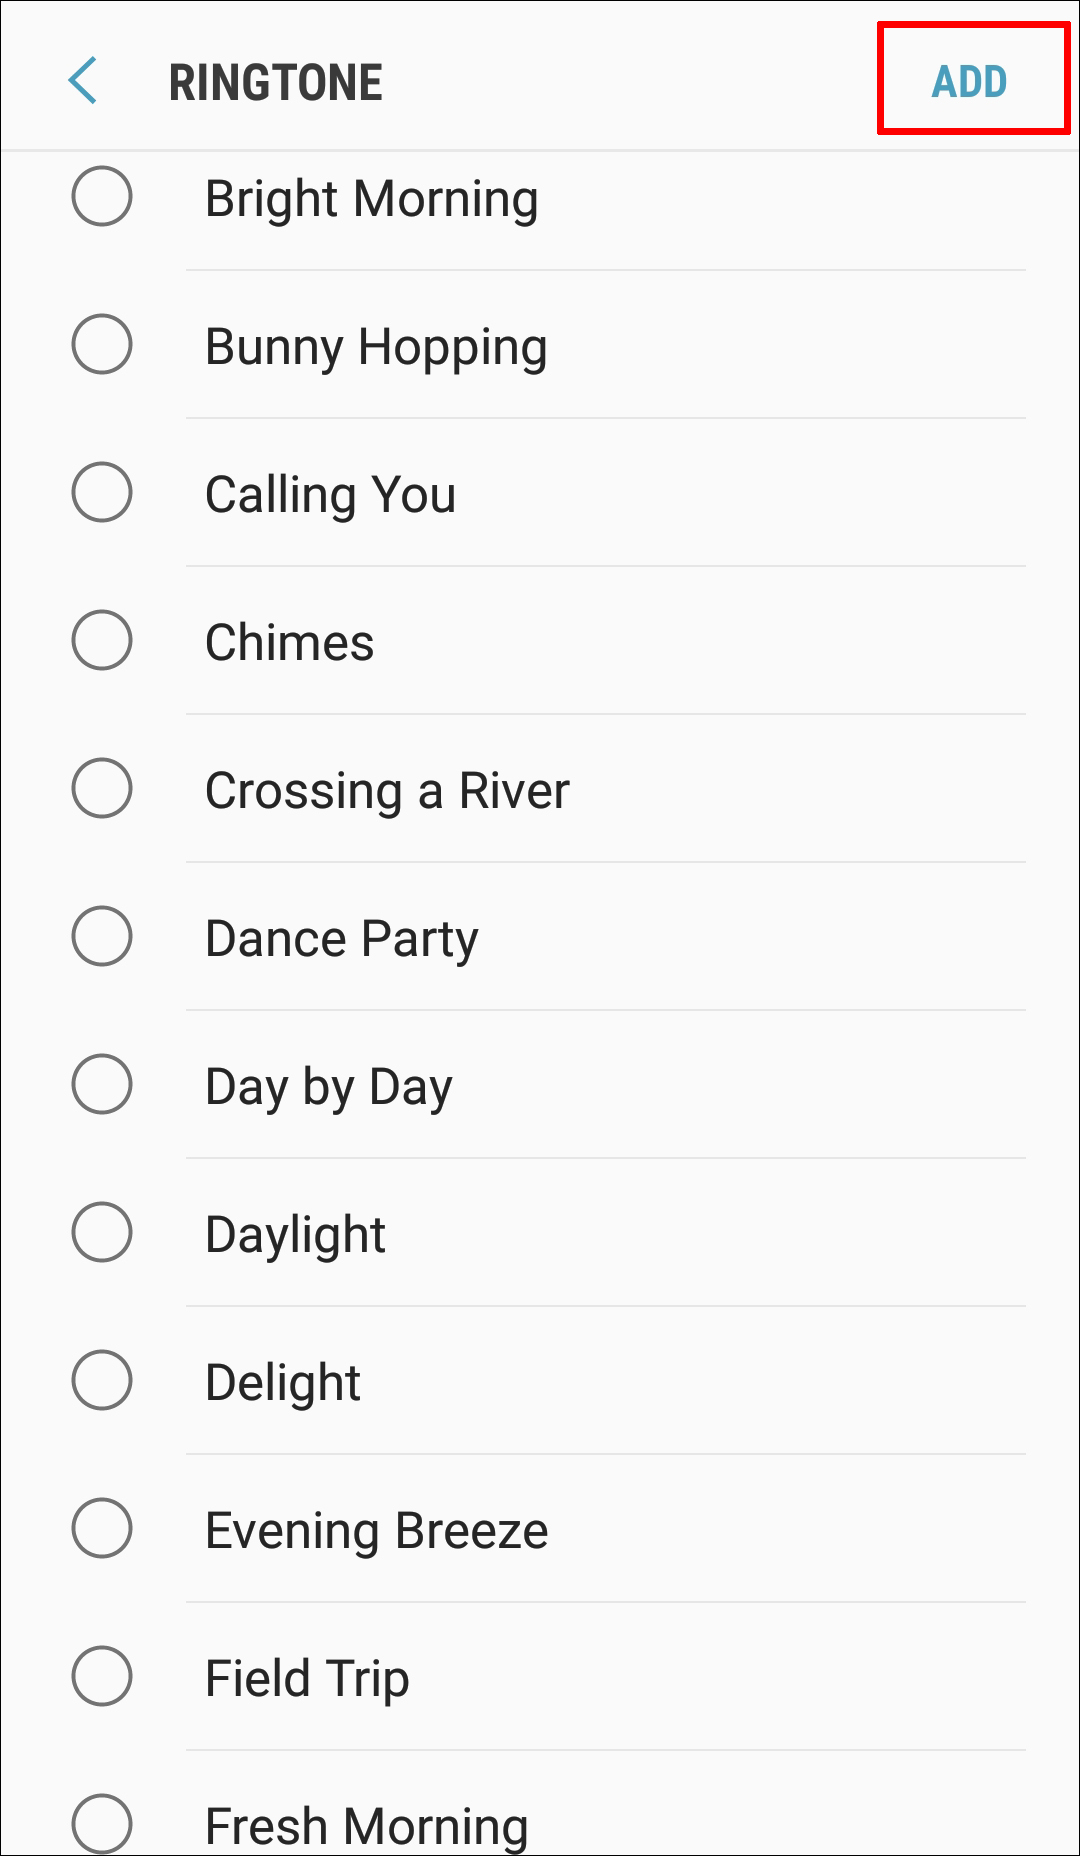
- Select “My Sounds.”
- If your new ringtone isn’t listed, in the bottom-right corner, tap the plus sign button.
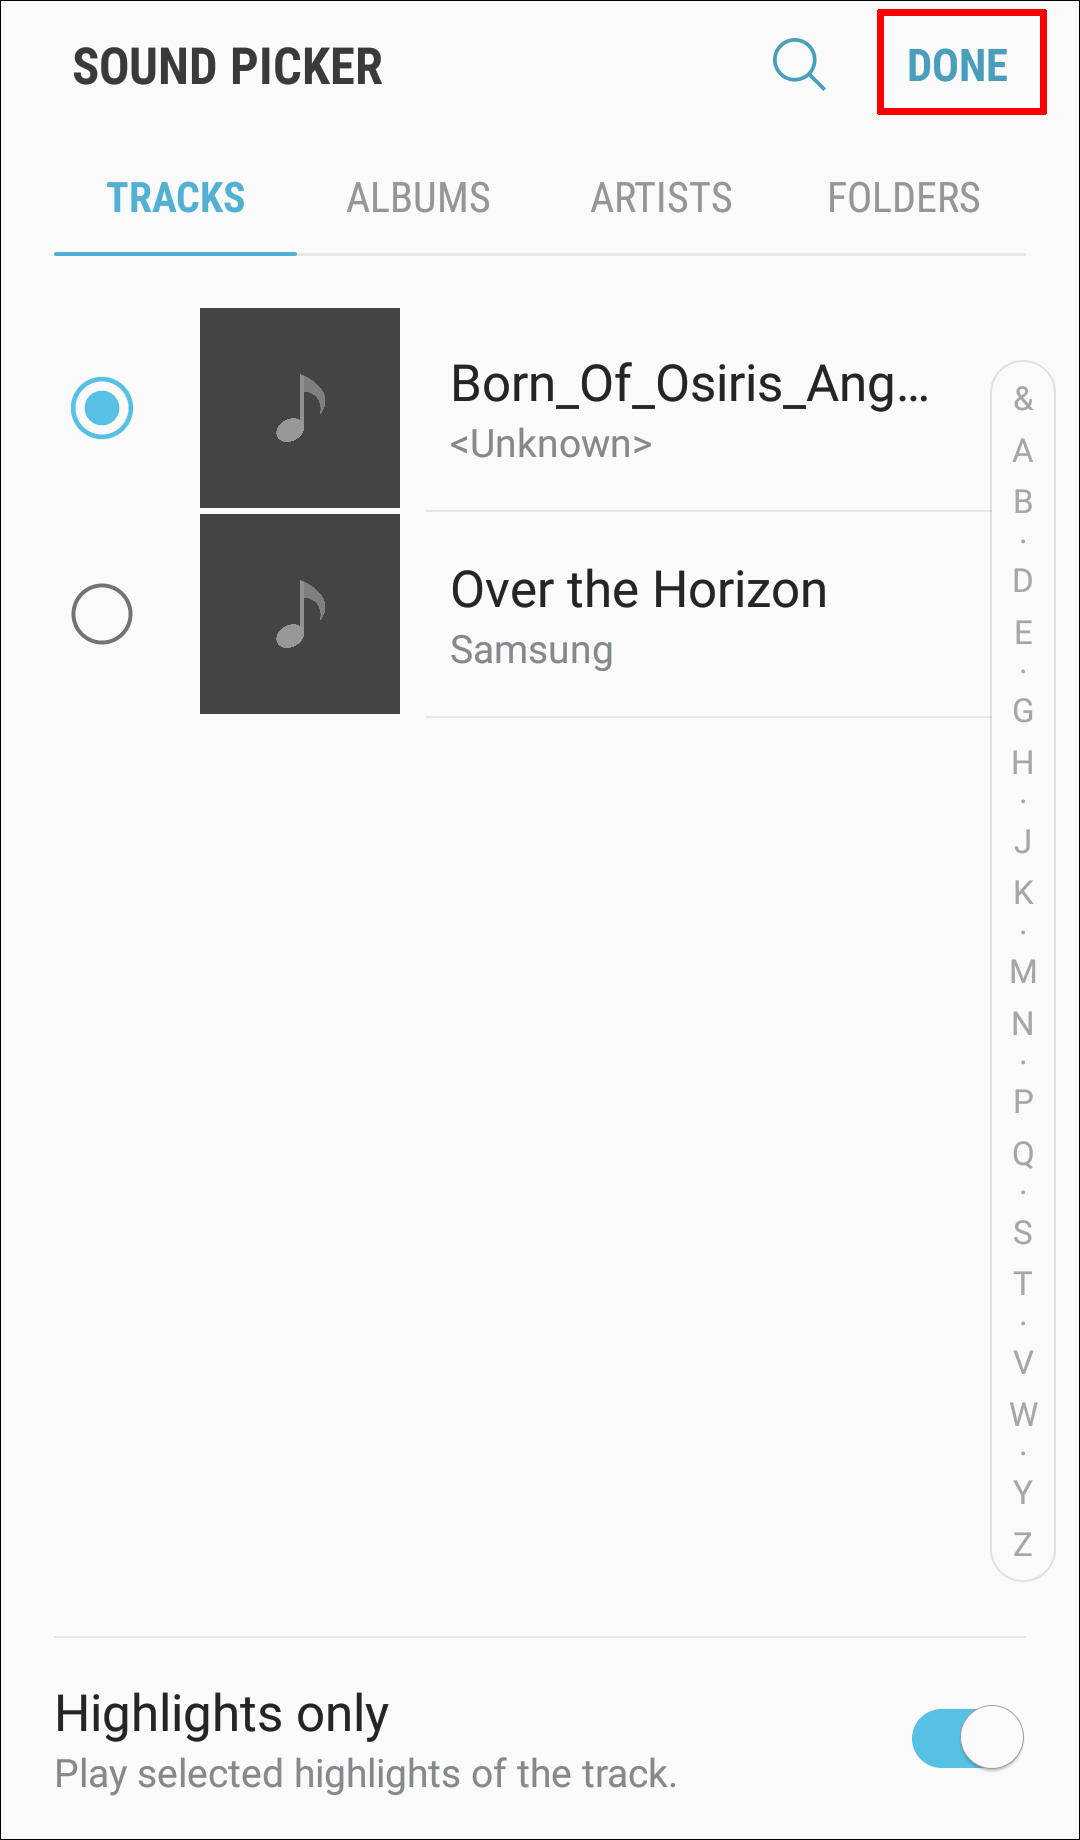
- Once you’ve found your ringtone, select it then “Done.”
GarageBand (macOS)
GarageBand is Apple’s free music creation application pre-installed on Apple products. It can be used to create ringtones for Android devices:
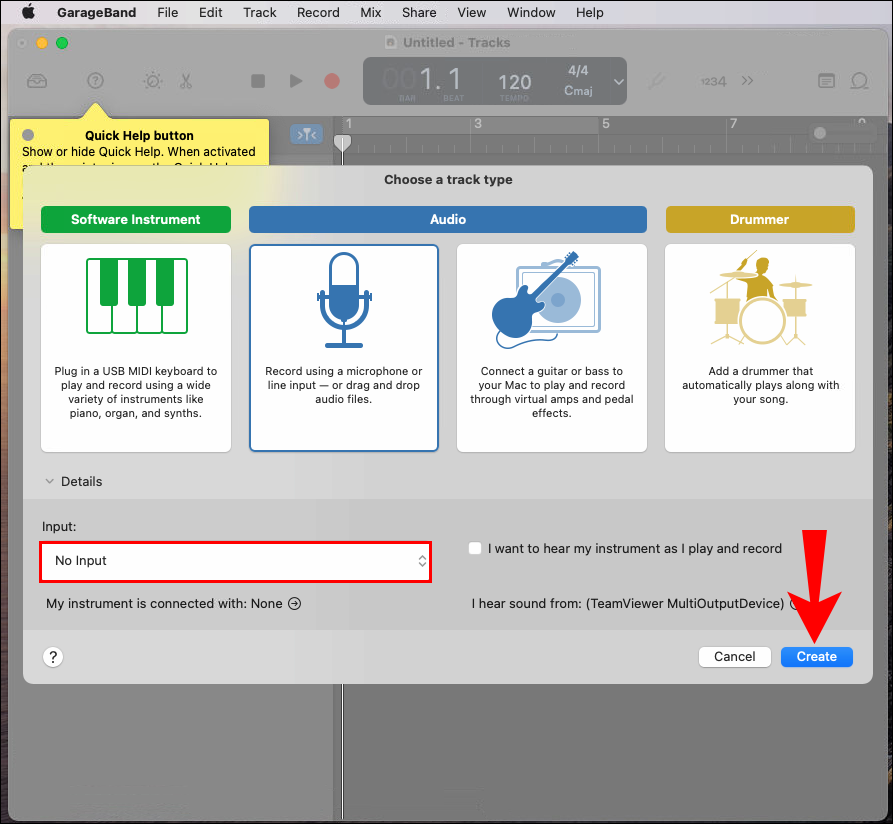
- Ensure you have the latest version of GarageBand installed, then launch GarageBand.
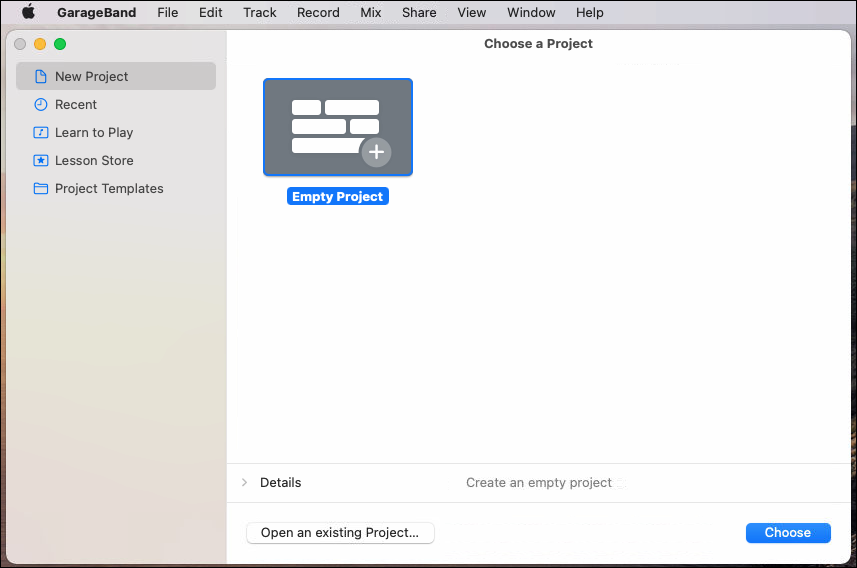
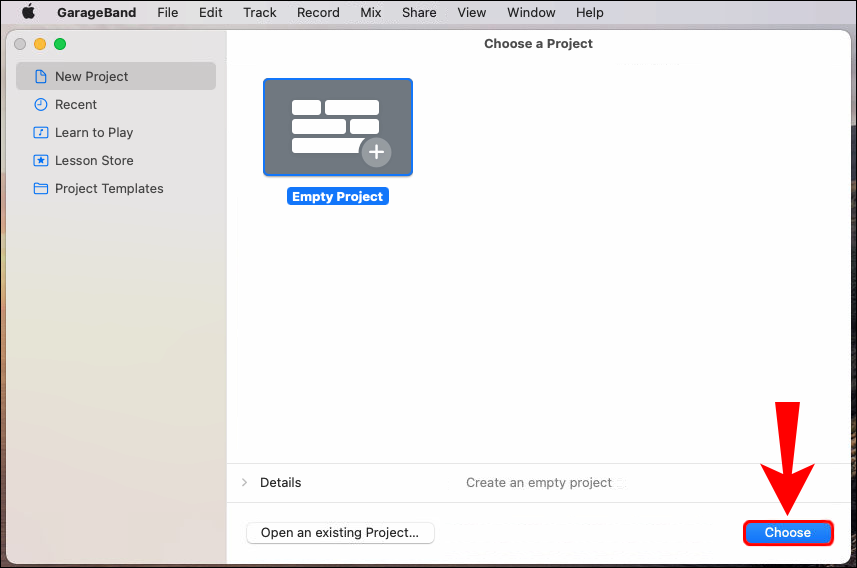
- By default, a new project is displayed with “Empty Project” highlighted.
- By default, a new project is displayed with “Empty Project” highlighted.
- Select “Choose.”
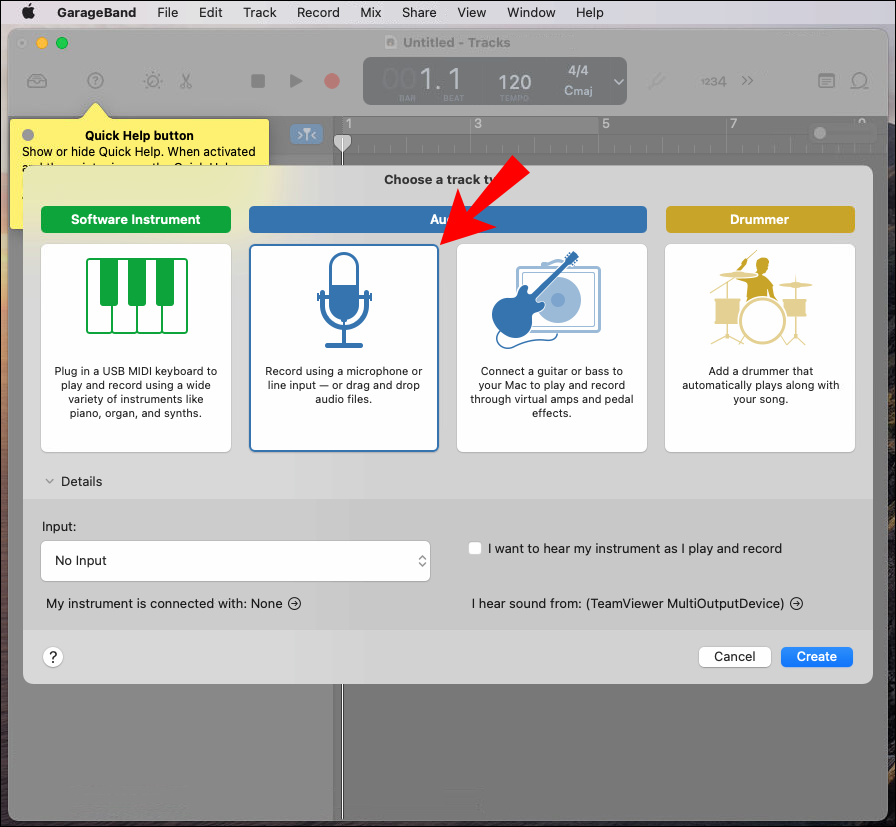
- In the pop-up select the “Microphone” title to import your audio file.
- Ensure “No Input” is enabled before selecting the “Create” option.
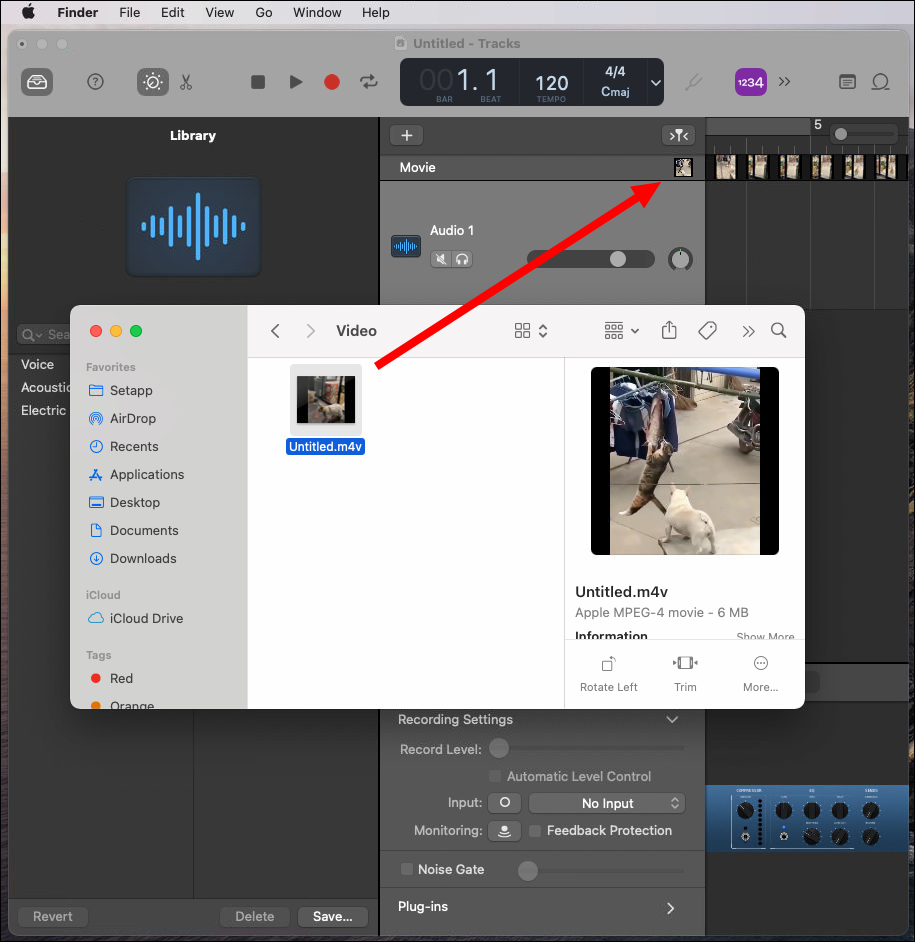
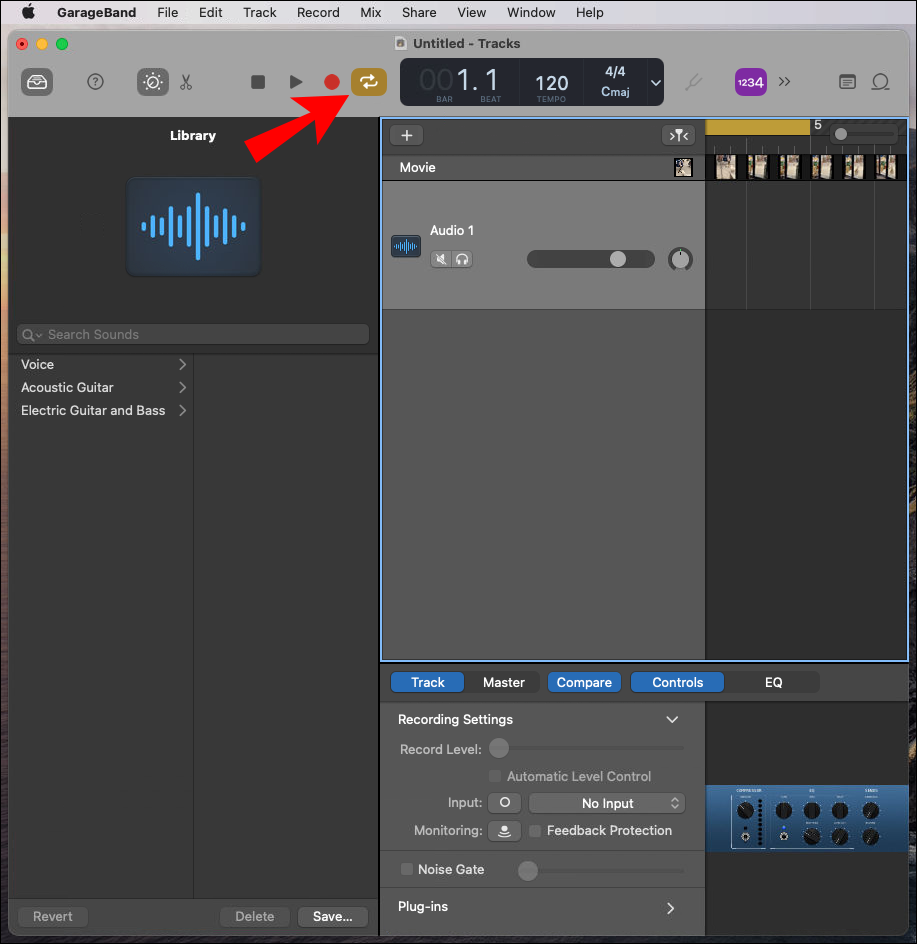
- Launch Finder to locate your track then move it into GarageBand.
- It will load into the first track.
- It will load into the first track.
- To the right of the record control, click the “Cycle” button. Leave it toggled ON until completion.
- Hover your mouse over the yellow highlight shown on the left end of the numbered line.
- To set your ringtone’s start point, move the arrow right or left accordingly; repeat on the right to fix its endpoint.
- Android ringtones generally run in 30-second or shorter loops. The start and end cycle points are highlighted in yellow.
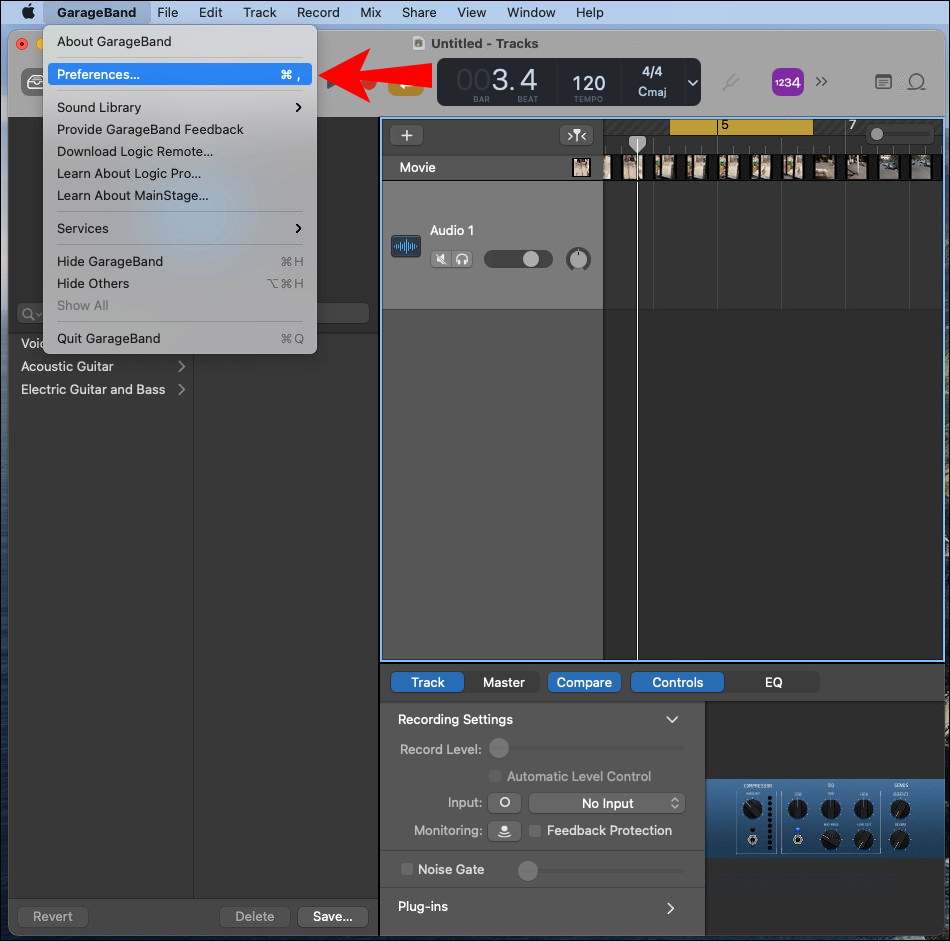
- From the menu, click on “GarageBand” and “Preferences.”
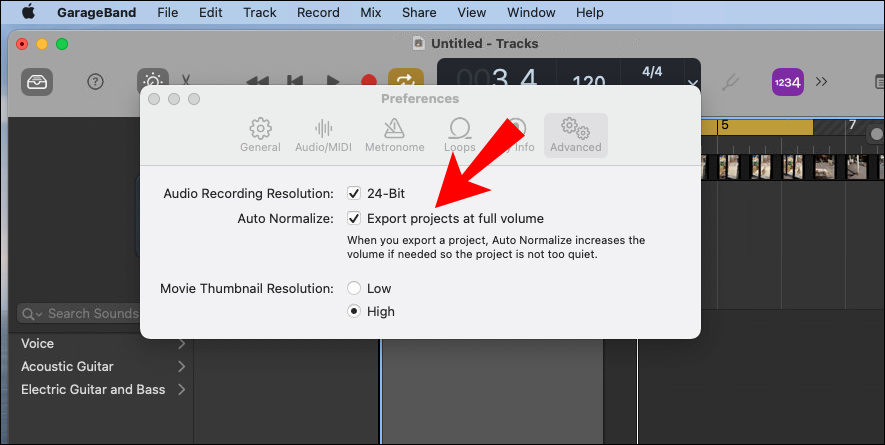
- Select “Advanced” and ensure the box next to “Auto Normalize” is enabled.
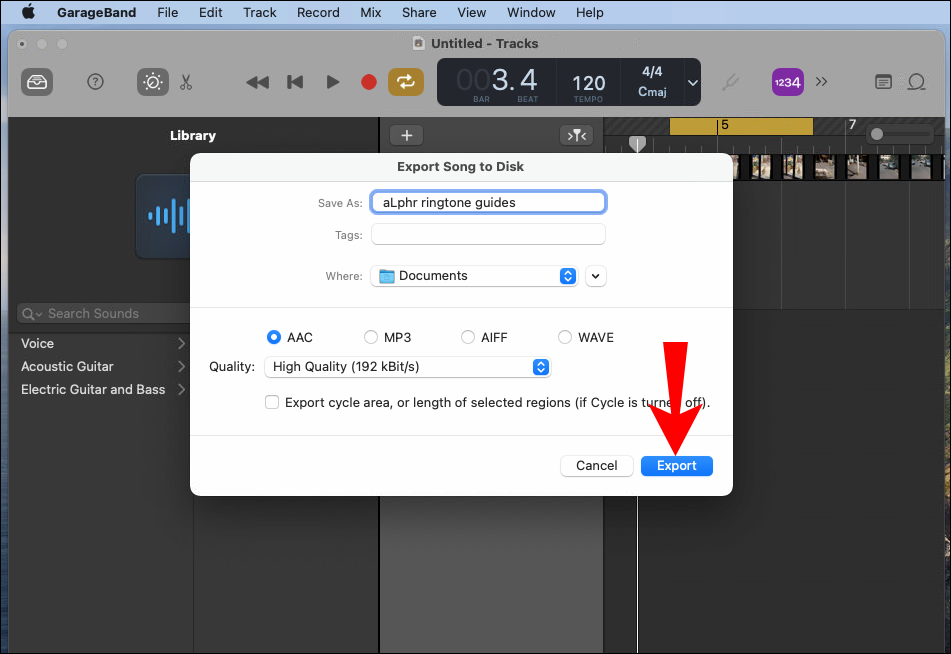
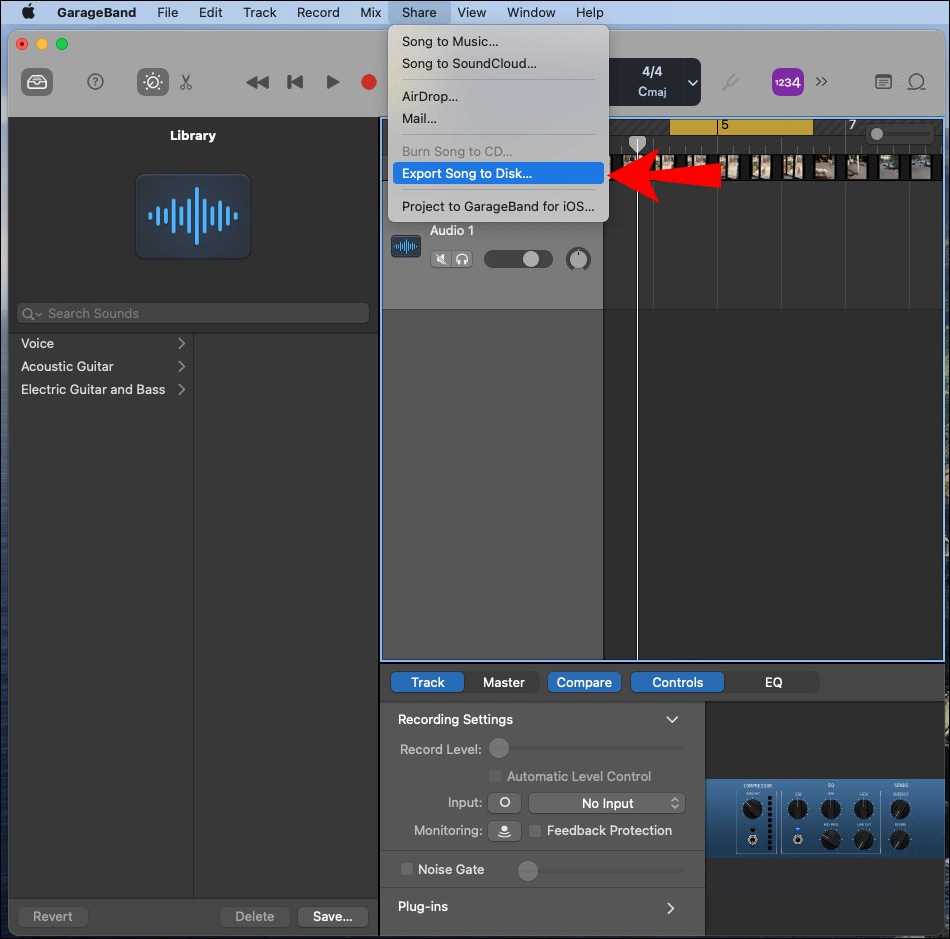
- Once you’re happy with your ringtone, from the menu, select “Share” > “Export Song to Disk.”
- From the pop-up select, a name, file format, save location, and quality.
- To finish, select “Export.”


Then to transfer your ringtone to your phone:
- Connect your phone to your computer using a USB cable.
- Once your computer picks up your phone, navigate to your phone’s internal storage.
- Access your “Ringtones” folder. If there isn’t a dedicated ringtones folder, you’ll need to create one.
- Save your newly created ringtone to the “Ringtones” folder on your phone.
Note: Alternatively, you could upload your ringtone to a cloud-based account if you have one like OneDrive or Google Drive, then download it to your Android device.
Then set your new ringtone as default:
- Launch the “Settings” app via your Android device.
- Navigate to “Sound & vibration.”
- Click on “Advanced” > “Phone ringtone.”
- Select “My Sounds.”
- If your new ringtone isn’t listed, in the bottom-right corner, tap the plus sign button.
- Once you’ve found your ringtone, select it then “Done.”
RingDroid
RingDroid is a free open-source ringtone creation app for Android OS. To create your ringtone using RingDroid:
- Ensure you have the latest version of RingDroid installed on your Android device.
- Once opened, RingDroid will list all the available music on your phone. Use the search bar at the top or scroll through the list to find the song you wish to make a ringtone.
- Try restarting the app if you can’t find your downloaded song.
- Select the song by clicking on its title; then “Trim” to reduce the size.
- Tweak the markers and choose the section of the song you want as the ringtone.
- Once you’re happy with your selection, at the bottom-right, click on the download icon.
- Give your ringtone a name then export it.
Then set your new ringtone as default:
- Launch the “Settings” app via your Android device.
- Navigate to “Sound & vibration.”
- Click on “Advanced” > “Phone ringtone.”
- Select “My Sounds.”
- If your new ringtone isn’t listed, in the bottom-right corner, tap the plus sign button.
- Once you’ve found your ringtone, select it then “Done.”
How to Customize Ringtones for Contacts?
First, you’ll need to convert your track into a ringtone. Follow the steps listed below on how to do this using software for Windows and macOS.
Customize your ringtone using AVCWare Ringtone Maker for Windows:
- Via your computer, download and install AVCWare Ringtone Maker.
- Open the program, then find and select the file you wish to convert by either:
- Selecting “Browse” from the top-right to go through your computer files, or
- Moving the file onto the blue button towards the bottom-right corner.
- Selecting “Browse” from the top-right to go through your computer files, or
- At the “Format” drop-down, select the format you want e.g., MP3 or WAV.
- The other settings will be automatically adjusted to ensure high quality.
- Click on the “Play” button to hear your file and decide which section you’d like to create your ringtone from.
- Use the slider to move to your preferred start and endpoints.
- To listen to your edited section hit the “Play” button.
- You can move the slider to new points if you wish to edit it.
- To convert the file, select the button towards the bottom-right corner. The progress bar will display 100% once the file is ready.


Customize your ringtone using GarageBand for macOS:
- Ensure you have the latest version of GarageBand installed, then launch GarageBand.
- By default, a new project is displayed with “Empty Project” highlighted.
- By default, a new project is displayed with “Empty Project” highlighted.
- Select “Choose.”
- In the pop-up, select the “Microphone” title to import your audio file.
- Ensure “No Input” is enabled before selecting the “Create” option.
- Launch Finder to locate your track then move it into GarageBand.
- It will load into the first track.
- To the right of the record control, click the “Cycle” button. Leave it toggled ON until completion.
- Hover your mouse over the yellow highlight shown on the left end of the numbered line.
- To set your ringtone’s start point, move the arrow right or left accordingly; repeat on the right end to fix its endpoint.
- Android ringtones generally run in 30-second or shorter loops. The start and end cycle points are highlighted in yellow.
- From the menu, click on “GarageBand” and “Preferences.”
- Select “Advanced” and ensure the box next to “Auto Normalize” is enabled.
- Once you’re happy with your ringtone, from the menu, select “Share” > “Export Song to Disk.”
- From the pop-up select, a name, file format, save location, and quality.
- To finish, select “Export.”


Then to transfer your ringtone to your phone:
- Connect your phone to your computer using a USB cable.
- Once your computer picks up your phone, navigate to your phone’s internal storage.
- Access your “Ringtones” folder, if there isn’t a dedicated ringtones folder you’ll need to create one.
- Save your newly created ringtone to the “Ringtones” folder on your phone.
Note: Alternatively, you could upload your ringtone to a cloud-based account if you have one like OneDrive or Google Drive, then download it to your Android device.
Then to set your new ringtone for your contacts:
- Access “Contacts” on your phone.
- Select the contact you want to set the ringtone for.
- At the top-right corner, click on the three-dotted menu icon.
- Then select “Set ringtone.”
- Click on your new ringtone added to your “Ringtones” folder.
- Click on “Save” or “OK.”
Additional FAQs
How to Set a Song as My WhatsApp Ringtone?
You can use software to create a ringtone from your song; for detailed steps on how to do that, check out the AVCWare Ringtone Maker (Windows) and GarageBand (macOS) sections discussed earlier in this article.
Once you have your new ringtone saved to your phone, set it as default for WhatsApp notifications:
1. Launch WhatsApp.
2. Tap on the three-dotted menu at the top-right.
3. Select “Notifications” > “Notifications tone.”
4. From “Choose an Action,” select “Media Storage.”
5. Select your custom ringtone to set it as default.
Then to set your custom ringtone as default for WhatsApp calls:
1. From the “Notifications” screen, select “Ringtone” under the “Calls” section.
2. From “Choose an Action,” select “Media Storage.”
3. Select your custom ringtone to set it as default.
Exclusive Android Ringtones
Setting customized ringtones for your calls and notifications acts as confirmation when you receive a message, or when it rings- you’ll identify the caller immediately. There is plenty of ringtone creation software available today to assist you with turning your favorite audio or video clip into a ringtone you’ll be proud of.
Now that you’ve seen how straightforward it is to create a ringtone for your Android device, how did you find the process – we’re you able to produce exactly what you wanted? Tell us about the most head-turning ringtone you’ve created in the comments section below.
Disclaimer: Some pages on this site may include an affiliate link. This does not effect our editorial in any way.


