Many of us are unaware that our laptops, like our smartphones, can broadcast Wi-Fi. We are not likely to concern ourselves with the feature when we are at home and using our Wi-Fi routers. However, it can come in handy when trying to get our devices online when we are on the go.
This article will look at creating a virtual router in Windows 10 and Windows 11. You will learn how to use your laptop to generate a Wi-Fi hotspot and share your internet connection with other devices.
Why Create a Virtual Wireless Router?
Turning your laptop into a virtual router is helpful in several scenarios. They include:
- Extending the range of your internet signal
- Staying in a hotel room or at an airport
- Locations that only have a wired Ethernet connection
Can My Windows Computer Be Turned Into a Virtual Router?
Before initiating the process, it’s important to make sure that your device can broadcast Wi-Fi signals. It’s easy to verify this. Simply follow the steps below:
- Press the Win+S shortcut keys.

- Type in “cmd” in the search bar.

- Scroll to “Command Prompt” and click on that.
- Type netsh wlan show drivers into Command Prompt.
- Click “Enter.” Your network drivers will be displayed.
- Ensure that “Yes” follows “Hosted network supported.”


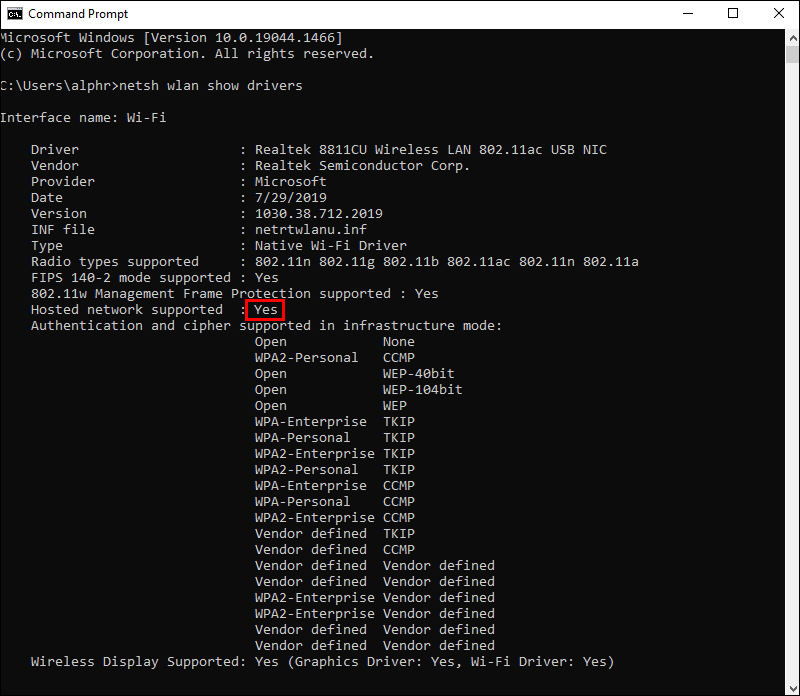
This means that you’re good to go and can broadcast a Wi-Fi signal in Windows 10. If the statement is followed by “No,” however, you will unfortunately not be able to create a virtual router using your device.
How to Setup a Virtual Router in Windows 10
Microsoft Windows has a virtual Wi-Fi tool to create and manage a virtual wireless network. You, therefore, will not need to buy additional software to activate the Wi-Fi hotspot feature.
However, you may find it easier to use software to set up your virtual router in Windows 10. Here, we will show you two methods you can use to turn your laptop into a Wi-Fi hotspot.
Setting Up Virtual Router Using Software
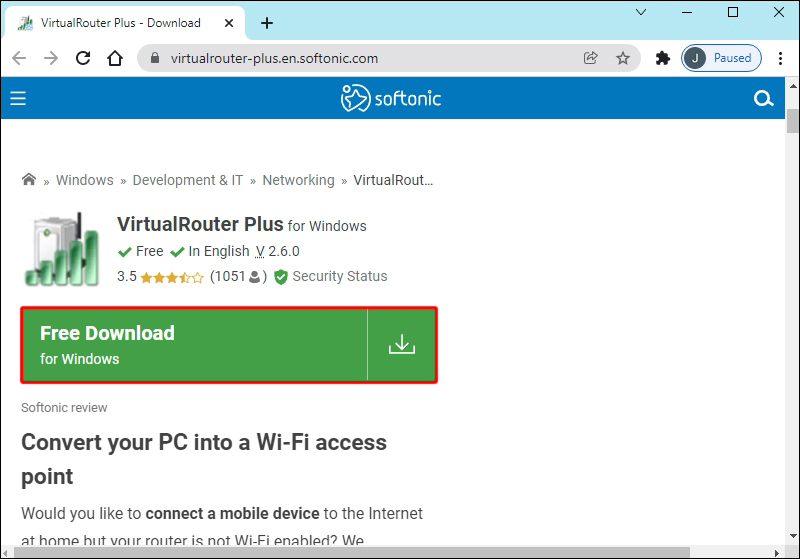
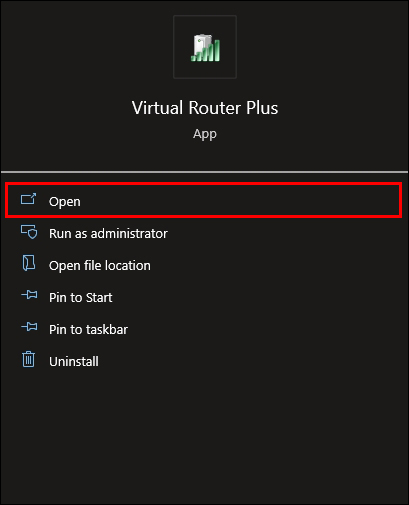
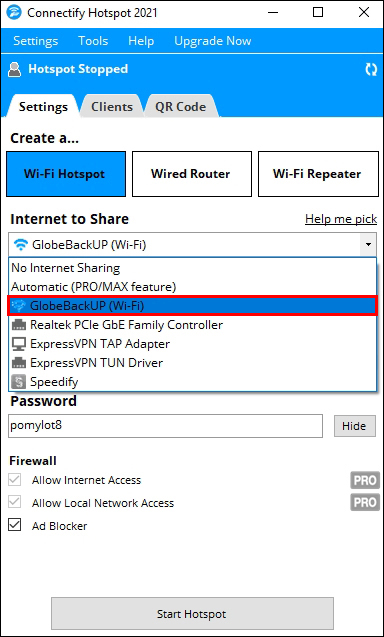
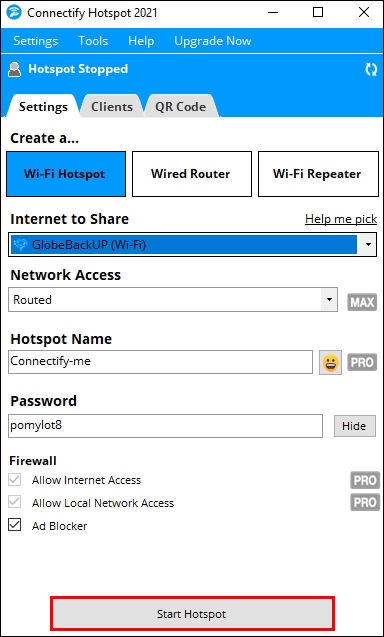
One of the easiest ways to create a hotspot on Windows 10 is using third-party software. Programs like Virtual Router Plus can be downloaded onto your computer and utilized to automate the process.
Follow the steps below to set up your virtual router using software:
- Download your preferred virtual router software.
- Install and open the program.
- Most programs will give you a menu where all you need to do is input the name of the network and the password.
- Launch the program.


Your network should now be visible to other devices.
Setting Up Virtual Router Using the Command Prompt
If you would like to manually create a virtual router for Windows 10, you can do this using the Command Prompt. Follow the below steps:
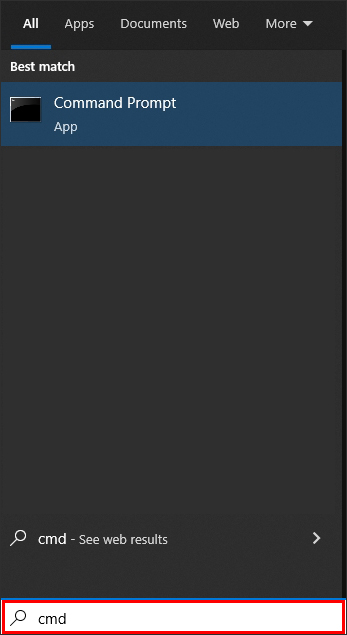
- Type in “cmd” in the Windows search bar.
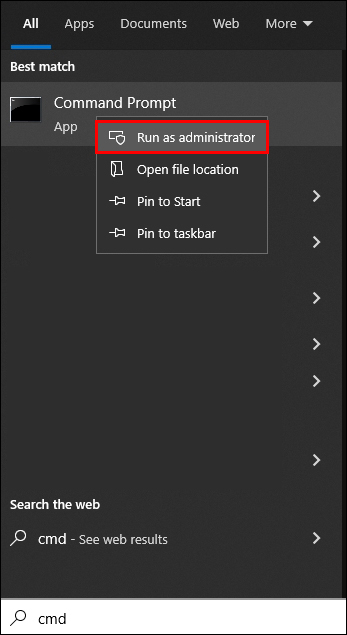
- Open Command Prompt as “admin” by right-clicking on it.
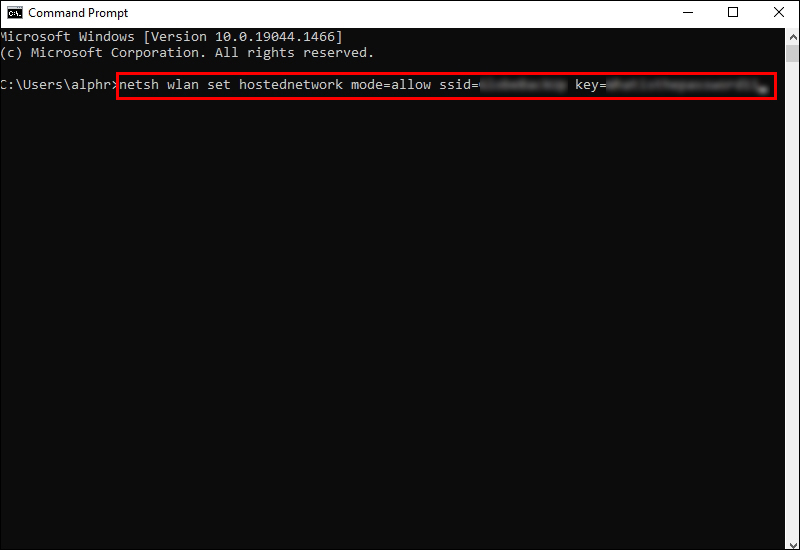
- To input the settings of your virtual router, type out the command below:
netsh wlan set hostednetwork mode=allow ssid=XXXXX key=YYYYY
In place of XXXXX, type in the name of your network.
In place of YYYYY, type in your password. - Press “Enter.”
- You can now launch your virtual router using the command below:
netsh wlan start hostednetwork - You can disable the virtual router using the command below:
netsh wlan stop hostednetwork


You have now successfully set up your virtual router on Windows 10.
Troubleshooting
If you encounter problems starting the network, your drivers might require an update.
To update your drivers, follow the guidelines below:
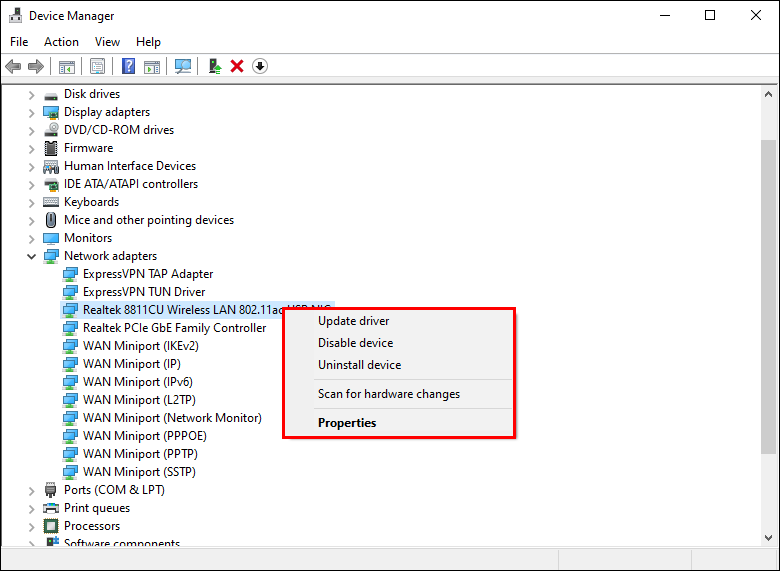
- Press Win+X and select “Device Manager.”
- Click the arrow pointing to “Network Adapters.” It will display a list of the network adapters available.
- Find your primary network adapter and right-click on it.
- Select “Update Driver Software” to check if any updates are available.
- Update the software if that is required.


How to Setup a Virtual Router in Windows 11
You can use two different methods to turn your Windows 11 device into a virtual router.
The first is through “Settings.”
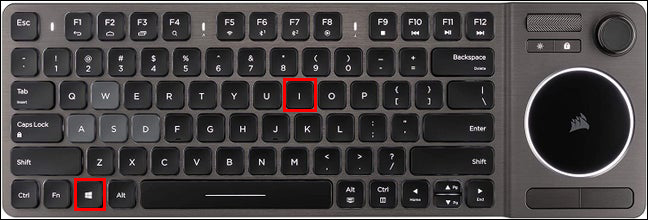
- Press Win+I to open “Settings.”
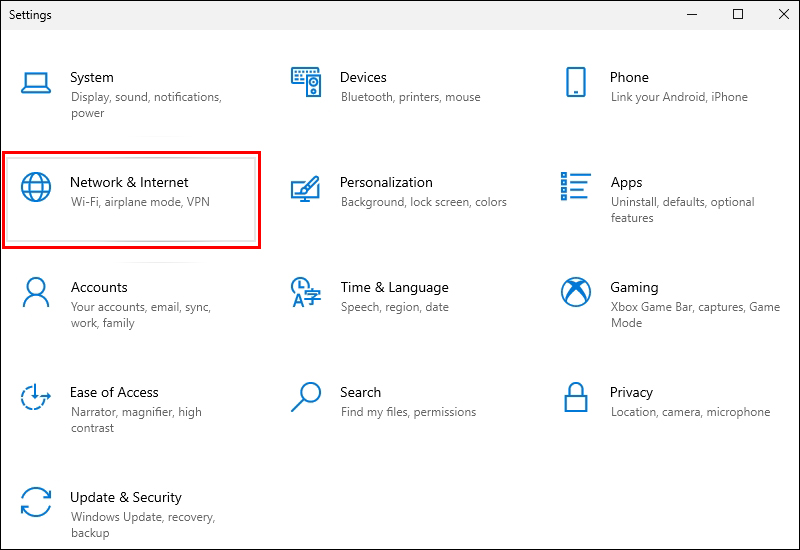
- Click on “Network & Internet.”
- Toggle to turn on the “Mobile Hotspot” option on the right pane.
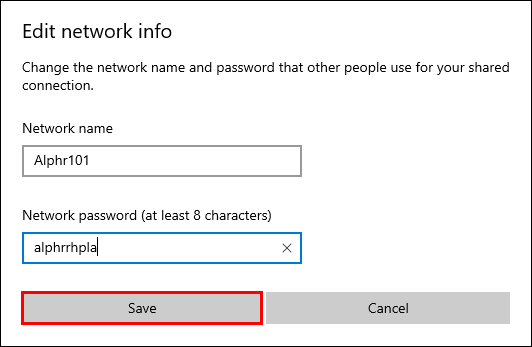
- Within the “Mobile Hotspot” category, click “Edit” to configure the network name and password.
- Input the name and password of your choice and then click on “Save.”


You have now successfully set up a virtual router in Windows 11.
If you would prefer to use a third-party app to set up your virtual router, then these are the steps to follow:
- Download and install your third-party app.
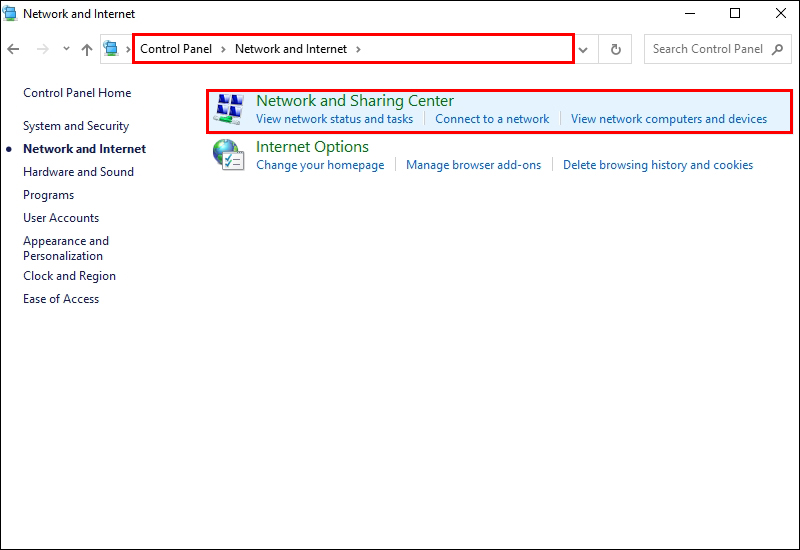
- Go to your control panel and navigate to “Network & Internet” and then “Network & Sharing Center.”
- Click on “Change Adapter Settings.”
- Right-click on the network you are connected to and then click on “Properties.”
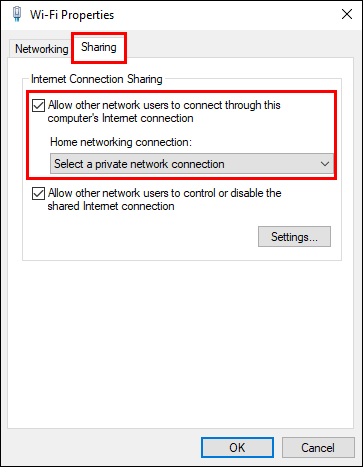
- Click on the “Sharing” tab and select “Allow other network users to connect using this computer’s internet connection.”
- Click on the “Apply” button. Your computer’s network can now be shared.
- On your Windows 11 computer, open the third-party app.
- Select the network for which you enabled sharing.
- Launch the app.


Your device should now be able to work as a virtual router in Windows 11.
Setting Up VPN Connection on a Virtual Router in Windows
Some devices don’t have the built-in software required to set up Virtual Private Network (VPN) connections. These include gaming devices, TV players, etc. You can, however, use a virtual router to connect them to VPN networks. If this is why you want to create a virtual router in Windows, follow the guidelines below to connect your devices.
- Download and install your VPN software. Make sure that it’s not connected.
- Go to “Settings” and select “Mobile Hotspot.”
- Click on “Share my internet.”
- Select a suitable name and password for your network.
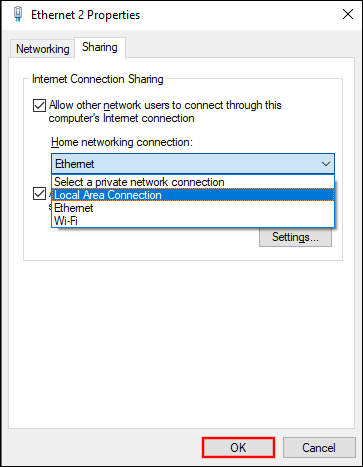
- Scroll to “Related Settings” and click on the “Change Adapter” option.
- Make a note of the “Wi-Fi” and “Local Area Connections” that have the green bars indicating they are connected.
- Right-click on the option that says “XXXX TAP Adapter.” The XXXX will be the name of your preferred VPN software.
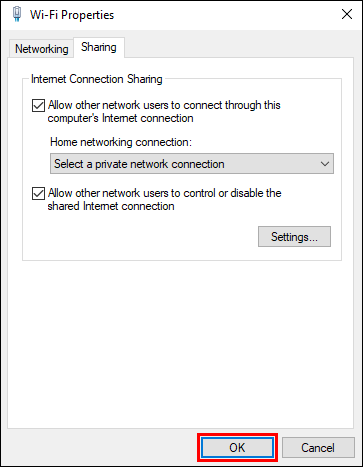
- Click on the “Sharing” tab and go to “Allow other users to connect.”
- From the dropdown menu, select the “Local Area Connection” noted down earlier.
- Click on “OK.”
- Now, you can open your VPN program and connect to your desired server. Your virtual router will now work only when the VPN is connected and turned on.
- On your device, you can now connect to the virtual router.


Creating a Virtual Router in Windows
Turning your laptop or PC into a virtual router can come in very handy, especially when you are in a pinch. Learning how to set up a virtual router in Windows means you no longer have to worry about finding a wireless router when looking to extend the range of your internet signal. You can also easily connect one or more devices to one internet source while traveling.
Have you encountered problems connecting to the internet while on the road? Let us know in the comments section below.
Disclaimer: Some pages on this site may include an affiliate link. This does not effect our editorial in any way.


