GIMP or GNU Image Manipulation Program offers several tools for selecting parts of illustrations or images, such as the Lasso, Ellipse, and Rectangle. All of these are incredibly useful when creating memes or working on your brand-new web design project. Cutting out the selected parts is another convenient feature; but how exactly do you use it?
This article will show you how to cut out selections in GIMP. You’ll learn how to master this function and take your creations to the next level.
How to Cut Out Selection
Cutting out a selection in GIMP is straightforward. Here’s how to do so with rectangular objects.
- Open your “Layer” menu, followed by “Transparency.”
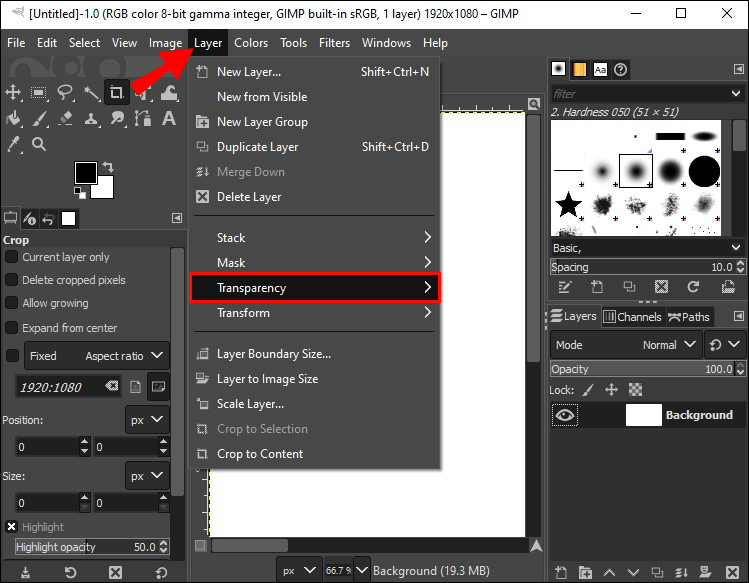
- Press the prompt that lets you add an “Alpha” channel. This will incorporate a transparent background.

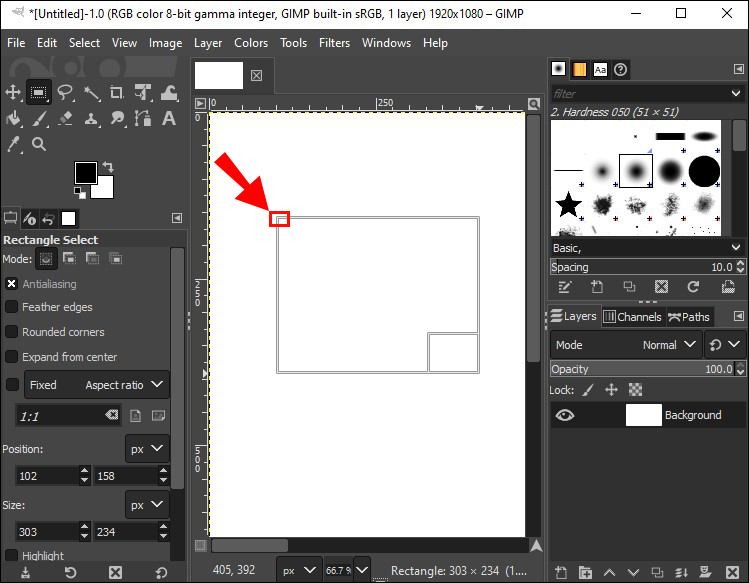
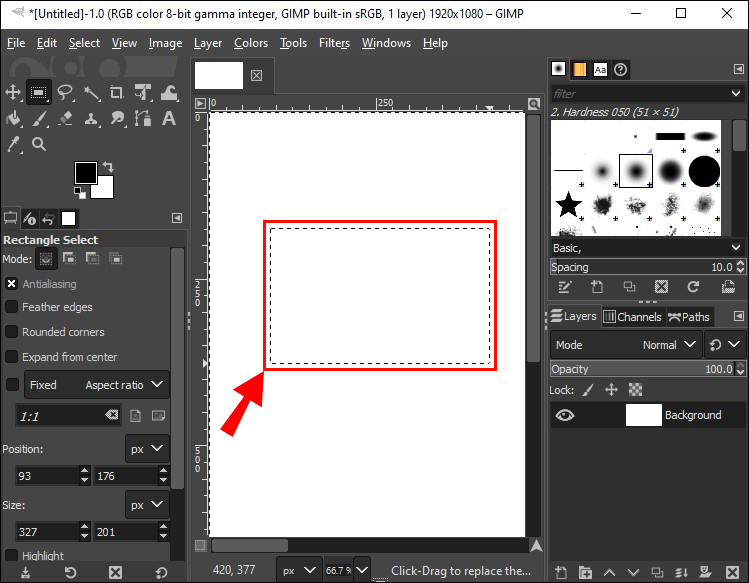
- Click your “Rectangle Select” option. Use the feature to create a rectangular zone around the selected object or image you wish to cut.
- Navigate to the top-left part of the image or object.
- Press and hold your left mouse button.
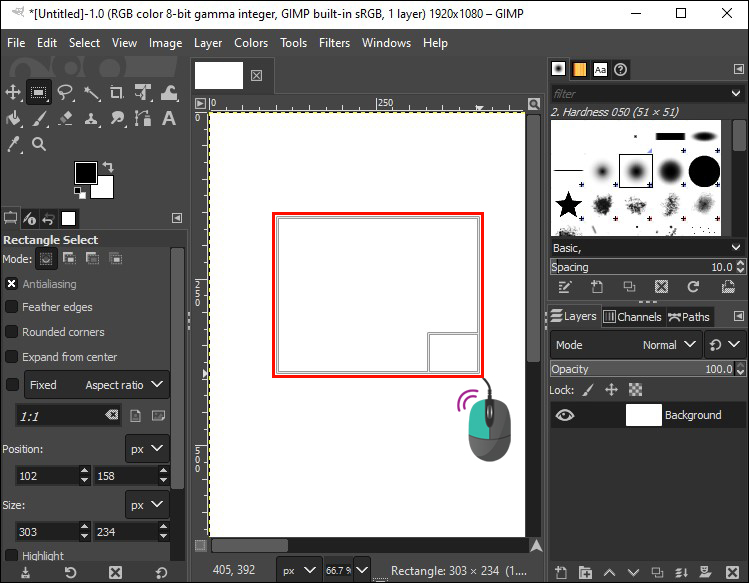
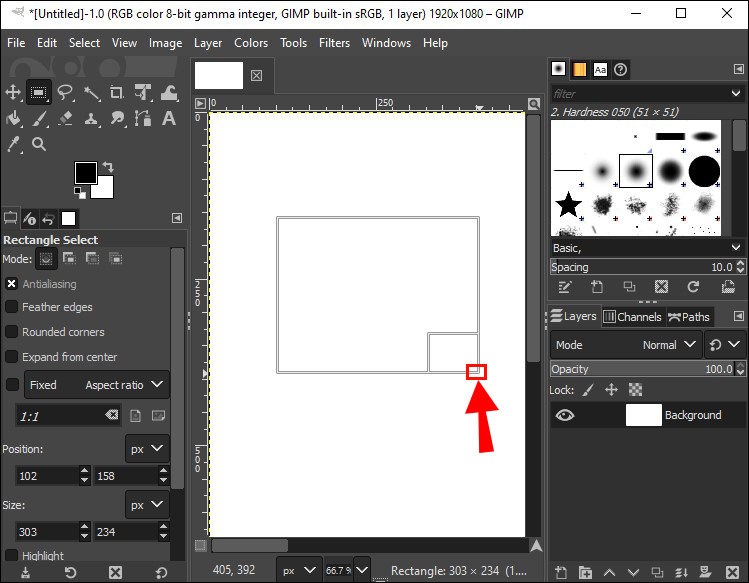
- Drag your cursor down to the right side of the area until your selection rectangle encloses it.
- Release your mouse button, and the program should show a box with moving lines around the part you wish to select and cut.
- Use the keyboard shortcut “Ctrl + I” to invert your selection.
- Press “Ctrl + X” to get rid of the section of the object or image you want to remove. The selected area should now appear on top of your transparent background.


This method works for cutting out elliptical, oval, and circular objects too.
- Enter your “Layer” menu and go to “Transparency.”
- Add an “Alpha” channel. This will set up a transparent background.
- Click your “Ellipse Select” option that allows you to draw a section around an image or object that will be cut out.
- Go to the upper-left part of the object.
- Press and hold your left mouse button. Drag the cursor to your right until the selection tool surrounds your entire image or object.
- Release the button, and you should see moving dashes around your object.
- Release the button and press “Ctrl + I”.
- Use “Ctrl + X” and the selected section will be cut out.
Finally, this is what you need to do to cut out selections in irregularly-shaped objects or images.
- Head to your “Layer” section and access “Transparency.”
- Include an “Alpha” channel to create a transparent field.
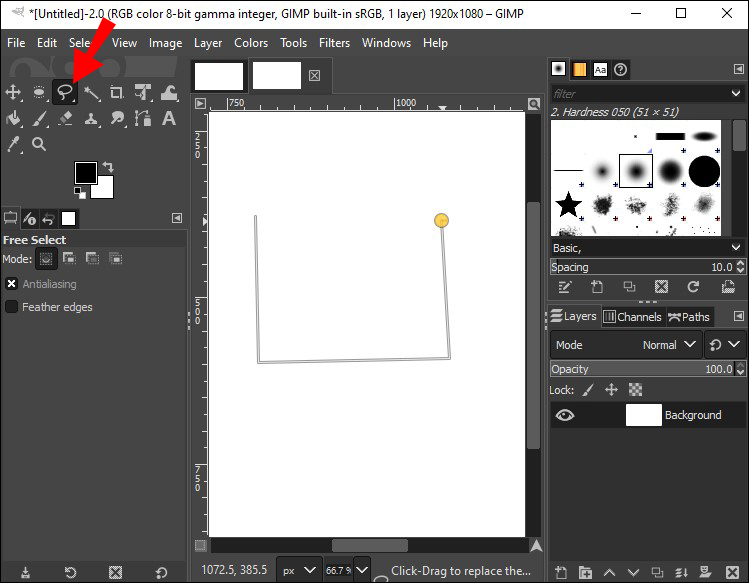
- Press your “Lasso” tool and draw a line around the image or object that will be cut out. Use your left click as you navigate the edges with your cursor. The shorter the distance between your mouse clicks, the more accurately you can select the desired sections.
- Choose the first spot (anchor point) you made with your “Lasso” tool to encircle the object with a loop.
- Open your “Select” menu.
- Press “Invert.” This will select all sections of the object except for the area outlined with the “Lasso” tool.
- Use “Ctrl + X” to remove the parts.


Additional FAQ
How do you deselect a selection in GIMP?
After creating a selection, you may realize it’s not quite right for your project. If so, you want to deselect it.
1. Head to the “Select” menu.
2. Press “None,” and the selection should disappear. Alternatively, use “Shift + Ctrl + A” or click outside your selection while your selection tool is active.
Let Your Imagination Run Free
The selection cut-out feature opens up endless possibilities. You can experiment with various shapes and paste them into transparent backgrounds for a mesmerizing effect. You can also embellish your previous projects with stunning creations. The key is to let your imagination guide you.
How hard is it to cut out selections in GIMP? Is it a beginner-friendly feature, or did you start using it once you gained some experience? Let us know in the comments section below.
Disclaimer: Some pages on this site may include an affiliate link. This does not effect our editorial in any way.


