Mastering Photoshop is by no means an easy task. The program offers a ton of features that might take quite some time and effort to understand. If you’re a rookie, you’ve probably got a long way to go before you can experience Photoshop’s full potential.
Even if you’re not, there are always some new tips and tricks to learn. Color management is a perfect example. This aspect alone has a broad spectrum of features that’ll take time to go through.
At first glance, removing a color doesn’t seem that complex. All you have to do is use the Magic Wand tool, choose the color that you want to remove and press delete, right?
Wrong. Try doing this and see what happens. There’s a huge chance you’ll be left with bits and patches of color in some complex image elements.
So what can you do?
Well, there’s a neat little feature that you’ll find very helpful – the Color Range tool.
Removing All of One Color with the Color Range Tool
The Color Range tool allows you to select and manipulate a subset of colors within an image. Once you’ve defined your selection, you can replace or remove it in just a few steps.
It’s not exactly the easiest feature to use, but it’s convenient and you can get the hang of how it works after just a couple of repetitions.
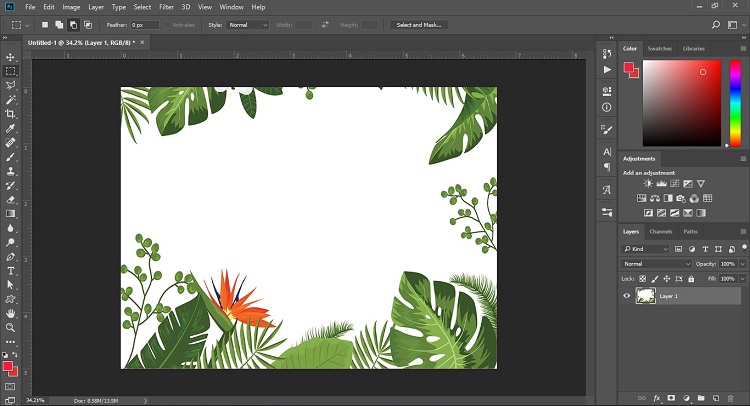
- To begin, open your image in Photoshop. The one you see below is a great example, as it has a lot of sharp edges, which are the biggest enemy of the Magic Wand tool, since they usually end up containing the color you’re trying to remove.

- Once you have your image, it’s best that you duplicate the layer, since this will let you reverse any mistakes easily. Also, it would be a good idea to zoom in on the specific parts of the image so that you can select the color easier.
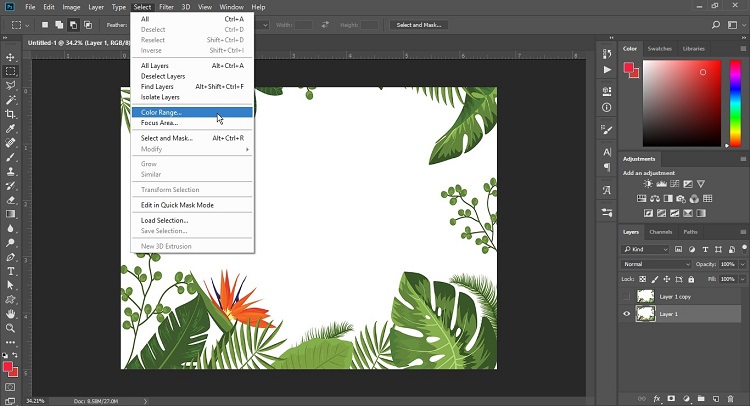
- Once you’ve done this, go to Select > Color Range.
- From here, you’ll get a variety of options which you can tweak to remove specific colors effectively. What you’ll want to do here is select the Eyedropper tool (the regular one) and click on the color you want removed.
- Then, adjust the Fuzziness to match the selection accuracy. What this does is adjust the color range and changes the number of specific pixels that will be removed. This might take some trial and error, so feel free to experiment a little.
- Another thing you can do is use the Localized Color Cluster option. It manages the space between the sample point and all the colors that will be removed. This is handy when you have multiple elements of similar colors and you want to include/exclude them from the selection.
- Once you’ve adjusted all the parameters, you can hit Delete to remove all of that one color


If you zoom in closely, you can see that it’s not only the plain white color that’s been removed but all the gray areas and shadows as well. It doesn’t matter if you want to remove a color from the foreground or the background, the process is the same.
Replacing the Deleted Color
After this, you can choose another color to replace the deleted one. All you have to do is create a new layer and add the new color. If you’ve managed to remove the selected color range entirely, your new color should show up without any spots or patches.
An issue that you might encounter is that some large black or white areas appear semi-transparent once you’ve removed a certain color. This doesn’t mean you’ve made a mistake, and you can fix this easily.
- With the color range selected, press Ctrl + Shift + I (Command + Shift + I if you’re a Mac user) and make a new layer that’s underneath the semi-transparent areas.
- Fill the layer with the color of the object that lost its transparency, then merge the layers by pressing Ctrl + Shift + E (Command + Shift + E for Mac). This will return the image back to normal, and you can continue editing.
Remove a Color with the Magic Wand Tool
If you want to try and remove a color using the Magic Wand tool, here’s a quick rundown of how to do it. Your success may vary.
- With the image open in Photoshop, select Magic Wand from the toolbar.
- Now, click on a spot in the image with the color you want to remove. You can add sections by holding Shift and clicking on them or remove sections by holding Alt and clicking on them.
- Next, you might need to adjust the Tolerance level, it’s used to set the color range relative to the pixels selected.
- Then, click Ctrl + Shift + I to invert the image.
- From here, go to the Layers Window, click on the Image Layer and add a layer mask.
Your image should now have the color removed, you can easily add another background layer if desired.
The Final Word
It’s not the easiest thing to do, but removing all of the same color from an image is certainly doable, and you can get used to these functions pretty easily. After doing this a couple of times, it will become intuitive and you’ll be able to do it in no time.
As mentioned, there are many Photoshop features that even more experienced users might struggle with. If there’s more you’d like to learn about the program, share your questions in the comments below.
Disclaimer: Some pages on this site may include an affiliate link. This does not effect our editorial in any way.


