Looking for a way to disable the keyboard on your laptop either temporarily or permanently? If your answer is yes to either one, we’ve got you covered!
This guide will set out the steps to deactivate your keyboard on both Windows and Mac machines.
Disable a Laptop Keyboard
Laptops are quickly becoming the primary computing device for many people, as they offer a convenient way to stay connected and productive while on the go. A key feature that makes laptops so versatile is their built-in keyboard.
Unlike desktop computers, which require an external keyboard, laptops have their keyboards built right into the chassis. This allows you to travel easily and type comfortably for long periods without having to worry about connecting or disconnecting an external keyboard.
Sadly, however, built-in keyboards aren’t immune to damage. For example, if a key becomes worn or frayed, it can eventually break off, rendering it unusable. This can make typing difficult because you may have to switch to the on-screen keyboard whenever you need to type in that particular letter or symbol.
To avoid the hassle associated with a subpar built-in keyboard, you may prefer to switch to an external one. However, you’d need to disable the built-in keyboard to avoid registering accidental or unintentional strokes on your computer.
Let’s see how you can go about it on Windows and macOS
How to Disable a Laptop Keyboard on a Windows 11 PC
You can disable the keyboard on your Windows 11 laptop in three ways:
(a) Disabling the Keyboard via the Device Manager
Windows 11, the latest and arguably the most exciting version of the Windows series, comes with a particularly useful setting for laptop users. You can turn off the built-in keyboard whenever you want with just a few taps:
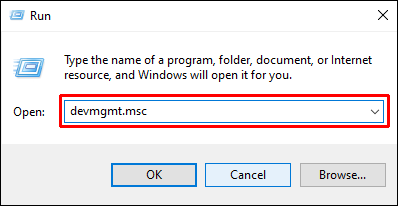
- Open the Device Manager by typing “
devmgmt.msc” into the Run dialog. Alternatively, you can type “Device Manager” in the Windows search box.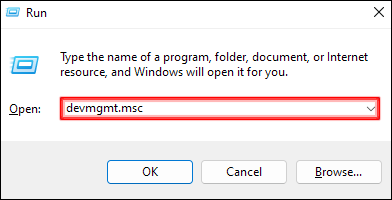
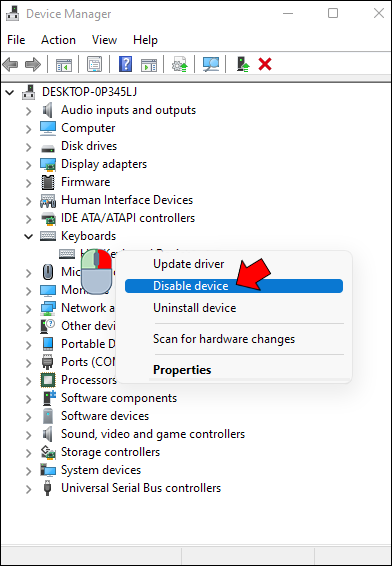
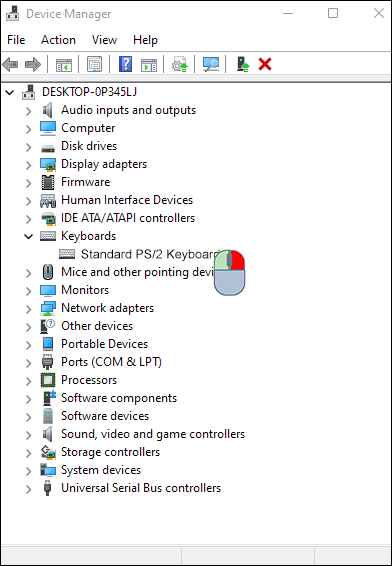
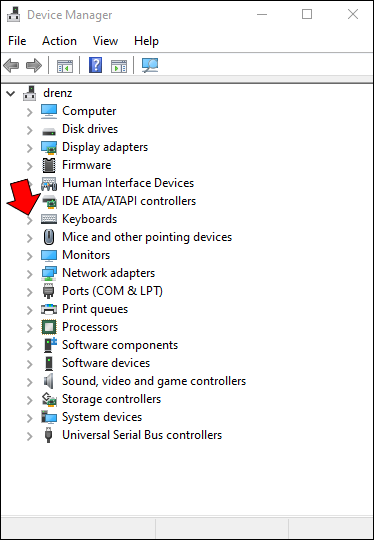
- Select “Keyboards” from the Device Manager window. This will show a list of all keyboards currently connected to your laptop, including the built-in one.

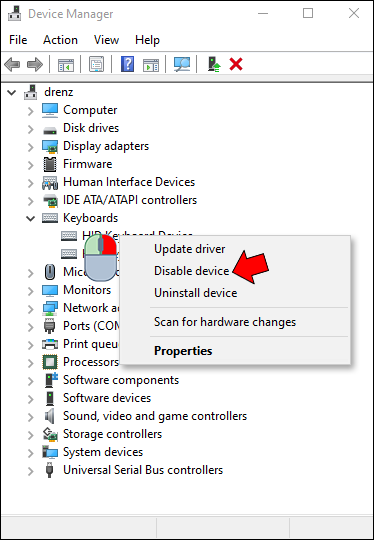
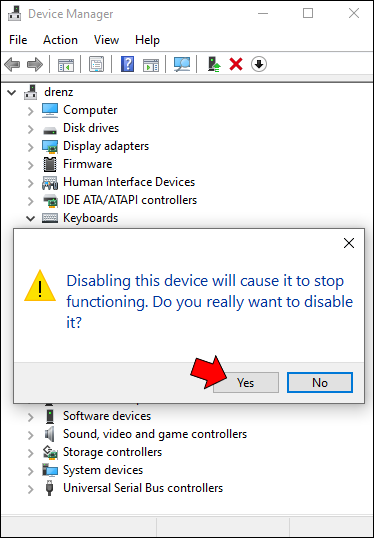
- Right-click on the built-in keyboard and tap “Disable” from the context menu.
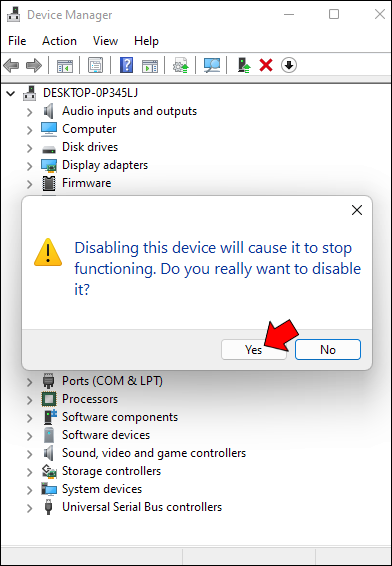
- Confirm the decision with a “Yes” in the resulting dialog box.

Some laptop models may not have the “Disable” button but an “Uninstall device” option instead. You can select that option, and the result will be the same: your built-in keyboard will be turned off immediately. However, neither option is permanent. Your laptop will automatically reenable the keyboard as soon as you restart.
As such, you’ll have to return to the keyboard section on the Device Manager whenever you boot up.
(b) Disabling the Keyboard via the Command Prompt
If you don’t want the inconvenience of opening the Device Manager to disable the keyboard every time you turn on your laptop, don’t worry. You can disable the keyboard permanently using the Command Prompt.
Here are the steps:
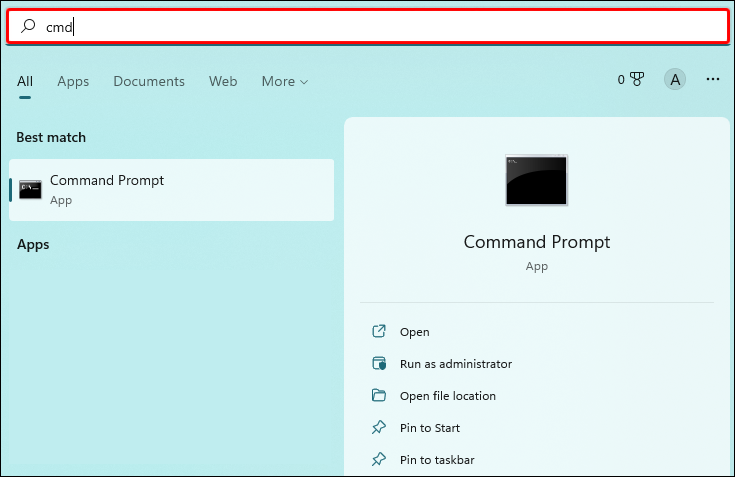
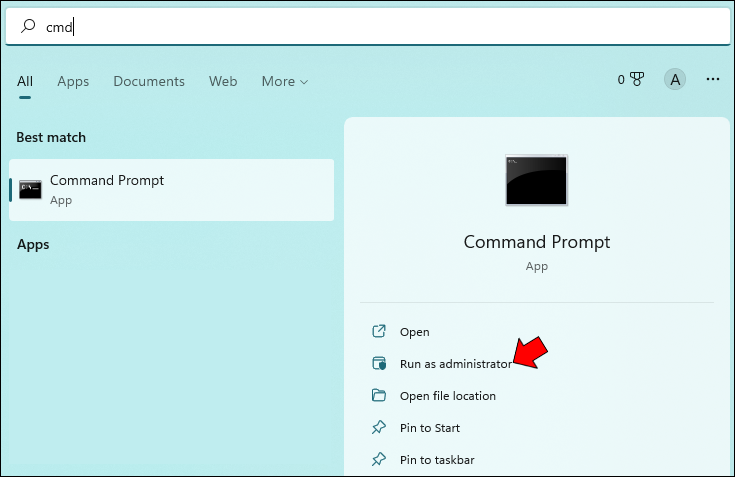
- Tap the Windows icon in the bottom left corner and type “cmd” in the search bar.
- Select “Run as administrator” under “Command Prompt.”
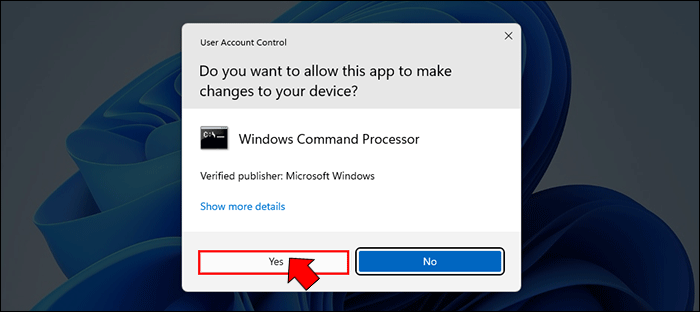
- Click “Yes” to confirm that you’re okay with the Command Prompt app making changes to your computer.
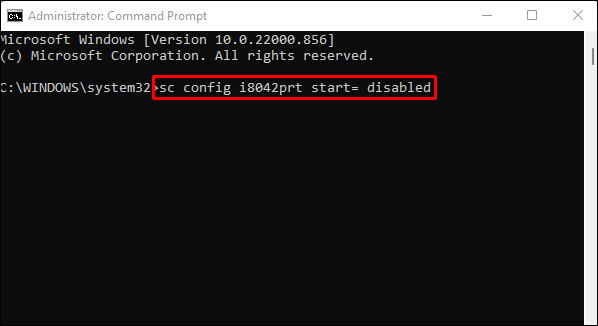
- Once the Command Prompt window opens, type the following command line, and then hit Enter:
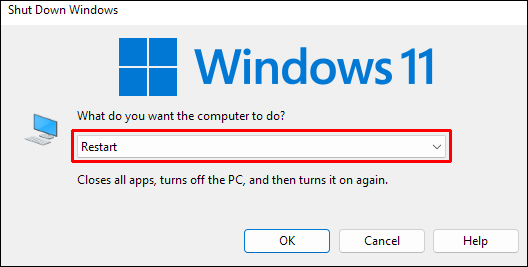
sc config i8042prt start= disabled - Close the Command Prompt and restart your laptop.
Please note that for this to work, first, you need to disable the keyboard via the Device Manager, as discussed above. The command line executed stops Windows from automatically reenabling the keyboard when you restart your laptop.
If you ever want to reenable the keyboard in the future, you just need to run the Command Prompt app and enter the following command:
sc config i8042prt start= auto
(c) Disabling the Keyboard by Choosing the Wrong Driver
Here’s an effective but unorthodox way to disable your keyboard. You can actually disable your laptop’s built-in keyboard by pairing it with the wrong driver. It’s probably an extreme way to do it, but it works, and reversing the changes you make isn’t too difficult.
Here’s how to pair your keyboard with an incompatible driver:
- Open the Device Manager by typing “devmgmt.msc” into the Run dialog box.
- Expand “Keyboards” and then right-click on the “Standard PS/2 Keyboard.”
- Select “Update driver” from the context menu.
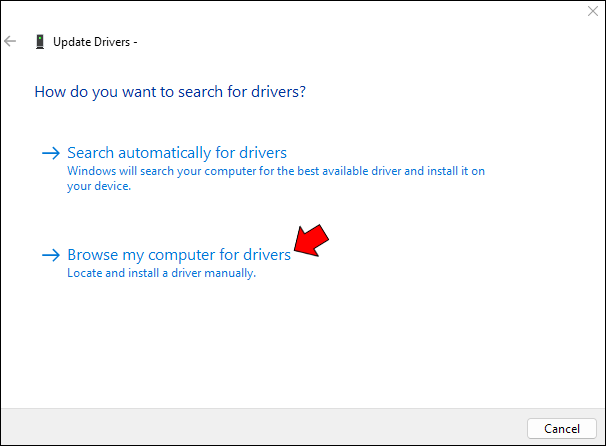
- At this point, your laptop will present options about how you want to search for drivers. Choose “Browse my computer for driver software.”
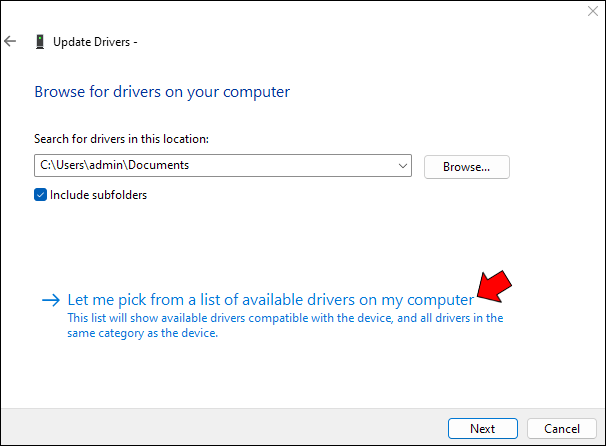
- On the next window, select “Let me pick from a list of available drivers on my computer.”
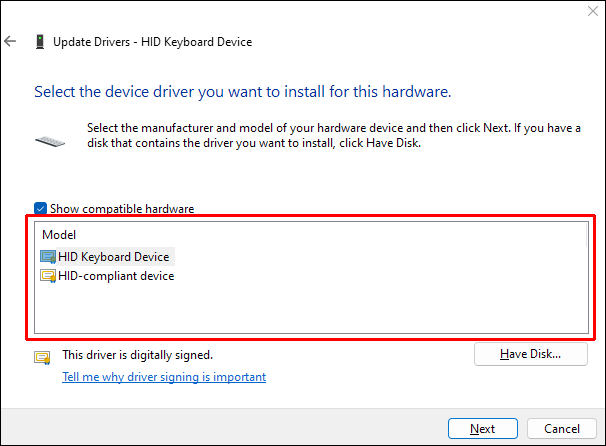
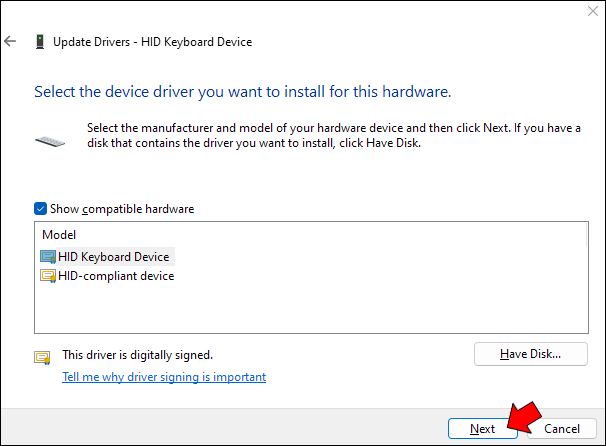
- Scroll down the list, choose a manufacturer different than your standard keyboard, and select any model listed.
- Click on “Next.”
- Windows will attempt to warn you the driver you’re about to install may be incompatible with your system. Tap “Yes” to confirm you want to continue with the installation.
- Close the “Drivers Update” window and restart your laptop.

Once your laptop reboots, your keyboard won’t work. However, you can easily reenable it by following steps 1 through 4 above and then selecting “Search automatically for drivers” instead.
How to Disable a Laptop Keyboard on a Windows 10 PC
Whether you’re trying to protect your laptop from curious little hands or trying to prevent yourself from accidentally hitting the keys and creating typos, there are times when you might want to disable your laptop keyboard.
Here’s a step-by-step guide on how to do it on a Windows 10 PC.
- Open the Device Manager by searching for it in the start menu or pressing the Windows key + R, typing “devmgmt.msc” into the Run dialog, and hitting Enter.
- Expand the “Keyboards” section of the list of devices.
- Right-click on your laptop’s keyboard entry and select “Disable” from the context menu that appears.
- A popup window will appear asking you to confirm that you want to disable the device; click “Yes” to continue.
Your keyboard will now be disabled; to enable it again, simply follow steps 1-4 and select “Enable” from the context menu in step 3 instead of “Disable.”
If desired, you can also use this same method to disable other devices like your mouse or trackpad. However, we don’t recommend doing so unless you have another input device available, as you won’t be able to use your computer without one.
How to Disable a Laptop Keyboard on a Mac
If you’re using a MacBook, you can disable the built-in keyboard, albeit temporarily, in a couple of different ways. One is to use Mouse Keys in the Universal Access preference.
Here are the steps to do this:
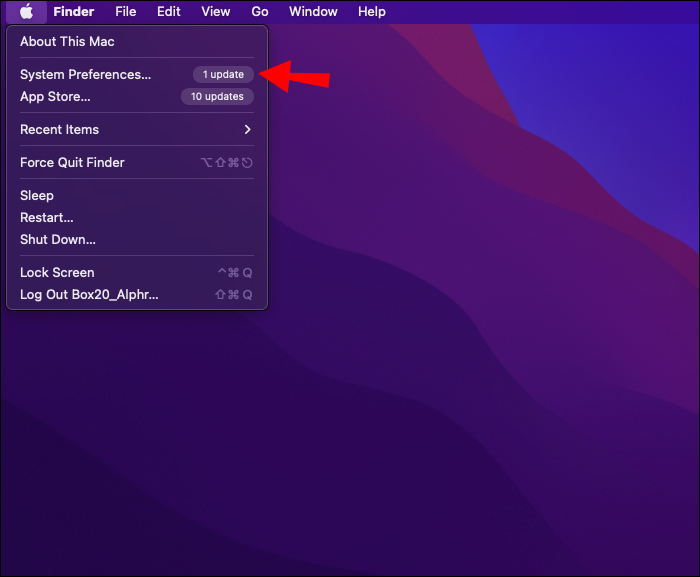
- Head to Apple menu.
- Click “System Preferences”.
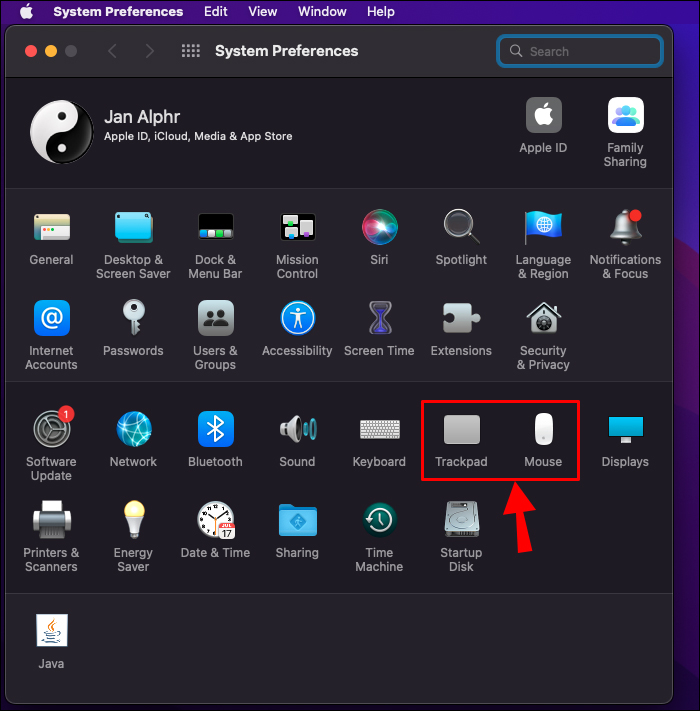
- Click on “Mouse & Trackpad” and check “On” for Mouse Keys.

With Mouse Keys enabled, your keyboard will be unresponsive to presses. However, this method may not work on macOS Big Sur and Monterey. So, what do you do if your Mac runs on either of these?
You can download a third-party keyboard utility app, such as Karabiner-Elements or KeyRemap4MacBook, which gives you more control over how your keys are mapped. For example, with KeyRemap4MacBook, you can remap modifier keys, such as Control, Option, and Command. You can also disable keys altogether or set them to perform different functions when tapped or held down.
When using either of these methods, you’ll need an external mouse or trackpad to navigate around the screen.
Prevent Accidental Presses
Disabling the built-in keyboard on your Windows or Mac computer can be a helpful way to avoid accidental key presses when you’re typing with an external keyboard. Just remember to enable the keyboard again when you’re done so you don’t have any trouble moving around your computer.
Have you tried disabling your laptop keyboard using any of the methods discussed in this guide? How did it go?
Let us know in the comments below.
Disclaimer: Some pages on this site may include an affiliate link. This does not effect our editorial in any way.