Most PC users eject external hard drives frequently. However, many don’t know the correct and safe way to do so. Incorrect ejection of external hard drives can lead to losing data on the drive, or some files can become corrupt.
Whether you’re not sure how to eject an external hard drive or do it safely, keep on reading. This article will walk you through methods to safely eject an external hard drive on your Windows PC.
Why Is Safe Ejection So Important?
Most of us have ejected an external hard drive at least once. However, it’s recommended to do so as safely as possible to avoid damage.
When discussing external USB devices, the phrases “eject” and “disconnect” are sometimes used interchangeably. If you want to “internally” unhook your USB device from your computer, you use the phrase “eject.” If you’re going to unplug your USB device physically, you use the term “disconnect.” So, the first step is to eject the USB device from your computer and then disconnect it physically from the USB port on the PC itself.
First, you instruct your computer to switch off the external USB device’s write cache and acknowledge that you’re ready to detach the device by ejecting the USB device. You can unhook the devices once this step has been completed. Errors in ejecting the disk can damage files and directories, necessitating a reformat of the entire drive and erasing all of your data.
Some external USB devices may not appear in the list of ejectable drives on some computers. These include iLok and eLicenser. But if the device is mentioned, you must eject it from your computer before securely removing it from the device list.
How to Eject an External Hard Drive on a Windows PC
So, now that you know why a safe ejection of a hard drive is essential, let’s see how to do it. Luckily, there are five different ways to choose from.
Safely Remove Hardware and Eject Media Icon
This method is the easiest and fastest technique for most users. Here’s how:
- Find the “Safely Remove Hardware and Eject Media” icon in the system tray and click on it to safely remove the device.*

- You’ll get a list of all of the attached removable storage devices. External hard drives, USB memory sticks, and various other USB devices are all on the list.
- Remove the device from the list of all the existing removable devices by clicking on it. Check the drive letter if you’re having trouble telling them apart.

- At the bottom right of your screen, you should see a message indicating that it is now safe to remove the hardware.
- You may remove the particular storage device from your computer.
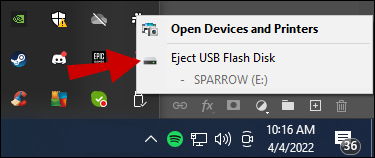

* Note that by default, Windows 10, does not display this icon next to the clock and the network icon. It’s possible to reveal hidden icons by clicking on an up-arrow and finding the USB-like symbol indicated below.
The prompt “This device is now in use” appears if Windows 10 or an app is actively using the storage device you wish to remove. Unplugging the storage device might damage the data on it. Please make a fresh attempt after closing all open programs if you see this error. Alternatively, you may try shutting down Windows 10 and unplugging the storage device to see if the problem persists. After that, you may use your computer as usual by restarting it.
Moreover, the “Safely Remove Hardware and Eject Media” icon may be moved to the system tray to make it more easily accessible. This will make the whole process a little bit easier.
File Explorer
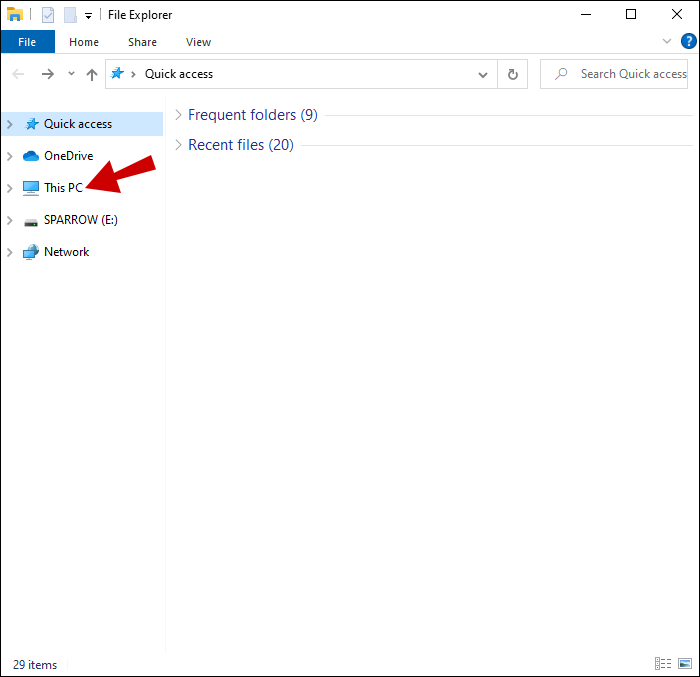
- Open File Explorer and navigate to This PC
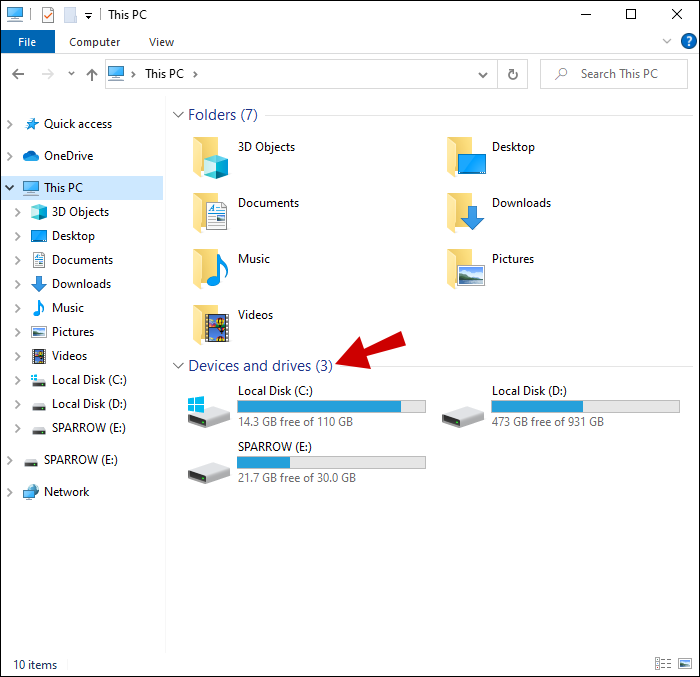
- Select “Devices and drives,” where you can view all of your PC’s partitions and disks and any external devices.
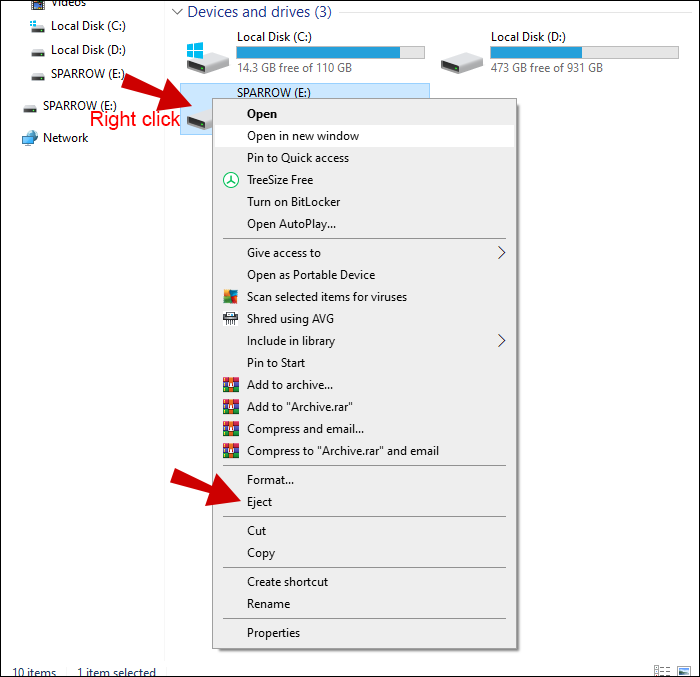
- Choose “Eject” from the menu that appears when you right-click or press-and-hold on the drive you wish to remove.
- You will receive a message that says, “Safe to Remove Hardware.” Once you’ve unplugged the device from your Windows 10 computer, you’re done.

Settings
The Settings app is a less well-known method, but still an effective one. Here’s how to do it:
- Open “Settings” by pressing Windows + I.
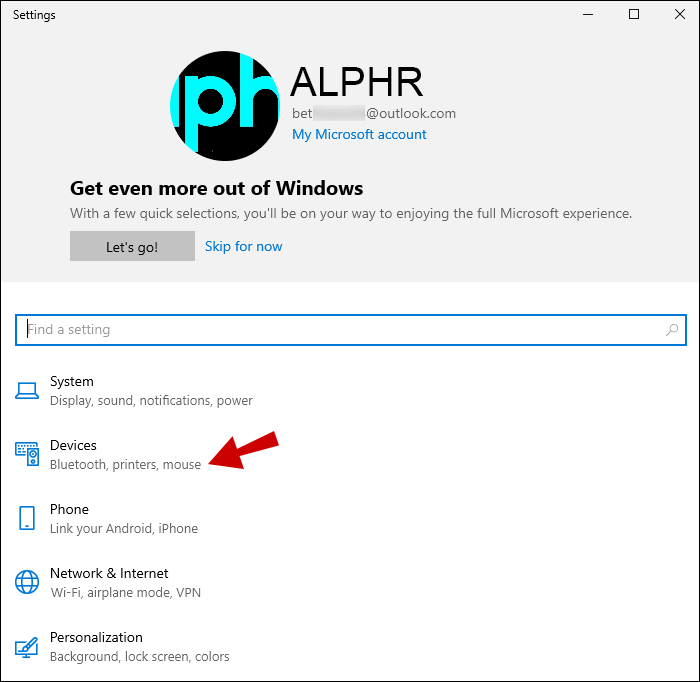
- Navigate to “Devices.”
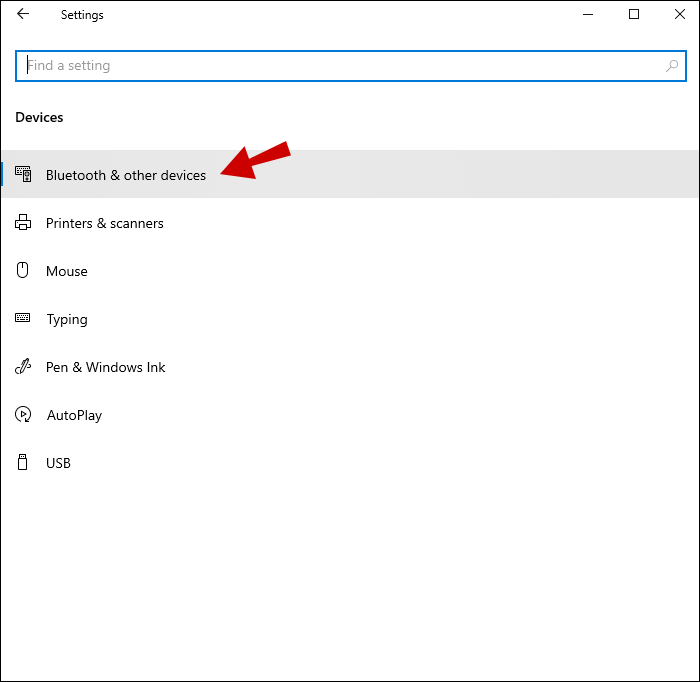
- Go to “Bluetooth & other devices” on the left side of the page. On the right side of the window, you’ll see an extensive list of devices.
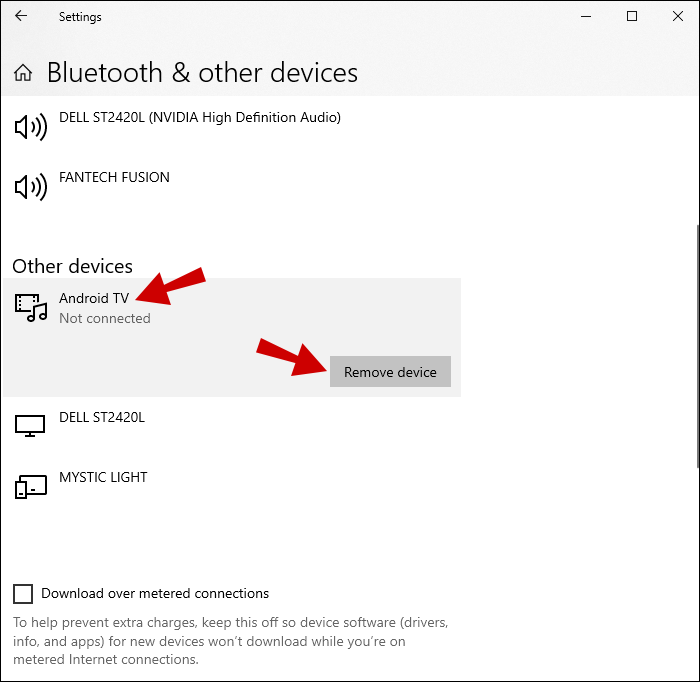
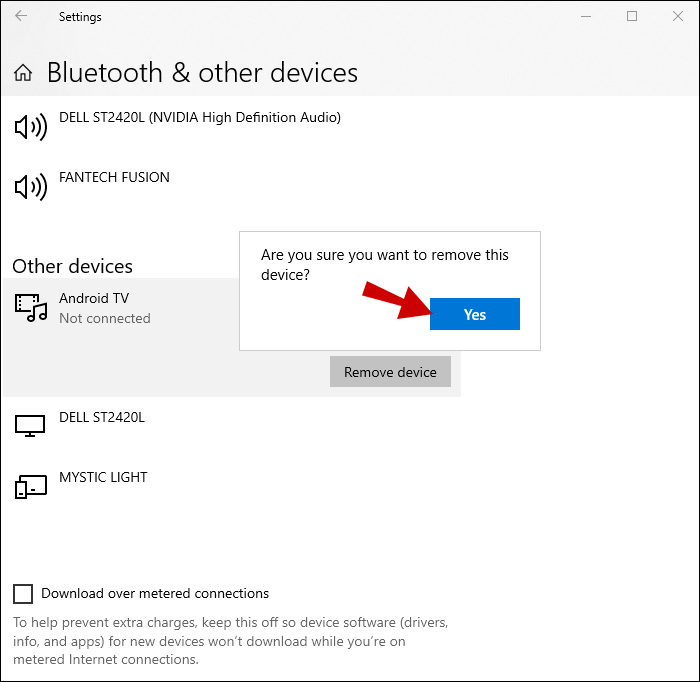
- You may find the external devices linked to your Windows PC in the “Other devices” section. Locate the device, select it, and then click or tap “Remove.”
- A dialog box asking for confirmation will display. Press “Yes.”
- You can now unplug the external storage device.
Disk Management
USB memory sticks can be removed with this method; however, external hard drives cannot.
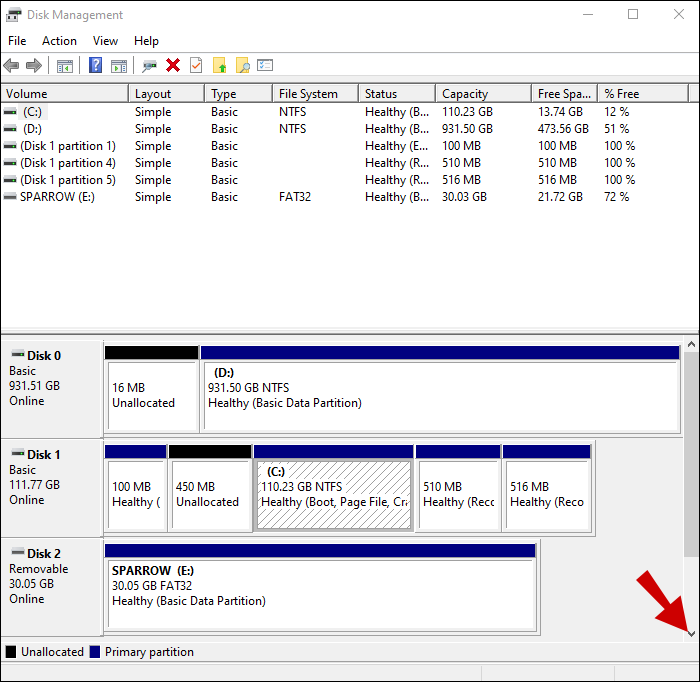
- Launch Disk Management.
- Use the arrows at the bottom of the list to go through the disks.
- Locate the USB flash device.
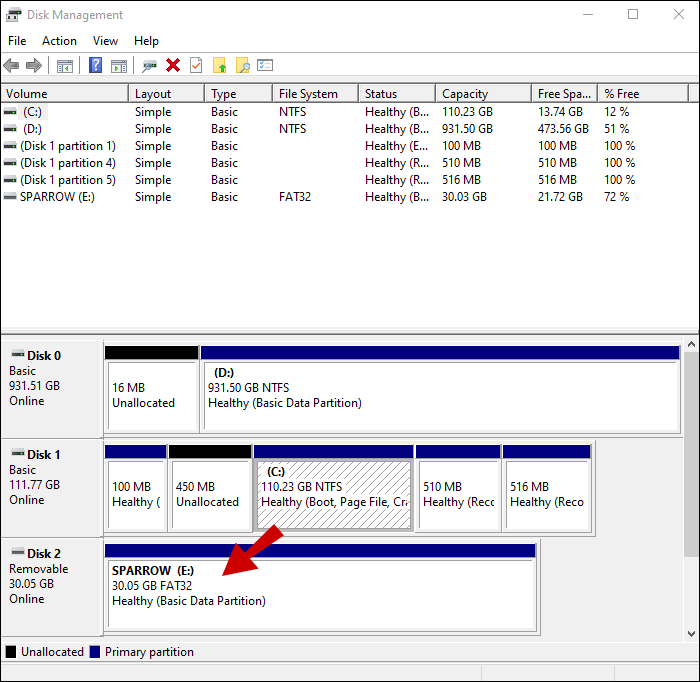
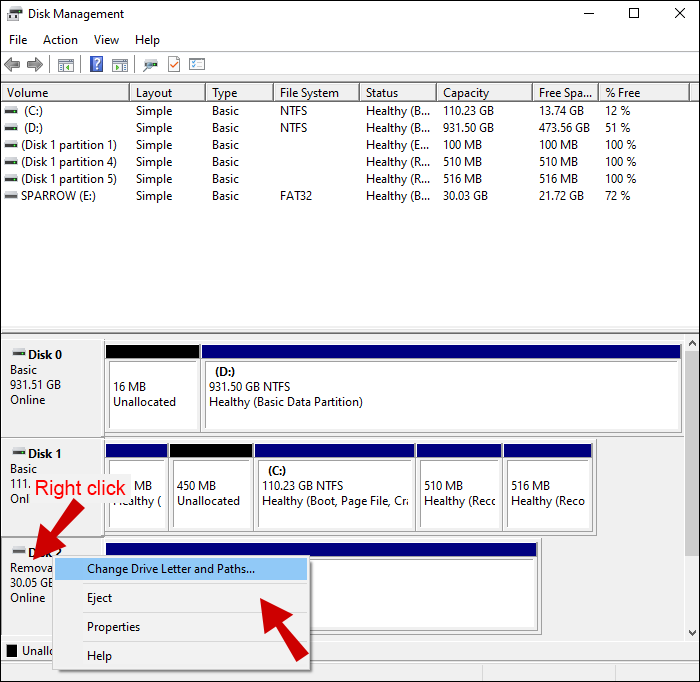
- Disk Management’s removable disks have the label “Removable” on them. Right-click on the USB and select “Eject.”
- The USB drive can now be unplugged from your computer or device without risk.


Safely Remove Hardware Wizard
This is an old method that works well in Windows 7. Although it’s still around and somewhat functional in Windows 10, the feature is no longer supported by Microsoft. It will either cease operating or be removed from Windows 10 at some time in the future. USB memory sticks cannot be ejected using this method – only external hard drives can. Here’s how to do it:
- Open the Run window by pressing Windows key + R.
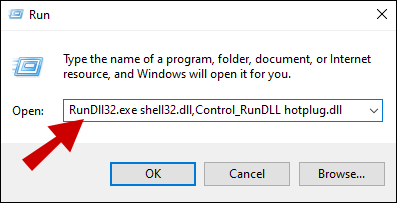
- Type in:
RunDll32.exe shell32.dll,Control_RunDLL hotplug.dll - Press Enter
- A Safely Remove Hardware window will appear with the devices that Windows has identified as removable.
- Press the “Stop” button to eject the selected item.
- A “stopped” device request will appear. Press the “OK” button to choose the item with the drive’s label.
- Once you see the message “Safe to Remove Hardware,” you can safely unplug the device.


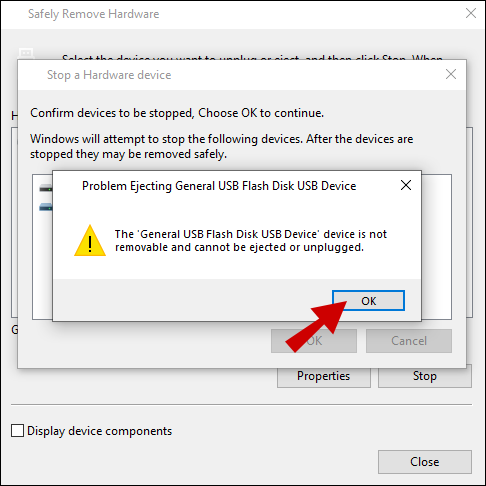
You’ll get an error message similar to the one below if you try the same procedures with a USB memory stick. This means you can’t eject or remove the device since it is not detachable.
Eject an External Hard Drive Not Working
This issue can occur due to many reasons. The problem can stem from the fact that the drive’s content is being accessed, or because background processes or programs use files on the external hard drive. Alternatively, the problem might be caused by corrupted Windows USB drivers. Old or faulty USB drives can also be to blame. However, there are ways to fix it and still safely eject an external hard drive.
Restart Your PC
The ejecting external hard drive issue in Windows 10 is nearly always resolved by a fresh reboot. All operating applications and third-party processes are terminated when you shut down your computer.
Safely Remove Hardware Utility
It’s possible to access Windows’ “Safely Remove Hardware” option via a keyboard shortcut. Here’s how:
- Press and hold the “Windows + R” keys together to open the Run application.
- In the shortcut box, enter “
RunDll32.exe shell32.dll,Control_RunDLL hotplug.dll” and press Enter. This should open the Safely Remove Hardware program by default. - You may remove a drive by clicking “Stop” once you’ve selected it.
- Check to see whether the issue is still present.
Windows Hardware Troubleshooter (Windows 10)
Built-in troubleshooters should be utilized for diagnosing problems if you’re having issues because of third-party hardware. You can sometimes solve issues with hardware or devices by using the Hardware and Devices Troubleshooter. To utilize the troubleshooter, follow these instructions:
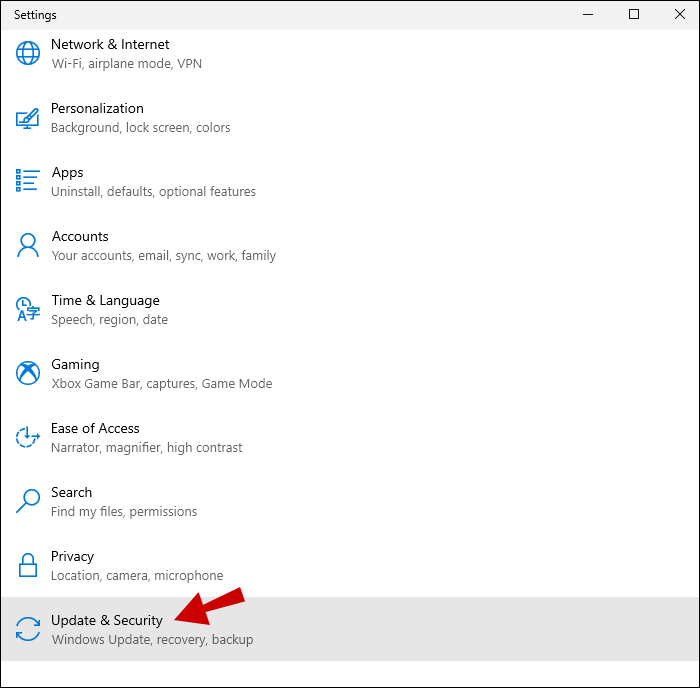
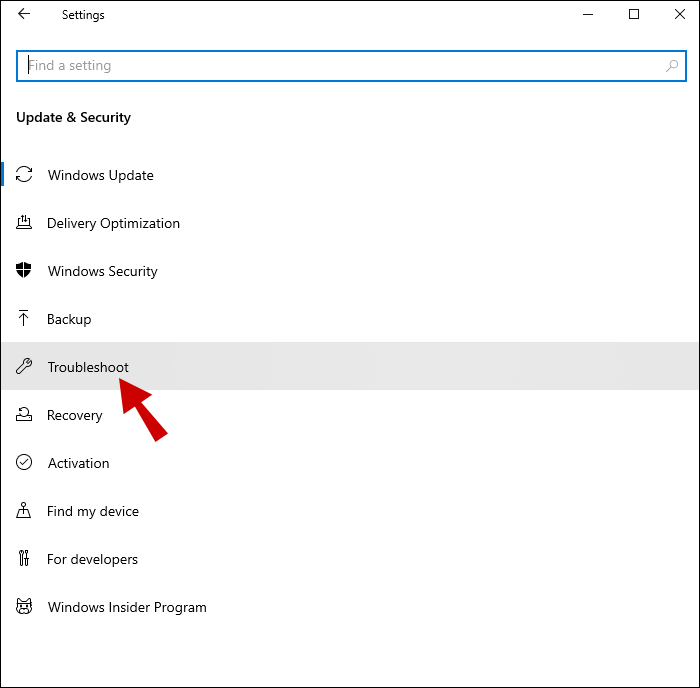
- Press the Windows Key + I to enter the Settings menu.
- Go to “Updates and Security.”
- Navigate to the “Troubleshoot” section to get started.
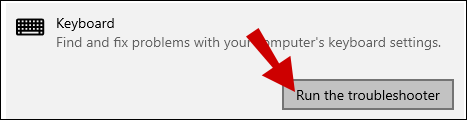
- By scrolling down, you’ll see “Hardware and gadgets.”
- After choosing it, press the “Run the troubleshooter” button.
Make Sure Your USB Drivers Are Up to Date
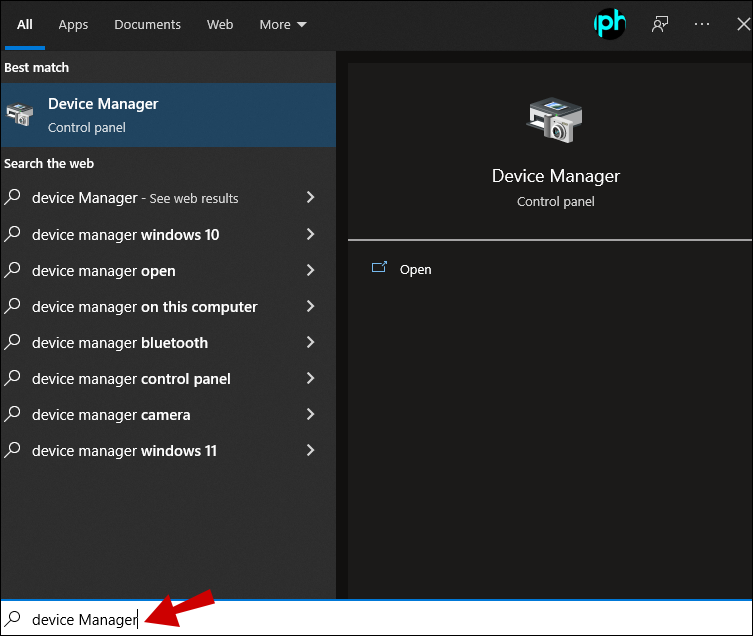
Using the device manager, you can check if your USB drivers are updated and working correctly.
- Open the Device Manager. Type “device manager” in the start menu to locate it easier.
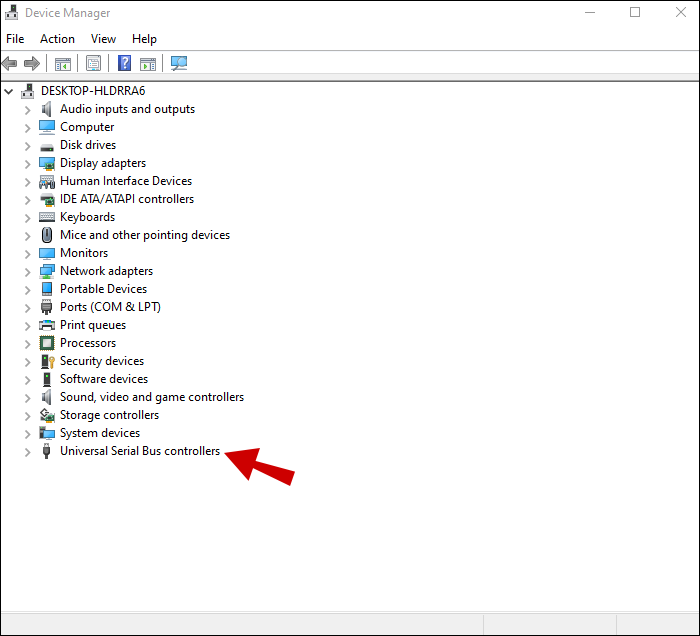
- Add a Universal Serial Bus controller to the list of available devices.
- Look for an entry that has an exclamation point in yellow. In the context menu, select “Update Driver Software.”
- Delete the driver and restart your computer to allow it to be installed automatically again if there isn’t an exclamation point.
Better to Be Safe Than Sorry
Now you can be sure that no further issues will occur when you eject an external hard drive. You can never be sure if your PC is still accessing files on the external hard drive. Corrupted and deleted files, as well as unreadable media, can all happen due to unsafe external hardware removal. However, removing your external storage safely reduces the chances significantly.
How do you eject your external hard drives? Have you had any issues with ejecting an external hard drive? Let us know in the comment section below!
Disclaimer: Some pages on this site may include an affiliate link. This does not effect our editorial in any way.


