There are several requirements your PC needs to meet to upgrade to Windows 11. One of them is Trusted Platform Module (TPM) 2.0. The system is essential for various security features, such as Windows Hello and BitLocker. It also stores passwords, certificates, and encryption keys to safeguard against software-based attacks and hackers.
Most devices can run TPM, but it may not be enabled on yours. This guide will show you how to activate this crucial feature and ensure a smooth transition to Windows 11.
How to Enable TPM in Windows 11
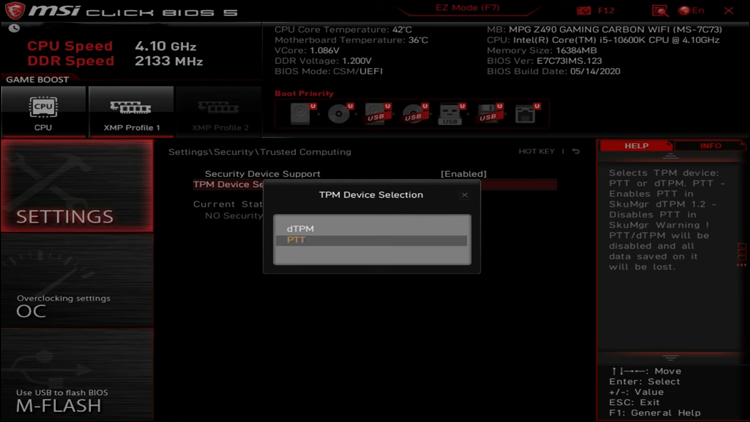
Enabling TMP shouldn’t be too difficult, but you can’t access this feature from your desktop. Instead, you’ll need to do it before Windows 11 starts by navigating to the BIOS of your motherboard. This is what the process involves on Intel motherboards:
- Press F2 or the Delete button during startup. If you make it to the load screen, restart the device.

- If the BIOS section is running in Easy Mode, change it to Advanced Mode by clicking this option on the sidebar or pressing F2.
- Double-click the “Miscellaneous” tab.
- Navigate to the TPM feature. On Intel motherboards, this feature should appear as “Intel PTT (Platform Trust Technology).” Click this option.
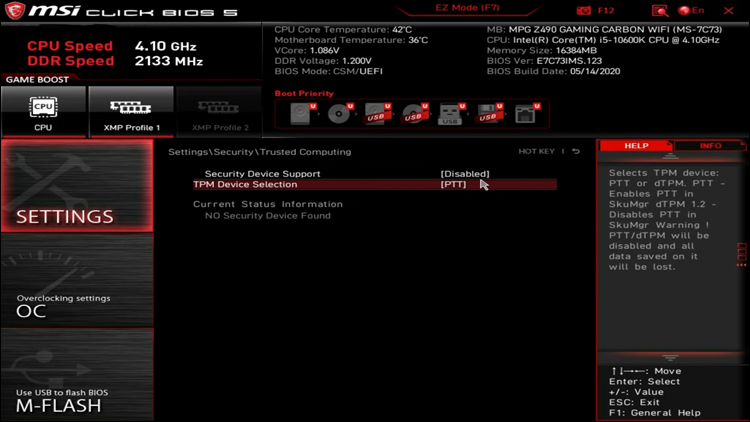
- Go to your drop-down menu and press “Enable.”
- Save your changes, press Exit, and restart the computer to finish the process.

TPM should work correctly on your PC now, but you may want to consider taking a few extra steps to ensure safe installation. More specifically, you should activate the Secure Boot feature:
- Press “Del” or F2 during startup to access the BIOS settings.
- Select Advanced Mode or hit the F2 key.
- Go to the upper section of your screen and select “Boot.”
- Choose “Secure Boot.”
- Click the prompt to activate the feature and change it to “Enabled.”
- Save the changes, leave BIOS, and restart the device to complete the task.
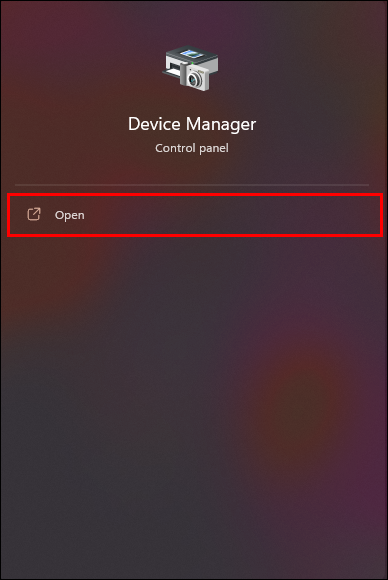
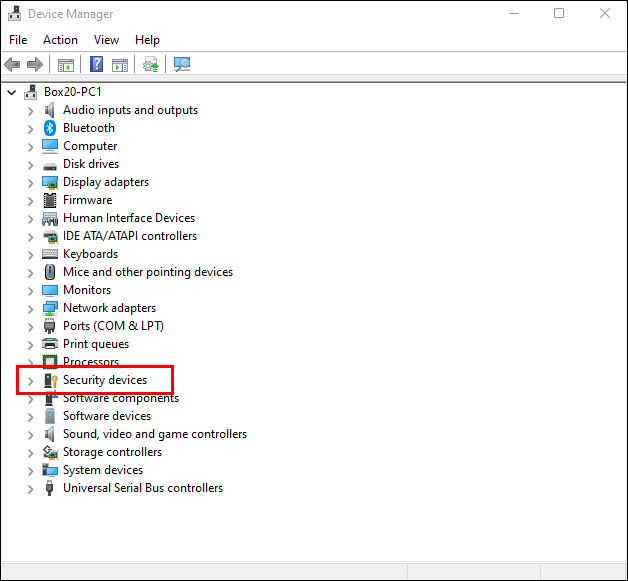
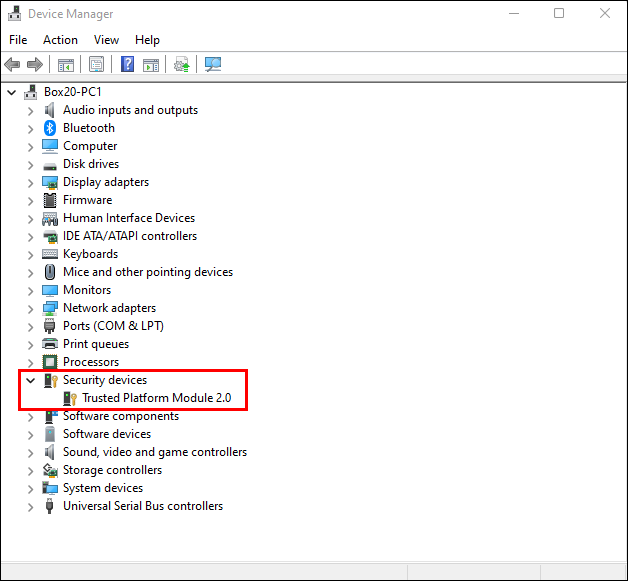
Take these steps if you want to verify your TMP is activated:
- Log into your Windows account.
- Right-click the Start button.
- Head to “Device Manager”
- Click “Security Devices.”
- If you’ve performed the above steps correctly, TPM 2.0 should appear in this window.
How to Enable TPM in Windows 11 on an ASUS
The previous steps should do the trick for most computers. That said, activating TPM might work slightly differently on certain brands. Here’s what you may need to do on your ASUS PC with an Intel motherboard to activate TPM:
- Strike the Delete button when your ROG or ASUS logo shows up to access the BIOS settings.
- Go to the Advanced configuration page.
- Enable “PTT.”
- If a notification window appears, press “OK,” and hit F10 to save the changes and restart your PC.

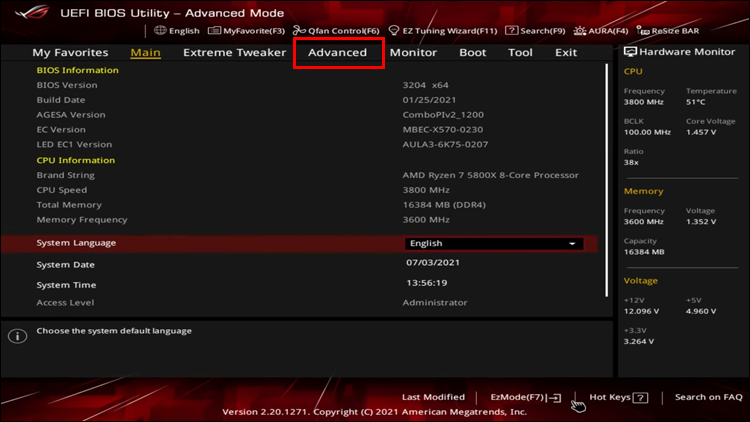
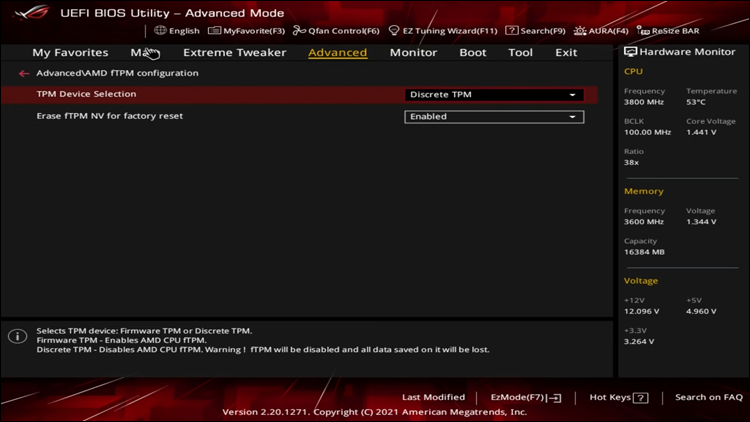
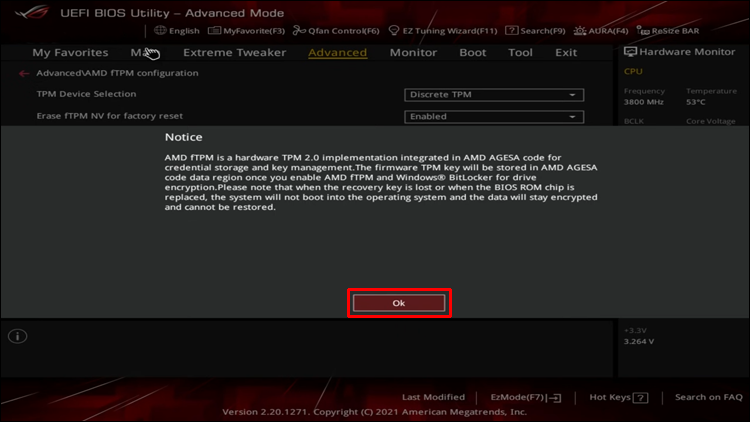
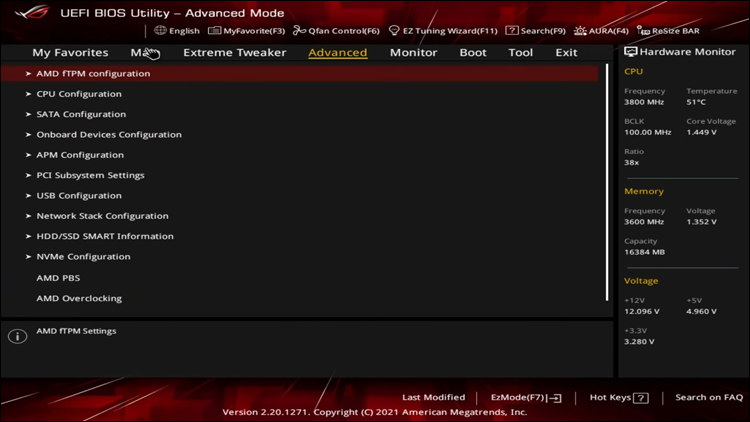
The activation is similar if you’re running an AMD motherboard:
- Press “Delete” when the logo appears to reach your BIOS.
- Launch the Advanced configuration page.
- Navigate to the TPM Device section and activate “Firmware TPM.”
- Save your changes by pressing F10.
How to Enable TPM in Windows 11 on a DELL
DELL users shouldn’t have a hard time enabling TPM, regardless of the model:
XPS, Vostro, Precision, OptiPlex, and Latitude
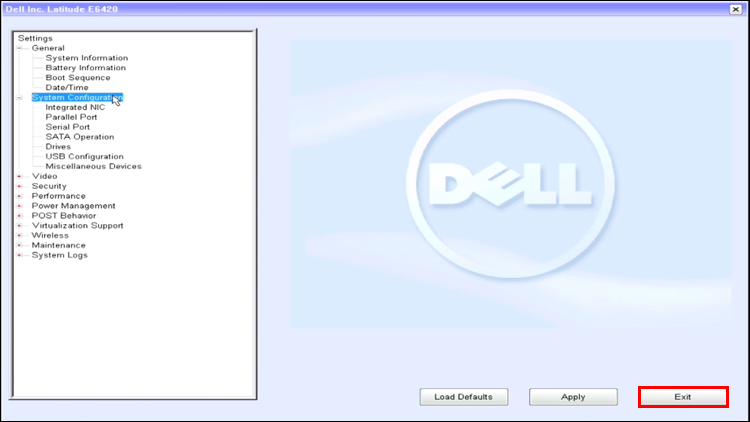
- Reboot the computer.
- Wait for the logo to appear and press F2. This should bring you to the BIOS section. Depending on the model, you might be able to navigate it with your mouse. Otherwise, you’ll need to use the right or left arrow key and select options with the Enter button.
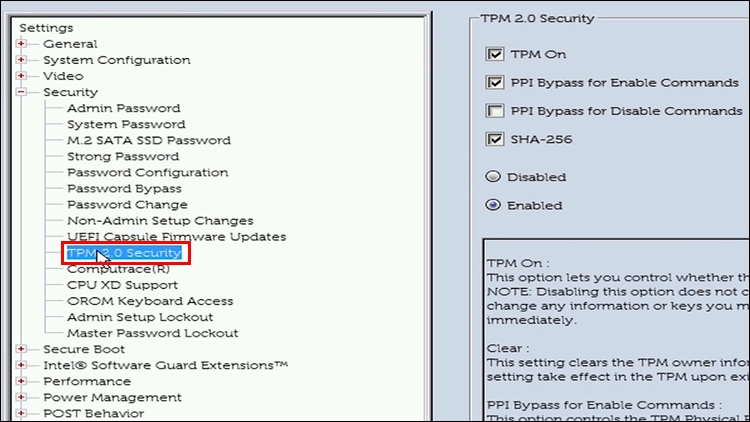
- Expand “Security” and choose “TPM 2.0 Security.”
- Activate the feature and press “Apply.”
- Hit the “Exit” button, and you should be good to go.

Alienware
- Restart the PC and hit F2 when you see the logo.
- Choose Security and set the “Firmware TPM” feature to “Enabled.”
- Exit and save the changes. You can also press F10 to save the changes and leave the section automatically.
Inspirion
- Reboot your device.
- Wait for the logo to show up before pressing F2.
- Pick “Security.”
- Go to the “Trust Technology” section and toggle it to “On.”
Models With Aptio Setup Utility
- Restart the computer and access the BIOS.
- Go to “Security” and find “Firmware TPM.”
- Select “Enabled” and hit the Enter button.
- Use the prompt to apply your changes, or hit F10 and press “Yes” to exit the section. Hit Enter once again, and TPM should be up and running.
HP
Enabling TPM on HP computers is relatively straightforward:
- Turn on your PC.
- Hit F10 to launch BIOS.
- Go to the “Security” section and check if the TPM status is hidden. If so, toggle it to “Available” and change it to “Enabled.”
- Exit by pressing F10 and hit the “Yes” button to save your changes. If prompted, use F1 to confirm your changes and reboot your PC.


Lenovo
Lenovo computers are known for intuitive interfaces. As a result, launching the BIOS section and changing TPM settings should be effortless. The main difference is that you can do so once your Windows starts up:
- Type “
Recovery options” in your Windows search box and click it. - Open “Advanced Setup” and press “Restart Now.”
- Wait for the options to load and click “Troubleshoot.”
- Choose “Advanced Options,” followed by “UEFI Firmware Settings” and “Restart.”
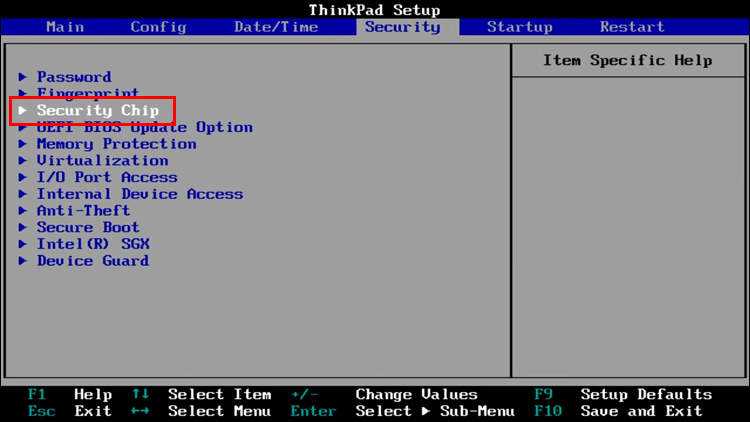
- Head to the “Security” section and select “Security Chip.”
- Make sure your Security Chip is TPM and enable it.

Why Do You Need TPM in Windows 11?
You might be able to use Windows 11 comfortably without some features, but TPM is indispensable. Microsoft requires it because it plays a pivotal security role.
The platform offers several properties that software-only CNG providers can’t deliver, such as key protection. It creates restricted keys and allows your OS to use them without copying them to PC memory, where they would be susceptible to malware. It can also generate non-removable keys that are unique and reside only within the system.
On top of that, the platform can import codes without creating more copies which can lead to security threats. This makes TPM superior to third-party software solutions prone to various reverse-engineering attacks. Potential attackers can’t make copies of your keys because they can’t access your PC’s memory.
Another great thing about TPM is that it provides reliable dictionary attack protection. Keys shielded by your TPM often require authorization values, such as PINs. With robust dictionary attack protection, TPM keeps your data safe if it detects too many attempts to determine your PIN. Once an attacker makes too many attempts, the system stops them from guessing for a specific period.
Third-party solutions may offer similar features, but they can’t guarantee the same protection. This is especially true if the PC restarts, the clock changes, or the files on the hard drive get rolled back.
What is more, dictionary attack protection allows you to use shorter authorization values without reducing the level of safety. This enables you to memorize your PIN more easily and use the PC comfortably, knowing TPM has your back.
You Can Never Have Too Much Safety
Malware attacks can happen at any time and cause irreversible loss of data. With TPM activated, the chances of this are slim to none. Use the above steps to enable this feature, depending on your device, and you’ll be able to use your Windows 11 safely.
How hard is it to navigate your PC’s BIOS? Does your PC meet other requirements for Windows 11? Tell us in the comments section below.
Disclaimer: Some pages on this site may include an affiliate link. This does not effect our editorial in any way.


