Today, losing access to your Gmail account sounds far more devastating than losing your wallet. Fortunately, numerous security features are available to protect your digital assets.
Turning on 2FA for your Google account will help protect it from uninvited guests. Here’s how to enable two-factor authentication for your Gmail accounts.
Two-step verification, or two-factor authentication (2FA), is an extra security layer you can add to your accounts. Once enabled, the login process will involve two steps (or two factors). The first step involves something you know (your login info), while the second step requires you to verify your identity using something you have (your phone). You’ll be the only one who can access your account since you possess both factors.
Although highly recommended, 2FA is not mandatory in Gmail. You can enable or disable it by following the instructions below.
How to Enable/Disable 2FA in Gmail on a PC
To turn 2FA on or off for your Gmail, you’ll need to tweak the settings of your Google Account. You can access these settings by heading straight to your Google Account or from Gmail in the following way:
- Open “Gmail” in your browser.

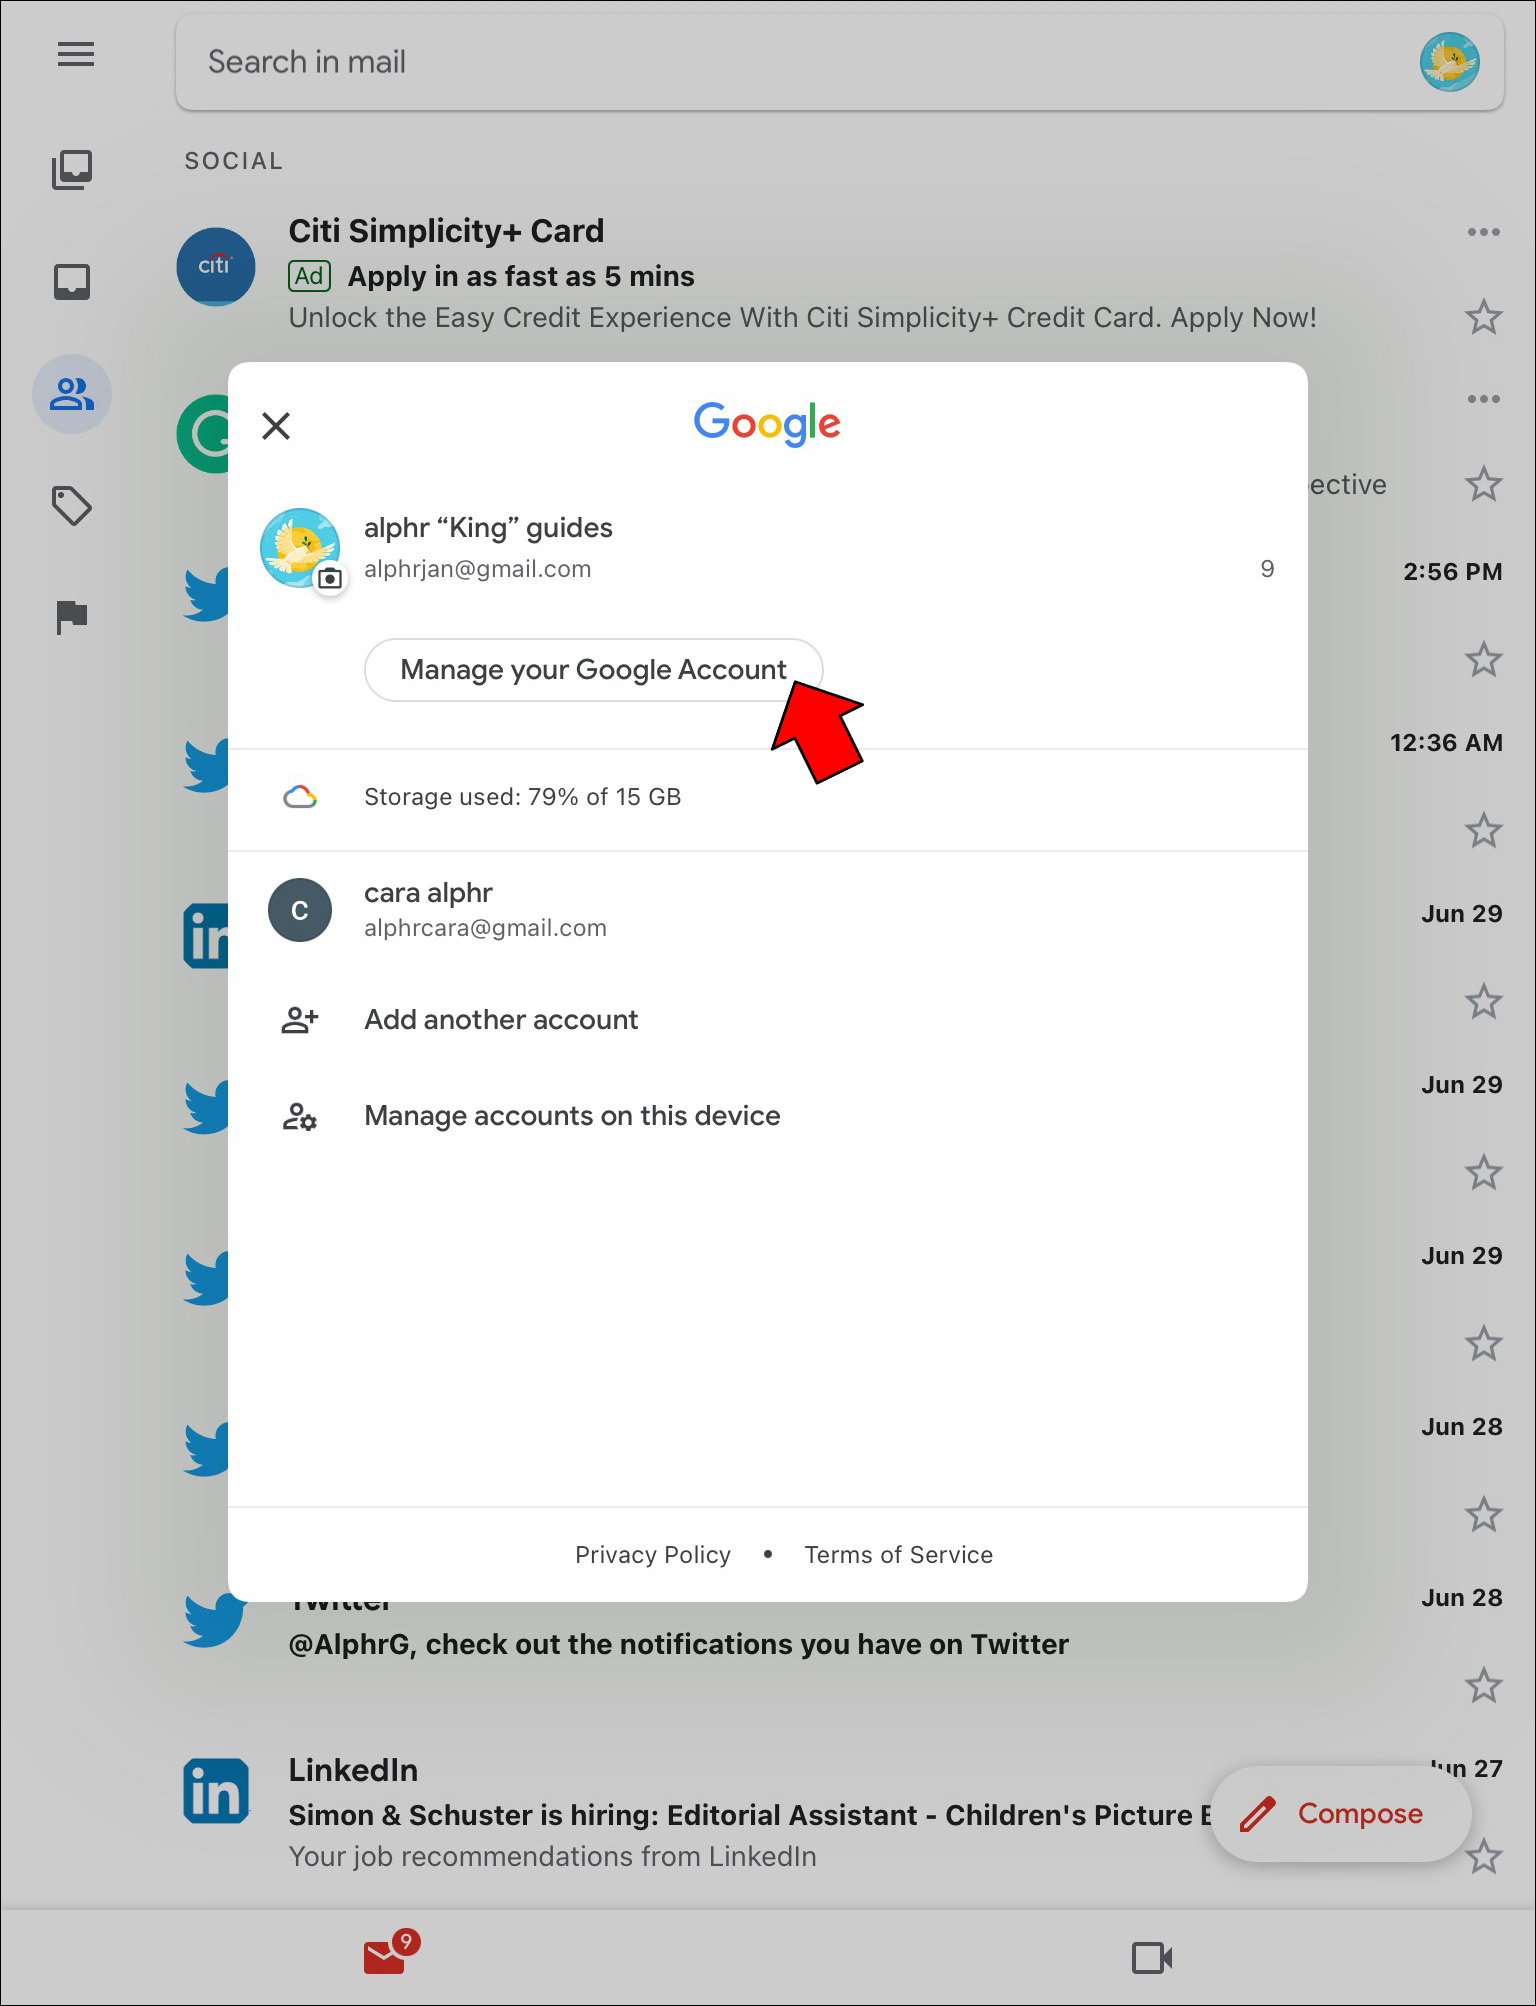
- Click your “profile icon” in the top right corner.
- Click the “Manage Your Google Account” button under your profile information, and you’ll be redirected to a new tab.
- Click on the “Security” option on the left side.
- Scroll down to the “How you sign in to Google” section.
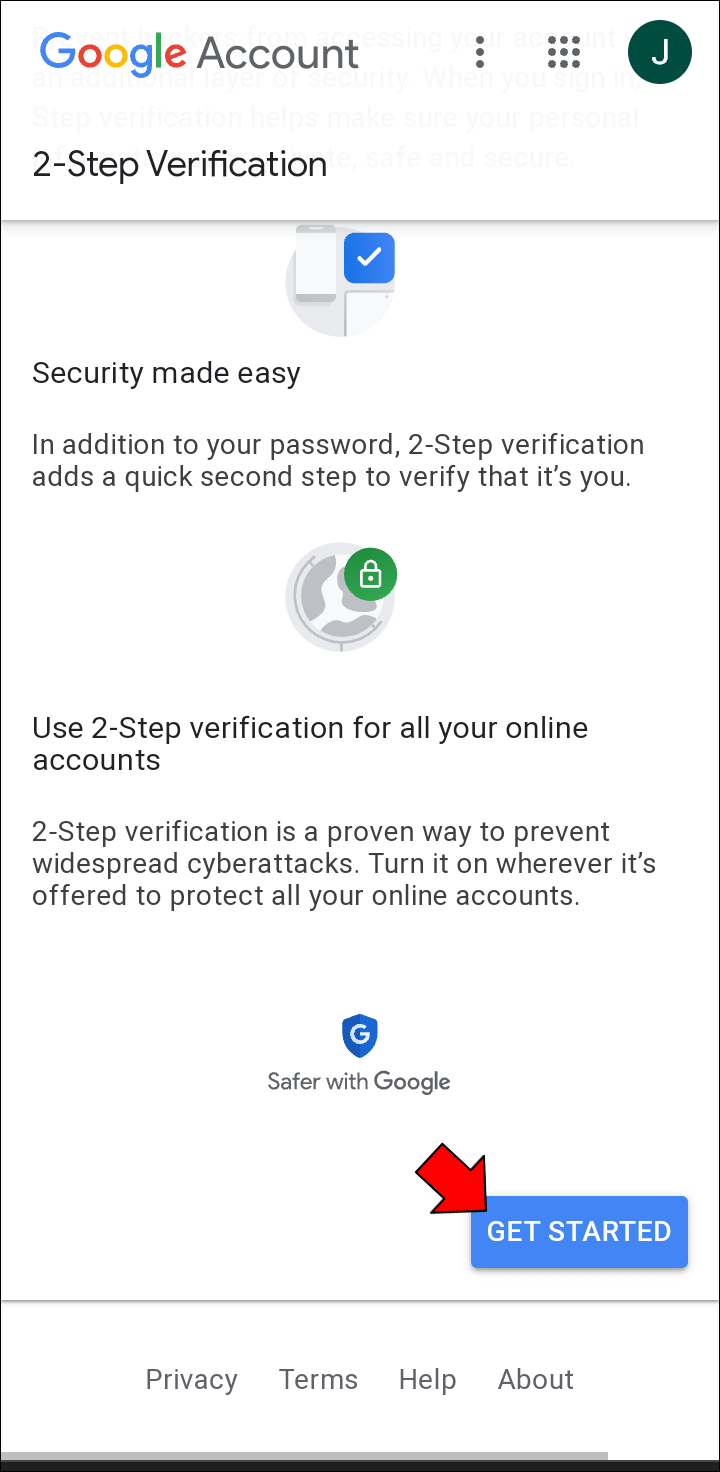
- Click “2-Step Verification.”
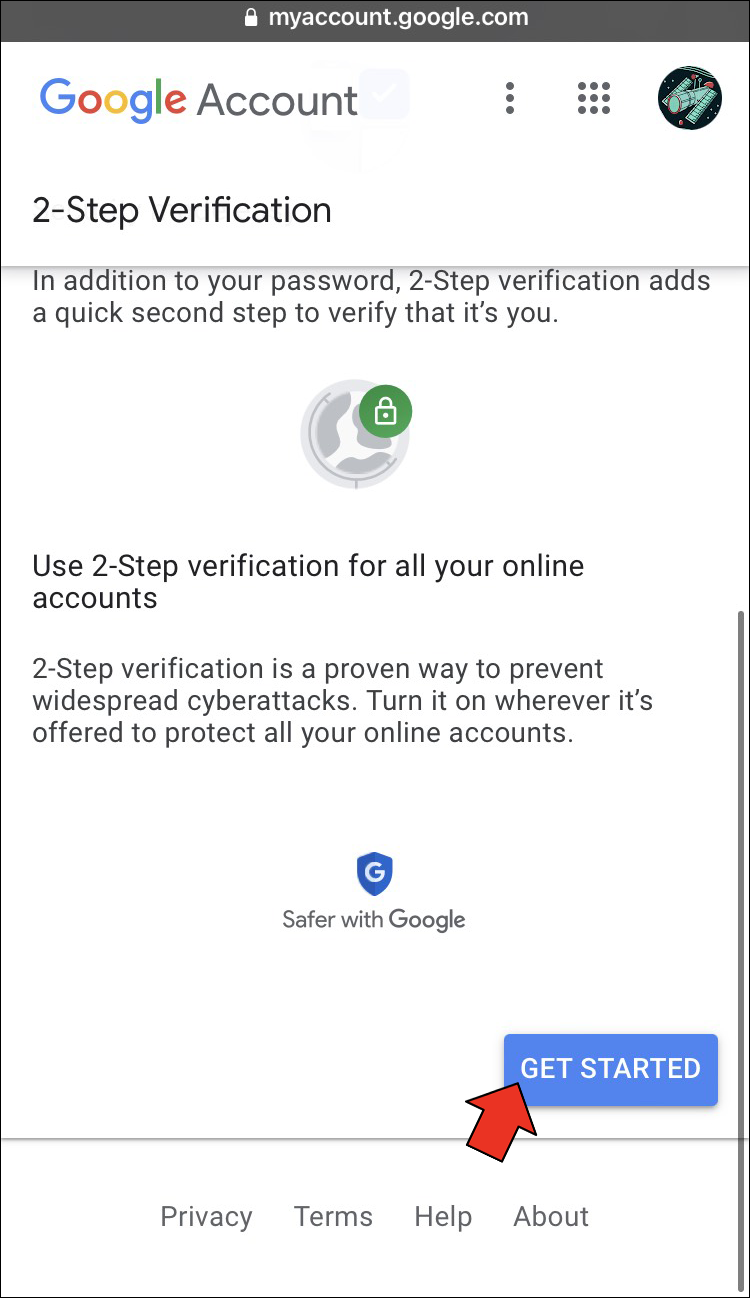
- If you’ve yet to set up 2FA, click the “Get Started” button.
- Enter your password to proceed.

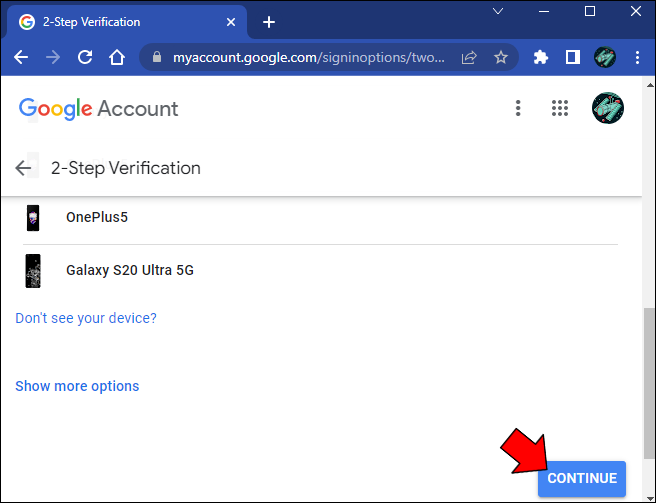
- Google will suggest “Google Prompts” as your default 2FA method and display your devices on a list. Select “Show more options” to change the 2FA method.
- Click “Continue” and complete the prompt.
- Back up your account with another phone number or select “Use another backup option” to receive backup codes.
- Click “Next,” then choose “Turn On” to finish the process.


If 2FA is already enabled, you can turn it off altogether in the following way:
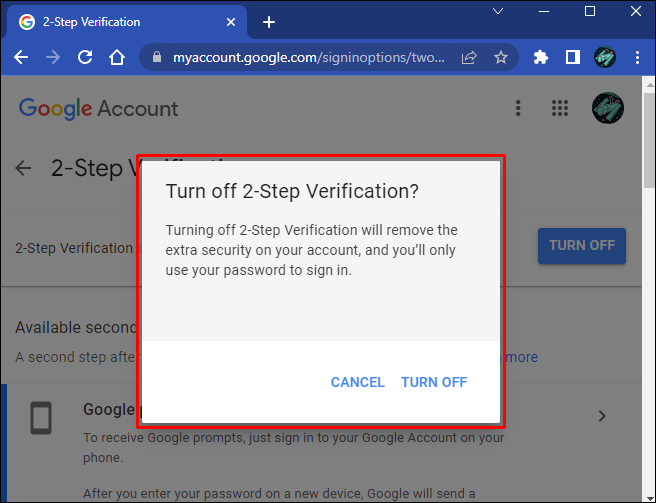
- Click on the blue “Turn Off” button at the top of the 2-Step Verification page.
- Confirm your choice in the popup to finish the process.

How to Enable/Disable 2FA in Gmail on iOS/iPhone
You can also tweak your Google settings using your mobile device. Follow the instructions below to enable or disable 2FA in Gmail on your iPhone.
- Launch the “Gmail app.”
- Tap your “profile icon” in the top right corner.
- Select “Google Account” to view your account settings.
- Scroll the tabs at the top to the left and select the “Security” tab when it appears.
- Scroll down to find and select “Two-step verification” within the “How you sign in to Google” section.
- Tap “Get Started” to enable 2FA and follow the instructions above to set it up.
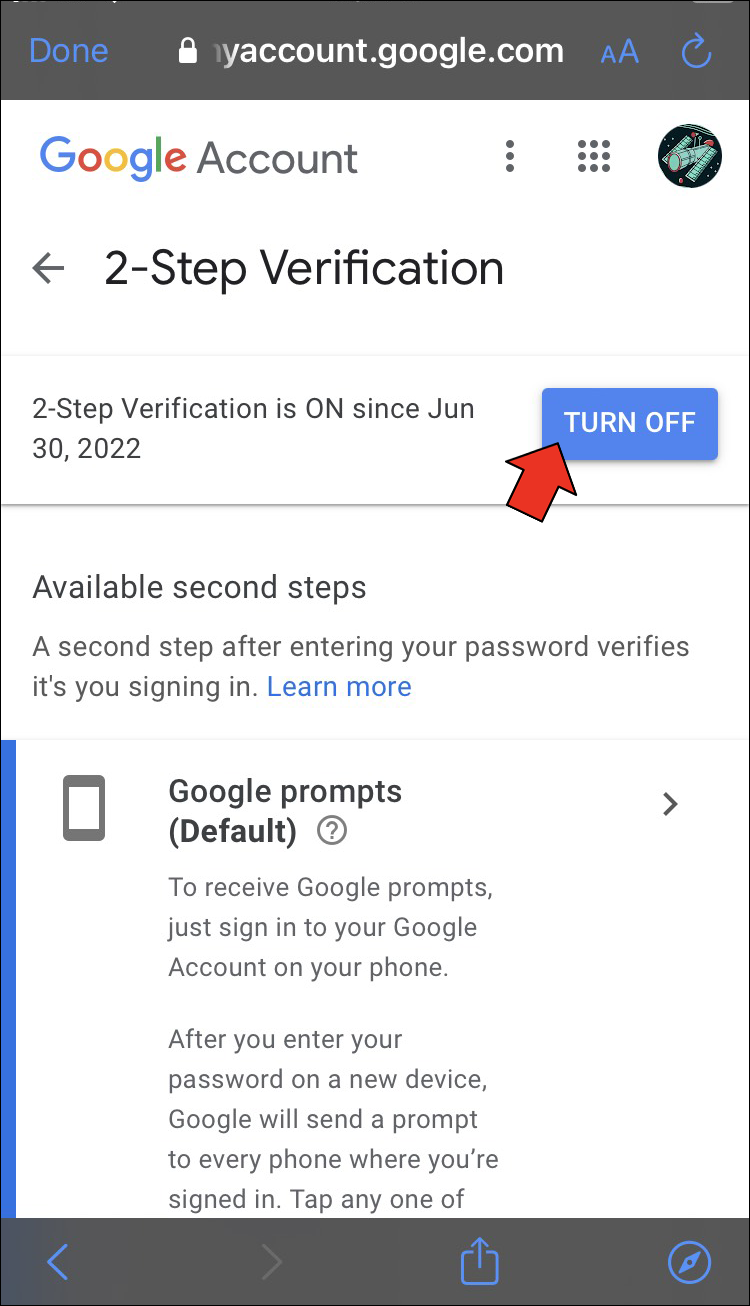
- To disable 2FA, hit the blue “Turn Off” button on the Two-Step Verification page.


How to Enable/Disable 2FA in Gmail on Android
You’ll need to access your Google account to tweak your 2FA settings. You can find your account settings on an Android device in several ways:
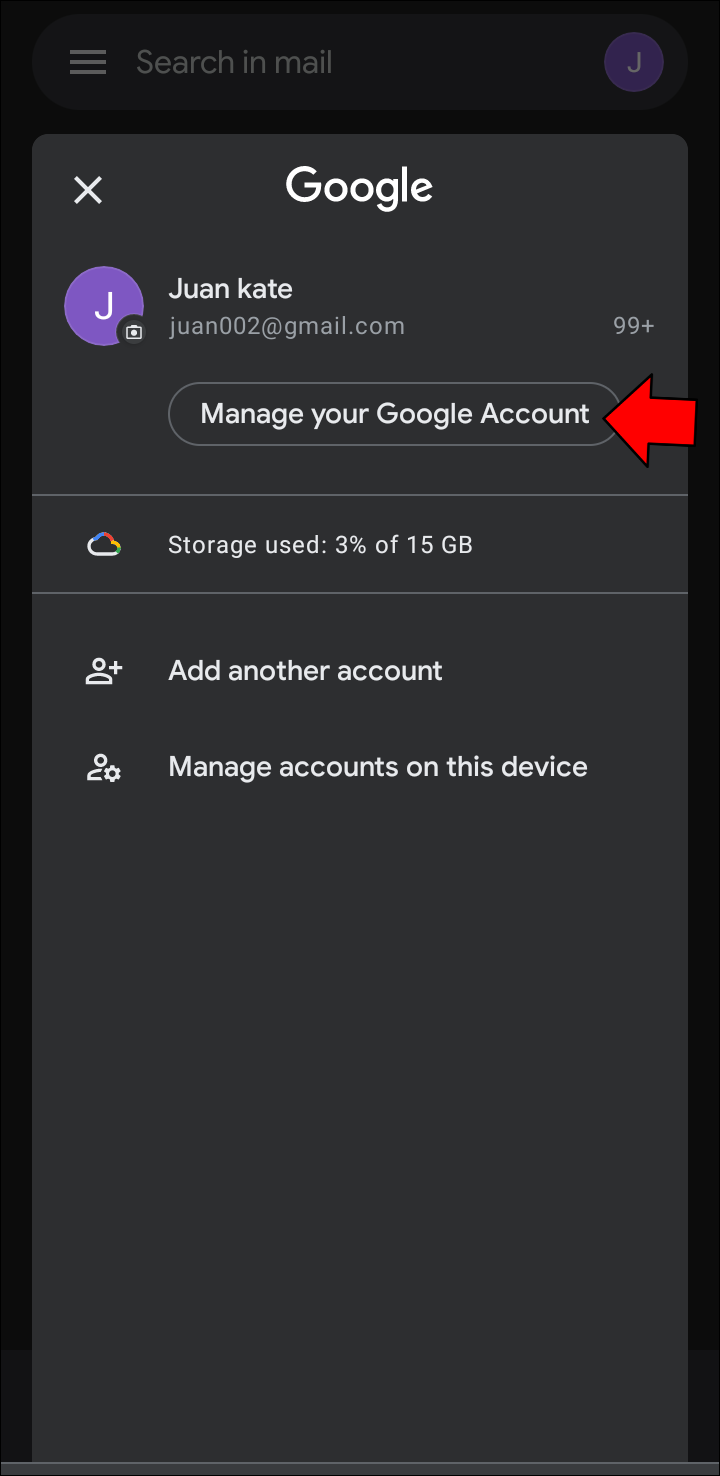
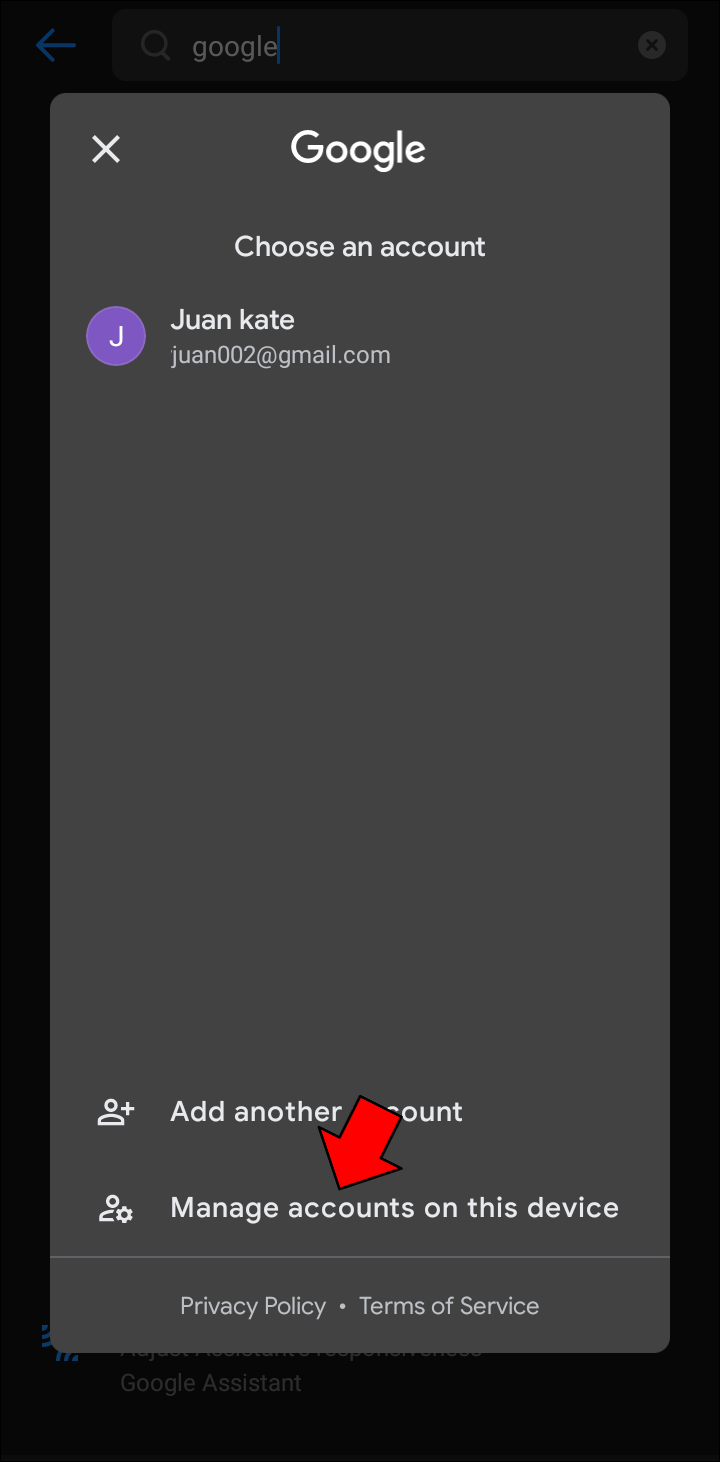
- Open “Settings” and search for “Google,” then select “Manage Your Account.”
- Launch “Gmail,” tap your “profile icon,” and select the “Manage Your Account” button.
In your Google account settings, find 2FA by following these steps:
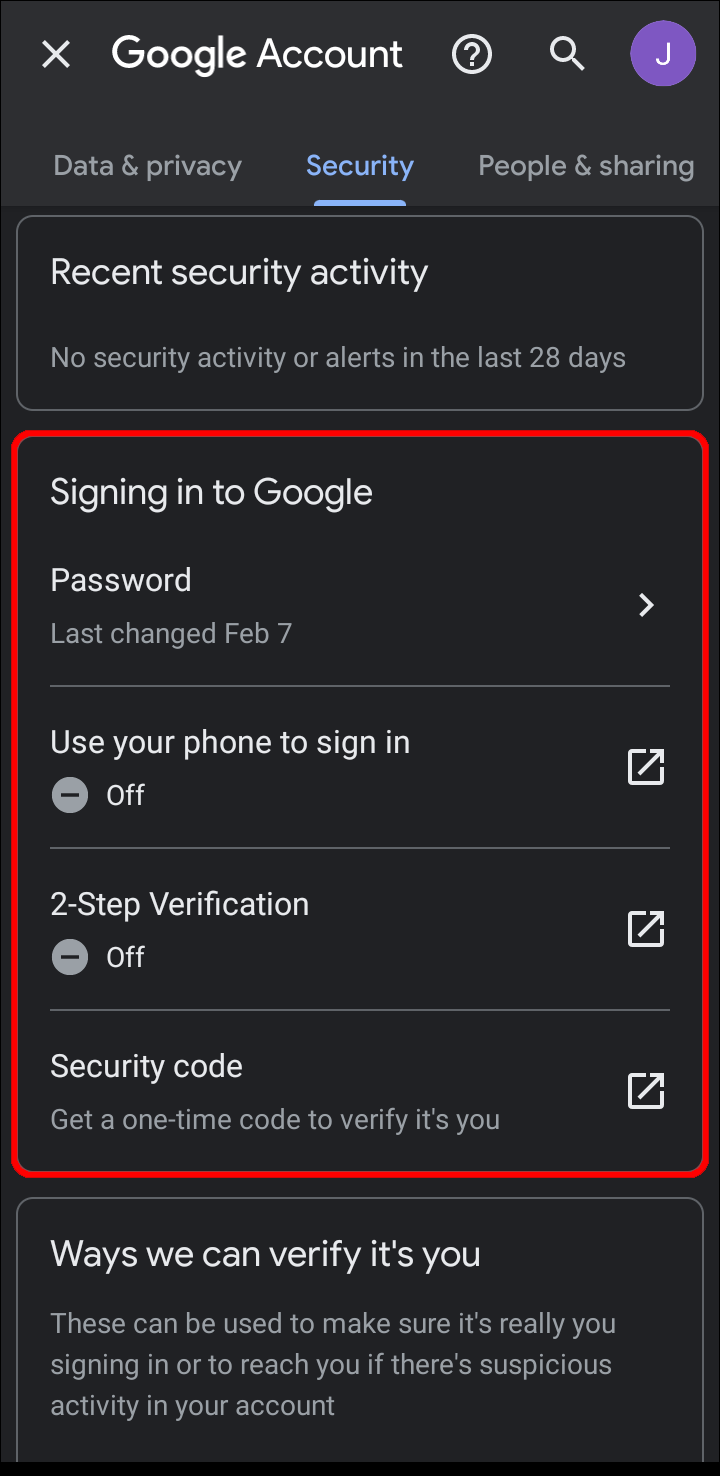
- Switch to the “Security” tab at the top.
- Scroll down to the “Signing in to Google” section.
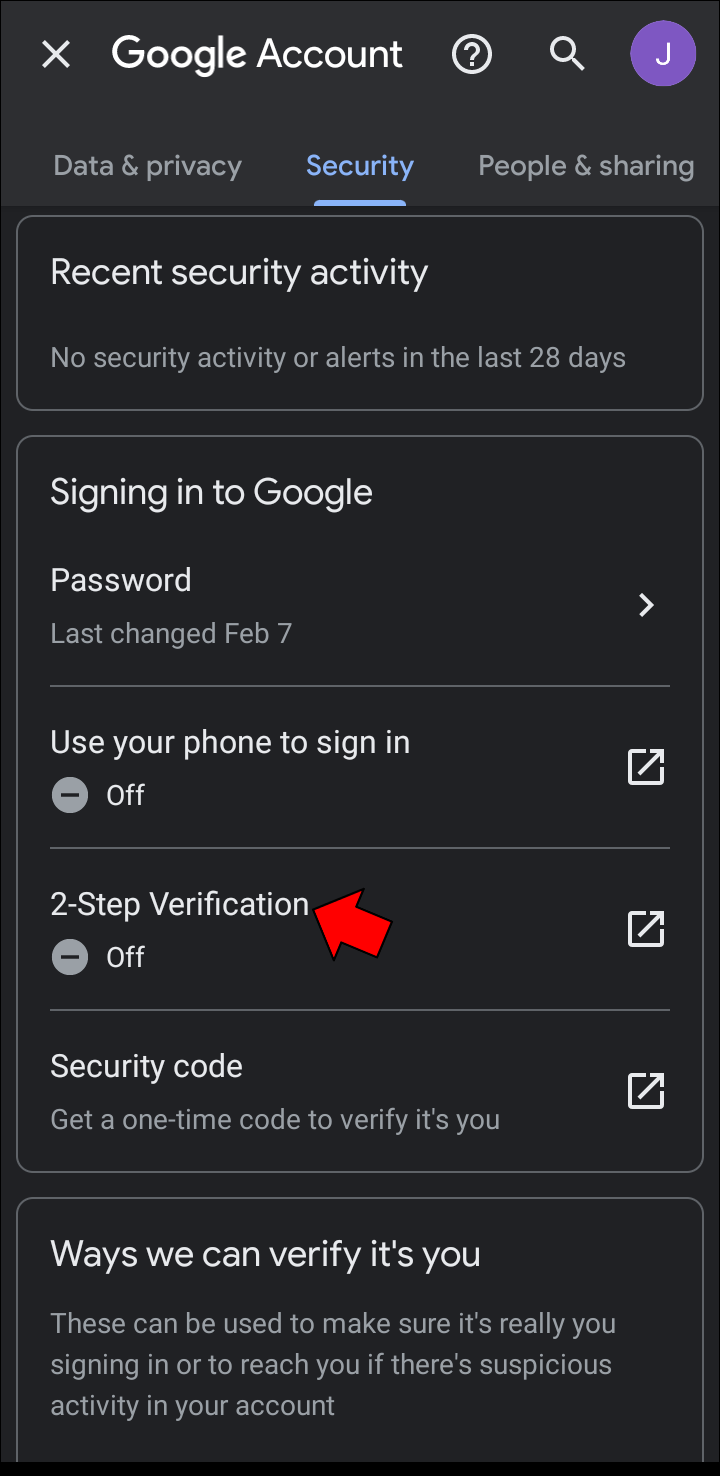
- Tap “2-Step Verification.”
- If you don’t yet have 2FA enabled, press “Get Started” and follow the abovementioned steps for setting up two-step verification.
- To turn off 2FA, simply hit “Turn Off” and confirm your decision.


How to Enable/Disable 2FA in Gmail on an iPad
You can change your 2FA settings for Gmail by accessing your Google account. Follow these steps on your iPad to turn on 2FA:
- Open the “Gmail app.”
- Press your “profile picture,” then “Manage your Google Account.”
- Switch to the “Security” tab at the very top of the page.
- Scroll down until you find “2-Step Verification” under “Signing in to Google.”
- Tap “Get Started” at the bottom of the page and follow the above-mentioned instructions.


You can also disable 2FA on this page using the “Turn Off” button.
Types of 2FA Available on Gmail
When setting up 2FA for your Gmail, you have several options. While SMS codes are perhaps the most well-known example of this security feature, many other ways exist to verify your identity. The following types of 2FA are available on Gmail:
- Google prompts: This is Google’s default two-step authentication method. You’ll receive a push notification on the devices you’re already signed in on whenever someone attempts to log in from a new device. You can allow or block the attempt with a tap.
- Verification codes through voice or text message: You can provide Google with your phone number to receive a one-time code each time you want to sign in to your account.
- Authenticator apps: Apps like Google Authenticator generate unique verification codes, much like SMS codes. However, authenticator apps are more secure.
- Security key: A security key is a device that authenticates your identity when plugged in. There are also phones with built-in security keys.
- One-time backup codes: The second factor in 2FA is usually your mobile phone. But what if you lose your phone? In that case, having these backup codes will help you regain access to your account.
Device Links
/ul>
Enabling/Disabling 2FA in Gmail FAQs
Why can’t I enable 2FA for my Gmail account?
If your Google account is connected to your school or workplace, you might not have the authority to add 2FA to your Gmail. In that case, you must contact the account administrator to make changes. This could be an institution’s IT department, your email or website manager, or someone similar.
Can I turn 2FA off for select devices?
2FA is an important security feature, but it may not be necessary in all cases. If you want to skip the authentication process on your personal computer, add it to your trusted devices. To add a trusted device, click “Don’t ask again on this computer” after the first time you enter your 2FA code.
You can also revoke this permission in the following way:
1. Go to your Google account settings and select “Security.”
2. Pick “2-Step Verification.”
3. Scroll down to “Devices that don’t need a second step.”
4. Click “Revoke all” under “Devices you trust.”
Why can’t I sign in using my Google Authenticator app?
Google Authenticator codes are time-sensitive. If your codes don’t seem to work, there might be a time-syncing issue. Correct this error in the following way:
1. Open your Google Authenticator iOS or Android app.
2. Tap the three-dot menu and select “Settings.”
3. Press “Time correction for codes,” then select “Sync now.”
Your codes should work after syncing the time this way.
Better Luck Next Time, Hackers
It’s highly recommended that you enable 2FA to keep your Gmail and Google Accounts safe. Choose any convenient method and eliminate the possibility that an unauthorized person will hijack your account. If you find 2FA a hassle on trusted devices, you can also create an exception for them.
How do you keep your Gmail account safe? Which of the 2FA methods described above is your go-to? Let us know in the comments section below.
Disclaimer: Some pages on this site may include an affiliate link. This does not effect our editorial in any way.