You can easily update the prices of items you’ve listed on Facebook Marketplace from your computer or mobile device. You can change your product information as often as necessary through a few simple steps to guarantee the sale.
How to Change Price
Facebook Marketplace is an easy-to-navigate platform that allows you to edit all the information about your listed products, including the price and description. It also offers valuable tools for stock management. To change the prices, you need to follow these easy steps:
- Open Facebook Marketplace from your computer or mobile device.
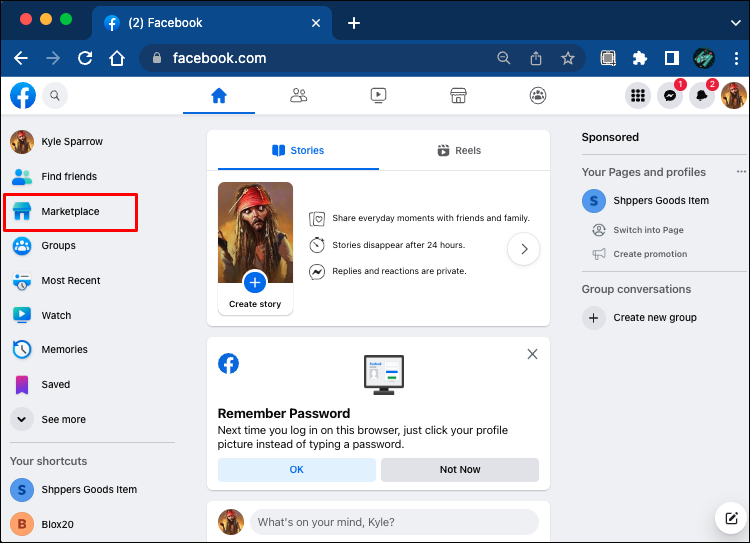
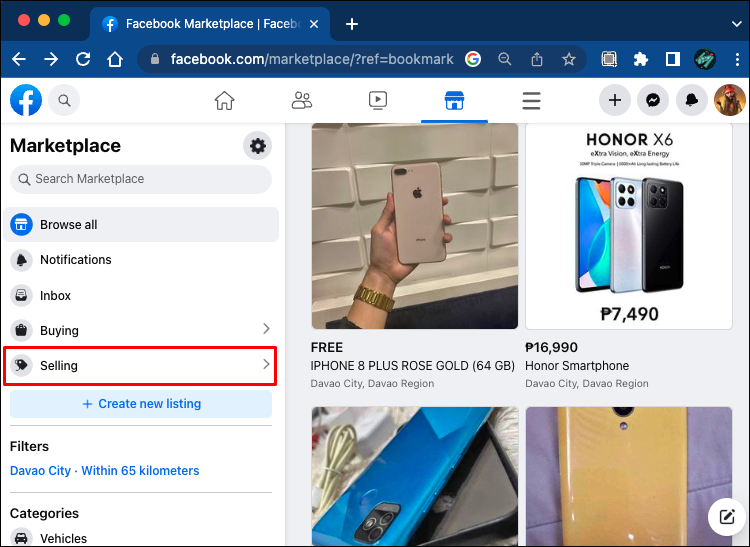
- Click on “Selling” to see the list of items you’re currently selling.

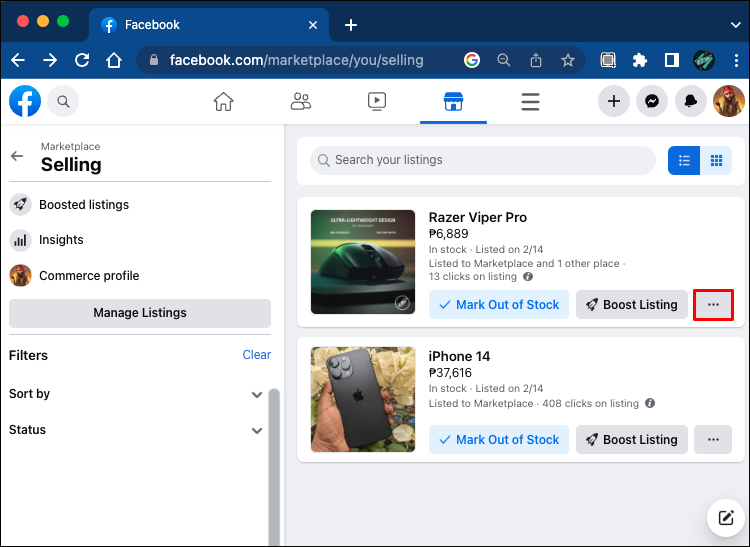
- Tap on “Three dots.” A drop-down menu will appear.
- Click “Edit Listing.” Find the price field and make the necessary changes.
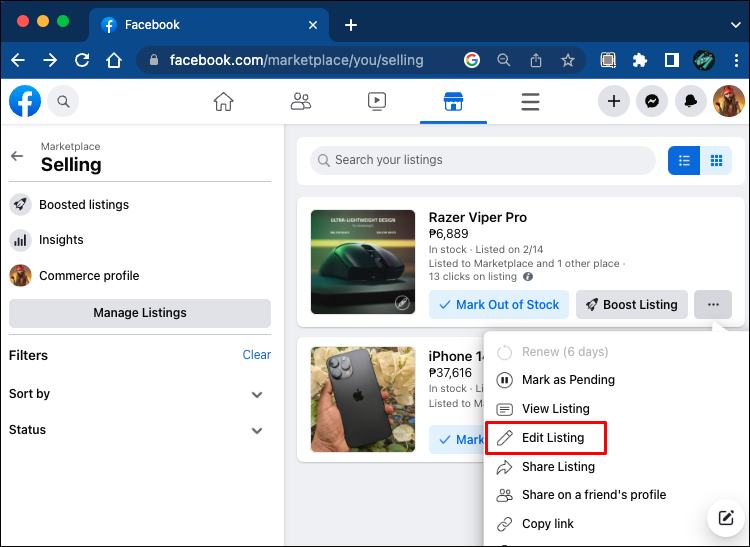
In the same section, you’ll be able to edit additional information on the item, such as the title of the listing, the category, the article’s condition, and more. You can also add additional pictures.
Price Offers in Marketplace
If you’re trying to sell a product in Marketplace, you can choose to accept offers. This is a convenient option to determine how much an interested buyer is willing to pay for your product. This will also allow you to negotiate the price.
The potential buyer will find a “Make An Offer” option at the top of your product page and be able to make an offer.
You’ll receive all the information about the offer with the option to accept or decline it through a Facebook notification.
How to Create an Online Store on Facebook
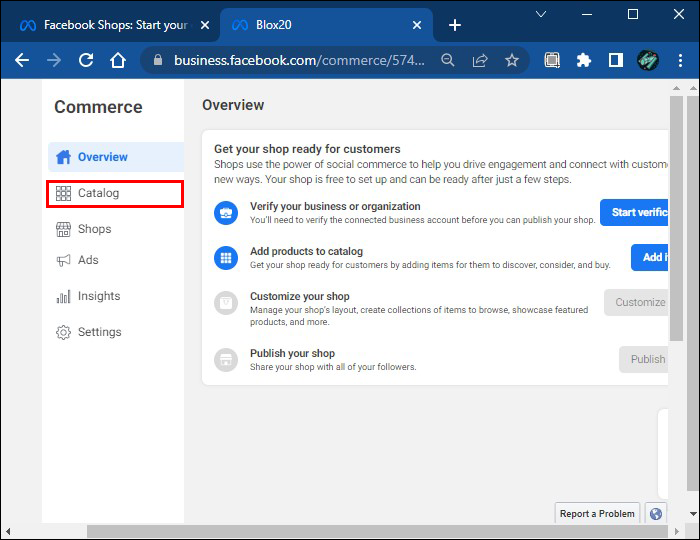
Facebook Commerce Manager provides a set of tools for sellers who are looking to manage a business across Facebook and Instagram. You’ll be able to use checkout, handle inventory, payouts, orders, and more.
Through the Commerce Manager, sellers can also bulk-upload items to the catalog through data feeds. You can upload multiple data feeds, but they must each contain different items. To create an online store:
- Go to Facebook Commerce Manager and log in.
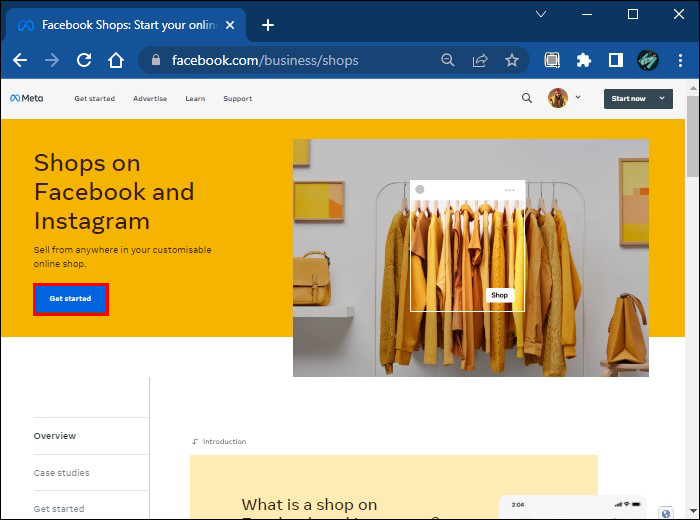
- Click on “Get Started” and choose “Shop” to create your shop page.
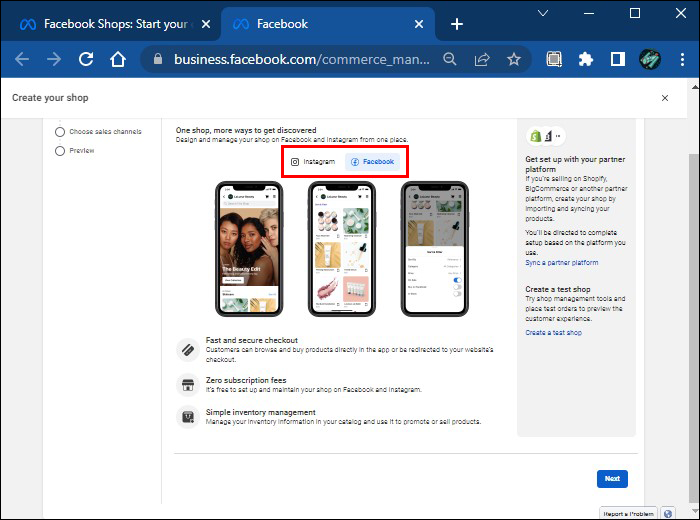
- Select “Checkout on Facebook or Instagram” and click “Get Started.”
- Choose between Facebook and Instagram.
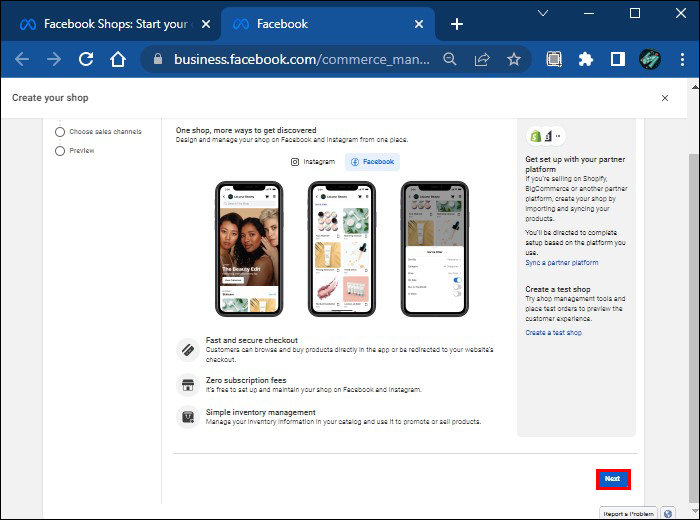
- Review what you need to set up your account. If you’re ready, click on “Next” to be taken to a page titled “Create Your Commerce Account.”
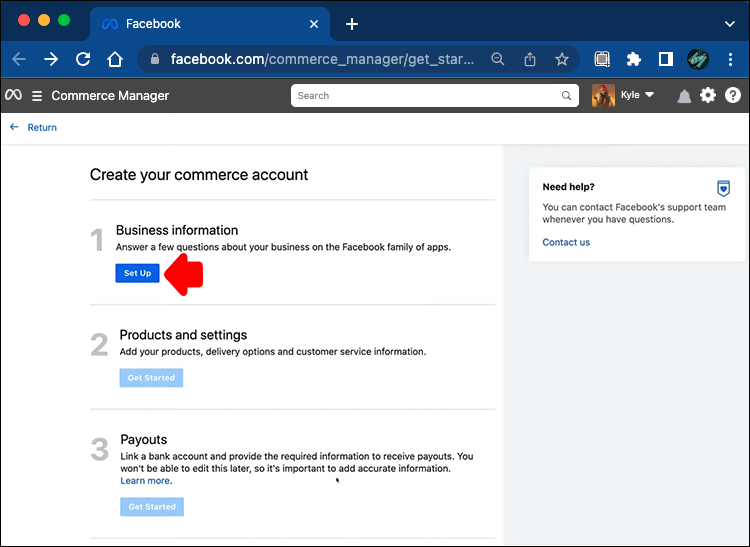
Create Your Commerce Account
Under “Create Your Commerce Account,” you’ll have to answer a few questions about your business. Follow these steps to set up your account:
- Under “Business Information,” click on “Set Up.”
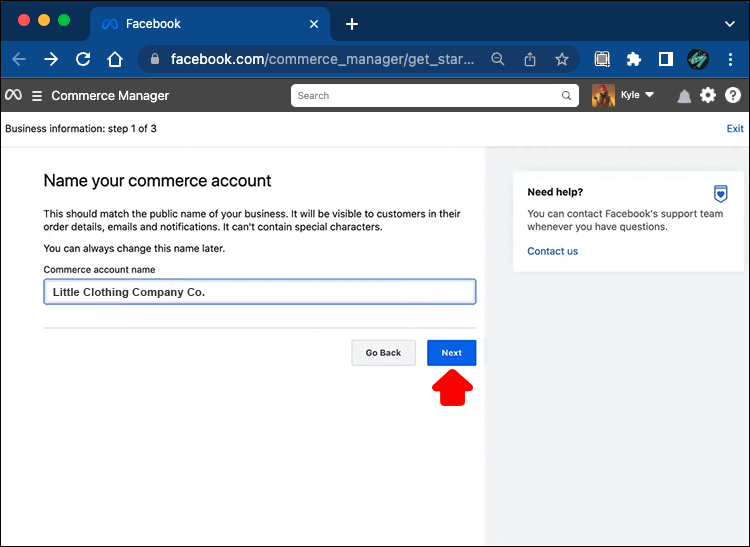
- Choose a name for your Commerce account, and click “Next.” This should match the public name of your business. Your customer will see this name in their order details, notifications, and emails.
- Connect your commerce account to an existing Facebook page or create a new one for your store. Then click on “Next.”
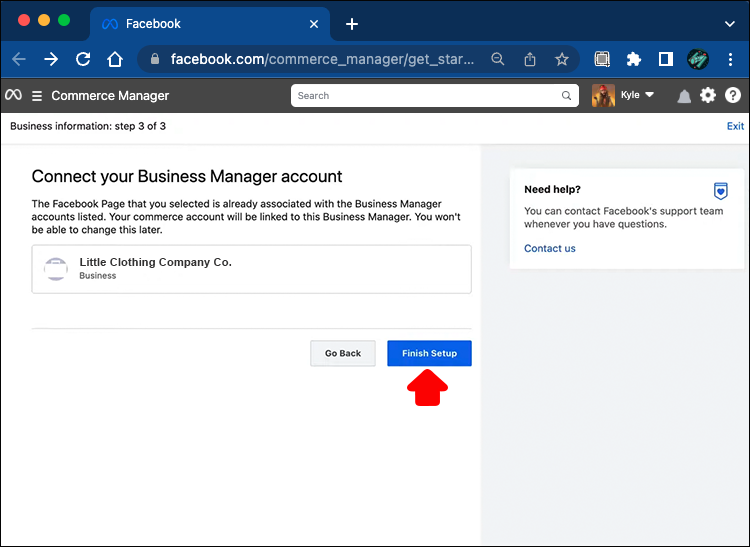
- Link your commerce to a Meta Business account. Click on “Finish Setup.”

How to Create a Data Feed on Facebook Commerce Manager
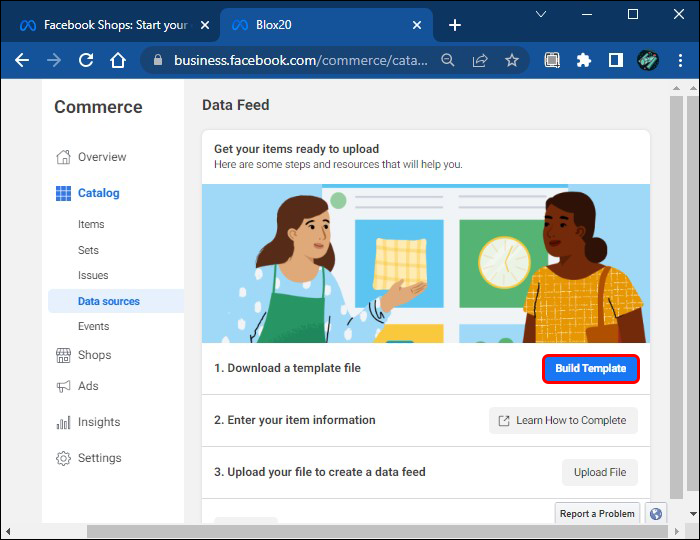
You can easily create a data feed from a template you can download from Commerce Manager. To download the template, follow these steps:
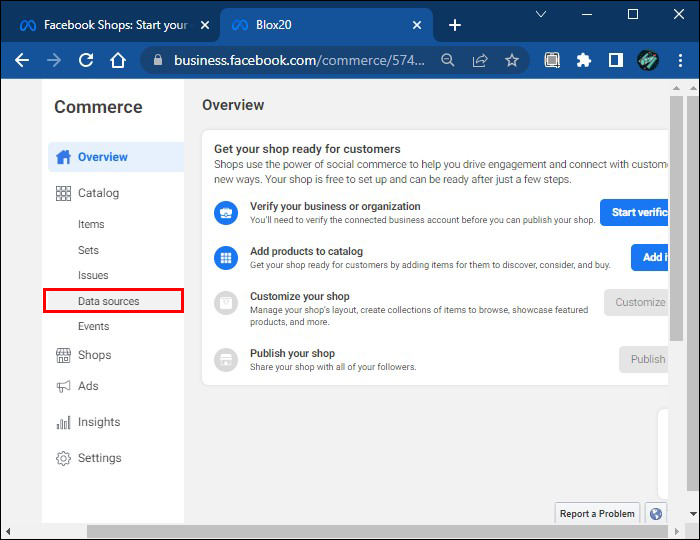
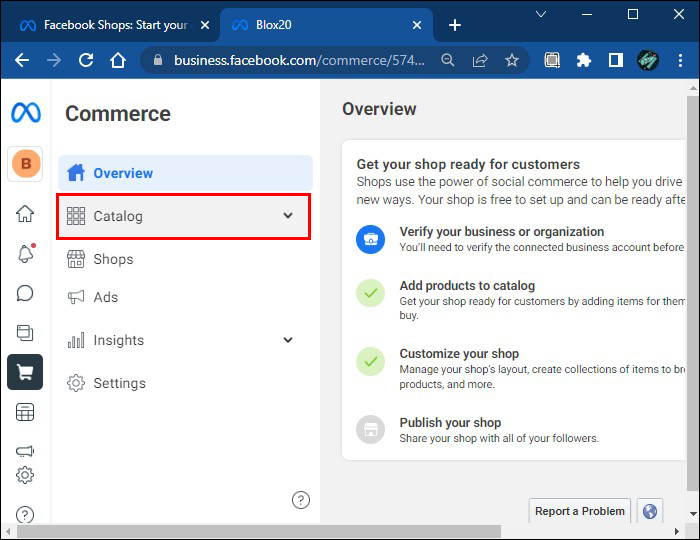
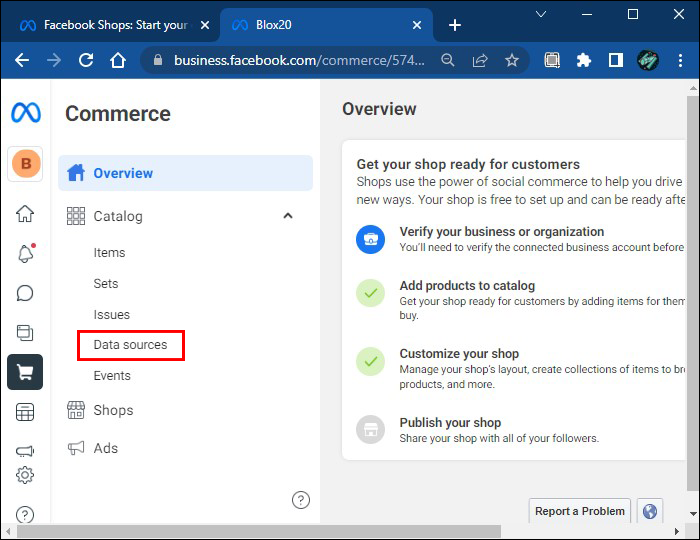
- From your Commerce account, select “Catalogs.”
- You’ll see a dropdown menu. Tap on “Data Sources.”
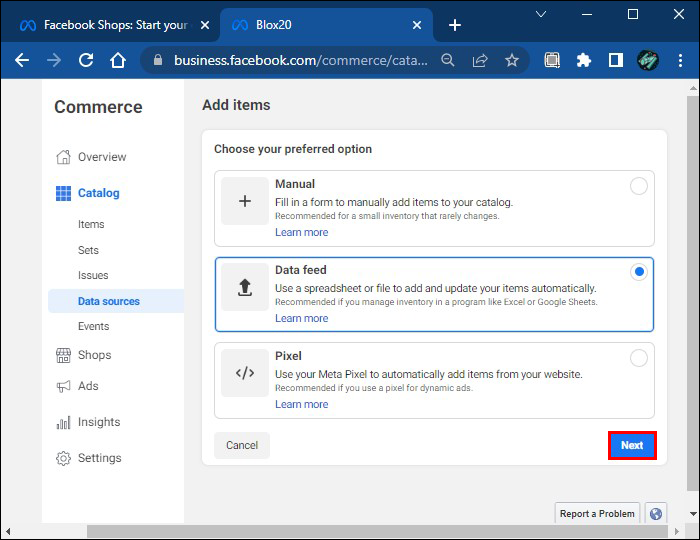
- Select “Data Feed” and then “Next.”
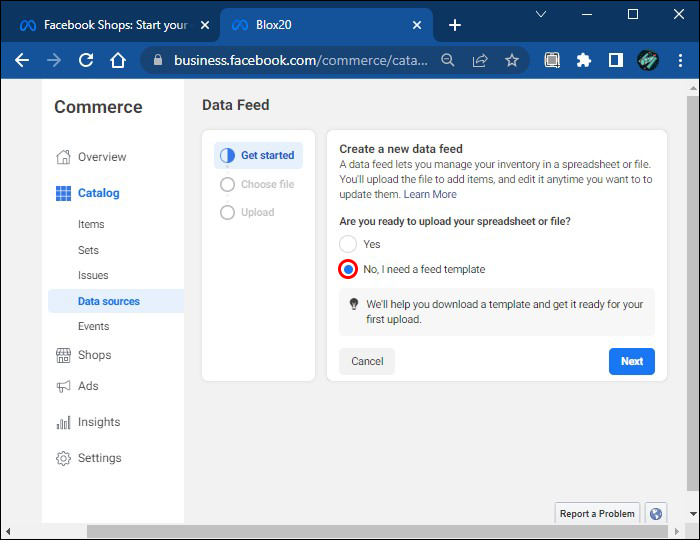
- You’ll get a notification that reads, “Is your spreadsheet ready?” select “No, I need a Facebook template.”
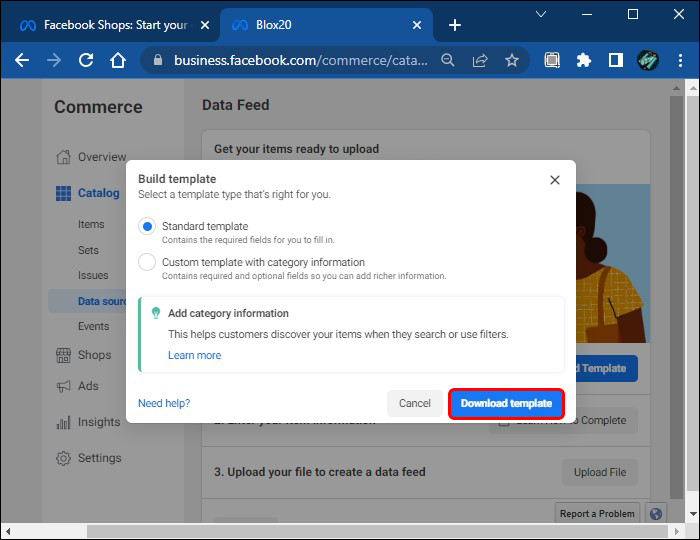
- Select “Build Template” You can choose a standard template or create a custom one with more product categories. If you sell products, the latter is recommended.
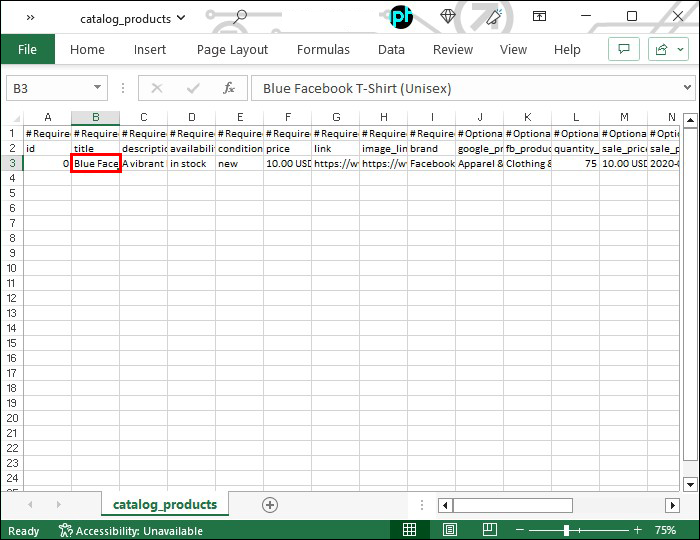
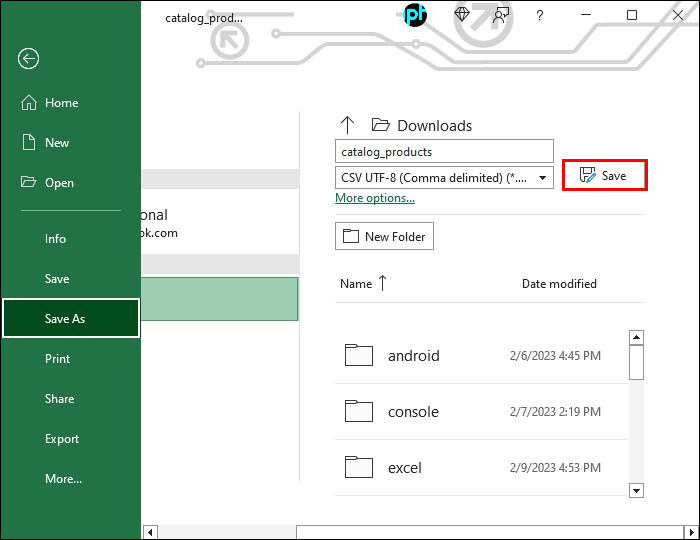
- Download the CSV file, then open it in a spreadsheet program such as Microsoft Excel or import it to Google Sheets.
- Delete any example information and complete it with your list of products.
- Once you’re done, save the file in CSV format.
How to Upload a Data Feed to Commerce Manager
Once you’ve created the data feed file with all the details of the products you’d like to sell, you can easily upload it to your catalog:
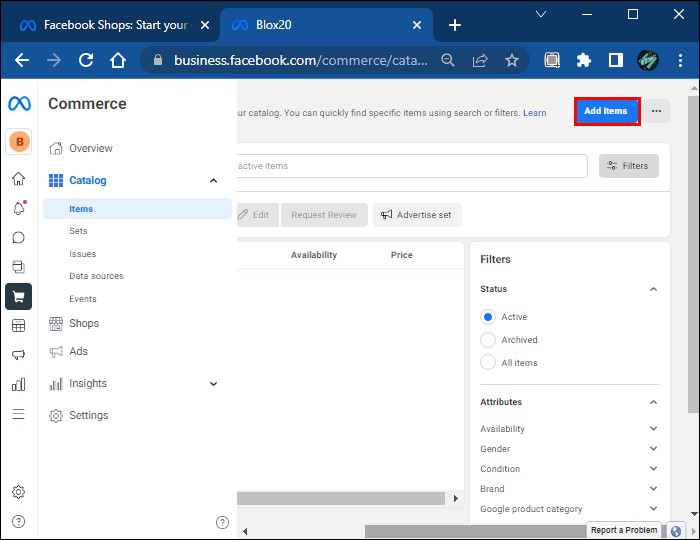
- Go to “Commerce Manager” and select “Catalog.”
- Tap on “Items” and then on “Add Items.”
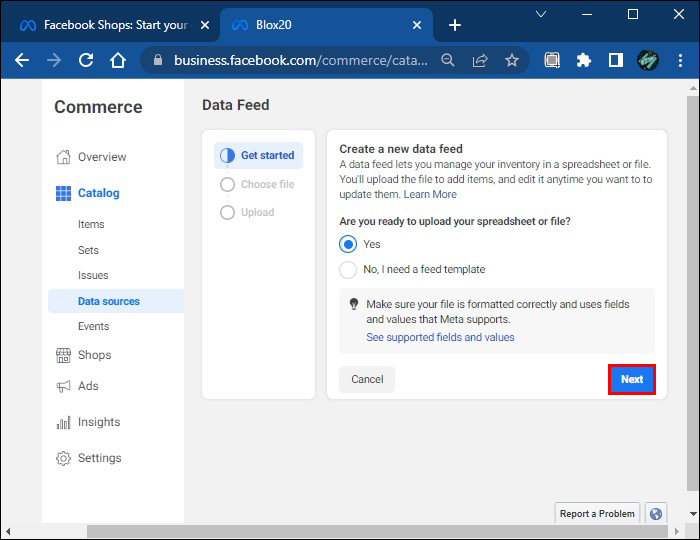
- Select “Data Feed” and then “Next.”
- Under “Is your spreadsheet ready?” select “Yes,” and then “Next.”
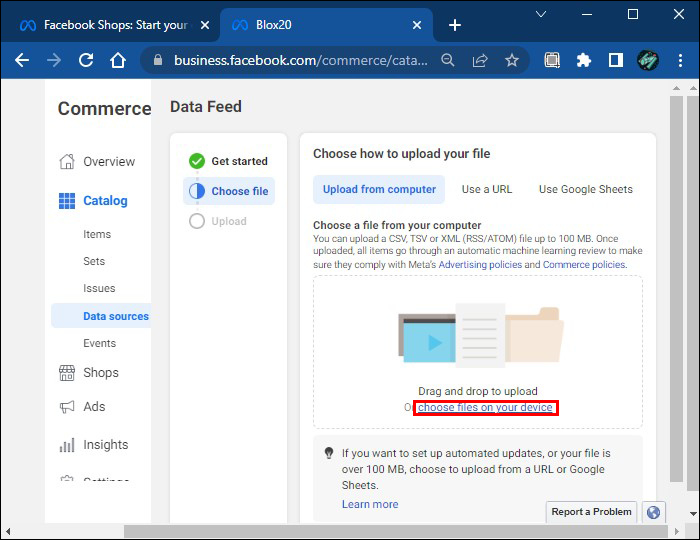
- Tap on “Choose files on your device” and look for the CSV file on your computer.
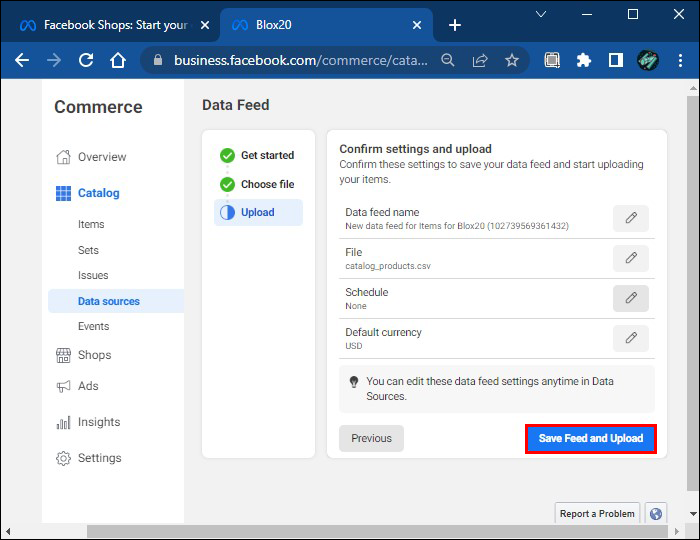
- Review all the information. If everything is correct, select “Save Feed and Upload.”
How to Change Prices in Data Feeds
Commerce Manager offers several tools for price management, including the addition of sale prices. To update the prices data feeds:
- From the Commerce Manager, click on “Catalog.”
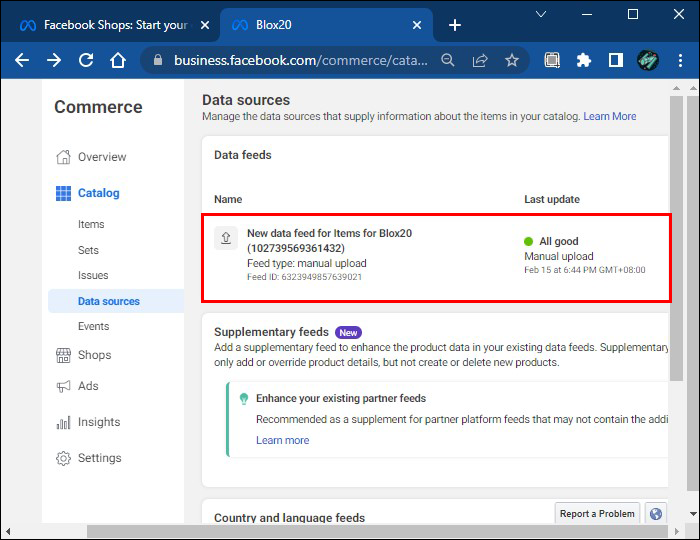
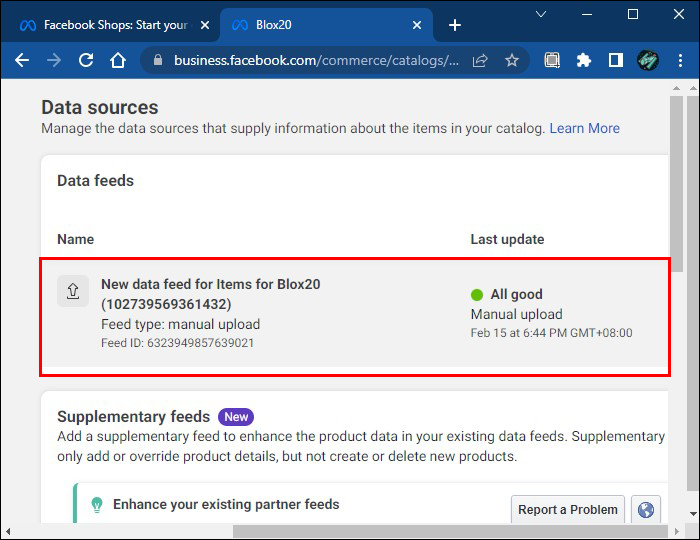
- From the drop-down menu, tap on “Data Sources.” You’ll find the data feed uploaded to your shop on the right side.
- Select the data feed you want to edit.
- Edit the price field. The correct format for prices is the number, a space, and a three-letter ISO currency code. For example, “9.99 USD”. Use a full stop for the decimal. Don’t use symbols.
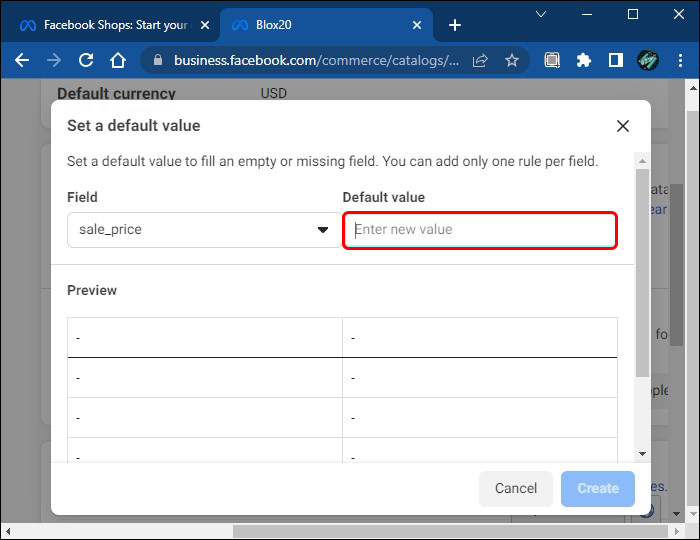
Sale Prices in Data Feeds
A data feed also allows you to set sale prices during a specific period. Many optional fields will be included if you use a template to create a data feed. If not, you can add them manually. The fields should read “sale_price” and “sale_price_effective_date.” To set sale prices:
- From the Commerce Manager menu, select “Catalog.”
- Tap on “Data Sources” on the drop-down menu. You’ll find the data feeds you’ve uploaded on the right side.
- Open the one with the product price you want to offer on sale.
- On the “sale_price” field, add the sale price for the item.
Unless you set a specific period for the sale prices, your items will be on sale until you manually delete the sale prices. To set a sale period:
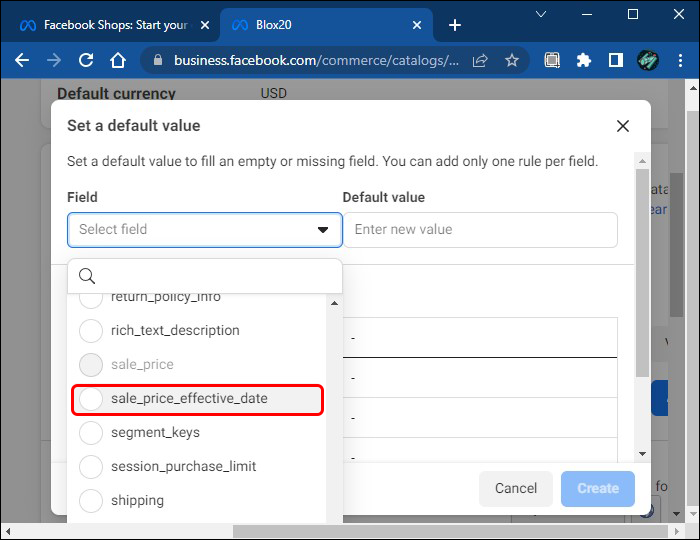
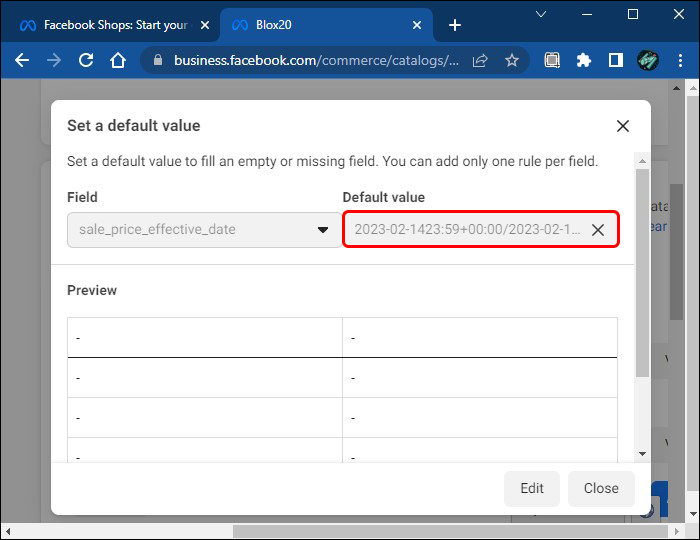
- Next to the “sale_price” field, you’ll find the “sale_price_effective_date.”
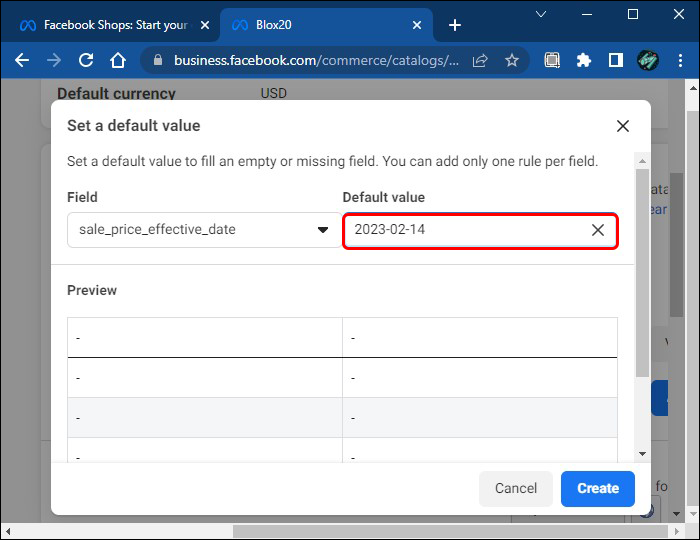
- Enter the sale start date followed by a “T.” Format: YYYY-MM-DDT
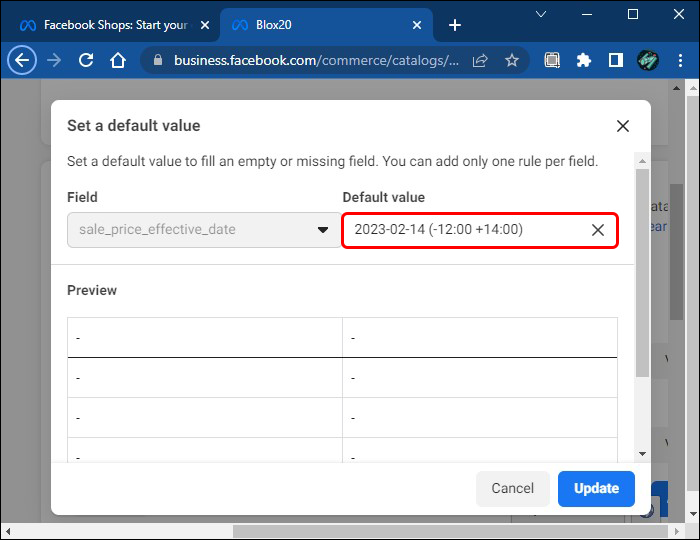
- Enter the start time in a 24-hour format followed by the UTC zone. (-12:00 to +14:00).
- Enter a “/”, and repeat the format with the date and time the sale should end. The correct format will look like this: YYYY-MM-DDT23:59+00:00/YYYY-MM-DDT23:59+00:00
A One-Time Sale or a Business Opportunity
Facebook Marketplace is an excellent tool to sell items you don’t want or need anymore. It’s free and easy to navigate. To encourage the sale, the seller can update the product’s information, change the price, and add more specifications and pictures. Through this user-friendly platform, the seller can also exchange messages with the potential buyer and even negotiate the price.
If, on the other hand, you’re trying to sell multiple items or set up your own online store, Facebook Commerce Manager offers many tools that will help you manage and grow your business.
Leave us a comment about your experience selling products on Facebook Marketplace or if you’ve moved your business to Commerce Manager.
Disclaimer: Some pages on this site may include an affiliate link. This does not effect our editorial in any way.