In the last few years, Figma has rapidly grown in popularity, and it’s no wonder. The free-to-use cloud-based software is easily accessible on all devices and doesn’t require any installments or downloads. From designing mobile app interfaces to manufacturing social media posts, with Figma, you can experiment with all sorts of graphic design features and expand your skills.
For even more consistency in your designs, you may want to consider using components in your work. Components are user interface (UI) elements that can be used across multiple files on Figma. These can often be a strong addition to your designs and enhance their overall quality.
Whether you’re new to Figma or have been using it for a while and are unsure how to use components successfully, we’re here to help.
In this article, we’ll explore how to use Figma components and how this can help you elevate your work.
If you’re interested in finding out more, then keep on reading.
How to Use Components in Figma
Mastering the use of components can help you out with organization and consistency when operating Figma. These UI elements can be used again and again over various design projects you might be working on. A component can be made in an icon, button, and more, depending on your project.
The great thing about introducing components to your Figma experience is that it saves you a lot of time. Any changes you might make to one component automatically get updated on the others. This may be particularly useful if you have a tight time frame or collaborate with other designers and want to speed up your workflow.
Getting started, you’ll notice that there are two sidebars on each side of the main canvas you are using. You can use tools from either of these sidebars to make edits to your project.
The sidebar on the right-hand side gives you access to any prototype settings and allows you to adjust or edit any properties of your components. However, the sidebar on the left presents you with the layers, assets, and pages used in your project. This is referred to as the “Layers Panel.”
Components should be introduced to your work fairly early on. They help you maintain consistency in your designs and allow you to speed up the rate at which you’re making changes across your projects. There are two key elements of a component:
- The Master (or Main) Component (quadruple diamond icon)
- An Instance Component (single diamond icon)
Master Components
Before anything else, you must first create the Master Component. To do this, follow the steps below:
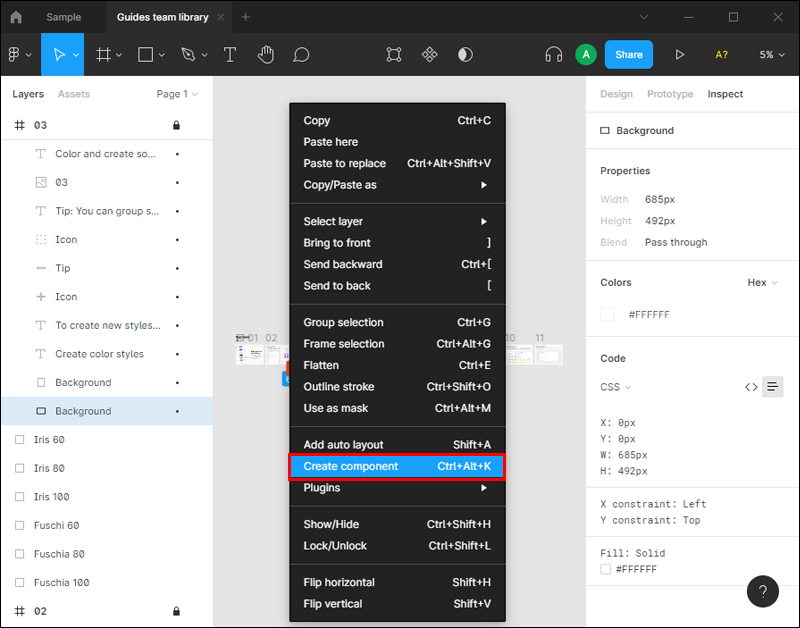
- Right-click on your layer, group, or frame.

- Select “Create Component.”

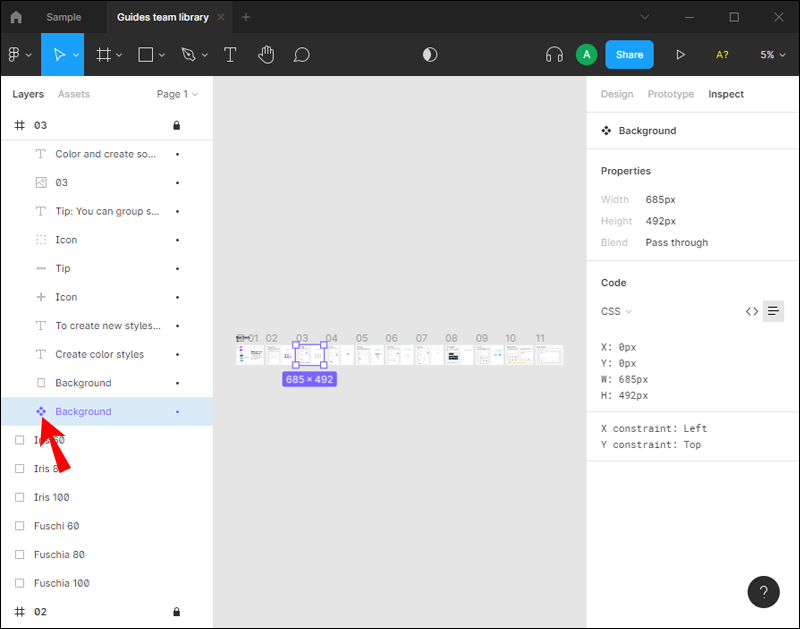
- On the left-hand side of the screen, you’ll see a drop-down menu that says “Component.” Click on this.
- From here, you’ll notice a menu where you can make changes to your component and redesign styles across projects.

Another way of creating a Master Component is to use the shortcuts:
- Options + Command + K for Mac
- Ctrl + Alt + K for Windows
Of course, this method only works if you are using Figma on a PC.
Instant Components
An Instant Component is a copy of your Master Component. When the Master Component is edited in any way, the Instance is automatically updated to match any changes made. If you’re building a website, this tool can be particularly useful and save you a lot of time. For example, gone would be the days of manually going into all of your components to repeat the same edits. Instead, Figma changes them all for you.
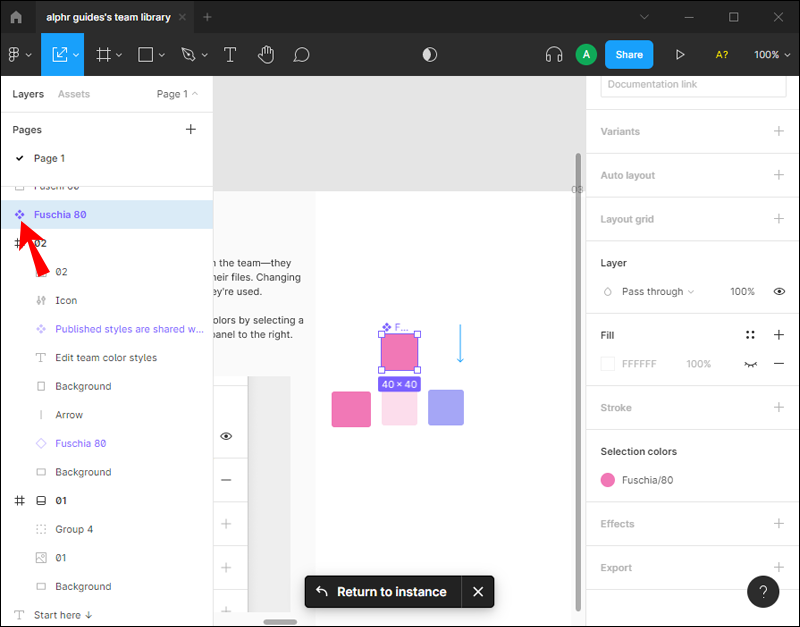
There may come the point where you have created multiple Instances and would like to head back to your Master Component so you can make a quick change to all of your components. To access your Main Component, do the following:
- Right-click on any Instance.
- Click on “Go to Master Component.”
- The Master Component will appear in the sidebar on the left-hand side.

While making components one at a time is relatively simple; you can speed things up by making them in bulk. To do this, follow these steps:
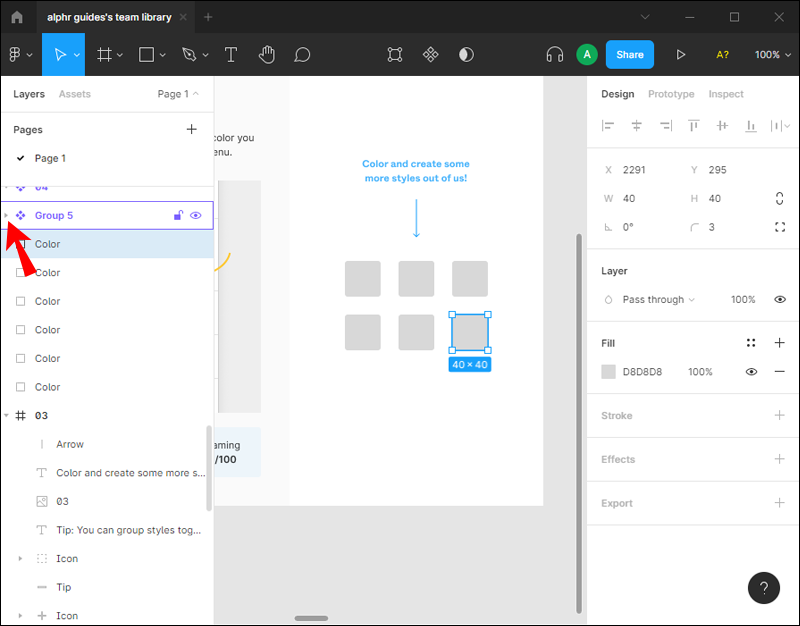
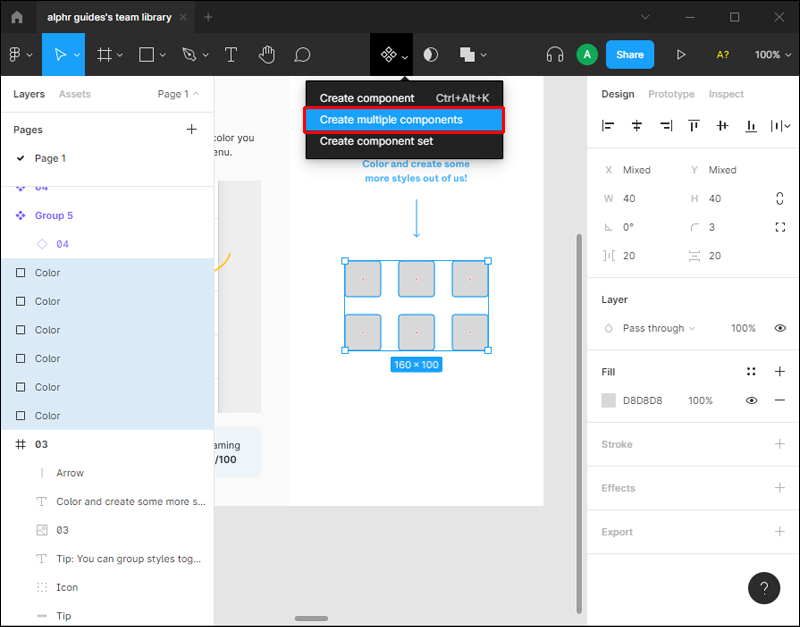
- From your “Layers Panel,” choose the layers where you want to create components.
- Click the downward-facing arrow icon located next to the Master Component icon within the “Layers Panel.”
- Select “Create Multiple Components” from the available options.
- From there, Figma will make a component for each frame layer.


Additional FAQs
How Do I Override or Detach an Instance?
There may be times when you wish to make changes to a particular Instance’s properties without changing all of the others. You can make variations of different components. In Figma, this is referred to as “overriding.”
Once you override an Instance, any changes made in the Master Component won’t affect it. To do this, check out the steps below:
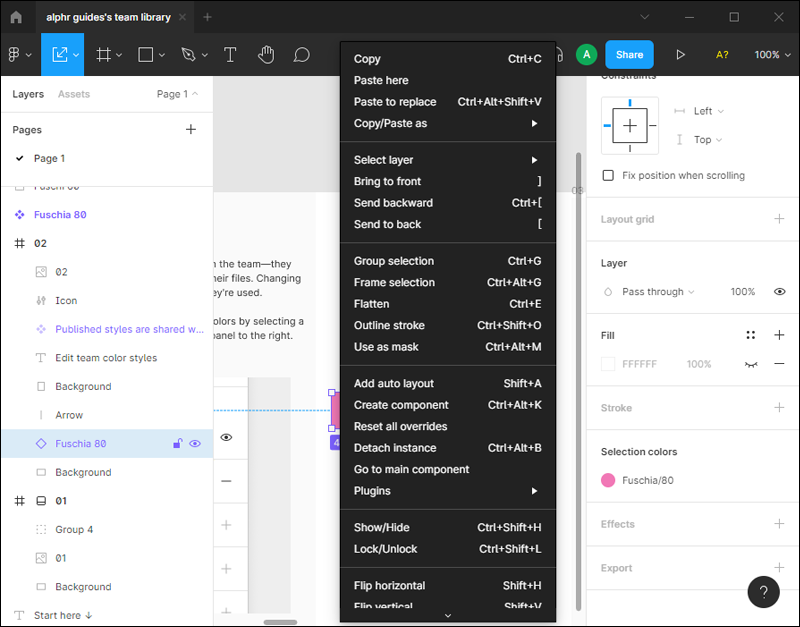
1. Click on your Instance Component.
2. From the Properties panel on the right-hand side of your screen, select “Component.”
3. From the drop-down menu that appears, choose “Detach Instance.”
If you would like to clear an override, select the component, then choose “Reset Instance” from the top middle bar on your screen.
What Do I Do if I Accidentally Delete My Master Component?
When you spend all day editing content, you may sometimes accidentally slip up and delete something important, like your Master Component. Fear not, for restoring it is as easy as 1-2-3. Just follow these basic steps to get back that missing Master Component:
1. Go to one of the Instances of the component.
2. In the Properties panel on the right-hand side of the screen, select “Restore Master Component.”
3. The Master Component will appear immediately.
How Do I Add a Description for My Components?
When creating your components, adding a description and a documentation link to each one can help you navigate your project better. It’s also handy for any collaborators you might be working with to have access to additional notes. To add a description, go to the Properties panel on the right-hand side of the page and select “Add a Description.”
Once you’ve done that, any outside viewers can access this information by going to the “Inspect Panel” in the right-hand sidebar.
How Do I Import Components Into Figma?
You can import all sorts of files into a Figma component. The easiest way to go about doing so is from your desktop. Simply follow these steps:
1. In Figma, open the page where you would like to import a file.
2. From your files, select the specific file you wish to use.
3. Drag and drop the selected file into your Figma page.
4. When you’ve finished this, click “Done.”
The Road to Success
Figma is a great tool to use whether you’re new to design or have been in the game for years. The software offers a beginner-friendly editing system where designers can create content from scratch or use the help of a template if needed.
Understanding how to use components successfully on Figma can save you a lot of time when conducting a design project. By learning how to create a high-quality component system, you’ll be able to grow as a designer. Not only that, but it can also help you maintain consistent workflow throughout your creative journey and allow any future collaborators to find your work easily.
Have you tried using Figma for your creative projects? How did you find using components? Let us know more about your experience in the comment section below.
Disclaimer: Some pages on this site may include an affiliate link. This does not effect our editorial in any way.