Developer options let owners of devices–including the Amazon Fire Tablet–configure various system behaviors to assist them in debugging and profiling the app’s performance. But changes to them should be made carefully. The wrong settings can lead to performance problems. Furthermore, Developer Options can either be enabled or disabled to protect against unwanted changes. Read on to find out more about Fire Tablet Developer Options.
What Developer Options Can Do
Fire Tablet has special settings that are safely tucked away in Developer Options. These are normally intended for app creation by developers (as the name suggests). However, these can be handy in other circumstances as well. Some of the features can be helpful, but it may not always be clear what an option does unless you have the technical knowledge. Here are the main Developer Options on the Fire Tablet.
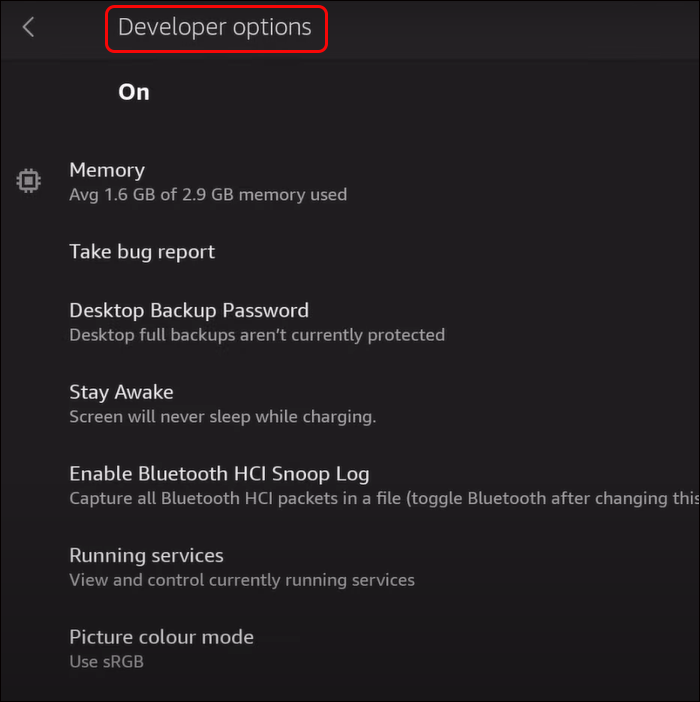
Memory
Selecting memory opens a screen with options for Random Access Memory (RAM). It shows the RAM your device is currently using and the interval-based averages. A list of apps on your tablet arranged by the amount of memory used is listed here as well. If your apps reload as you switch between them, check here to see if any are having issues.
Bug Report
This generates a bug report for the system.
Bug Report Handler
This changes the applications that handle the bug shortcuts on the Fire Tablet. You may not need to alter this.
Desktop Backup Password
With this, a backup password can be created using Android Debug Bridge (ADB) commands to restore and back up device data and apps.
Stay Awake
By enabling this, your phone will not automatically sleep. It works well if you don’t want to keep unlocking your Fire Tablet over a certain period. This is a good option if you want to test tasks or apps.
Enable Bluetooth HCI Snoop Log
This option saves the HCI Bluetooth packets to an sdcard/btsnoop-hci.log stored file. This is then opened using tools such as Wireshark for troubleshooting or analyzing the Bluetooth data.
OEM Unlocking
This needs to be enabled when the boot loader is being unlocked. There are other options that can unlock the boot loader but not on all the devices.
Running Services
This displays a screen that shows system and application processes for currently running apps, including the memory being used by each. It’s useful for current device state checking.
Picture Color Mode
This switches the Fire Tablet to sRGB color mode.
Automatic System Updates
Allows automatic updates to the operating system when restarting and an update is already downloaded.
System UI Demo Mode
This helps capture the best screenshots with no distracting details.
Quick Settings Developer Tiles
This allows you to add toggles to some other developer options to the device’s quick settings.
USB Debugging
Enables ADB utility on a PC to communicate with the Fire tablet through USB. The options can grant app permissions, change system settings using commands, and side-load apps. If this option is enabled, however, some games and apps may not launch.
Revoke USB Debugging Authorizations
When your Fire Tablet is ADB connected for the first time, you need to authorize a computer. This control revokes any other ADB authorizations.
Wireless Debugging
This option allows ADB use over local Wi-Fi networks, not just USB.
Disable ADB Authorization Timeout
This automatically disables USB debugging authorizations if they are not used for a week, they may be revoked automatically.
Bug Report Shortcut
The option adds another button in the power menu to generate a bug report.
Wireless Display Certification
The setting enables the tablet to cast to any monitor which supports Miracast
Mobile Data Always Active
Mobile data is usually shut off if your Fire Tablet is connected to Wi-Fi. The option reverses the setting, which reduces the time it takes to switch between Wi-Fi and mobile data. However, keeping the two connections active drains the battery.
There are more developer options available related to networking, debugging, memory, media, drawing, and input.
Enabling Developer Options
Many of the options found in the Developer Options are intended for use by developers who want to simulate app behavior in different scenarios like low memory. Developer Options can be enabled and disabled. To enable Developer Options:
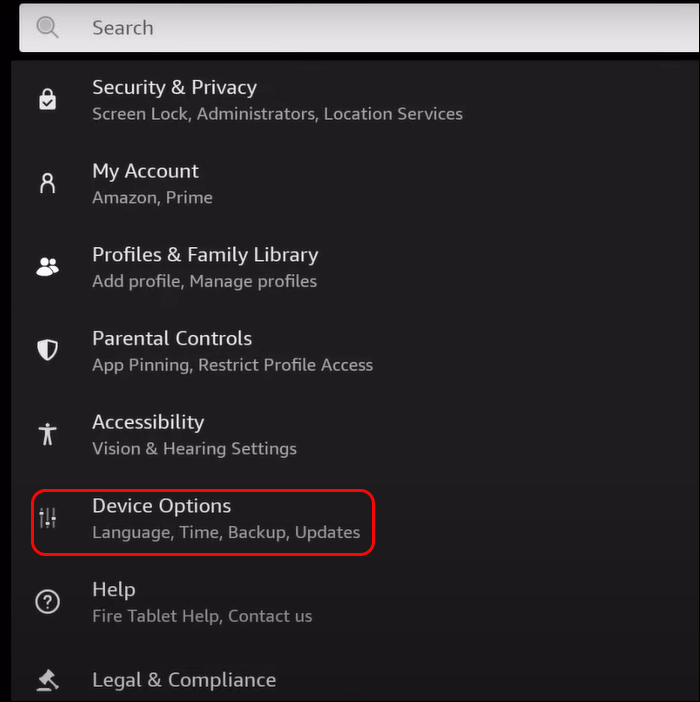
- Go to “Settings” on your Fire Tablet.

- Select “Device Options.”

- Navigate to the “Developer Options” menu.
If you don’t find the Developer Options menu after following these steps, it means that they are hidden. To access them, follow these steps:
- Go to “Settings” on your Fire Tablet.
- Select “Device Options.”
- Once you reach the Device Options page, find the serial number field and tap it seven times. After two taps, you will get pop messages stating: “You are now X steps away from being a developer.” After the seventh tap, you will be notified that the Developer Options have been enabled on the tablet.
- After enabling Developer Options, return to “Settings” and navigate to the Device Options page. You will now see a new entry labeled “Developer Options.” This means the Developer Options have been successfully enabled on the Fire Tablet.
- Tap the “Developer Options” to access them. This should only be done if you are conversant with the settings options. Don’t turn these options on or off if you are uncertain about how they will affect the performance of your tablet. Changing the setting can potentially degrade the Fire Tablet’s performance significantly.


Some Fire Tablet owners need to access Developer Options to use USB debugging or the ADB to allow the device to accept commands from the PC.
Hiding Developer Options on the Amazon Fire Tablet
Once you’ve successfully enabled the Developer Options on your Fire Tablet, you can hide them again if you don’t need to use them anymore. It can be useful to hide the options if there are children who use the same tablet as well. As we mentioned, altering the options without proper knowledge can lead to unnecessary device problems.
Hiding the Developer Options on an Amazon tablet can be relatively easy. Developer Options on the Fire Tablet can be hidden or disabled by clearing the Settings app data. Follow these steps to hide Developer Options.
- Go to “Settings” and choose “Applications.”
- Select “Manage All Applications.” Here, third-party applications are usually shown by default.
- Select the arrow down button. It is next to the third-party applications option.
- In the drop-down menu, select “All Applications.”
- Navigate to settings and select “Settings.”
- Choose “Clear data.” This clears all the saved data connected to the settings app. Following these steps does not remove any other settings or your account.
- When you select “Clear Data,” you get a warning message regarding what clearing data means. You can confirm your decision by selecting “OK.”
- Confirming the action resets the Settings menu and hides Developer Options on the Amazon Fire Tablet.
Access Developer Options Conveniently on Fire Tablet
There are many tweaks that Fire Tablet users can access on their devices, and more advanced ones can be found under Developer Options. This section has tools experienced users can adjust to make necessary changes. These settings should be hidden when not in use to avoid someone tampering with them and causing issues to your device. You should be careful when making changes since a wrong move could harm the performance of your Fire tablet.
Have you ever tried to access the Developer Options on your Fire Tablet? Which steps did you use? Let us know in the comments section below.
Disclaimer: Some pages on this site may include an affiliate link. This does not effect our editorial in any way.