Cloudflare is known for its security protocols that help protect websites from people with malicious intent, such as spammers, phishers, and hackers. However, websites with this security might sometimes inaccurately flag you, blocking your access. If you’re mistakenly blocked, this explainer will assist you with nifty ways to resolve the Cloudflare you have been blocked error that you might be encountering.
Websites protected with Cloudflare may block your access if they consider you potentially harmful, which might not necessarily be true in every case. But, it can be detrimental in the long run for both visitors and website administrators. The former might permanently lose access to the website, while the latter will observe a significant traffic loss, translating to irredeemable losses.
Thankfully, you can restore access to Cloudflare-secured websites by tweaking specific web parameters as a visitor. This includes changing your IP address, disabling website automation, and turning off active VPN profiles and proxy channels.
Before you begin, check if the issue exists on a specific page or an entire website and verify it using a different web browser. If it persists, clear your browser’s cookies and cache and ensure your system has the correct date and time to avoid server-side conflicts.
1. Change Your IP Address
Most ISPs issue the same IP address to multiple customers. This can create issues accessing a website protected by Cloudflare if it blocks the shared IP group. Changing your IP address is the easiest way to get around Cloudflare’s “You Have Been Blocked” issue. This is something your ISP will be able to do.
Alternatively, if you’re using a static IP address, contact your ISP and request a change.
2. Stop Making Too Many Requests
If you use software, an extension, or a bot on your computer to access a protected website, Cloudflare will block you due to sending too many requests quickly. Cloudflare does it to conserve website resources and save it from a potential DDoS attack. Once blocked, you’ll have to wait a specific period to regain website access to your IP address.
To prevent it from happening, turn off all website automation on your system and disable installed extensions in your browser. You can uninstall apps on Windows under Settings > Apps > Installed Apps.
Disable extensions in Google Chrome or your preferred browser. Alternatively, you can go incognito on your browser to access the Cloudflare-protected website, as this mode disables installed extensions by default.
3. Disable VPN or Proxy
When you access a website with a VPN or a Proxy, its server governs your IP address. Now, if Cloudflare blacklists your address or server, you won’t be able to open a protected website unless you change your IP address.
In such situations, you should disable the active VPN profile or the proxy channel to reinstate access to a website. Alternatively, switch to a reputable VPN service provider to avoid Cloudflare blocking you inaccurately.
4. Contact the Website Admin or Cloudflare Support
When the administrator or owner enforces strict Cloudflare settings, it filters out most traffic on a website. This can sometimes lead to inaccurately flagging visitors for potential spam. If the above methods don’t help you regain access, you can contact the website admin directly to whitelist your IP address or lift the site access restriction through their Cloudflare dashboard.
Reaching out to them will help resolve the “You Have Been Blocked” issue. When complaints are numerous, raise concerns so the website owner can follow up on the problem, ensuring it is permanently fixed. If the website admin can’t grant you access, they can contact the Cloudflare technical team for support to resolve the issue.
If you’re the owner, you can set up a new IP access rule in Cloudflare to avoid blocking legitimate incoming traffic. You can reasonably counter Cloudflare’s aggressive security measures by setting up whitelist rules to guide and provide an allowance for people trying to access your website.
- Open your Cloudflare dashboard and select your account and domain.
- Press Security in the left sidebar.

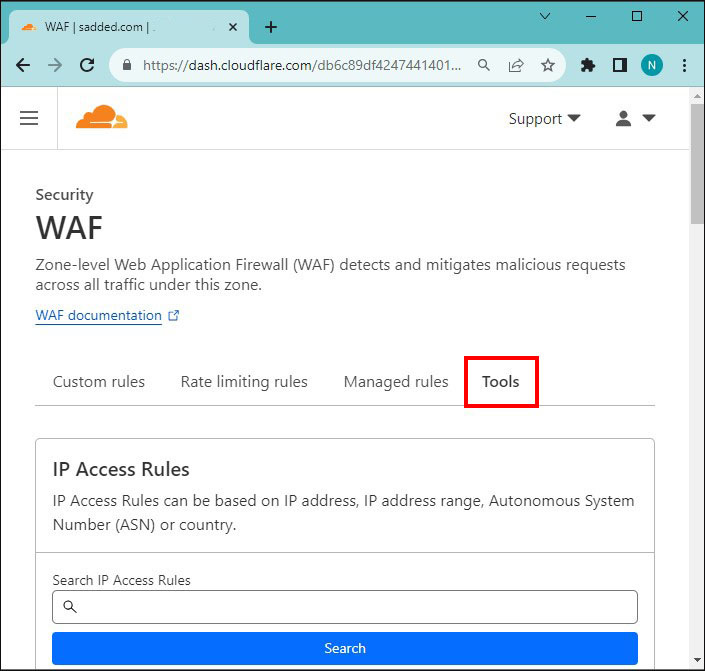
- Expand WAF (Web Application Firewall) under Security.
- Expand the Tools section.

- Enter the correct Value for your IP parameters and pick Action.
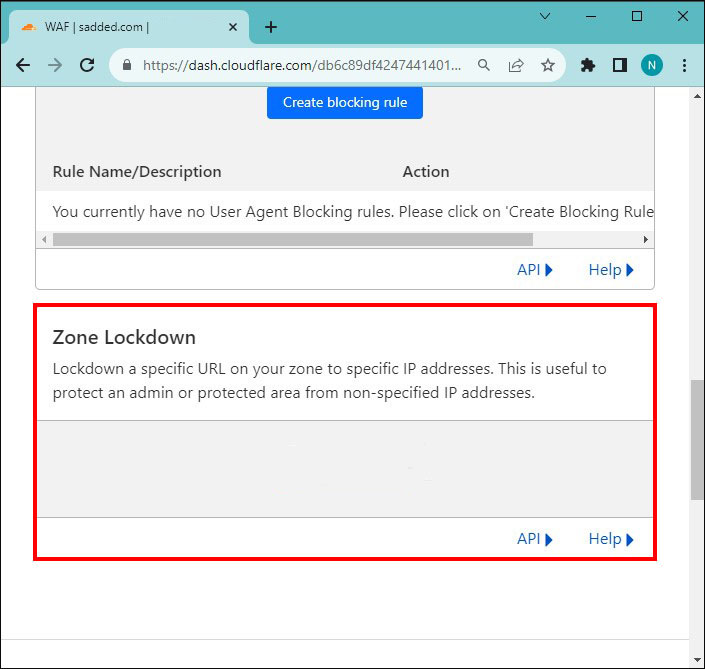
- Select the rules you’d like to apply to your website and specify the website under Zone Lockdown.
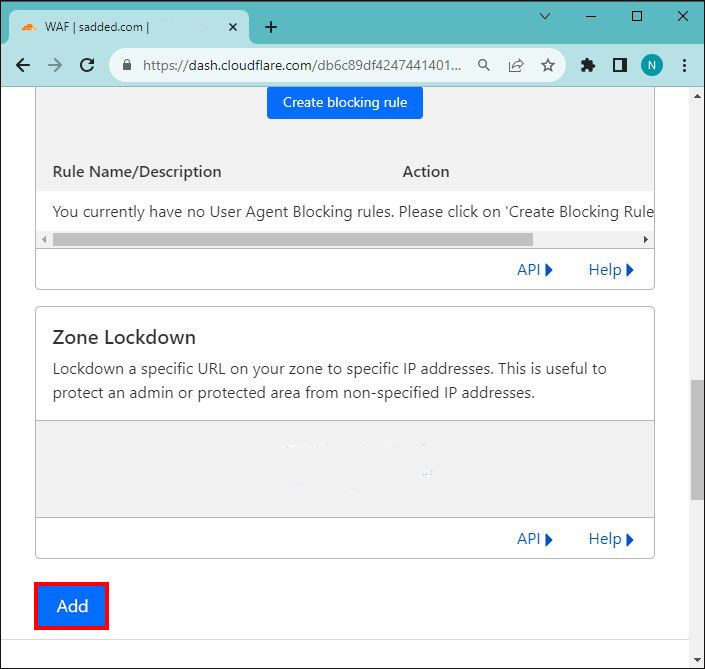
- Finally, click Add to save changes.

Enjoy a Seamless Cloudflare Experience
Cloudflare’s stringent security measures aim to provide a safe browsing experience to website owners and visitors. However, its inaccurate blocking might sometimes get on your nerves, disrupting the browsing experience. Nonetheless, you can quickly resolve the issue by following the above-listed methods and making the situation less stressful.
FAQs
The block duration depends entirely on Cloudflare’s configuration for website security. A temporary IP block should automatically lift after a few minutes, while a permanent block blacklists your IP forever unless intervened by the admin for a lift.
Ensure turning off all automated website tools and disabling browser extensions to speed up the Cloudflare waiting room period. If it takes forever to load, clear the cache or try a different web browser.
Disclaimer: Some pages on this site may include an affiliate link. This does not effect our editorial in any way.