If you find yourself regularly using GIMP (GNU Image Manipulation Program) as a go-to editing tool, then you may eventually need to create a transparent background.
Removing backgrounds is a standard procedure that editors may wish to do for many reasons. Perhaps you don’t like the current background and want to add a different image. Or maybe you’d prefer no background at all.
Fortunately, the process is relatively simple to do with GIMP, and the editing software offers a few different ways of achieving a transparent background. This article will walk you through the process step-by-step.
Keep reading to find out more.
How to Make a Transparent Background
Available on both Mac and Windows, GIMP is a great, free alternative to Adobe Photoshop with many of the same features available.
When creating a transparent background, a few tools can be applied depending on the edited image. Some are perfect for beginners, whereas others are aimed at more experienced GIMP users. Here, we’ll list these various methods.
Using the Fuzzy Select Tool
One of the easiest ways to get rid of a background on GIMP is by using the Fuzzy Select tool. It allows users to select specific parts of the image based on color similarity. This method is ideal for images with a vast amount of color in the back that you wish to remove.
To successfully use the Fuzzy Select tool, simply follow these steps:
On Windows:
- Open GIMP on your Windows computer and select the image you wish to edit.

- From the menu on the bottom-right side of the screen, select your image layer.

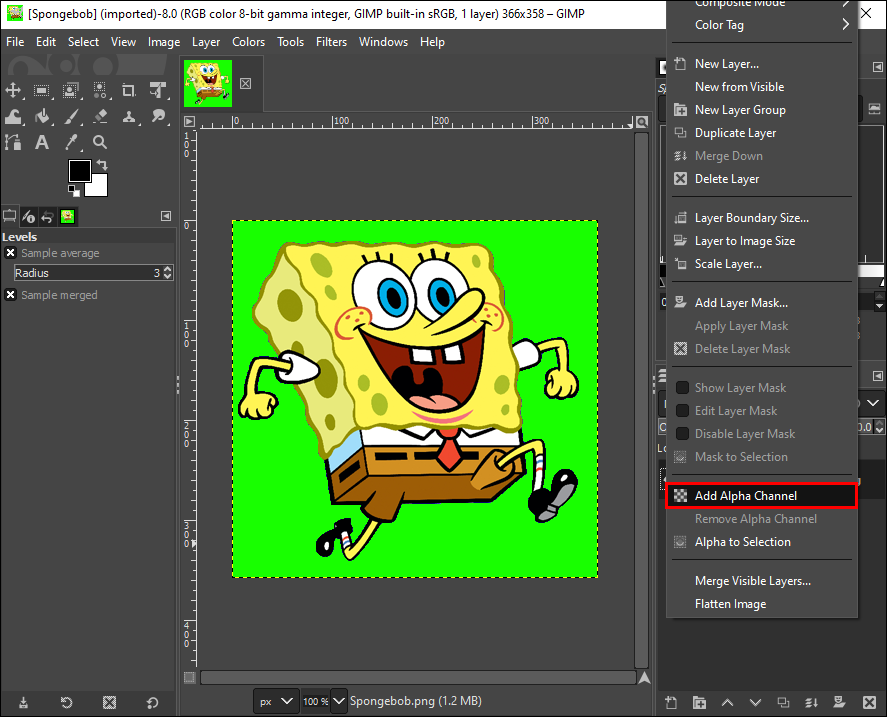
- Right-click and choose “Add Alpha Channel.” This will ensure that your image is transparent rather than black or white. If you cannot select “Add Alpha Channel,” then the background already has the setting.
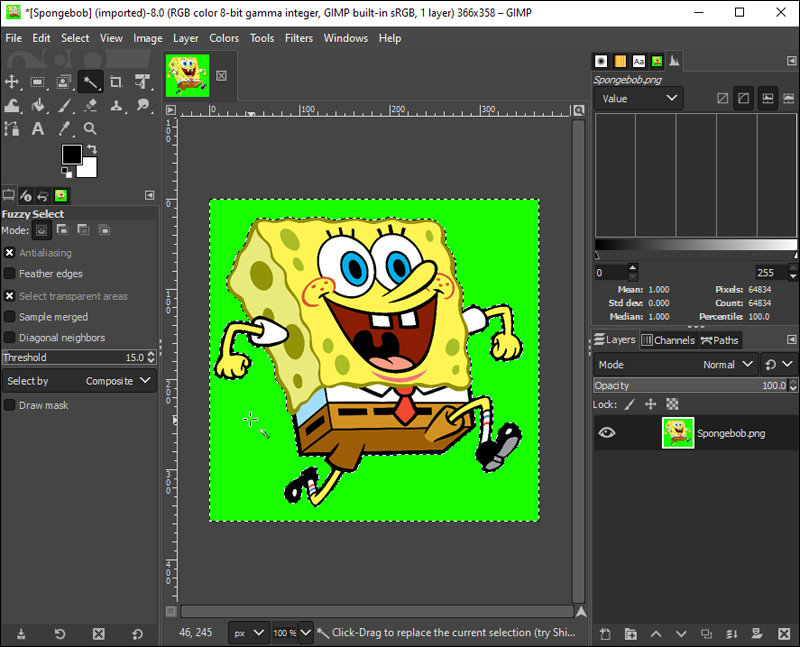
- From the tools panel in the top-left corner of the screen, click on the Fuzzy Select icon. (It looks like a wand with a star on top.)
- Click and drag on the image to create a selection area to save.
- A dotted outline will be created around your main subject. This is known as a “selection.”
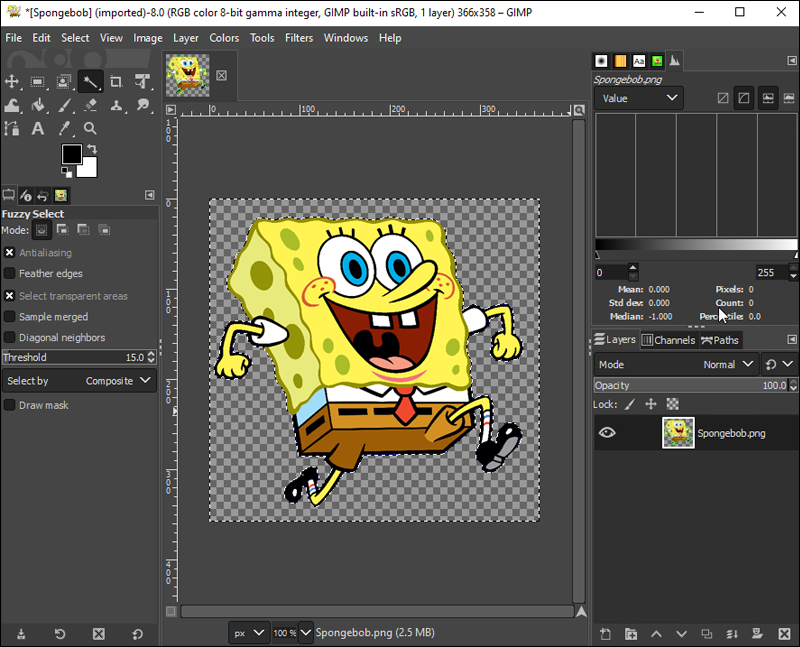
- If the selection was created by clicking on the background, press “Delete” on your keyboard. The background should then be transparent.


On a Mac:
- Open GIMP and choose the image you wish to edit.
- Select your image layer from the bottom-right menu.
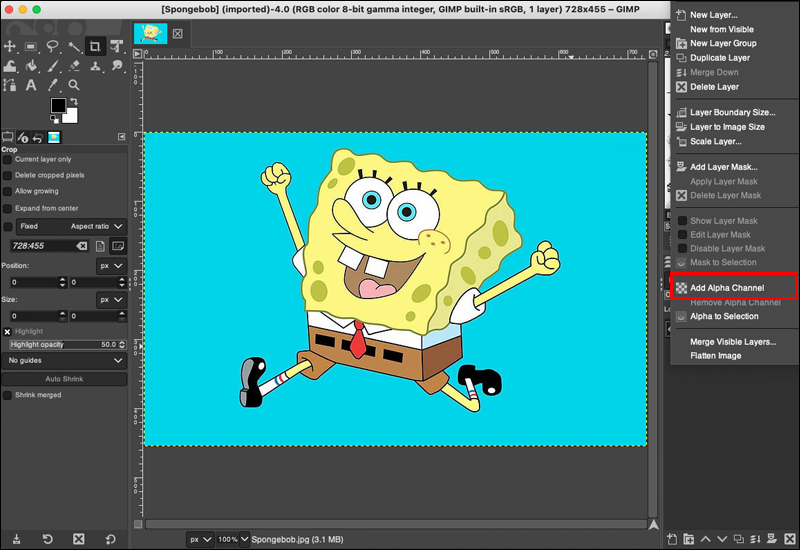
- Right-click on the “New Channel” button and select “Add Alpha Channel” from the drop-down menu. If the option is unavailable, this means that the image already has a transparent background setting.
- Select the Fuzzy Select icon from the tool panel on the left (it looks like a magic wand, with a star on top).
- Using this tool, click and drag around the image where you wish to separate the background.
- Go to “Edit,” then “Clear.’ The background should now be transparent.


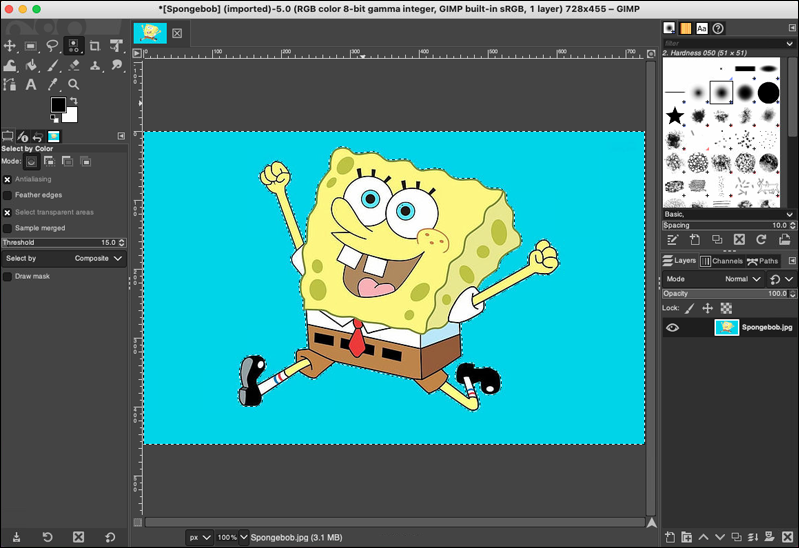
Using Select by Color Tool
The “Select by Color” tool is another perfect method for beginners. It works by creating a selection around your chosen pixels and other pixels that are the same color. This tool is ideal for backgrounds that use just one color or perhaps a couple of shades.
Here’s how to use the “Select by Color” tool to make a transparent background.
On Windows:
- Open GIMP, then the image you wish to edit.
- From the tool panel from the left-hand side, click on the “Select by Color” icon (this looks like three circles in triangular form with a dotted box around the top circle). It’s also possible to access this tool by pressing “Shift+O.”
- Click on the part of the image containing the color you would like to delete. Increase the selection size by clicking and dragging towards the right (to make the size smaller, do this towards the left).
- Once an area is selected, press “Delete” on your keyboard to make the background transparent.


On a Mac:
- Open the image you wish to edit in GIMP.
- Select the “Select by Color” icon (three circles with a dotted box around the top circle) from the tool panel on the left-hand side.
- Select the part of the image you wish to delete.
- Go to “Edit,” then “Clear.”
- The background should now appear transparent.


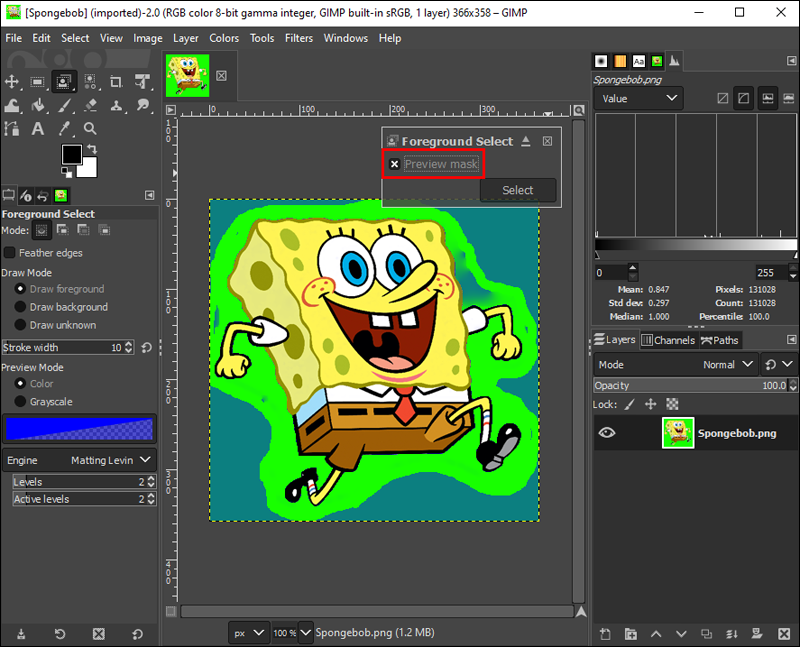
Using the Foreground Select Tool
This method may seem a little more advanced but is still worth learning. It’s particularly advantageous if the main subject of your image has a lot of fine hairs you wish to crop around.
The instructions for use are the same whether you’re using a Windows computer or a Mac:
- Open GIMP, then the image you wish to edit.
- From the tools panel on the left, select the “Foreground Select” tool. The tool looks like two squares on top of each other with the outline of a person in one.
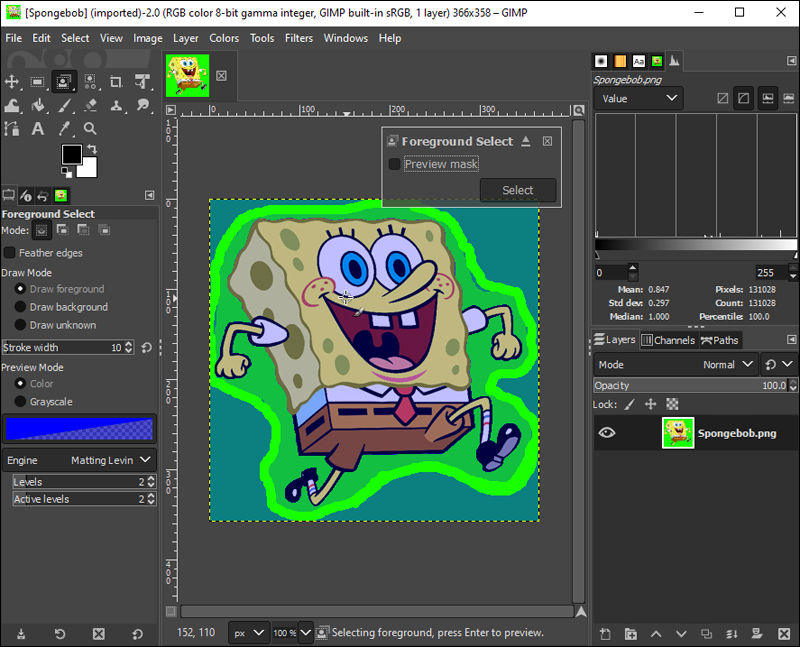
- Draw a rough outline by dragging the tool around the subject. Doing so will turn the image dark blue where your background is and light blue where your main subject is.
- The next step is to brush in the finer areas of the main subject manually. The brush size can be adjusted by hitting the bracket keys.
- Toggle the preview setting to have a look at your work.
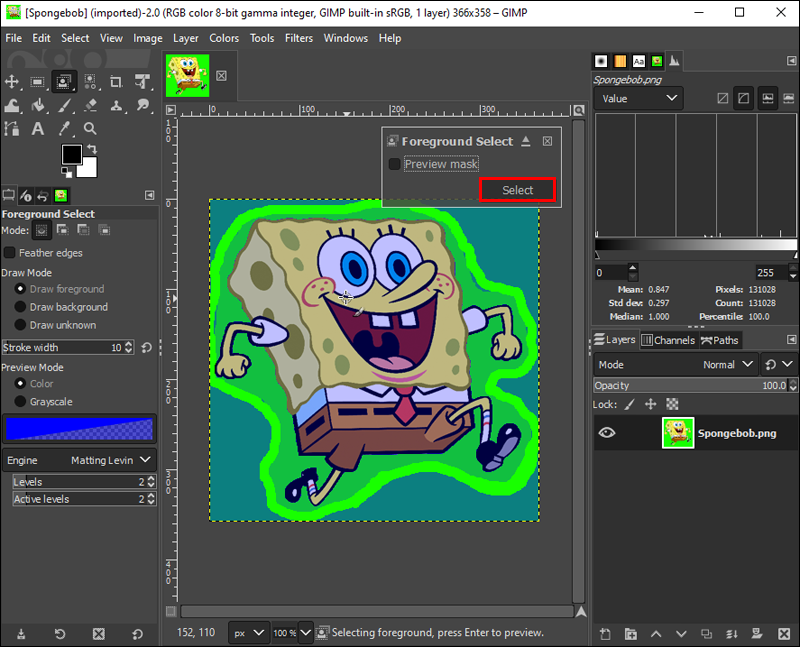
- If satisfied, press “Enter” on your keyboard.
- Click “Select,” then “Invert,” and “Delete.” This will successfully remove the background.


Using Layer Masks
This method may be better suited to more advanced GIMP editors as it includes finetuning specific details of an image.
Instead of using a single tool, this method utilizes a set of functions to help users achieve a transparent background. The goal is to simplify the image to a black and white setting, after which you can separate between the background and foreground.
The image must have a lighter background to subject ratio to execute this method successfully. Here’s how it works:
- Open your image on GIMP.
- Create a duplicate layer by selecting the “Duplicate Layer” button on the bottom-right of the screen. Do this twice to create two duplicates.
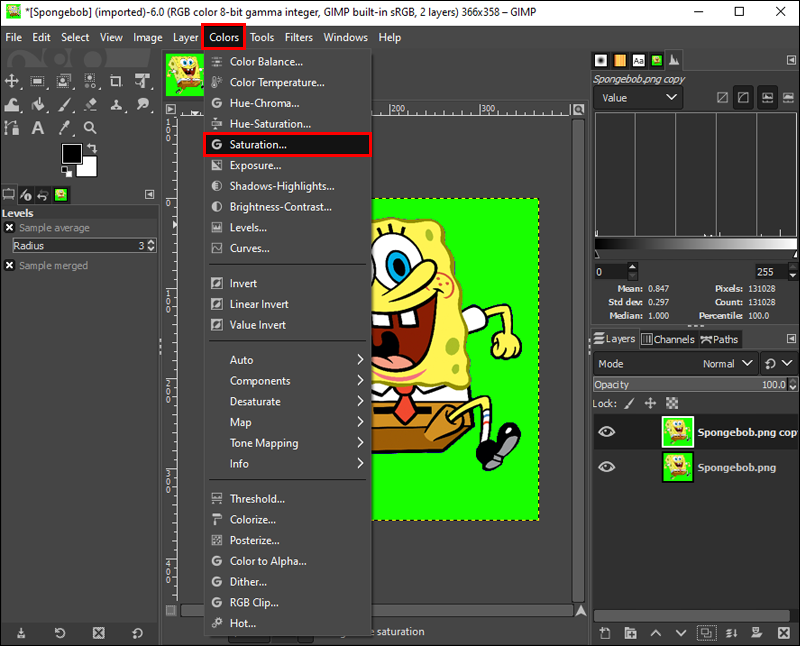
- From the top of the page, select “Colors” then “Saturate.” Use this tool to create a more vivid contrast between the subject and the background.
- Click on “Colors” again, but this time select “Desaturate.” This will greyscale your image. Click “OK” to apply.
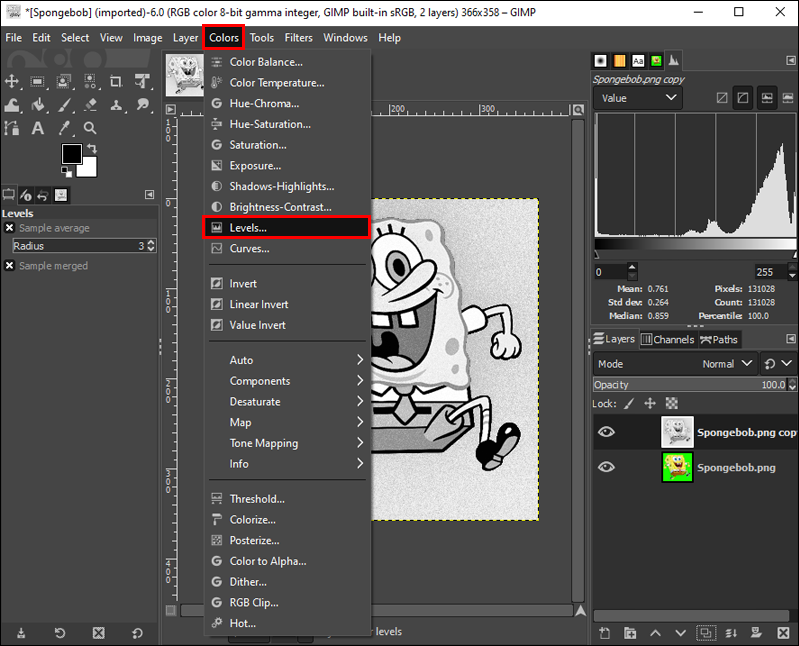
- Select “Colors,” then “Levels.” Darken the main subject to give it a silhouette-like quality to make cropping easier.
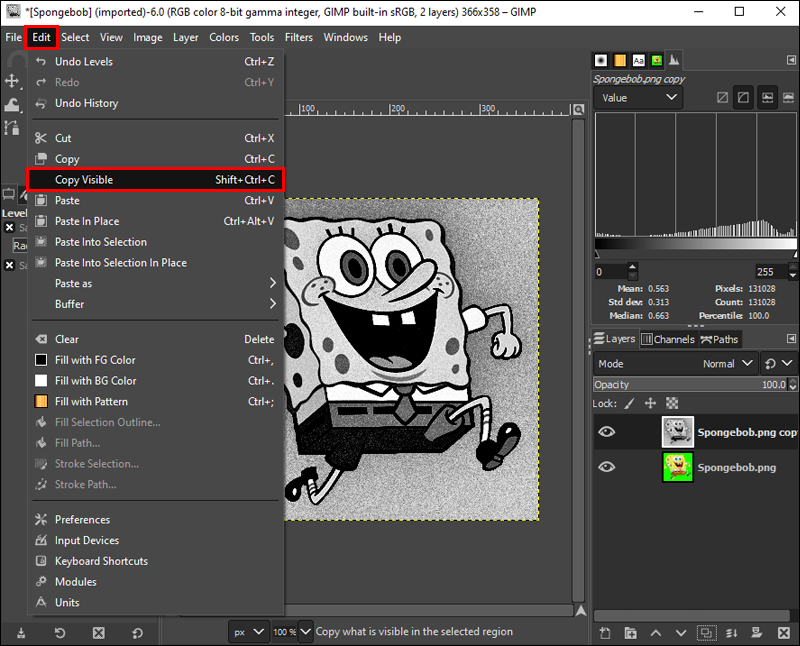
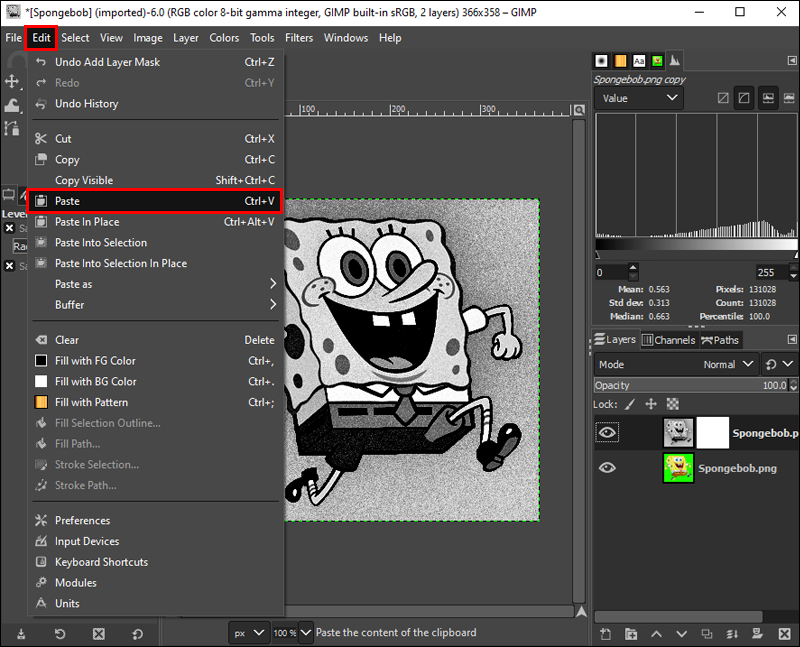
- Head to “Edit” and click on “Copy Visible.” Turn off the visibility of the layer you worked on by checking the box on the right-hand side.
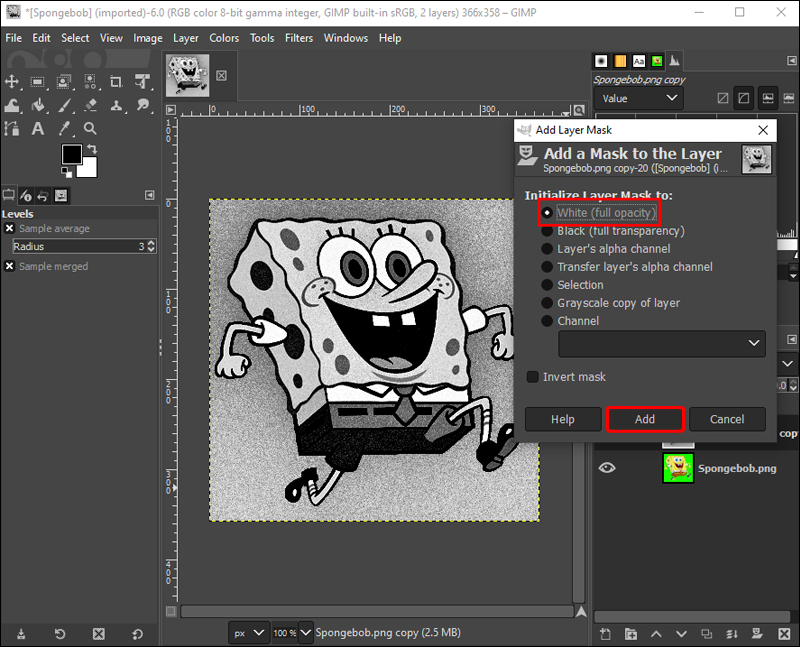
- Right-click on the second layer and select “Add Layer Mask.” Choose “White Full Opacity.”
- Go to “Edit,” then “Paste.” You’ll notice the main subject is deleted.
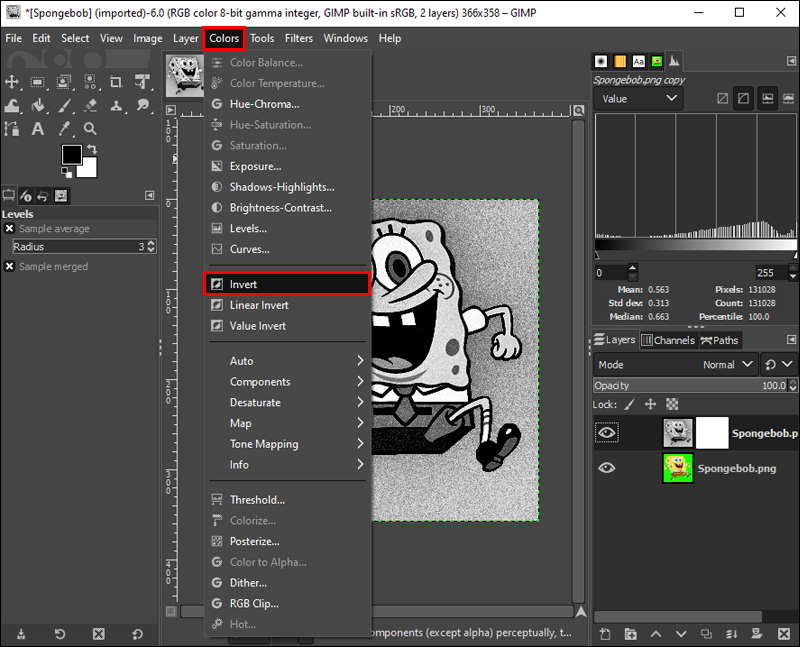
- To invert this, head to “Colors,” then “Invert.” The main subject will reappear while the background is now transparent.


Transparency Is Key
Including a transparent background in your editing project can significantly enhance your overall work. Knowing how to use this tool is extremely handy, whether you’re a beginner with GIMP or an editing pro.
The method you wish to use is entirely down to skill level and personal preference. However, it’s worth testing out different ways to build upon your knowledge of the software.
Have you tried making a transparent background on GIMP? If so, we’d love to hear about your experience. Let us know what you think in the comments section below.
Disclaimer: Some pages on this site may include an affiliate link. This does not effect our editorial in any way.


