Buying a laptop used to involve a straight choice between two operating systems – Windows or OS X. But now there’s Google’s Chrome OS, which offers a low-cost third option. Chromebooks running the cloud-based operating system have become very popular and it’s easy to see why. They are affordable because as long as you’re happy to carry out most of your work on the web and in your browser, they don’t require much expensive processing power.
The same principle can be applied to an old PC, so although it may not be able to run the latest version of Windows, your old computer may still have more than enough power to run the Chrome operating system. CloudReady brings the Chromebook experience to your PC and can either replace your existing Windows installation or run alongside it. The OS is aimed commercially at schools but is being given away free to home users.
What You’ll Need
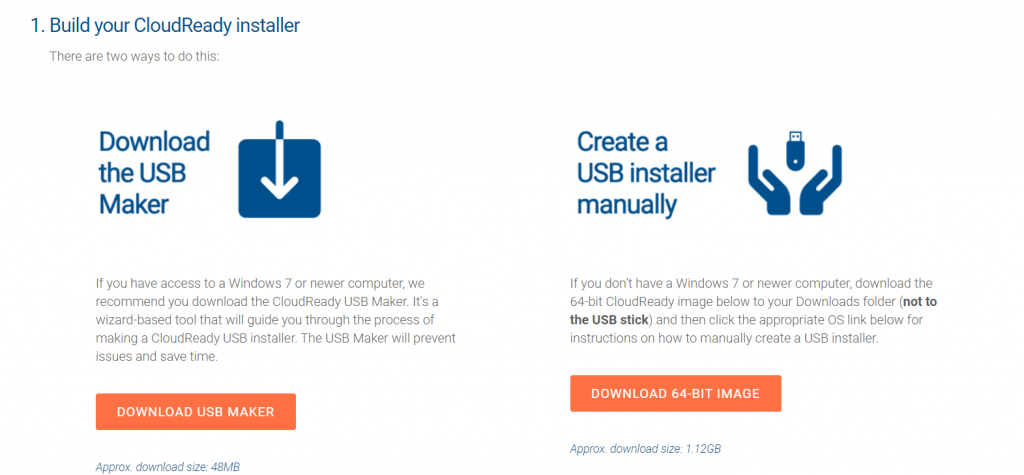
In addition to the CloudReady image file, which is a 600MB download from the website, you’ll need the Chromebook Recovery Utility. This is an official Google tool that lets you create recovery drives for Chromebooks, but it can also be used to install Chrome OS (via CloudReady) on your PC.
It requires the Chrome browser to work. You also need an empty USB flash drive (or SD card) to write the installer to. This should have a capacity of at least 8GB, though 16GB would be better. You can pick one up on Amazon for a few dollars.
How to Turn Your Old Laptop into a Chromebook
- Go to www.neverware.com/freedownload and select either the 32-bit or 62-bit download file. Don’t unzip the CloudReady download yet, because it might cause problems.
- Insert a blank USB flash drive (or one you don’t mind losing the data on), open the Chrome web browser, then install and run the Chromebook Recovery Utility. Do not click the Get started button. Instead, click the gear icon and choose Use local image.

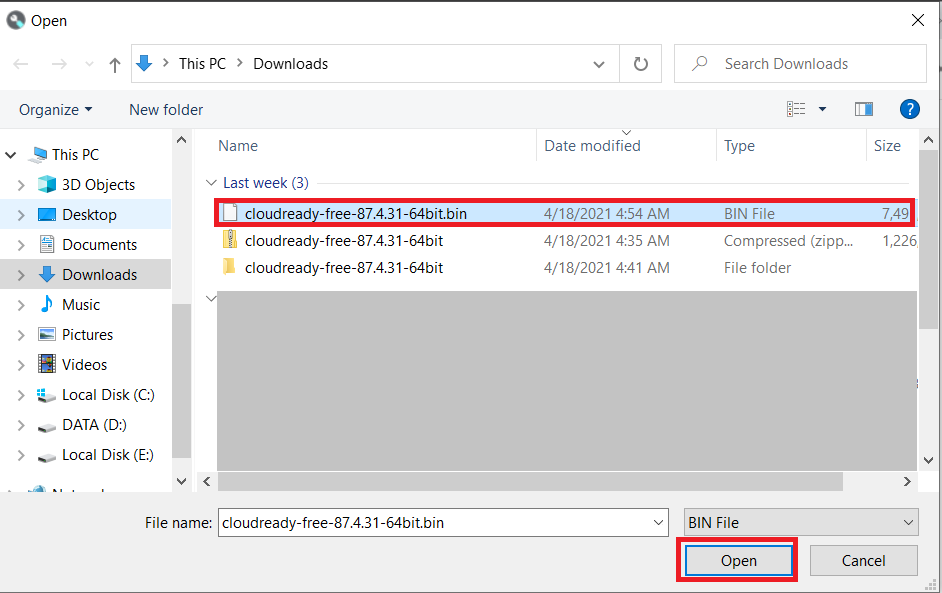
- Navigate to the saved file and select the media you want to use for the installation and click Open.
- Make sure you select the correct drive and then click Continue.
- Next, confirm that the details on the next page are correct. Assuming they are, click Create now.
- Agree to the UAC prompt that appears.
- Creating a recovery image should only take a few minutes – don’t unplug the USB drive during the process. When it’s done, restart your PC and boot from the USB drive. The CloudReady installer will load. Set your language, keyboard, and network, then click Continue to begin the installation process.
- During installation, you’ll need to agree to install Flash, then sign in to your ‘Chromebook’ using your existing Google account. If you don’t have an account or want to create a new one to use with CloudReady, click More options and choose Create new account. Click Next and enter your password.
- Choose a picture to use for your account and you’ll be offered the chance to take a tour of your new device. All the apps can be accessed through the launcher in the bottom-right corner. The System Tray provides access to the settings, which is where you’ll find the option to install CloudReady.
- Click the Install CloudReady button. You’ll have the option of installing it as a standalone operating system (which will completely erase anything on your hard drive) or as a dual boot alongside Windows. If you select the latter, you’ll be able to choose between loading Windows or CloudReady when you boot up.


Installing Chrome OS is a fairly simple process using CloudReady, the free version of Chromebook.
Additional Tips
Run CloudReady on VirtualBox
If you want to try CloudReady without installing it on your PC, you can set it up temporarily using VirtualBox (www.virtualbox.org). This isn’t as straightforward as setting up other operating systems, such as the different versions of Linux, because the download comes as a BIN image file, and you’ll need to convert this into a format that VirtualBox can work with before you do anything else. Fortunately, this isn’t difficult to do.
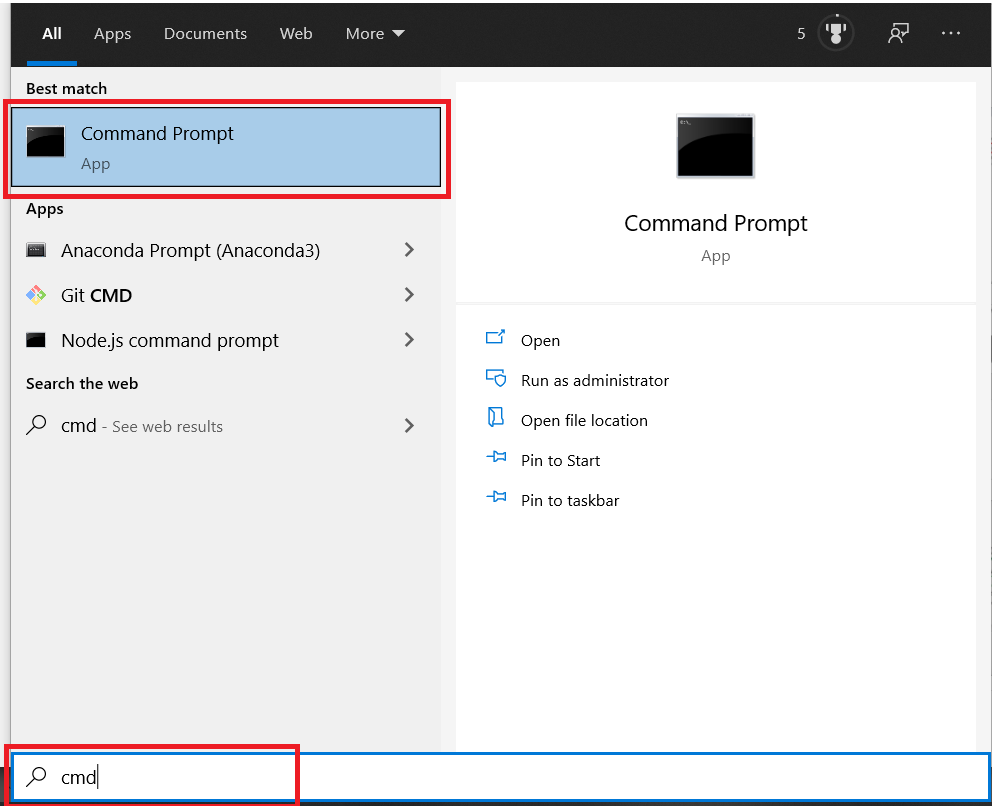
- Unzip the chromiumos_image.bin file, click Start, type ‘cmd’ and launch the Command Prompt.
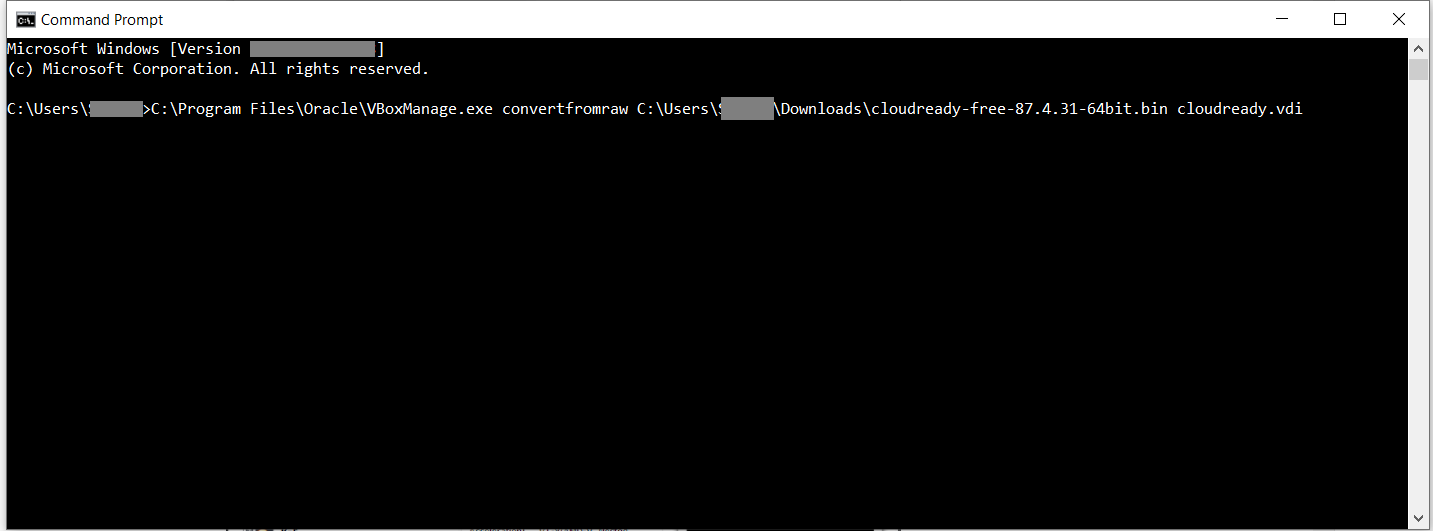
- Inside the window, type: “c:\program files\oracle\virtualbox\VBoxManage.exe” “convertfromraw” “C:\Users\[username]\Downloads\chromiumos_image.bin” cloudready.vdi. You’ll need to add your username and the name of the location you saved the BIN file to. If for any reason you can’t find the saved file, search your hard drive for cloudready.vdi and copy it to the Desktop.
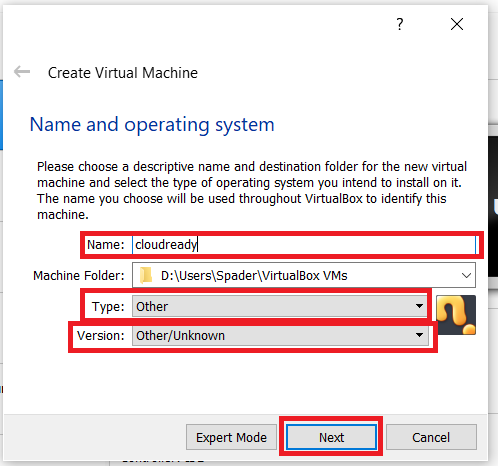
- Launch VirtualBox and click New.
- In the Name box, enter ‘cloudready,‘ set the type as Other, the version as ‘Other/Unknown,’ and click Next.
- Now, assign a minimum of 2GB (2048 MB) RAM to the OS and click Next.
- Then, in the Hard Disk box, select Use an existing virtual hard disk file.
- Click the folder icon and browse to the cloudready.vdi file.
- Next, click Open and then click Create. Make sure the CloudReady entry is selected on the left and click Settings. Go to System, Motherboard and tick ‘Enable I/O APIC’ and ‘Enable EFI’. Next, select the Processor tab (still under Settings) and tick ‘Enable PAE/NX’ next to Extended Features. Increase the number of processors from one to two or more. Finally, click Display on the left, change video memory to 128MB and tick ‘Enable 3D Acceleration’. Click OK and the changes will be applied.


With CloudReady selected in VirtualBox, click the Start button at the top. The virtual machine will start, and the memory will be tested. Once that’s complete, CloudReady will load and you’re ready to set it up.
Master CloudReady
Navigating CloudReady is fairly simple. You access your apps through the launcher and browse the web through Chromium.
- The system tray icon lets you switch Google accounts, manage your internet connection, adjust the volume, and access Settings. You can also shut down the OS or lock it.
- The Settings screen lets you manage your internet connection and install and update media plug-ins such as Flash. You can also set the wallpaper, get themes, and adjust settings for the mouse, keyboard, and display.
- The Advanced Settings screen lets you manage the date and time (you’ll probably need to change this because we found CloudReady couldn’t identify our location correctly, so it was displaying the wrong time), as well as privacy settings, languages, and downloads.
- Right-click a blank area of the Desktop to bring up a context menu that lets you autohide the shelf (the Chrome OS equivalent of the Windows taskbar) and change its position. By default, it sits at the bottom of the screen, but it can be positioned on the left- or right-hand sides, which is useful for widescreen monitors.
Change the Background
The dull, grey default background is one of the first things you’ll want to change in Chrome OS. Browse the web until you find an image you’d like to use as Desktop wallpaper. You can also use a photo of your own if it’s stored in Google Drive (you’ll need to download the Google Drive app from the Web Store).
- To change the background, right-click the Desktop and select Set Wallpaper.
- Click the plus symbol under Custom, then Choose File and select the wallpaper to use from either Google Drive or Downloads. You can adjust the position of the image, which can be centered, cropped, or stretched.

Install Some Apps
There are lots of apps to choose from, but we’d definitely recommend the following:
- Google Drive: Store and access all your files through Google’s cloud-storage service
- VLC for Chrome OS: An excellent media player that can handle any audio or video file
- JSTorrent: A BitTorrent client that works very well on Chromebooks (or PCs pretending to be Chromebooks)
- Evernote: The popular note-taking app
- Kindle Cloud Reader: Read ebooks directly in the Chromium web browser.
Frequently Asked Questions
Here are the answers to more of your questions about converting your laptop to a Chromebook.
Will this work for any laptop?
CloudReady supports over 450 laptop models so it’s likely you have one compatible with the software. You will need at least 2GB of RAM and can check your devices’ compatibility here.
Can I use CloudReady without losing my original OS?
Yes! You can boot your computer using the USB flash drive that you use to install the program rather than overwriting your existing OS.
Chromebooks
Although you have to jump through a few hoops, you can turn your old PC into a Chromebook using the steps shown above, and if you want to expend a little more effort, you can even use it on a virtual machine.
Were you able to breathe some new life into your old laptop? Do you prefer Chrome to Windows? Let us know in the comments below.
If you decide in the end that you’d rather buy a new Chromebook, we recommend the excellent Samsung Chromebook 2, available on Amazon.
Disclaimer: Some pages on this site may include an affiliate link. This does not effect our editorial in any way.