Device Links
It is awful when you connect a portable HDD or SSD to the PC but get no response or prompts, leaving you unable to view its contents. Disk Management, a system tool used to manage all identified devices, will, in most circumstances, display these hard drives. However, they occasionally fail to appear in Disk Management.
We’ve compiled a list of potential fixes for this problem. Keep reading to learn what to do when a hard drive is not showing up in disk management on various operating systems.
Hard Drive Not Showing Up in Disk Management in Windows 11
If your hard drive doesn’t appear in Disk Management, there could be a few potential causes. Here are some of the options for fixing this issue.
Make a New Volume
Try creating a new volume if the external hard disk doesn’t appear in Disk Management. To do so, stick to the instructions below:
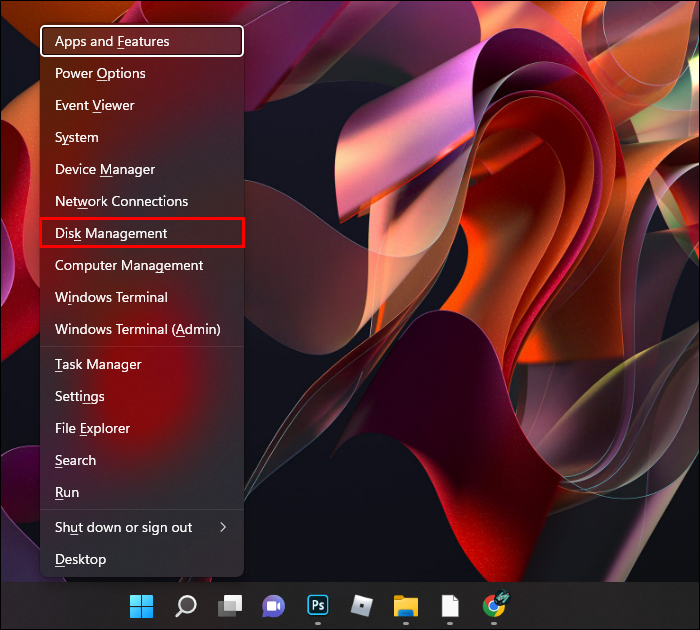
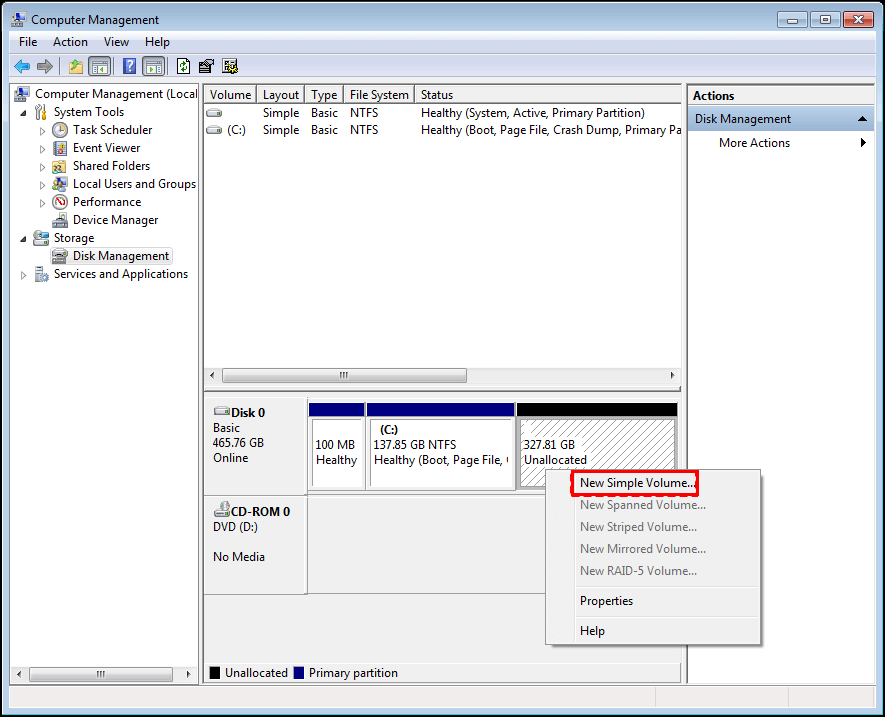
- Click on the “Windows key + X,” and then choose “Disk Management” from the list.
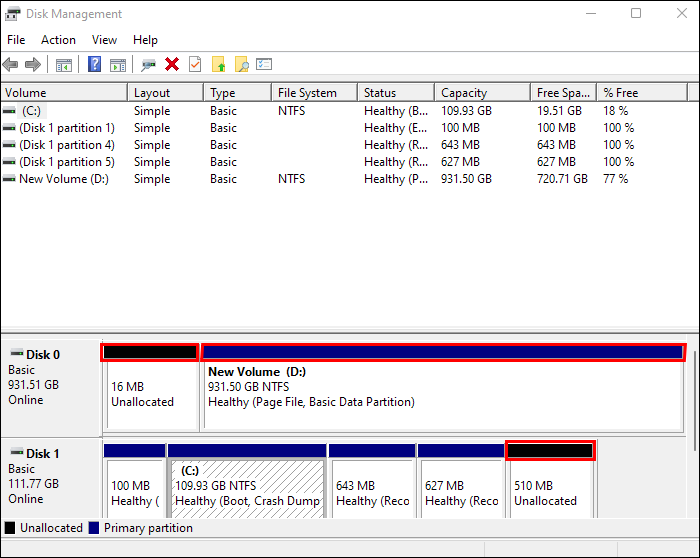
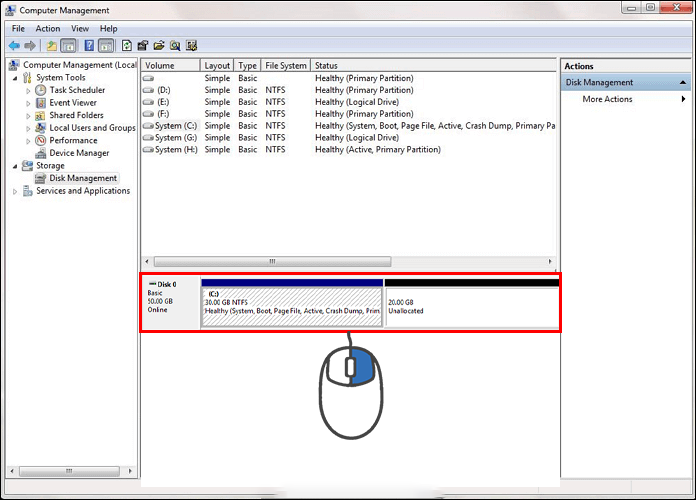
- Verify whether the drive is the primary partition or already an unallocated space in Disk Management. The primary partition will have a blue bar on top, while the unallocated space will have a black bar.

- You must make the drive’s primary partition unallocated space. If it’s already labeled as unallocated space, skip the next step.
- To delete a volume and make it unallocated space, right-click the problematic volume or drive and choose “Delete Volume.” The drive will successfully be labeled as unallocated space once you’ve done this because a black bar will appear on top of it. You must now build a new basic volume for the space.
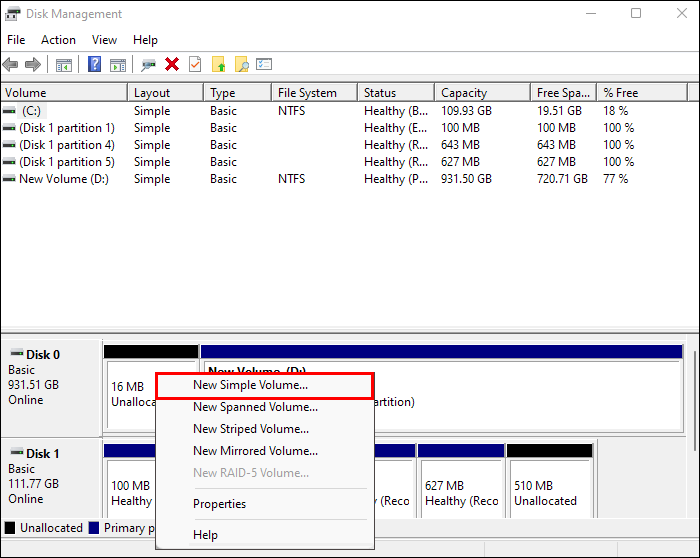
- Click “New Simple Volume” from the context menu by right-clicking the unallocated space.
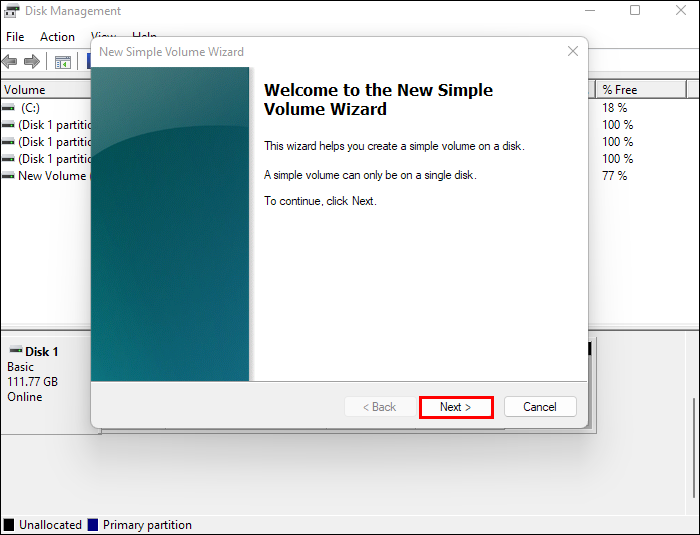
- This will launch the “New Simple Volume Wizard.” Select “Next.”
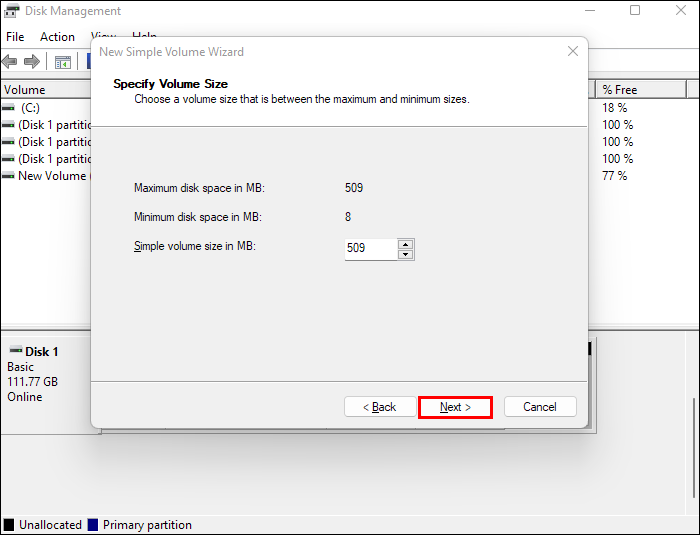
- The “Simple Volume Size” (in MB) input field will be presented to you. You won’t be able to exceed the limit here, but you can set a custom size. Once finished, press “Next.”
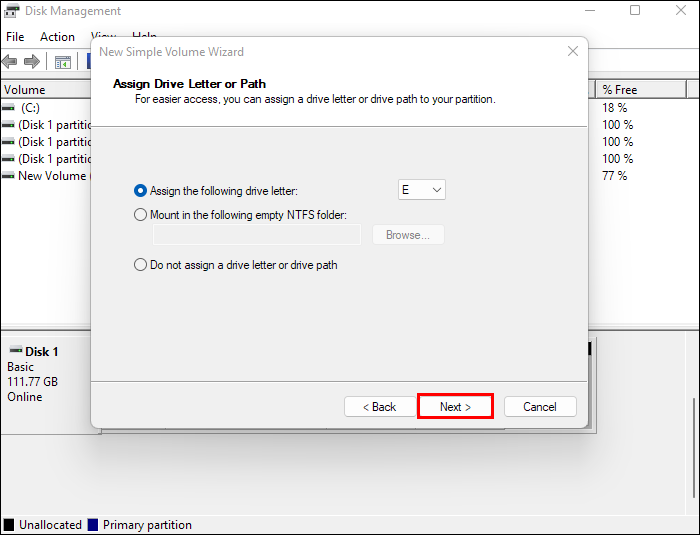
- Your next options are to set the drive letter or mount it in the empty NTFS folder. After choosing “Assign the next drive letter,” choose the drive letter. Select “Next.”
- You will be prompted to format the drive. Choose the “Format this volume using the following settings” option. The file system, unit size, and volume labeling will then need to be established. Most of the time, leave these to defaults. Hit “Next” once you have finished all of this.
- Select “Finish” to end the “New Simple Volume Wizard.”

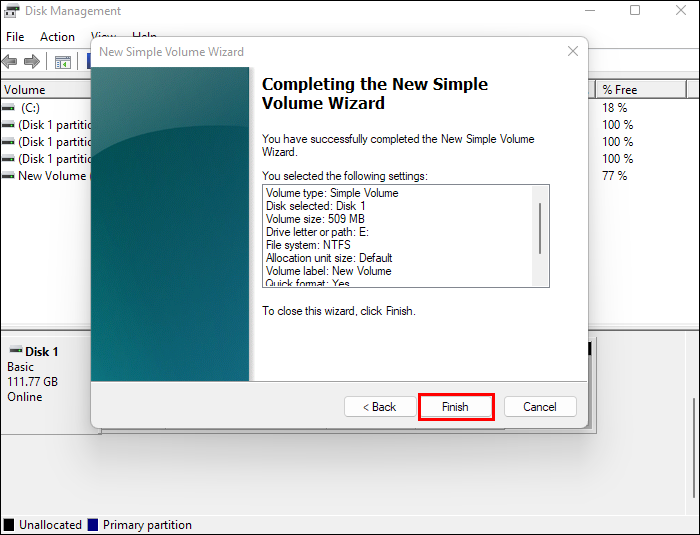
As soon as you do this, the drive should appear in the Disk Management and resolve the issue.
Update Drivers
You should update your hard drivers first and then see if the error persists. Follow the steps below to upgrade the hard disk drivers:
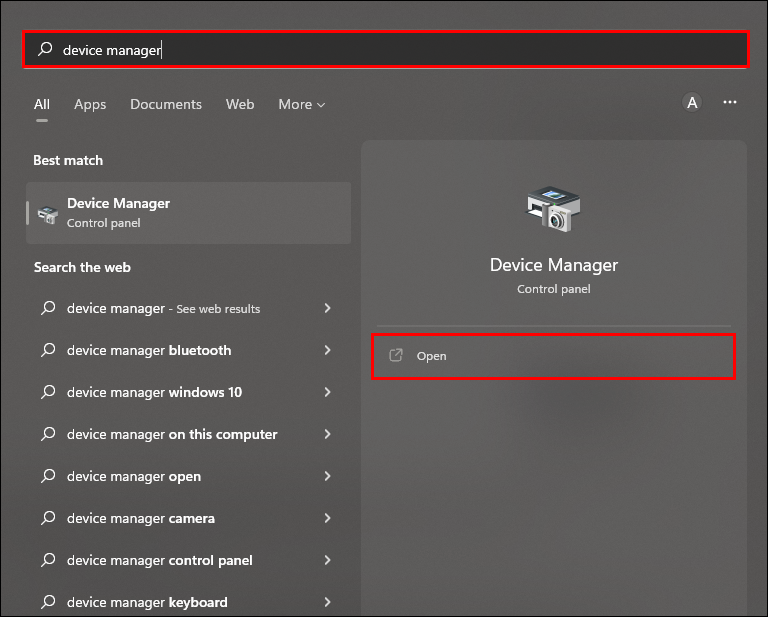
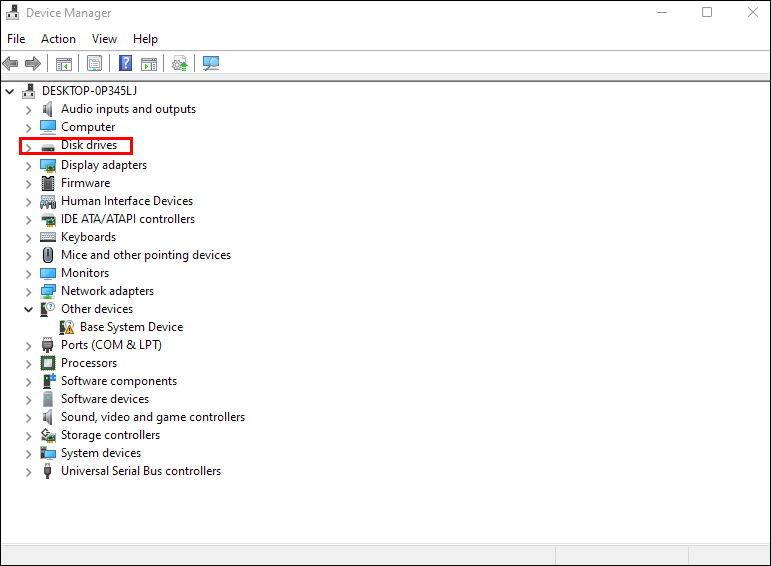
- Find the “Device Manager” on the Start Menu and launch it.
- To expand the “Disk Drives” section, double-click on it.
- Right-click on the drive that has the mistake in this area.
- Then choose “Update Driver.”


Restart your computer to apply all the changes. Now, you shouldn’t experience the issue of Windows 11 not recognizing hard drives.
External Drive Not Showing Up in Disk Management in Windows 10
There are a few options for fixing this issue in Windows 10.
Formatting
Your disk could just be unformatted or formatted for an obsolete standard. An external drive you’re using might need to be formatted in order for Windows 10 to recognize it:
- Click the right mouse button on the external in “Disk Management.”
- Select “Format” from the menu that appears.

The Disk Management program may not recognize your hard drive if there are issues with your connections, out-of-date drivers, or physical damage. It’s quite likely you simply have a bad hard drive if your problem doesn’t get better after verifying connectivity, upgrading drivers, and following the instructions in this post.
Change the Assigned Letter
When a drive is formed, it is given a letter for identification. For instance, Windows drives often start with “C.” If your machine boots up, you might be able to fix the visibility problems by simply replacing this letter.
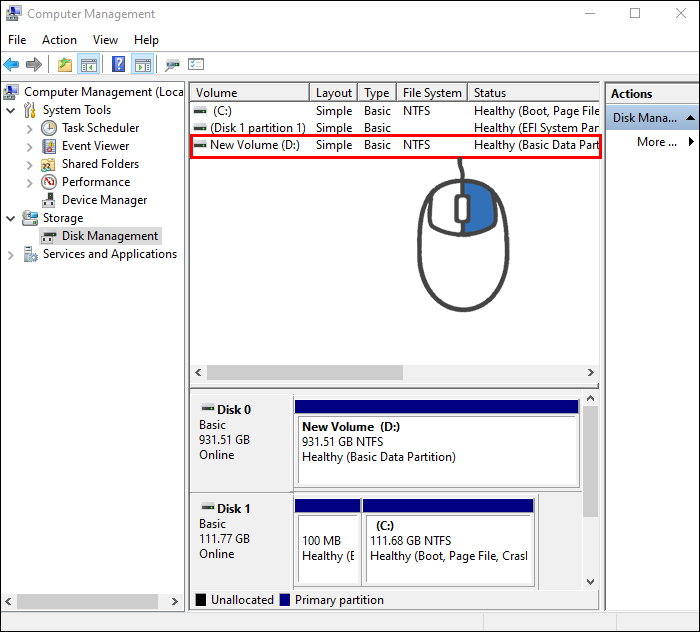
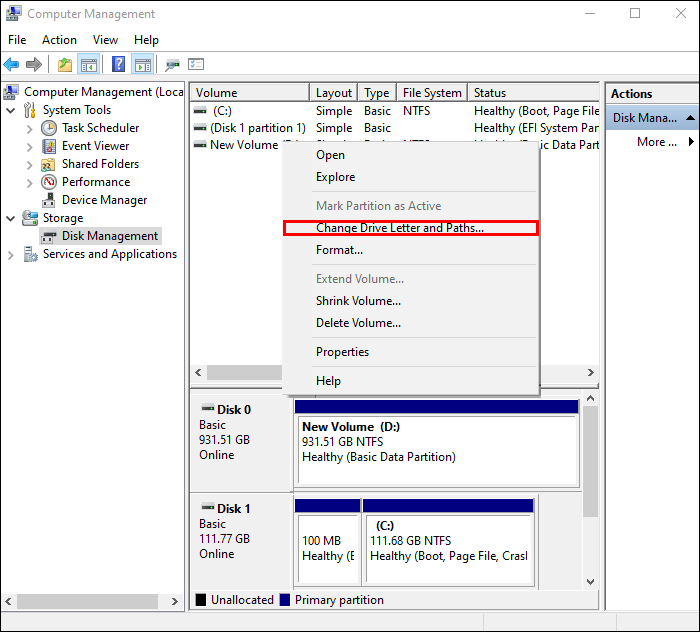
- Click the right mouse button on the “Volume” in “Disk Management.”
- Choose “Change Drive Letter and Paths.”
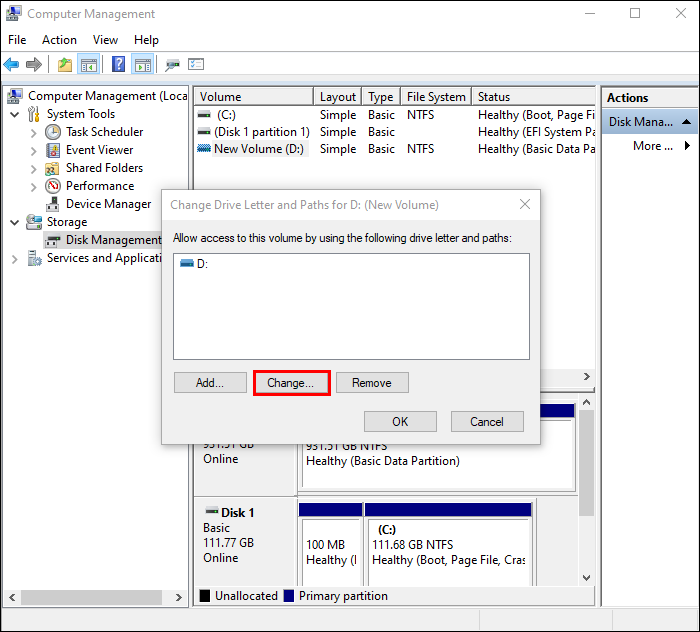
- Select “Change” in the new window.
- Tap “OK” to give your USB a new drive letter in this window.
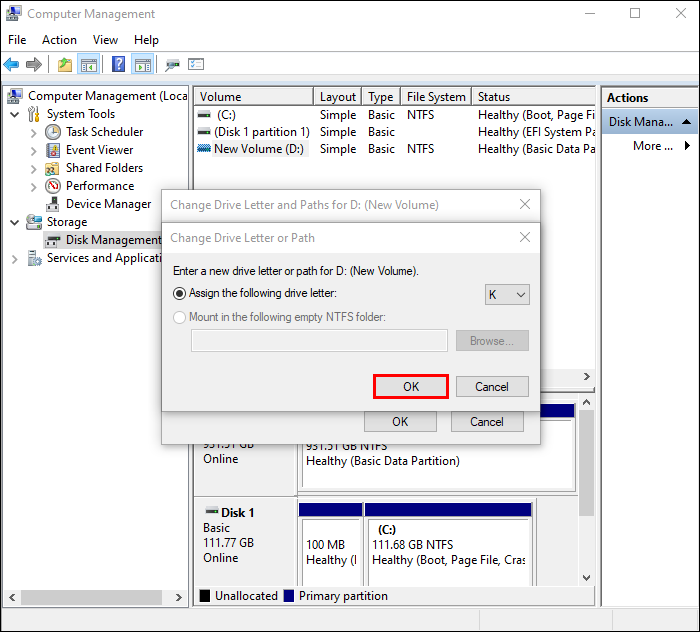
This ought to resolve the issue. Avoid doing this for the system drives (C or D, usually).
Hard Drive Not Showing Up in Disk Management in Windows 7
Here is a list of possible solutions for Disk Management problems in Windows 7.
Unallocated Space Data Recovery
To do this, you should:
- In Disk Management, right-click on the C: drive.
- Select “Extend Volume.”
- Press “Next.”
- Follow the instructions for formatting the remaining unallocated space.
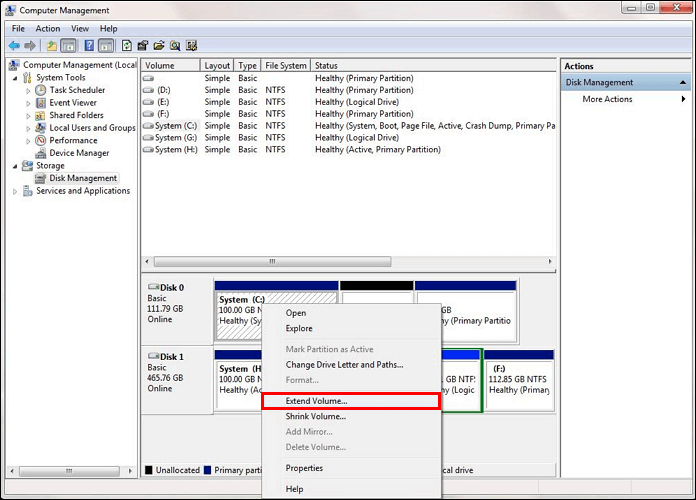


Disk Management might prevent you from extending the drive since it is your system OS partition. Downloading and installing one of the various programs available will help you resolve this. Carefully research which option will work for you and avoid scams.
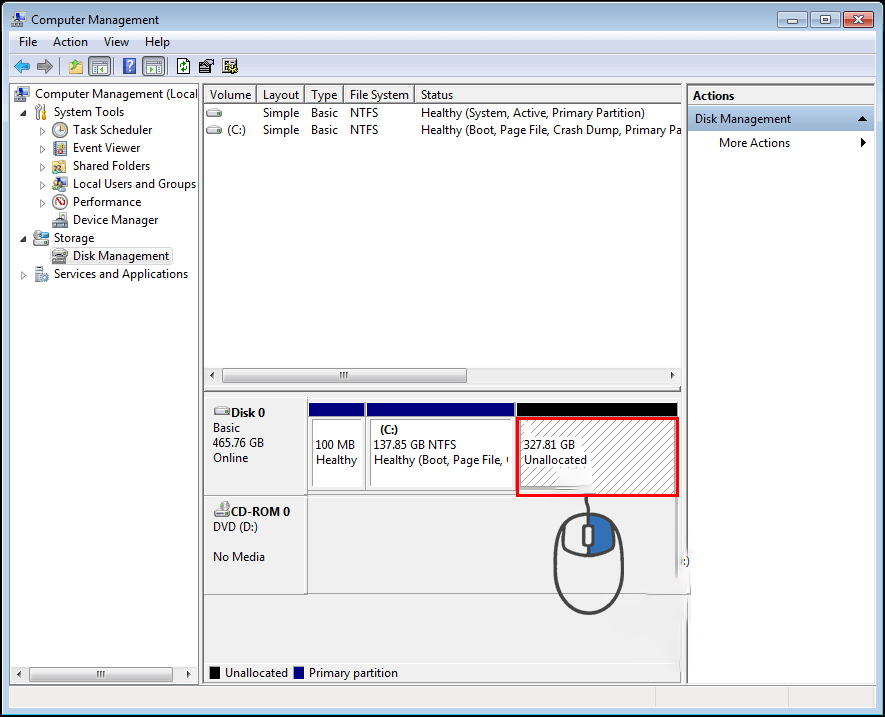
After you’ve restored your files, you’ll need to create a new partition:
- In Disk Management, right-click on an empty space.
- Choose “New Simple Volume.”
Follow the setup directions to complete the process. If this doesn’t work, check to see if your drivers are current. Your computer could experience serious issues if your drivers aren’t kept up to date.
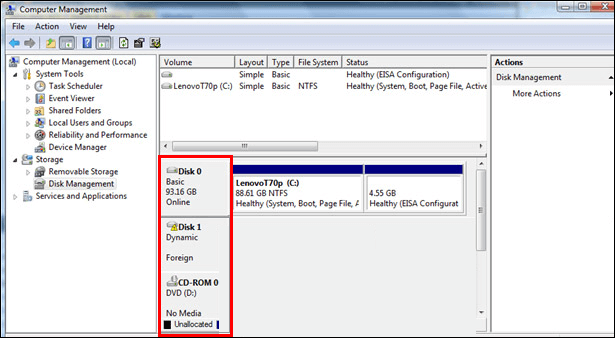
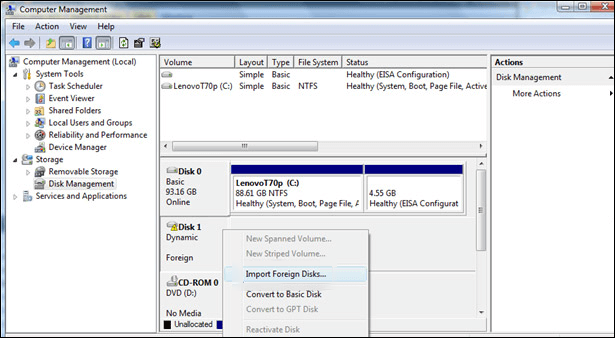
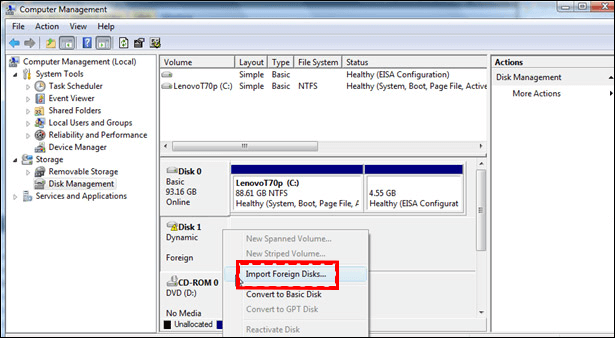
Import Foreign Disk
The disk won’t appear in My Computer or Disk Management as a viewable partition. It is identified as a foreign disk by the system. To fix the issue with this method, follow this guide:
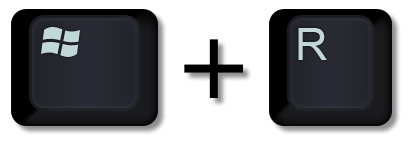
- Press “Windows key + R” to open the “Run” dialogue box.
- After that, enter “
diskmgmt.msc” to launch “Disk Management.” - Try to see whether you have another disk listed under your OS disk.
- Using the drop-down menu, right-click on one if you have it.
- Choose “Import Foreign Disks.”
- After a little while, File Explorer and Disk Management should recognize your new HDD drive as a volume.
Reboot the device to see if the problem persists.
Try the Hardware and Devices Troubleshooter
This utility can be used to determine whether your device has any problems if your installed hard disk or other hardware isn’t operating as it should. For the Hardware and Devices troubleshooter to launch and run:
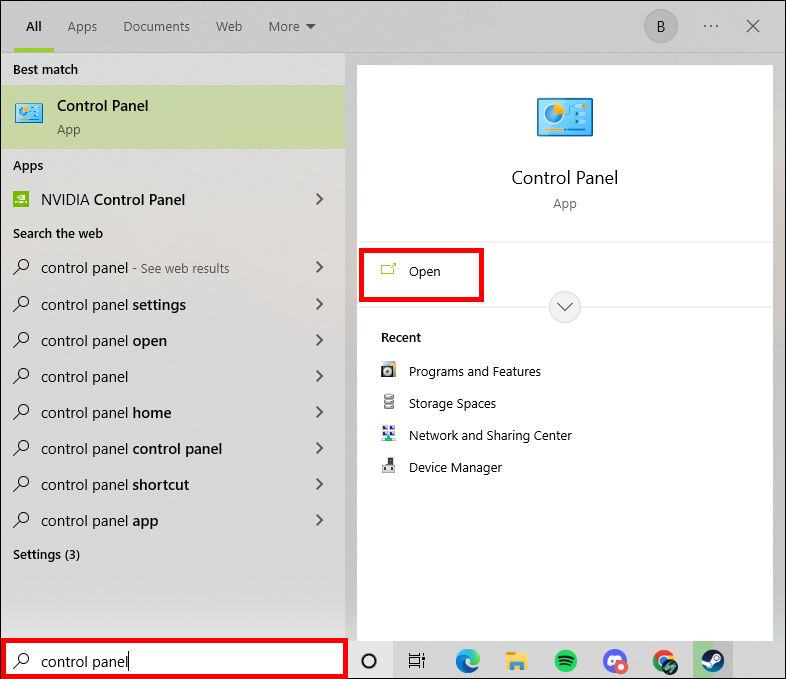
- Open the Start menu.
- Search for the “Control Panel” and open it.
- Type “troubleshooter” into the search field in the Control Panel window’s upper right corner. When “Troubleshooting” is shown, click on it.
- Click any devices under “Hardware and Sound.”
- It will now launch the “Hardware and Devices Troubleshooter” window.


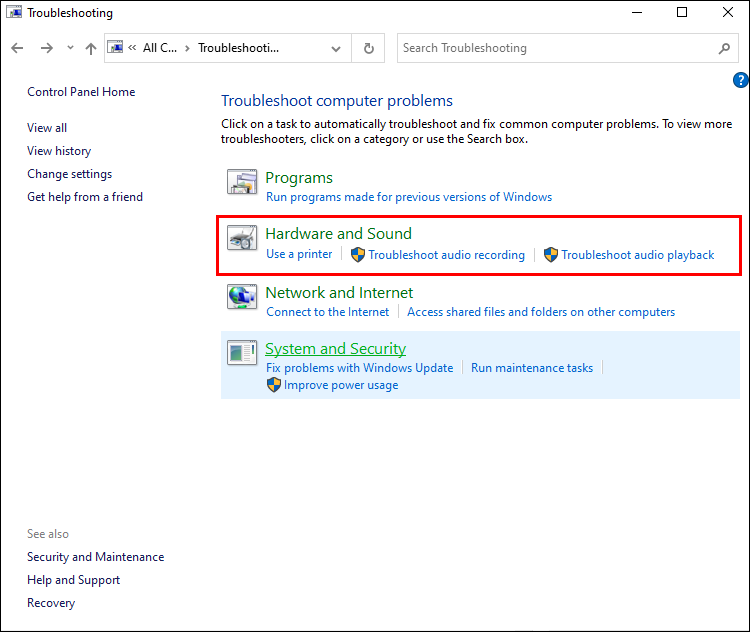
A popup that looks into the hardware issue appears. The wizard will guide you through the remaining steps. In some of the aforementioned steps, you may be asked for an administrator password.
Hard Drive Not Showing Up in Disk Management on a Mac
If the external drive is not showing up in Disk Utility on your Mac, here are some possible solutions to this issue.
Show an External Hard Disk Manually in Disk Utility
If your external hard disk isn’t showing in Disk Utility, you can verify if the “External” option is present in the left sidebar. If so, follow these instructions to manually display it.
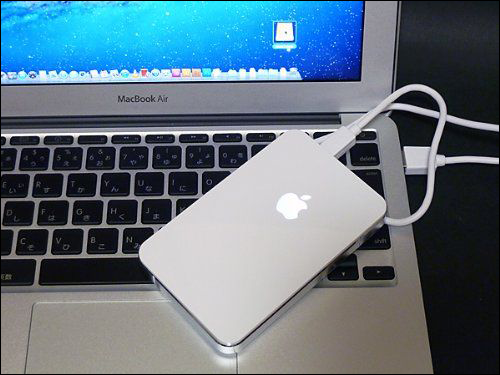
- Connect the external hard drive to your Mac.
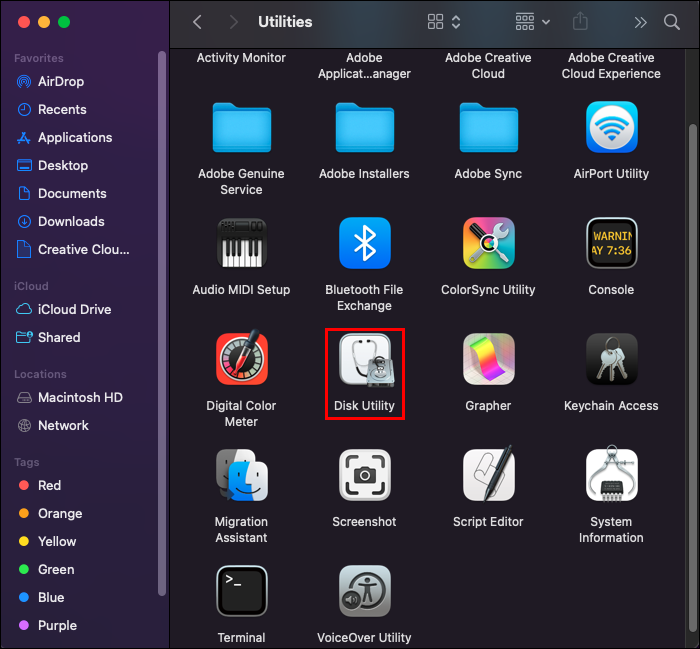
- Launch “Disk Utility.”
- Move the mouse to the “External” selection.
- The “Show” selection will be visible. Click on it.
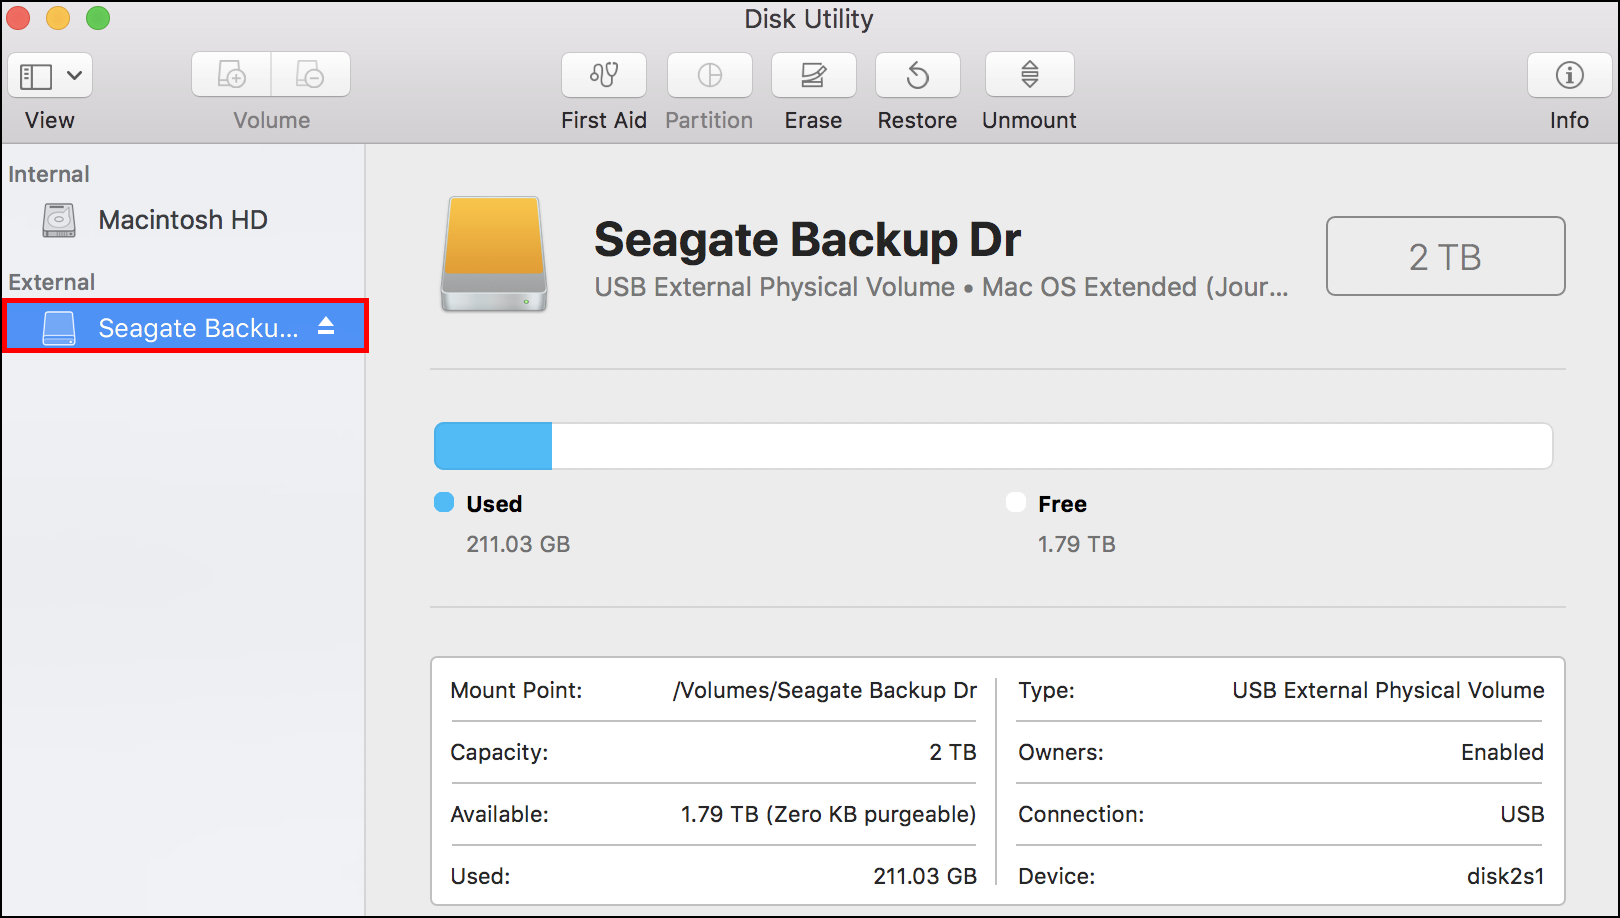
Check if the “Disk Utility” is able to recognize the external hard disk once more.
Use Apple Diagnostics
Apple Diagnostics is a collection of diagnostic tools that technicians use to identify problems. It can help you pinpoint a potential hardware problem with your Mac. Additionally, it makes suggestions for fixes and facilitates your contact with Apple Support.
- All external devices should be turned off, except for the keyboard, mouse, and other necessary gadgets.
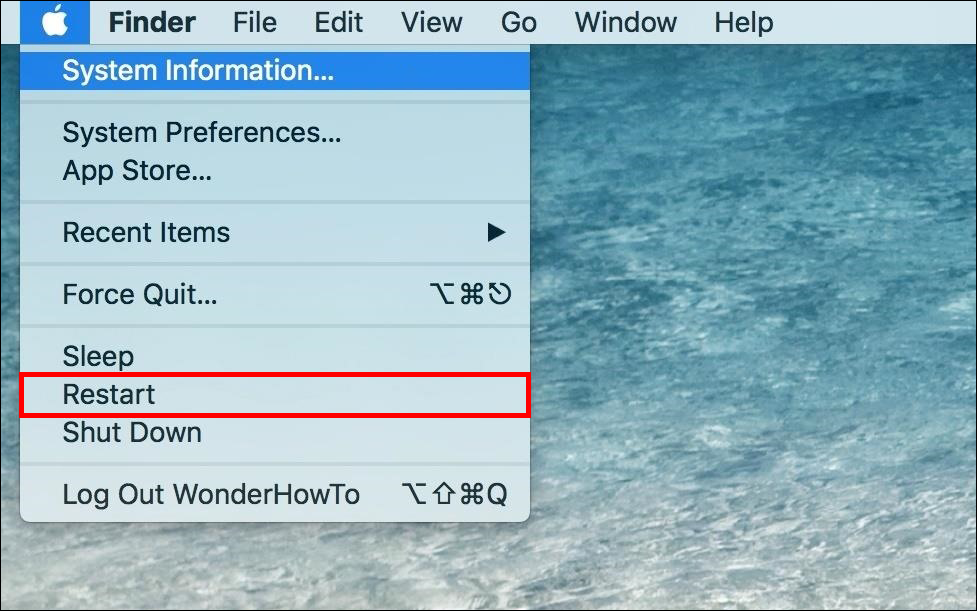
- Restart your Mac, or if it’s not powered on, turn it on.
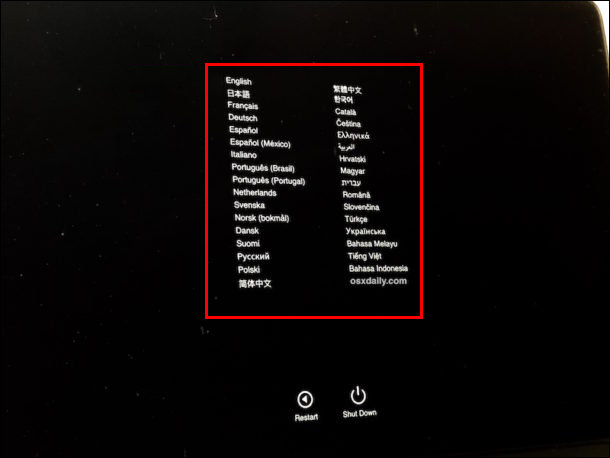
- Hold down the D key on your keyboard until a language selection screen appears.
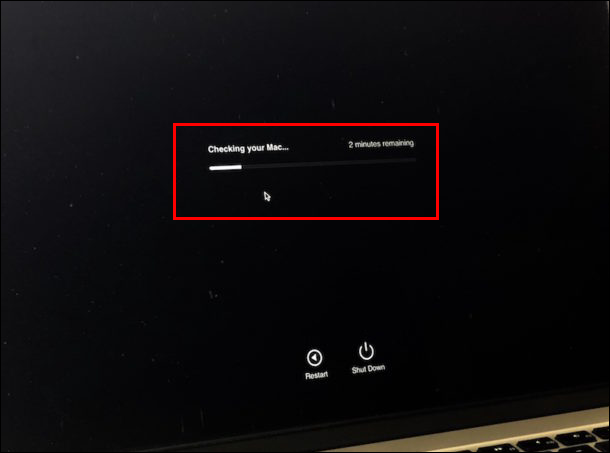
- A progress bar stating “checking your mac” will appear once you choose your language.
- Once the diagnostics are complete, it will recommend fixes for the faults found.
Update Your Hardware and Software
Various hardware problems are caused by obsolete firmware and software. For instance, a Mac’s incompatible USB driver prevents external hard drives from functioning. You must check for system updates by launching the App Store and selecting the Update tab. Install any available firmware and macOS software updates on the Mac.
Easy to Manage Hard Drives
Experiencing these kinds of problems can be very annoying. Instead of immediately going to service, we’ve created this guide for you to try and fix this error yourself. Most of these solutions will fix your problem and save money by avoiding tech support.
What solution worked best for you? How often do you encounter this error? Let us know in the comments!
Disclaimer: Some pages on this site may include an affiliate link. This does not effect our editorial in any way.


