Are you experiencing the dreaded stutter when playing Minecraft on Windows 10? If you find that your game isn’t flowing the way that it should, your RAM, or rather, the lack thereof may be the culprit.
This article will look at how to find out how if you have enough RAM to run Minecraft in Windows 10 and how to get more if you need it. Make stutters and frozen screens a thing of the past by giving the game more RAM to work with while you play.
How to Allocate More RAM to Minecraft in Windows 10
There are a couple of ways you can allocate more RAM to your Minecraft game. Before you start, it’s a good idea to find out how much RAM you have on your computer. If you don’t know how to do this, follow the steps below:
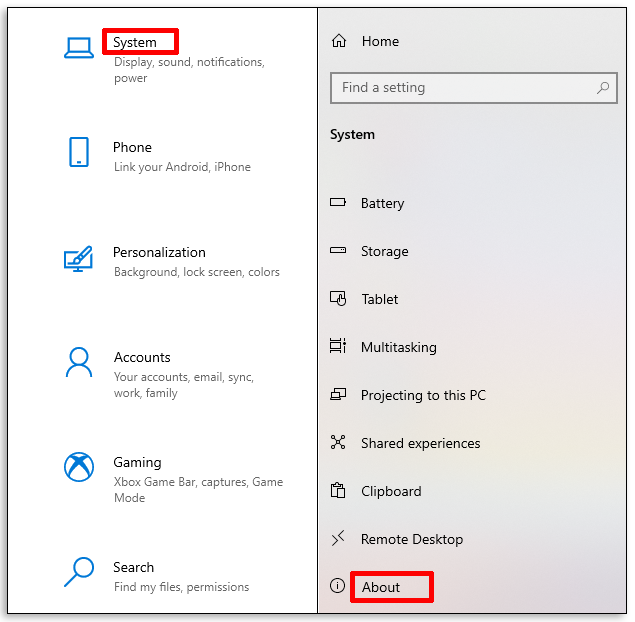
- Go to the Start menu and choose the “Settings menu” or select the gear icon.

- Select the “System” button and then select “About” from the left-hand pane.

- Under “Device Specifications”, check out your Installed RAM.
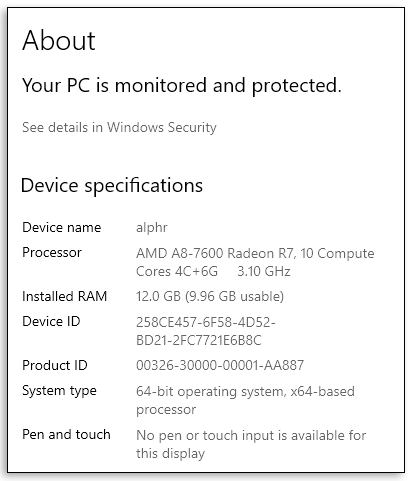
You should see two figures under Installed RAM. The first figure shows you what’s installed on your computer and the number in parenthesis is the RAM available for use.
According to the Microsoft Store, you need a minimum of 4 GB of RAM to run Minecraft for Windows 10. The recommended memory is 8 GB for an optimal gaming experience.
If you have an RTX system, you’re in luck. The game has official support for RTX graphic cards, but you do need 8 GB of RAM to run the game.
As an important side note:
If you have Minecraft for Windows 10 (i.e. the Bedrock Edition), it automatically allocates RAM according to your game requirements. Java versions of the game allow you to change RAM allocations. Both can be played on Windows 10 so it can get a little confusing.
So, let’s look at dedicating more RAM to Minecraft…
If you have the Java version of Minecraft, check out the steps below to allocate RAM via the Minecraft Launcher:
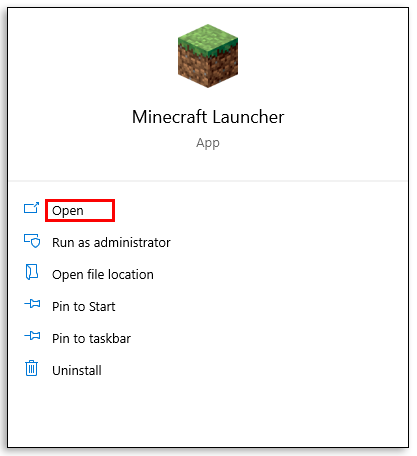
- Launch the Minecraft Launcher.
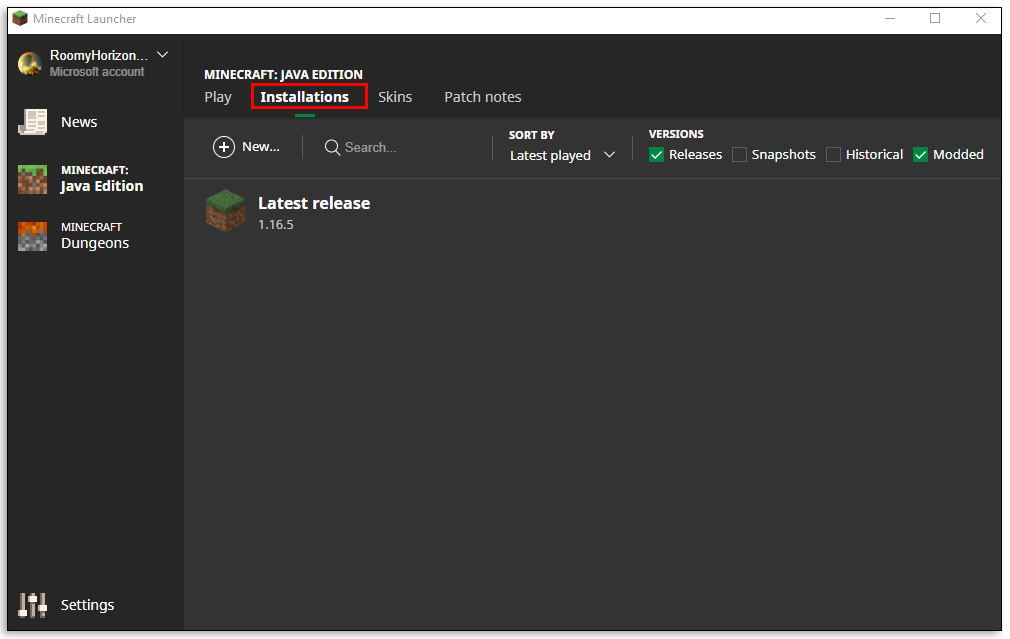
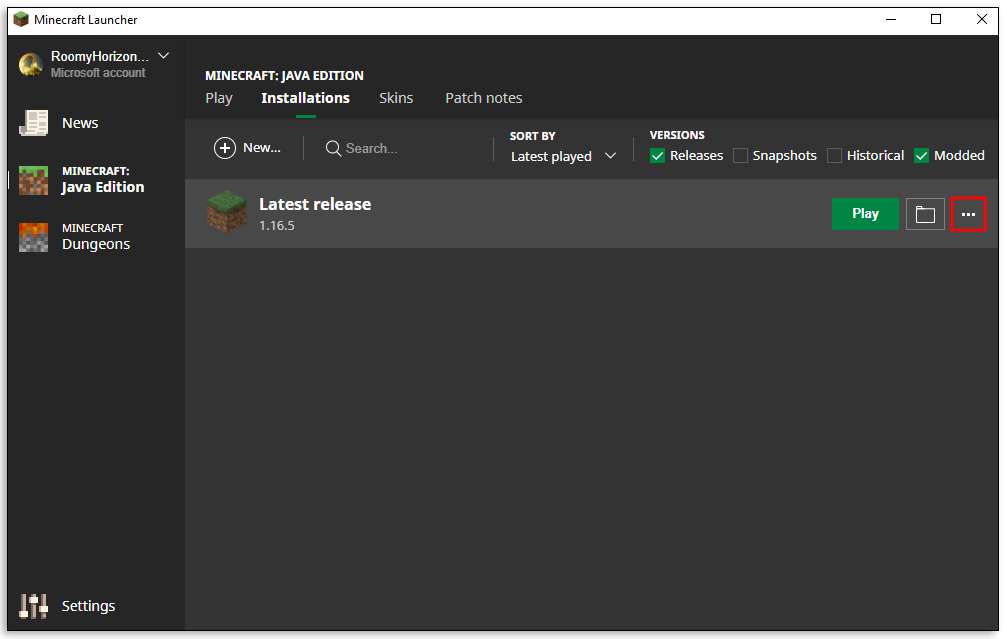
- Go to the “Installations” tab for the game.
- Find the “Latest release” option or create a new custom installation.
- Select the three horizontal dots next to the “Play” button (if you’re using the latest version).
- Select “Edit” from the drop-down menu.
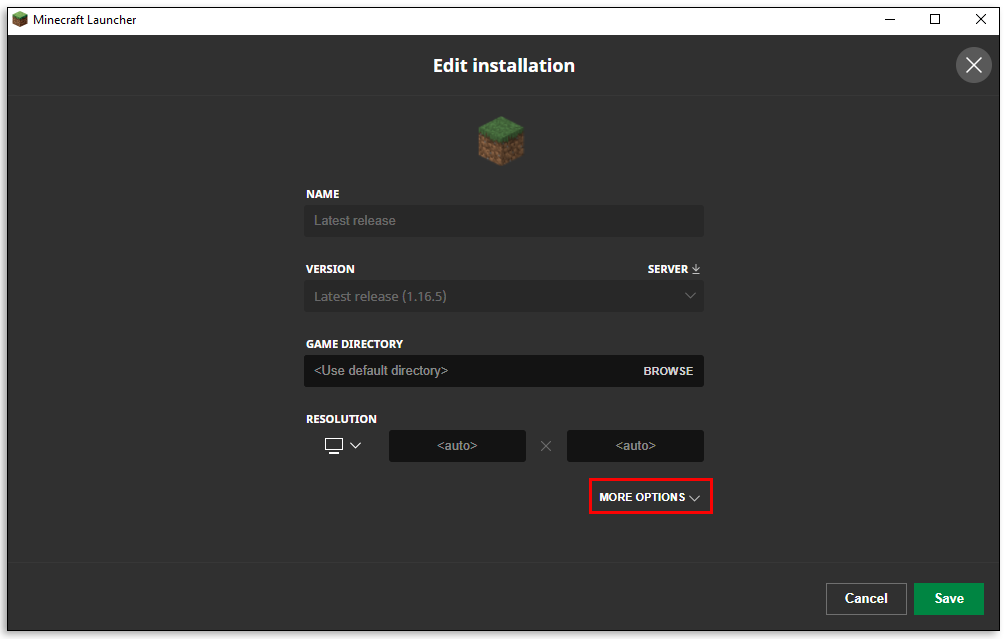
- In the next window, go to “More Options” and look for the “JVM Arguments” text box near the bottom.
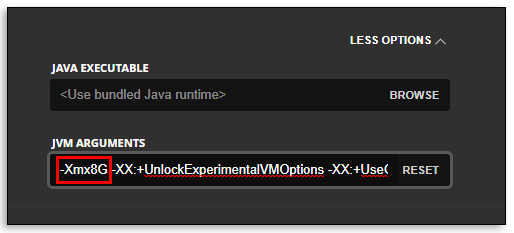
- You’re looking for the part of the code that says “
Xmx[number]G”. This is the amount of RAM allocated. - Change the number in
Xmx[number]Gto the RAM you’d like to allocate. For example, if you haveXmx4Git means that you have 4 GB of RAM allocated to the game. Change it toXmx8Gif you’d like 8GB of RAM instead. - Press the “Save” button and launch the game.


As a general rule, you never want to allocate more than half of your available RAM to Minecraft. Just because you allocate a certain amount of RAM to the game doesn’t necessarily mean that the game will use all of it for the game. It simply increases the available RAM pool to draw from.
Keep in mind that you’ll have to repeat these steps for each installation of Minecraft in your launcher if you like to play different versions.
How to Allocate More RAM to Minecraft Servers in Windows 10
Dedicating more RAM to Minecraft servers may sound like a complicated process, but you can make these changes in a few simple steps. Just follow the instructions below to get started:
- Go to the Minecraft server directory. It’s the folder that has the file Minecraft_server.exe. If you can’t find it, search for “Minecraft server” on your computer.
- Press the “Home” button and then “New Item”.
- Go to “Text Document”. The goal is to create a new text document in the server directory.
- Paste or type the following:
Java -Xmx##M -Xmx##M -exe Minecraft_Server.exe -o truePAUSE
Replace the # #s with the value you want to allocate in MB. So, 2Gb of RAM is 2048. - Go to “File” and “Save As…”
- Change the file type to “All Files”.
- Enter the file name as “file server launcher”.
- Change the extension type to .bat.
The new file is now your Minecraft server launcher. To run it with your new allocation, just double-click on the file.
How to Allocate More RAM to Minecraft 1.15.2
Allocating more RAM to different versions of Minecraft is a simple process. Take a look at the steps below to change RAM allocation for 1.15.2 and other versions of Minecraft using the Minecraft Launcher.
- Launch Minecraft using the launcher icon.
- Go to the “Installations” tab.
- Select the version you’d like to change.
- Select the three horizontal dots next to the green “play” button to open the drop-down menu.
- Choose “Edit” from the menu.
- Look for the text box called “JVM Arguments”.
- Look for the part of the script that says
-Xmx[number]G. For example, if you have 2GB of RAM allocated, it will say-Xmx2G. - Change the number to the new amount of RAM you’d like to use.
- Save the changes and launch the game.


How to Clean Up RAM on Windows 10
Restarting your computer is one of the simplest ways to clean up RAM on Windows 10. Old, stored data and programs/processes running in the background could take up RAM without your knowledge. Restarting a computer can, essentially, wipe the slate clean.
How to Optimize RAM on Windows 10
There are a few ways to make sure your RAM is optimized on Windows 10. Here are a few things you can try if you notice your computer running a bit sluggish:
1. Clear Your Cache
Sometimes you just need to do a little housekeeping for your computer. Holding onto cache information may help to reload pages faster, but it also uses up RAM to maintain. If you find your computer isn’t running at optimal speed, you may want to try clearing your cache.
2. Updating Software
Older versions of apps and software may be taking up more memory to process than they should. Making sure that all your software and applications are up to date can help ensure that each one is running at optimal speed with minimal RAM impact.
3. Monitor and Maintain Your Processes
You may not realize just how much RAM certain applications are taking up when they run in the background. It’s a good idea to regularly check to make sure you don’t have these RAM vampires sucking the life from your memory.
If you want to find out exactly how much memory is used on your computer, open the Task Manager by pressing “Ctrl+ Alt+Delete” simultaneously and go to the “Processes” tab. In the Memory column, you’ll be able to identify these RAM culprits and delete them as needed.
How to Get More Virtual Memory on Windows 10
Have you received a message from your computer telling you that you’re running low on virtual memory? If you have, one of the easiest ways to get more virtual memory is through the “Settings” menu.
- Go to the “Settings” menu.
- Choose the “System” button and then “About” in the left-hand pane.
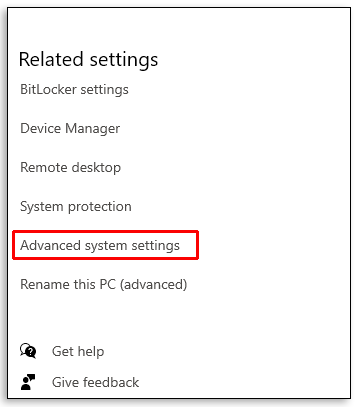
- Click “System info” under the “Related settings” section.
- Choose “Advanced system settings” from the options in the left-hand pane.
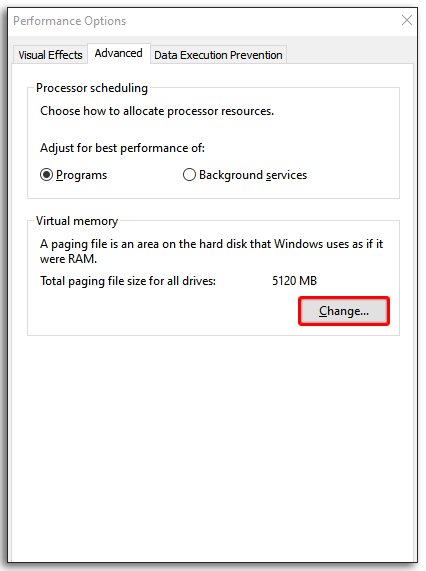
- In the new window, go to the “Advanced” tab and choose “Settings”.
- Choose the “Advanced” tab again and go to the section called “Virtual memory.”
- Select the “Change” button.
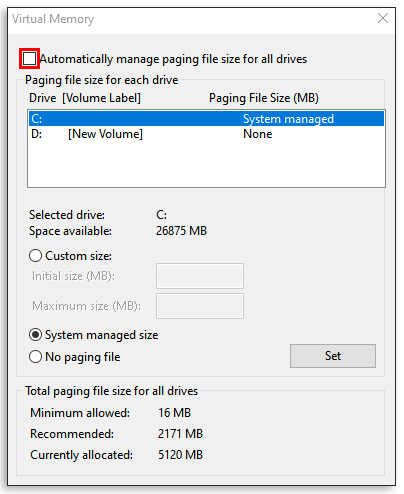
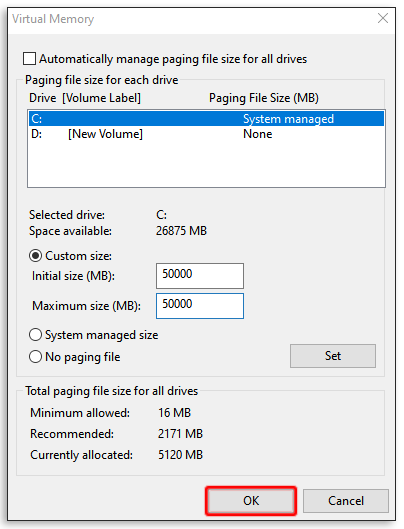
- Uncheck the box that says, “Automatically manage paging files size for all drives.”
- Go down to the “Custom Size” option and select it.
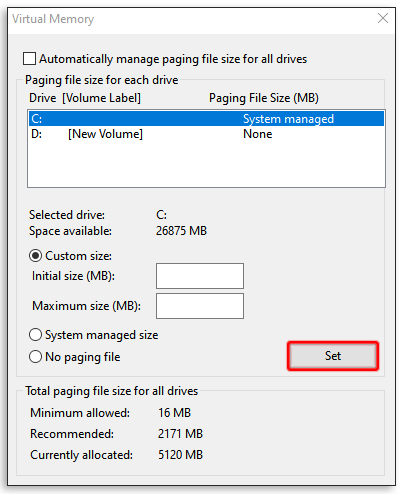
- Enter the parameters for the initial and max sizes (in MB) for the paging file.
- Press the “Set” button.
- Confirm by pressing the “Ok” button twice.
- Restart your computer.


Before you go down this road, though, you should know that changing these settings can cause serious problems to the way your computer runs if you don’t know what you’re doing. Use these steps as a last resort or talk to an expert before trying it on your own.
How to Allocate More RAM to Minecraft in the Launcher
Dedicating more RAM to Minecraft via launcher is as simple as changing a number. Follow the steps below to allocate more RAM:
- Open the Minecraft Launcher.
- Go to the “Installations” tab.
- Click the version that you’d like to change.
- Select the three white horizontal dots next to the green “Play” button.
- Choose “Edit” from the drop-down menu.
- Scroll down and find the text box called “JVM Arguments”.
- Look for this part of the script:
-Xmx[number]G
The number represents the amount of GB already dedicated to Minecraft. So, if you already have 2GB of RAM allocated to Minecraft, it’ll say “Xmx2G”. To change the amount of RAM, simply replace the number. - Save the changes and launch the game.
How to Check How Much RAM Minecraft Is Used in Windows 10
You can find out how much RAM Minecraft is using in real-time with Task Manager in Windows 10. If you need a refresher, this is how you access Task Manager:
Press Control + Alt + Delete
OR
Right-click on the Start menu icon and select “Task Manager”
The processes tab shows all the software and apps running on your computer at that moment. So, accessing it while running Minecraft can show you in real-time how much memory the game is taking up. Simply look under the Memory column to see it in megabytes.
Additional FAQs
How Much RAM Does Minecraft Require?
On a 64-bit system, the minimum RAM requirement for Minecraft is 4 GB to run the base game and the recommended RAM allocation is 8GB. Of course, if your running mods along with the base game, you’ll need more RAM to support it.
Prioritize Your RAM
Maxing out your Minecraft RAM allocation may seem like a good idea at the time but remember it’s at the cost of every other application on your computer. That’s why, as a general rule, most gamers don’t put more than half of their available RAM into the game.
If you’re scraping for more RAM, look for hidden software and applications running in the background. They may be eating up your RAM without you knowing it. Disabling them or closing them out before running Minecraft may improve game performance exponentially.
How much RAM do you allocate for Minecraft for Windows 10? Do you find that you need more when using mods for the game? Tell us about it in the comments section below.
Disclaimer: Some pages on this site may include an affiliate link. This does not effect our editorial in any way.