Changing drive letters in Windows certainly has its benefits. You can hide a specific drive from all apps on your computer, thus preventing these apps from writing on a specific partition or edit the drive letter after adding a new HDD or SSD.
If you’re looking to change drive letters in Windows 10, you’ve come to the right place. In this article, we’ll provide you with detailed steps on how to change or remove various drive letters.
How to Change a Drive Letter in Windows 10
There are a couple of different ways to change a drive letter in Windows 10. Below, we’ll show you how to do so with Disk Management. This is the most straightforward way to apply changes to your drive letters in Windows 10.
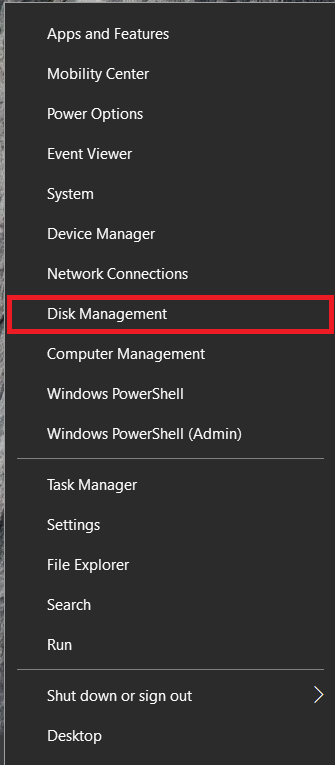
- Right-click on the Windows Start button and choose the Disk Management option from the menu.
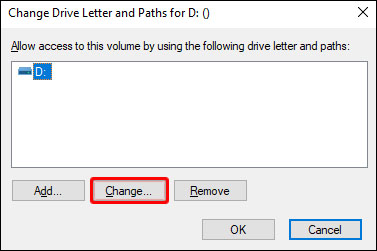
- Right-click on the drive you want to change a letter for and choose Change Drive Letter and Paths from the menu.

- Click Change. Windows will now ask you to assign a new name for your drive. You can choose from the remaining A-Z letters from the menu.
- Click OK.
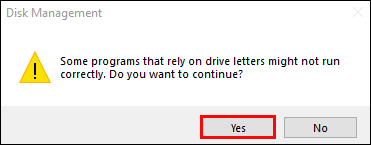
- Windows will let you know that apps that are stored on this partition might not work correctly, click Yes.


You have now successfully changed a drive letter in Windows 10.
How to Change Drive Letter in Windows 10 Using Command Prompt
Another way to change drive letters in Windows 10 is using Command Prompt. This process is relatively simple:
- Make sure you’re running your PC in Admin mode.
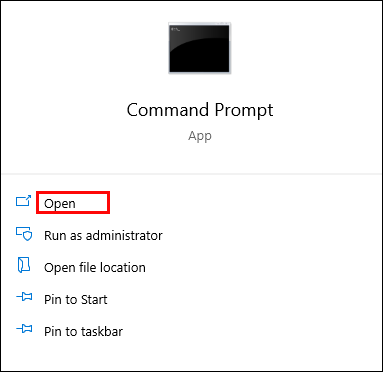
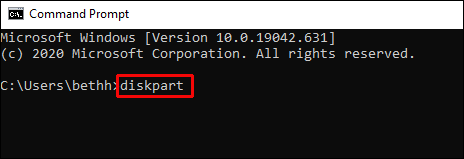
- Open Command Prompt. You can do so by typing “Command Prompt” in the search box and opening the App.
- Once you’re in, type “diskpart” and hit Enter.
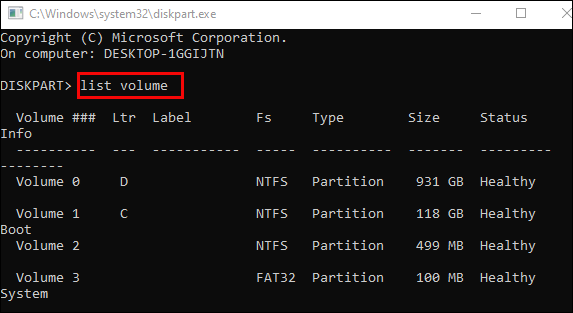
- Type “list volume” to get a list of all volumes available on your PC.
- Look at the ### output. Check for the volume number of the drive you want to change the letter of.
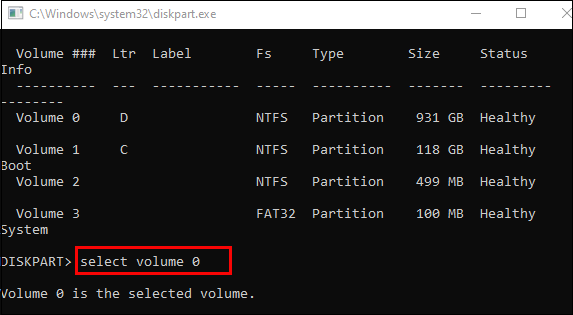
- To select the drive, type this command: “select volume [NUMBER].” Then replace [NUMBER] with the volume number your drive is located under.
- To change the drive letter, run this command: “assign letter=[X].” Then replace [X] with the letter you want to assign to your drive.


You have now changed your drive letter in Windows 10.
How to Remove a Drive Letter in Windows 10
If you want to remove a drive letter in Windows 10, you can do so from Desk Management. Just follow these simple steps:
- Right-click on your Windows Start button and choose Disk Management from the menu.
- Right-click on the drive you want to remove a letter for and choose Change Drive Letter and Paths from the menu.
- Click Remove in the dialog box. Windows will now warn you that folders that rely on this partition might not work correctly.
- Click OK to confirm the operation.

You have now successfully removed a drive letter in Windows 10. After removing a drive letter, you won’t be able to see it in your File Explorer any longer. Also, to remove a letter, you must sign in as the administrator.
How to Change a Network Drive Letter in Windows 10
Changing a network drive letter in Windows is a pretty straightforward process. Just follow these steps, and you’ll be good to go:
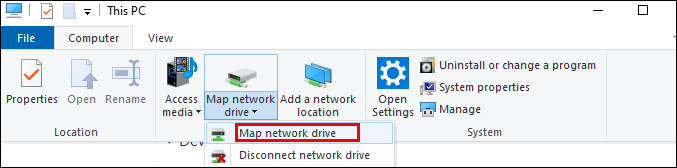
- Go to the This PC section of the File Explorer.
- At the top of the ribbon menu, click on Map network drive.
- A drop-down menu will appear, choose the Map network drive option.
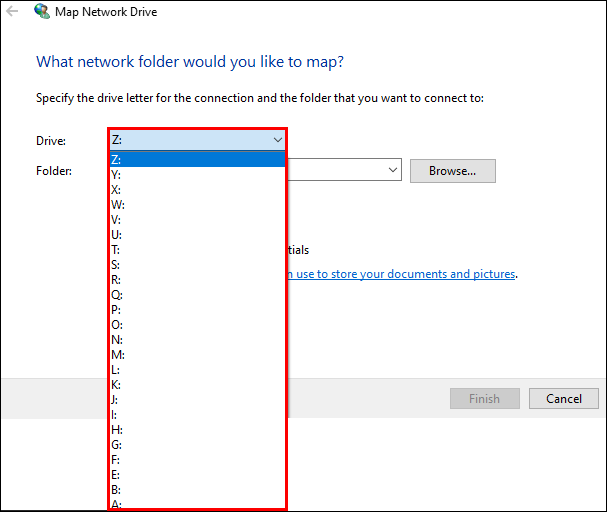
- A new window will open asking you to choose a drive letter for your network folder. Go ahead and choose a new letter.
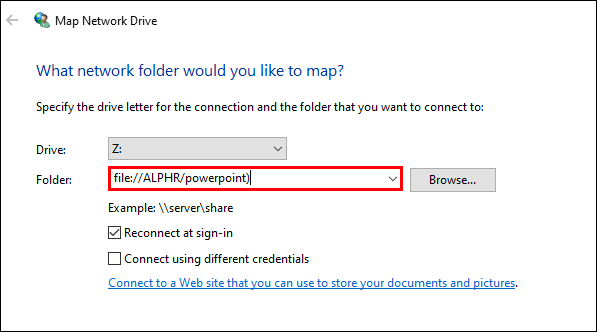
- Enter the full address of your network share into the box labeled Folder. You can also browse for it.
- Click Finish.


Additional Steps if You Receive an Error Message:
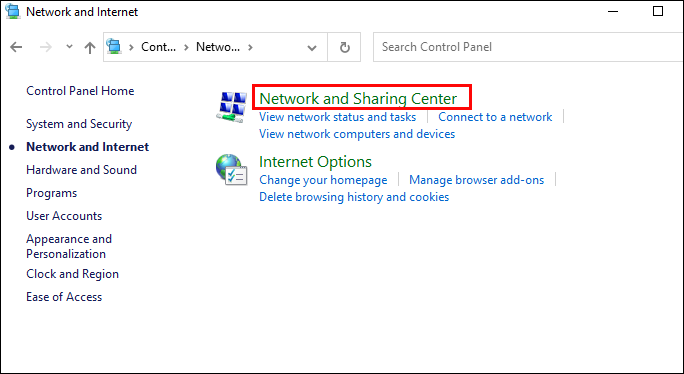
- Go to Control Panel.
- Then, select Network and Internet.
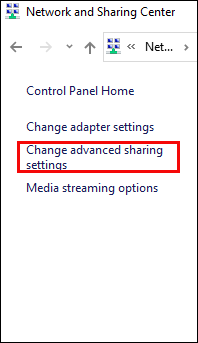
- Click on Network and Sharing Center.
- Now, choose the Change advanced sharing settings option on the right-side.
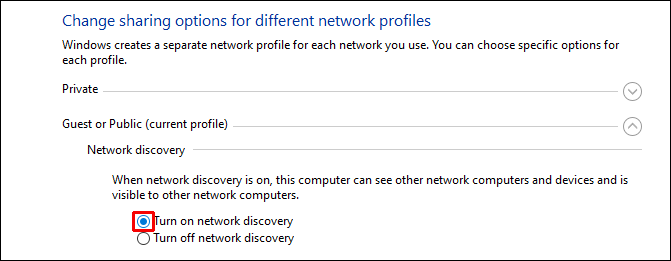
- Click on Turn on network discovery.
- Save your changes.


You’ll now see your network share in the This PC screen.
How to Change a USB Drive Letter in Windows 10
You might want to change a USB drive letter in Windows 10 if Window Explorer doesn’t recognize the external hard drive. For this or any other reason, just follow the simple steps shown above for an HDD/SSD to change your USB drive letter.
How to Change DVD Drive Letter in Windows 10
Changing a DVD drive letter in Windows 10 can be done easily through Disk Management. Just follow the steps shown above to also change the DVD drive letter.
You have now successfully changed your DVD drive letter in Windows 10.
How to Change Recovery Drive Letter in Windows 10
Changing your recovery drive will only take a few seconds. Just as before, follow the directions shown previously to quickly change your recovery drive letter.
How to Change Boot Drive Letter in Windows 10
Unfortunately, changing your boot drive letter in Windows is not possible through Desk Management.
We only recommend changing your boot drive in case of an emergency. Otherwise, you shouldn’t make any changes to your boot drive. If you make a wrong step, you might not be able to run your system properly. For that reason, please follow the steps we’ve provided carefully. You should also make a system backup before proceeding any further.
Below, we’ll explain how to swap drive C and D letters. To assign your C drive with another letter, you should rename the \DosDevice\letter: value to another letter that’s not already in use.
Also, before you mess with the Register, it’s a good idea to create a copy of the Register before it’s been edited.
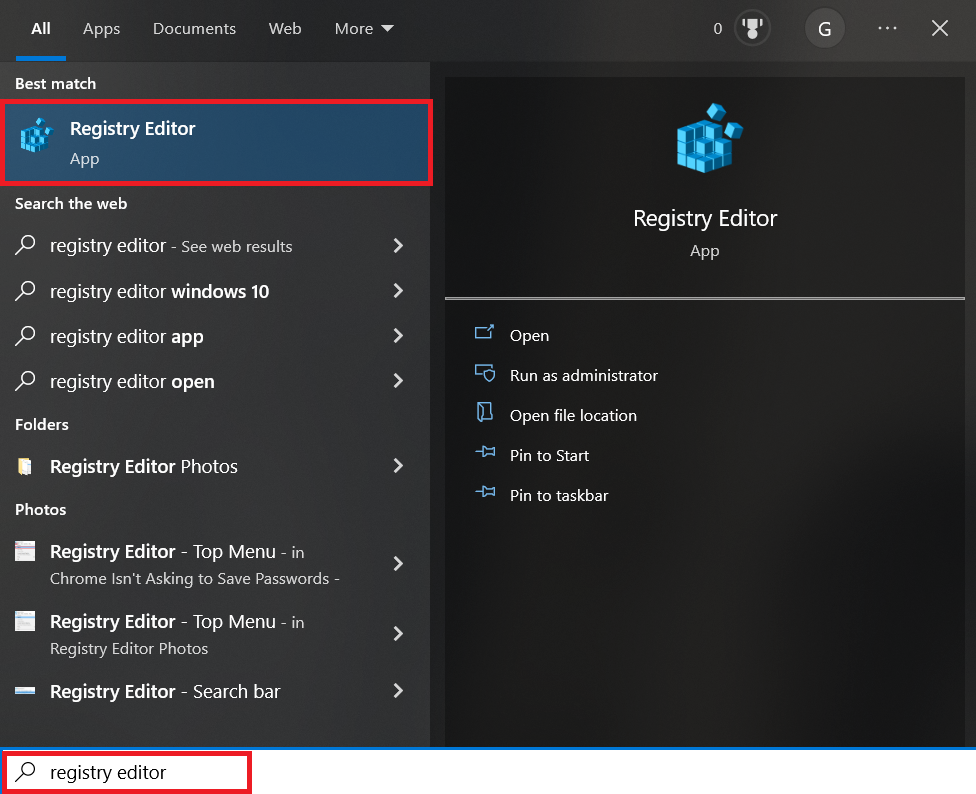
- Start typing “registry editor” into the Search bar and open it up.
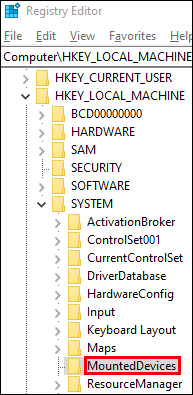
- Now, navigate to:
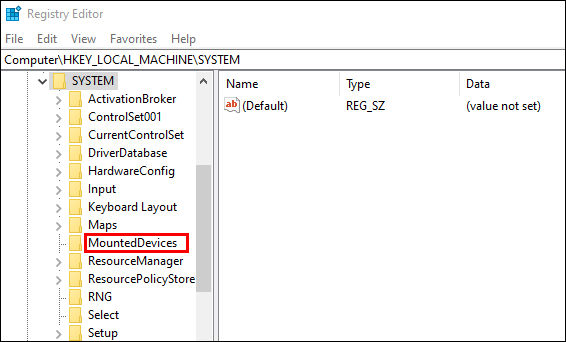
HKEY_LOCAL_MACHINE\SYSTEM\MountedDevices. - Click on MountedDevices.
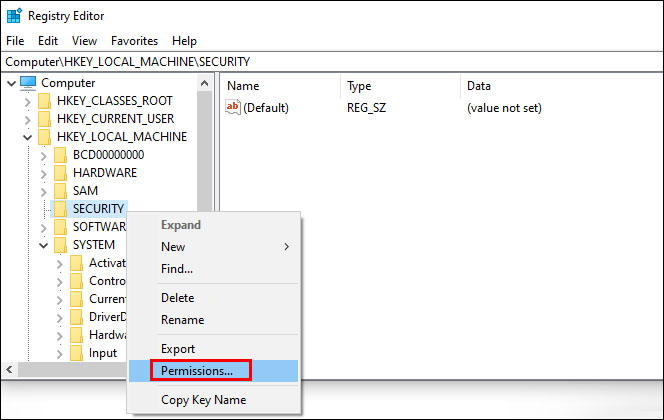
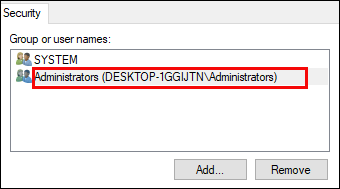
- Head over to the Security menu and click on Permissions.
- Verify you have complete control as admin.
- Close the Registry Editor, wait a few seconds, and then open it back up.
- Again, navigate to
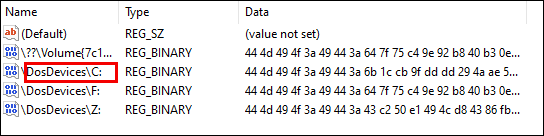
HKEY_LOCAL_MACHINE\SYSTEM\MountedDevices. - Look for the new letter for your drive. Find \DosDevice\C: and right-click on it.
- Click Rename.
- Rename the file to a new drive letter \DosDevices\Z:. This will empty your C partition.
- Locate the drive you wish to change the letter of. Find \DosDevice\D:. Right-click on it and click Rename.
- Change the name to the new drive letter \DosDevice\C:.
- Choose the appropriate value for \DosDevices\Z: and click Rename.
- Change the name to \DosDevices\D:.
- Close Regedit and open it back up.
- Change the Admin permission settings to Read Only.
- Restart your PC.
You have now successfully changed your boot drive letter in Windows 10.
Additional FAQs
Is It Safe to Change Drive Letters?
Changing drive letters is not a problem in itself. But if your computer needs to run a file that’s written in that very drive, you might have an issue. It’s not just for any reason that Windows warns you before changing a drive letter.
Generally, it’s not recommended to change drive letters unless that would help solve a specific issue. For example, if your Windows Explorer doesn’t recognize an external device under a certain driver, it’s okay to change its name.
There are some drives you can change the letters of without consequences. For example, to a partition that has files you rarely use. Also, you can change an external drive’s letter without problems.
Changing Drive Letters in Windows 10
In this article, we’ve provided you with some useful tips on how to change drive letters in Windows 10. Remember, only do this if strictly necessary, as it might cause some apps on your computer to not run properly.
Have you ever had to change your drive letters for a specific reason? Did you run into any problems? Share your experiences in the comments section below.
Disclaimer: Some pages on this site may include an affiliate link. This does not effect our editorial in any way.


