Formatting your SD card is a useful practice for many reasons. It’s a quick way of deleting old and unnecessary files from the storage format. This way, the card remains clean and ready to use on various devices. But how exactly do you format an SD card?
In this article, we’ll give you a step-by-step guide to formatting a Secure Digital, or SD, card on several devices.
How to Format an SD Card
In most cases, formatting an SD card takes just a few clicks or taps, depending on the device you’re using. However, there might be some impediments to formatting that may delay the process, such as write protection. But no worries – we’re about to cover every detail of formatting your SD card and help you overcome potential obstacles.
How to Format an SD Card on Mac
Formatting your SD card on Mac shouldn’t give you a hard time:
- Connect the SD card to the computer. You can do this by inserting the card into the SD slot. If you want to format a micro SD card, put it into an SD adapter cartridge and insert it into the SD slot.
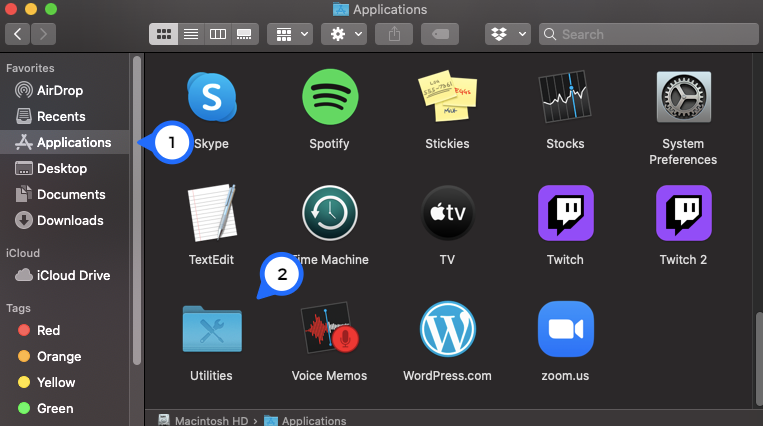
- Go to the Finder and click “Applications,” followed by “Utilities.”

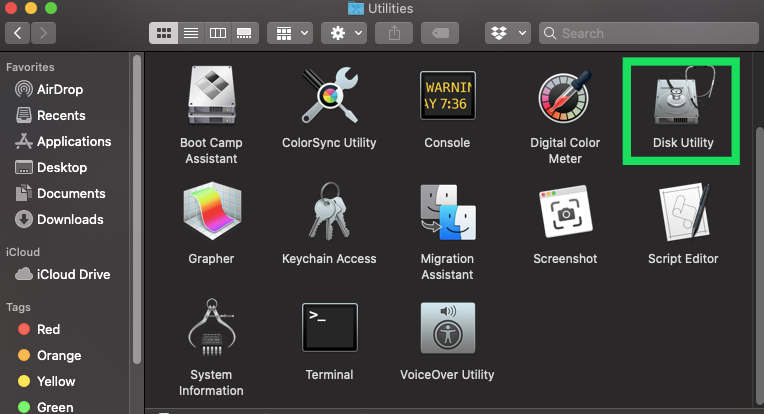
- Open the “Disk Utility” app.
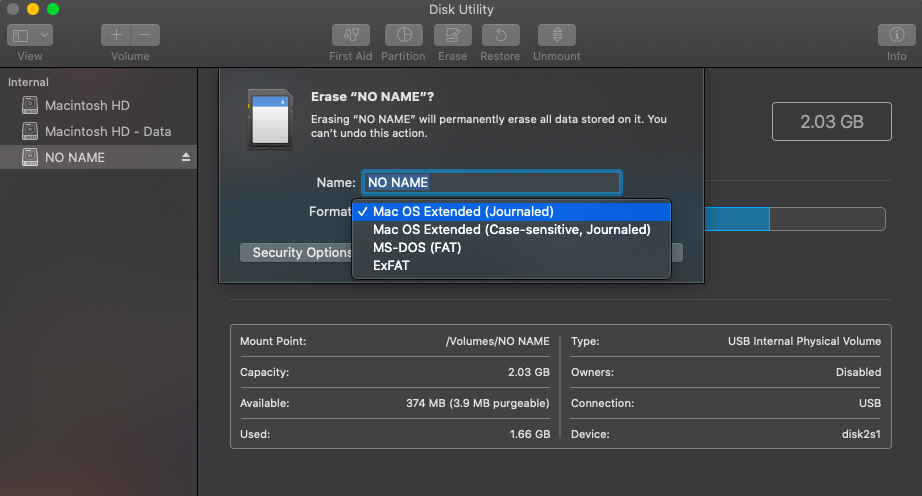
- On the “Disk Utility” screen, find your SD card in the “External” section. If it hasn’t already been formatted, it should be named “UNTITLED” or “NO NAME.”
- Select the card and choose the “Erase” option from the functions at the top of the screen.
- In the next pop-up window, select the “Format” drop-down menu and select your desired format. You can also type in the name for your card, but this is optional.
- Select the “Erase” function.
- The screen will then read “Unmounting.” Wait for the process to complete, and you’re done.

How to Format an SD Card on Windows 10
Formatting an SD Card on Windows 10 is also straightforward:
- Insert your SD card into the computer.
- Open your “File Explorer.”
- Right-click on the SD card and choose “Format.”
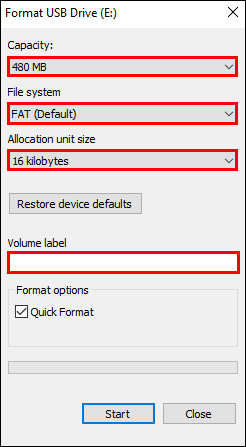
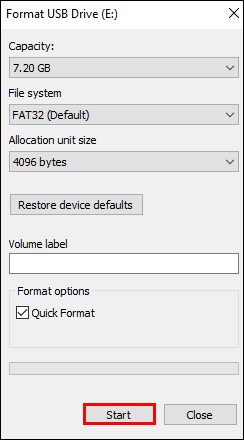
- From the “Format” menu, make sure that the “Capacity,” “File System,” “Volume Label,” and “Allocation” unit size are properly configured before moving on.
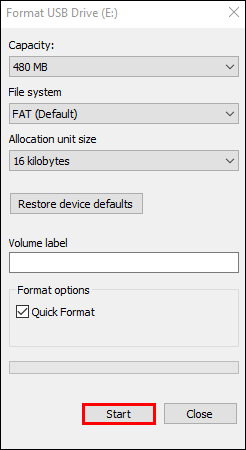
- Press “Start” at the bottom of the menu.
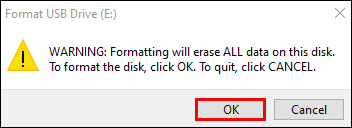
- A warning pop-up window will appear, and you’ll need to hit “OK” to proceed.
- If the “Format Complete” window shows up, press “OK,” and that’s it.

How to Format an SD Card for Android Phone
You can also format your SD card on an Android device without using your computer:
- Go to your phone’s “Settings.”
- Select “Device Care/Device Maintenance.”
- Choose “Storage” and hit the “Advanced” button.
- Under the “Portable” storage menu, select “SD Card.”
- Hit the “Format” button, read the following message, and choose “Format SD Card.”

How to Format an SD Card on a Computer
Whether you’re using a Windows PC or a Mac, you can format your SD card according to the steps we described above. Just refer to the second or third section, depending on your device, and follow the steps.
How to Format an SD Card to Fat32
The easiest way to format an SD card to Fat32 is by using the “File Explorer” option on your computer:
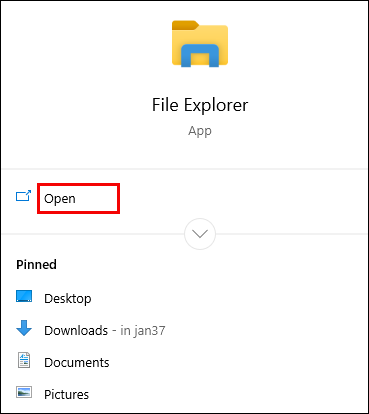
- Go to the “Start” menu and choose “File Explorer.”
- Under the “Devices and Drives” section, choose the SD card you want to format.
- Right-click on the SD card and select “Format.”
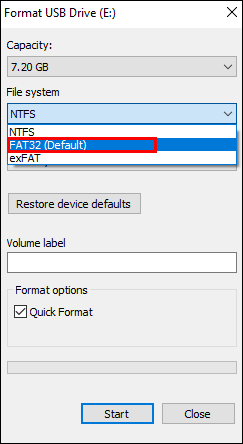
- The Fat32 format should be the default option. If not, select the format under the “File Options” section.
- Hit “START,” and that’s all there is to it.

You can also go to “DiskPart” and format the SD Card from there:
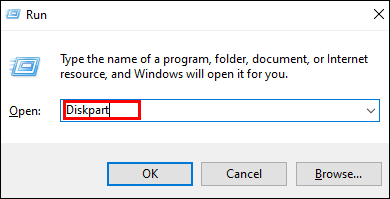
- Insert the SD card and open “Cmd” by pressing the Windows icon and “R” on the keyboard.
- Type in “diskpart” and press the “Enter” button to launch it. You’ll now need to enter several commands.
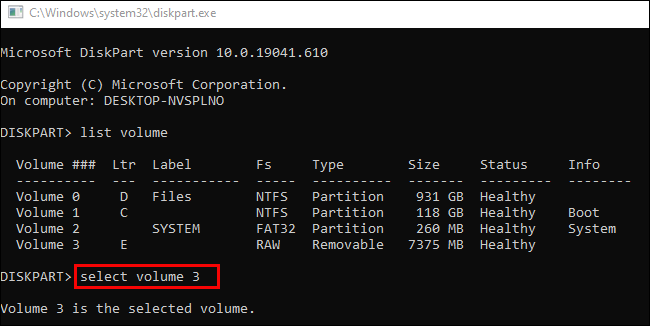
- First, type in “list volume” and hit “Enter.”
- Second, type in “select volume X,” where the “X” is the SD card drive letter.
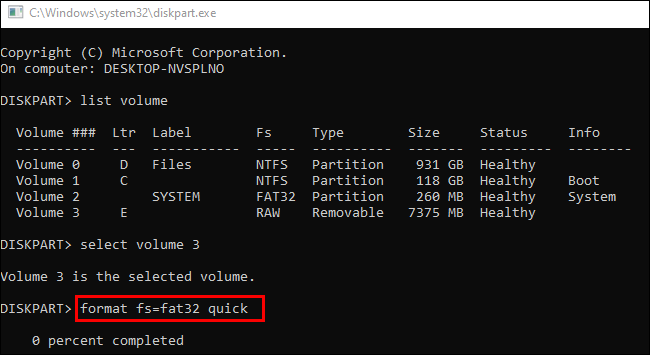
- Type in “format fs=fat32 quick” and press “Enter.”
- To finish, type in “Exit” and hit “Enter. “


How to Format an SD Card for a Camera
Here’s how to format your SD Card on a digital camera:
- First, back up your SD card to a cloud storage service or your computer.
- Make sure your camera is fully charged.
- Turn the camera off and insert the card into the correct slot.
- Turn the camera back on and go to the “Menu. “
- In the “Camera Display” section, choose “Setup,” followed by “Format” or “Format Memory Card.”
- Choose “OK” and wait for the camera to format the card.
- Once the process is complete, shut the camera off, and you can now use your formatted SD card.
How to Format an SD Card for a Trail Camera
Formatting your SD card is an option if you have a Trail Camera (a camera used for wildlife photography that is activated by movement and/or the body temperature of the subject) as well:
- Insert your card in the Trail Cam Buddy or other SD card reader and place it into your computer’s USB slot.
- Backup or copy the SD card files to avoid losing important files.
- Go to “My Computer” and right-click on the removable drive representing the SD card.
- Select “exFat” in the “File System” section if your card is larger than 32 GB. If it has 32 GB or less, select “Fat32.”
- In the “Allocation unit size” section, select “Default allocation size.”
- Press “Start” and close the window when the process is over.
How to Format an SD Card for Switch
Formatting an SD card on your Nintendo Switch is relatively simple:
- Insert your card into the Nintendo Switch and turn the Switch on.
- Choose “Settings” from your “Home” screen.
- Tap “System” at the bottom of the “Menu.”
- Choose “Formatting Options.”
- Press “Format micro SD Card.”
- Hit the “Continue” button, and that’s it.
How Do You Format an SD Card That Is Write-Protected?
If your SD card is write-protected, you’ll first need to remove the protection to format the card. You can try several methods to do this:
Removing the Physical Write-protection Switch
- Disconnect the SD card from your computer and look for a small switch on the bottom or the side of the card.
- See if the switch is positioned to “On” the unlocked side. If not, switch it to “Off” to unlock your card.
Using Anti-Virus Software
- Download and open your anti-virus software on the PC.
- Insert the card into the computer.
- Let your anti-virus software scan and clean the card, which will remove the write protection.
Running the DiskPart
- Connect the card to your PC.
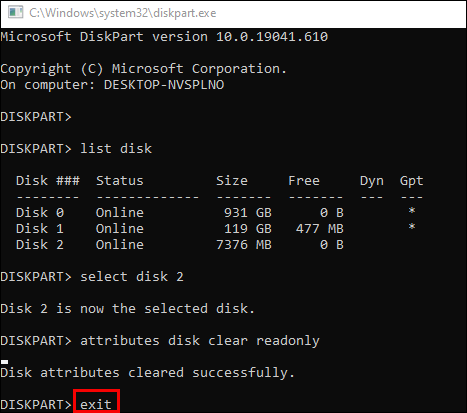
- Press the Windows button and “X” simultaneously to open a “cmd” window.
- Type in “diskpart” and hit “Enter.”
- Type in the following commands and press “Enter” each time: “list disk,” “select disk X” (X is the drive letter of your card), and “attributes disk clear readonly”.
- Wait until the removal is complete and leave the DiskPart by typing “Exit” and hitting “Enter.”

Once you’re removed the write protection, access the “File Explorer” on your computer and follow the rest of the steps from the second section to format your SD card.
How to Tell If an SD Card Is Partitioned?
If your card has been partitioned, it means that it has multiple drives. To determine whether this is the case, you can again use the “DiskPart” function:
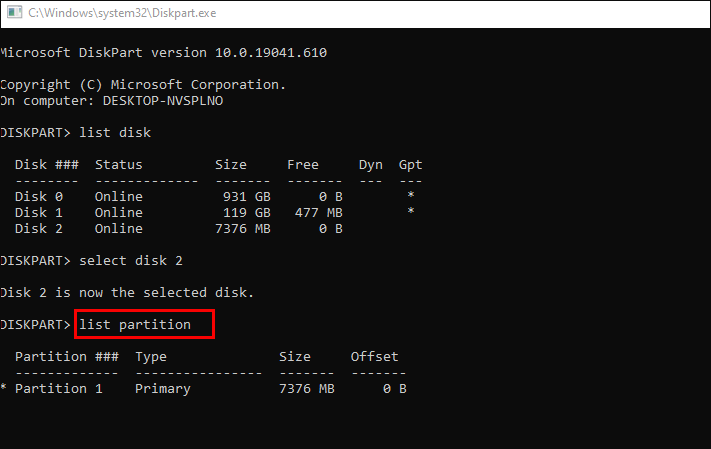
- Hit the “Windows “button and “X” to launch a “cmd” window. Type in “diskpart” and press “Enter” to open the “DiskPart” window.
- Type in “list disk” to see the drives connected to your PC. The disk number should be the same as in the Disk Management tool.
- If the number is 1, type in “select disk 1.”
- To see if the card has any partitions, type in “list partition.” If the card has any, they will appear on the list.
Additional FAQs
If the above suggestions didn’t answer your inquiries, here are some other possible solutions:
How Often Should I Format an SD Card?
A rule of thumb says that you should format your camera’s SD card after each photoshoot. Once you download the card and copy the files in multiple places, format the card before reusing it. This will keep the card storage much cleaner.
What Format Should My SD Card Be in?
The Fat32 format has better compatibility, but you should typically use it if your card contains 32 GB or less. For larger cards, you’re usually better off with the exFat format.
How Do I Force Format an SD Card?
If your SD card doesn’t format for some reason, you can use this method to force-format it:
• Back up the data on your card.
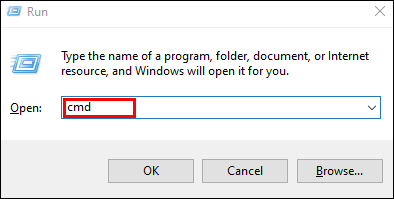
• Hit the “Windows” key and the “R” button at the same time.
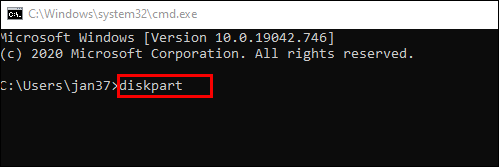
• Type in “cmd” in the box and press “Enter” to open cmd.exe.
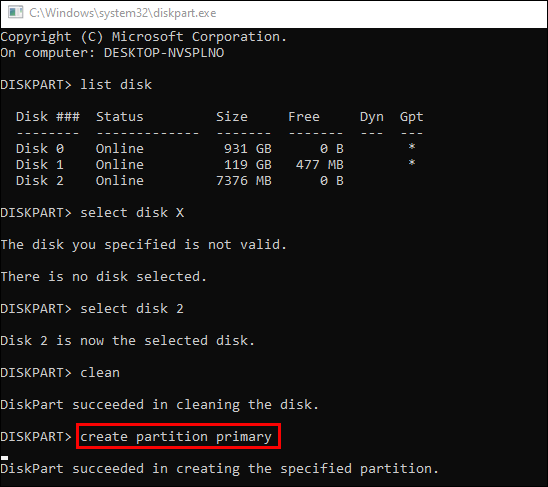
• Enter “diskpart” to open “Diskpart Utility.”
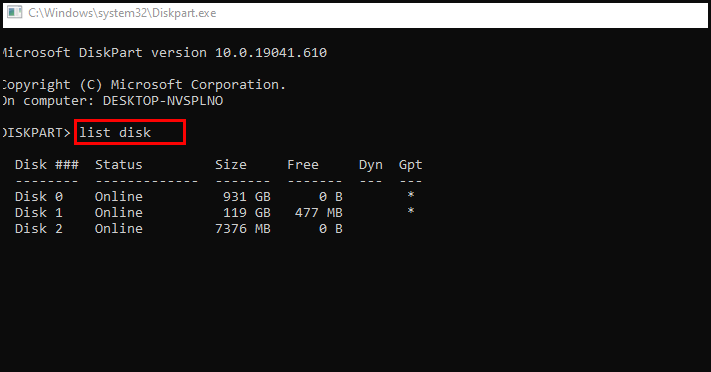
• Type in “list disk” to see your computer drives.
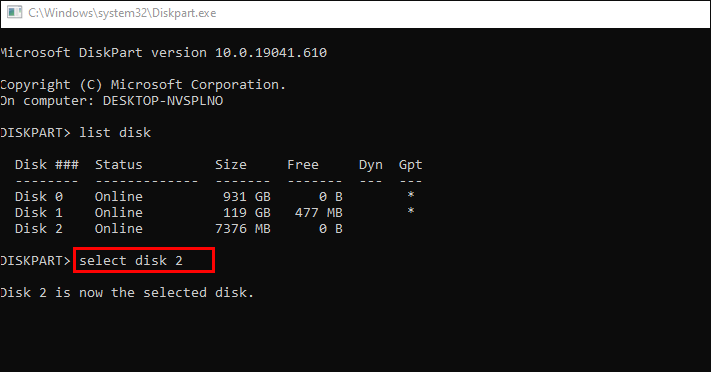
• Enter “select disk X” (“X” is the drive number of the SD card).
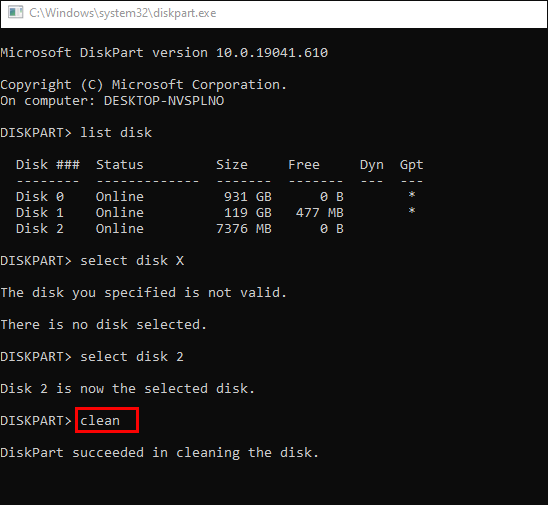
• Type in “clean” to start the clean utility. This option will wipe all the data on your card (which is why you should back it up beforehand).
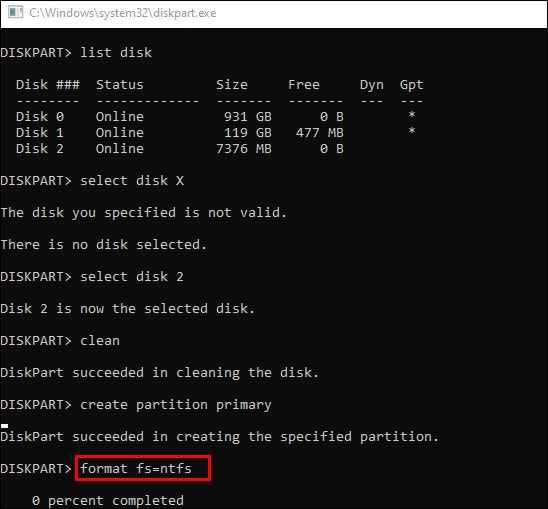
• Enter “create partition primary” to set up a new partition.
• Type “format fs=ntfs” or “format fs=fat32” to format the partition.
What Does It Mean to Format an SD Card?
When you format an SD card, you’re cleaning the card by removing all data from the card (low-level formatting) and setting up a new file system (high-level formatting).
Do You Need to Format a New SD Card?
Formatting a new SD card is a good idea for many reasons. But primarily, formatting it before using the card on your device will ensure that it’s ready for the particular device.
How Do You Format an SD Card?
You can format your SD card on various devices, such as Windows or Mac PC, Android phones, Nintendo Switch or digital cameras. We’ve gone through the process for each device, so check out the section you need and start formatting your card.
Your Turn
All in all, you can format an SD card in various ways. With this guide, formatting on any device shouldn’t give you a hard time. Therefore, remove leftover files on your SD card and format it regularly to keep it clean and neatly organized.
Disclaimer: Some pages on this site may include an affiliate link. This does not effect our editorial in any way.