Port forwarding is a way of routing incoming and outgoing data traffic between your home network and remote servers. To connect to the Internet, each device uses a unique IP address that has multiple ports with which it establishes communication.
Due to security reasons, each router that handles this kind of communication uses only a selection of ports to provide essential services. If you want to open up a port for your online game server or a specific application, you’ll need to create a new port forwarding rule on your router.
How to Forward Ports on Windows 10
Adding a forwarding rule to your Windows 10 computer is done through the Windows Security menu. To add a custom rule, follow the steps below.
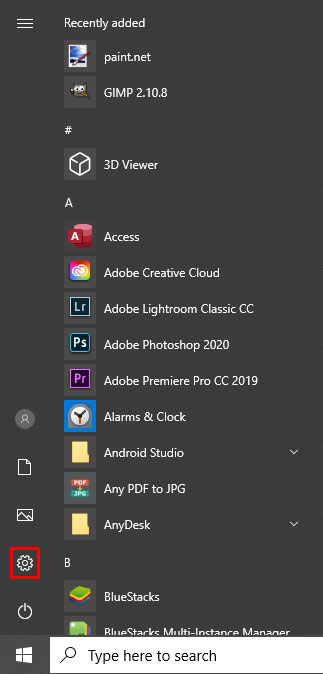
- Click the Windows logo button in the bottom left corner of your screen.

- Click the Settings icon. It’s the one looking like a cog, right above the Windows logo.
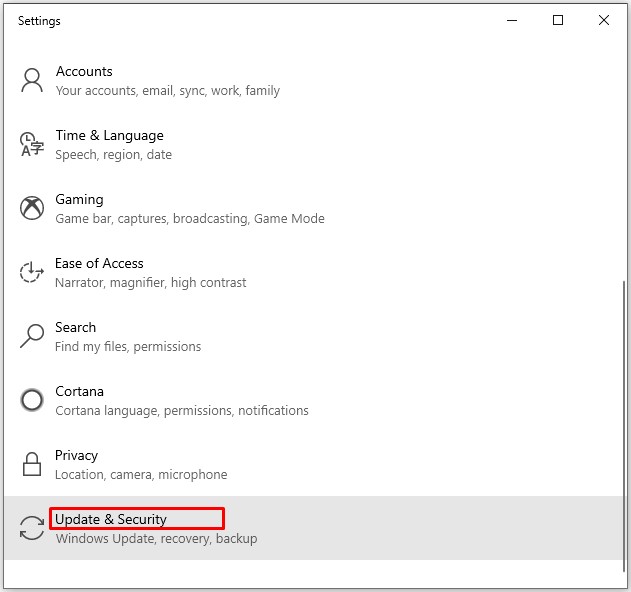
- From the “Settings” menu, click “Update & Security.”
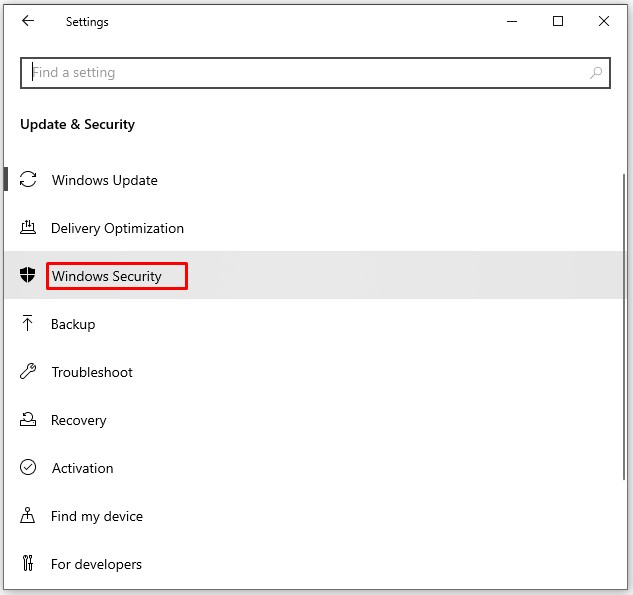
- From the menu to the left, click “Windows Security.”
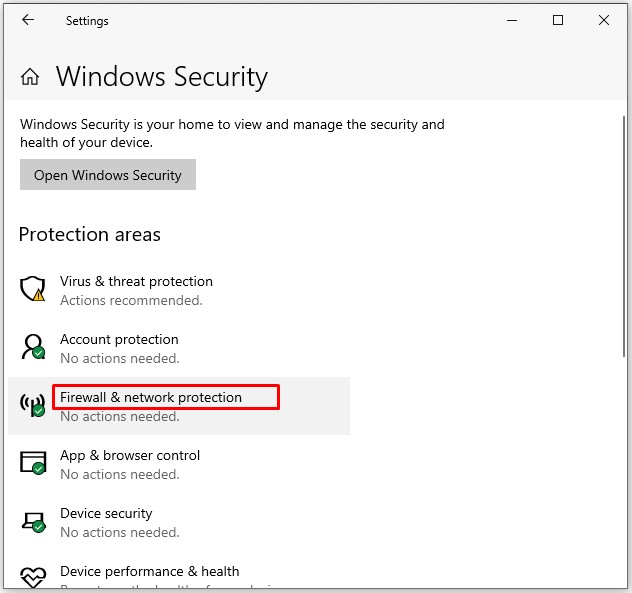
- Click “Firewall & network protection” in the main window.
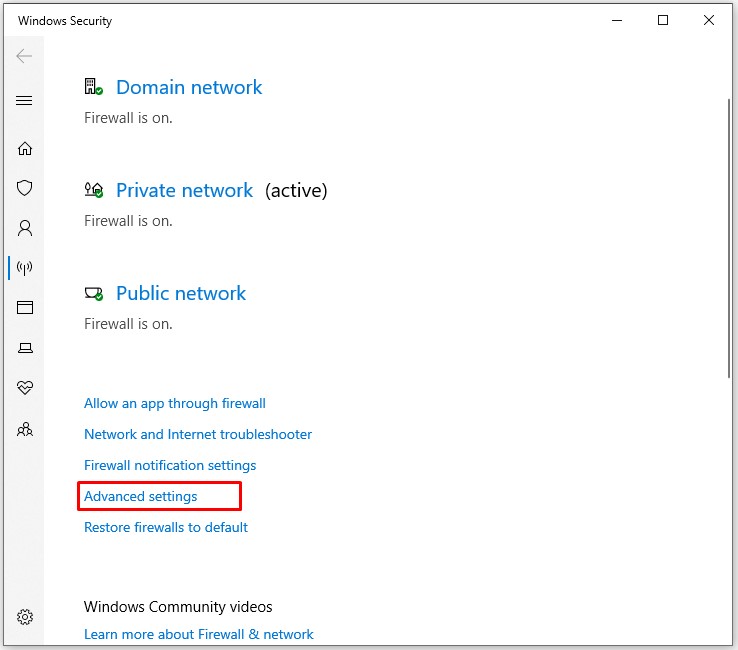
- A separate “Windows Security” window opens. Click “Advanced settings” in the lower portion of the main window.
- A “User Account Control” window might pop up, asking you to confirm this action. Click “Yes.”
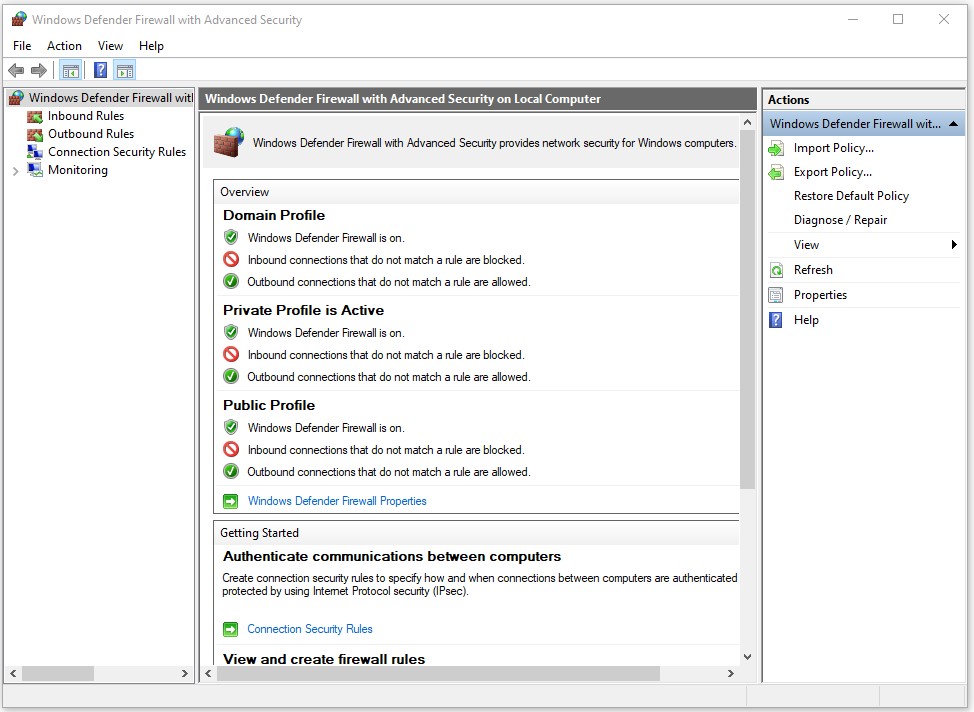
- Now the separate menu opens, titled “Windows Defender Firewall with Advanced Security.”
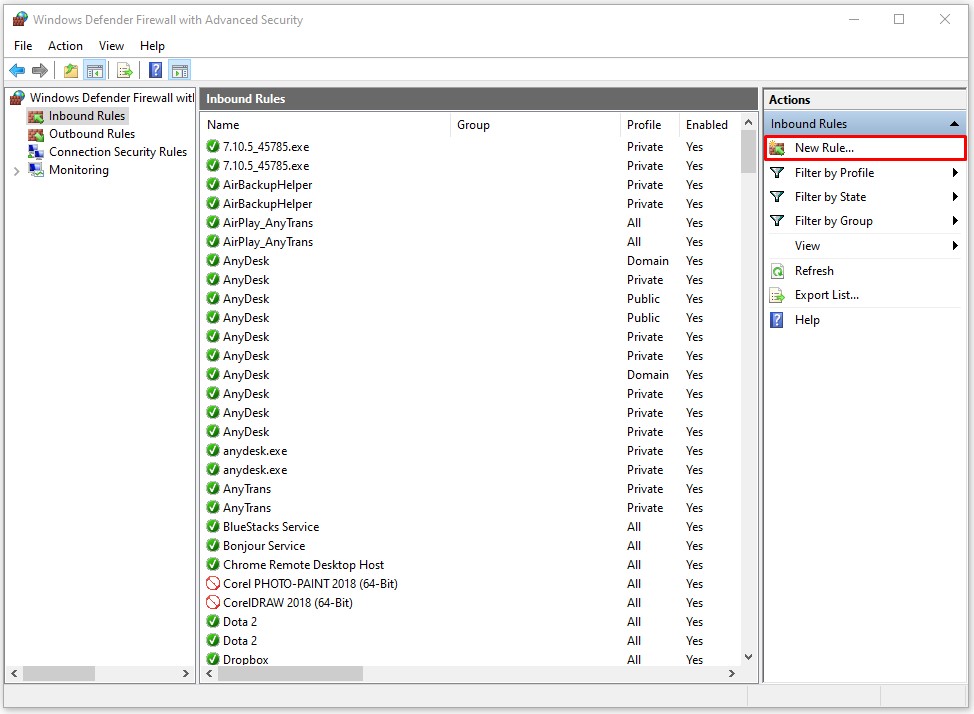
- Click “Inbound Rules” on the menu to the left. In the main portion of the window, you should now see various rules you already have in your system.
- Click “New Rule…” from the menu to the right.
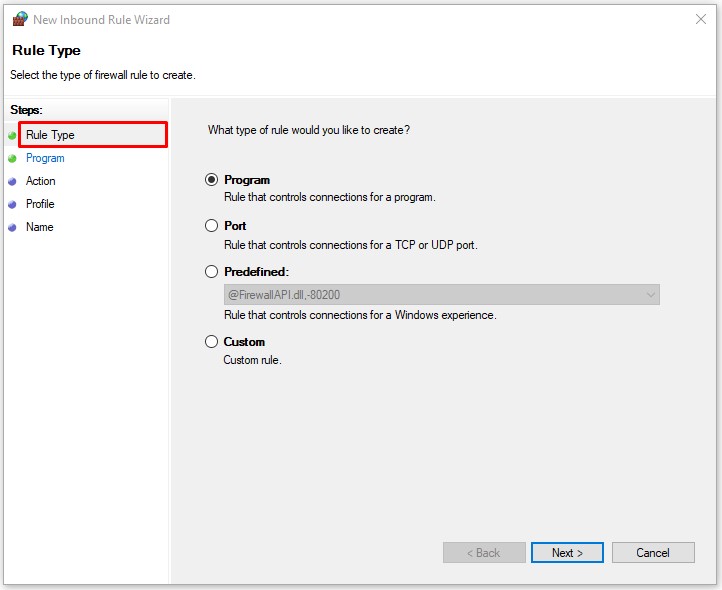
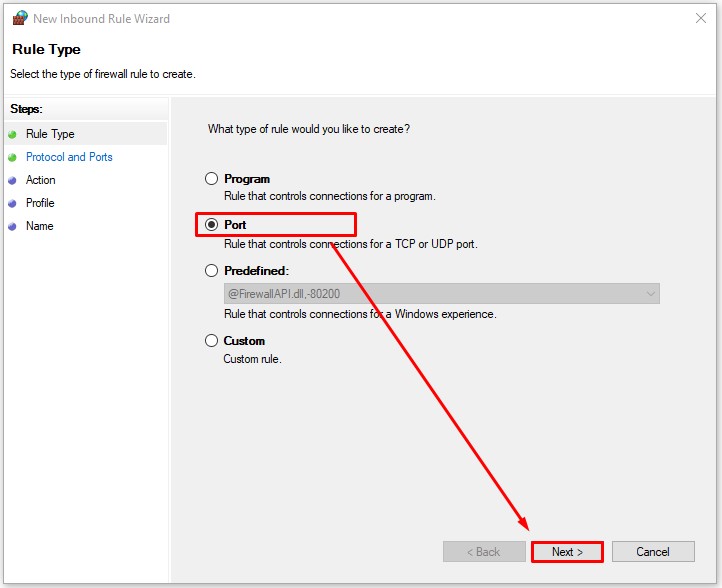
- The “New Inbound Rule Wizard” window opens. Click “Rule Type” on the left menu.
- Check the “Port” radio button on the main screen and click “Next.”
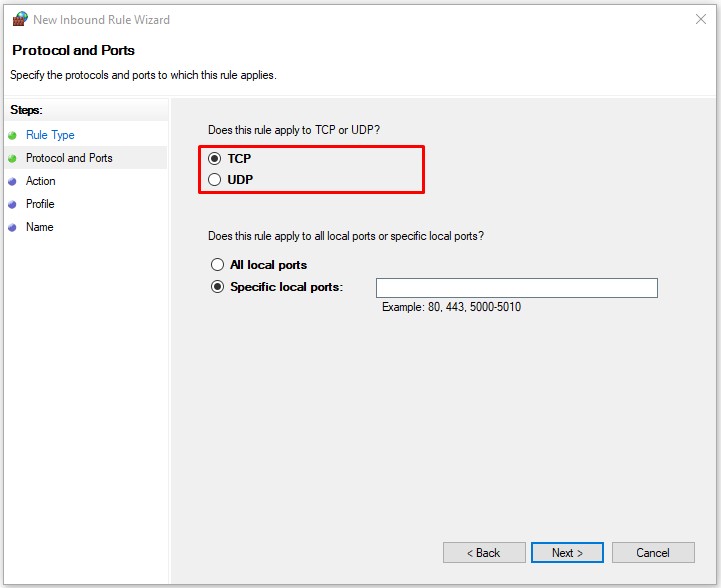
- Depending on which protocol you want to use, either check the “TCP” or “UDP” radio button.
- Check the “Specific local ports” radio button.
- Now enter the port number you’d like to use. If you plan to use more than one port, you can specify this as well. To enter a range of ports, enter the first and last ports of the range and separate them by a dash. For example, you can enter 5000-5010. To use ports that are not in sequence, simply separate them with a comma – 80, 443. Of course, you can also combine these by entering 80, 443, 5000-5010, for example.
- Once you’ve defined the ports, click “Next.”
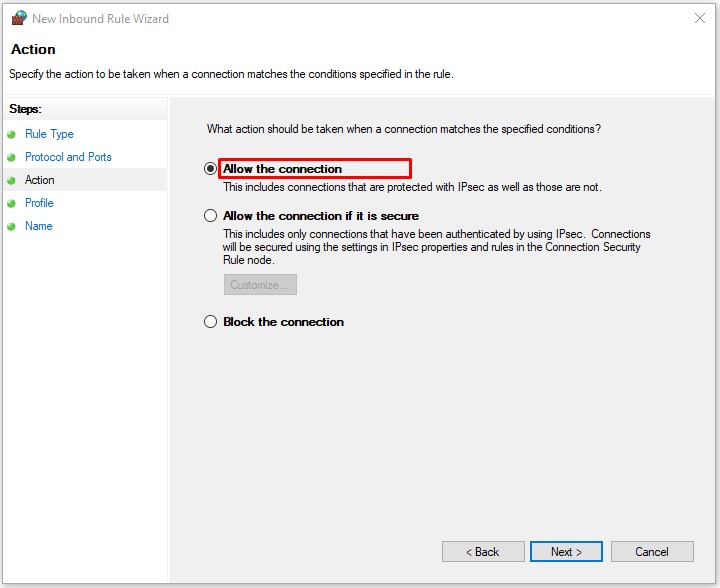
- Check the “Allow the connection” radio button and click “Next.”
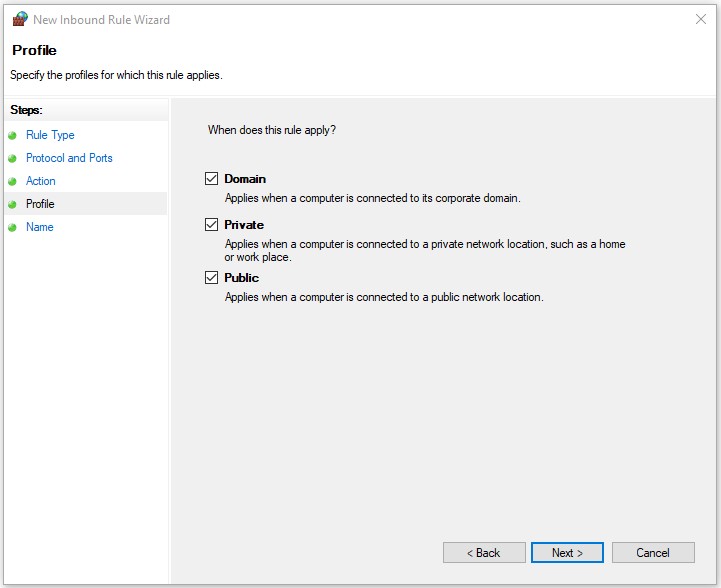
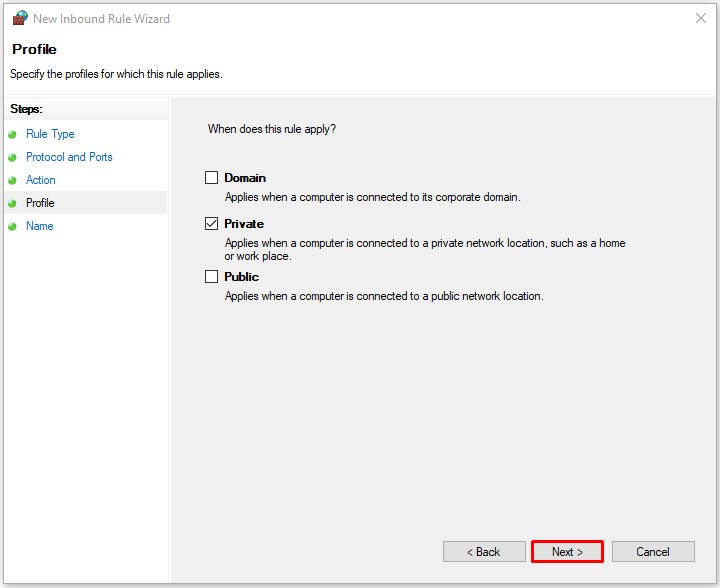
- Now select the network types you want this rule to apply to. You can select each of the following: Domain, Private, Public. Please be aware that allowing a forwarding rule to work on public networks may compromise your computer’s security.
- With that done, click “Next.”
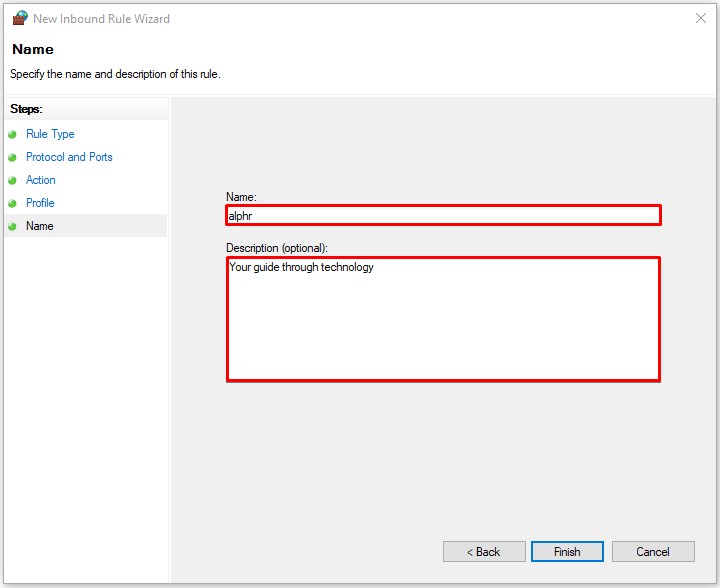
- As the final step, enter the name for the new rule. You can also add a description so you know for what purpose you’ve created it.
- Click “Finish.”
- Now your new port forwarding rule will appear in the list of the existing rules.


If at any point you want to disable this rule, simply select it from the list and click “Disable Rule” from the menu to the right.
How to Forward Ports for Minecraft
By default, Minecraft uses port 25565 for communication with the game servers. To forward this port, you’ll have to do it through your router’s administration page.
- Open a browser on your computer or mobile device.
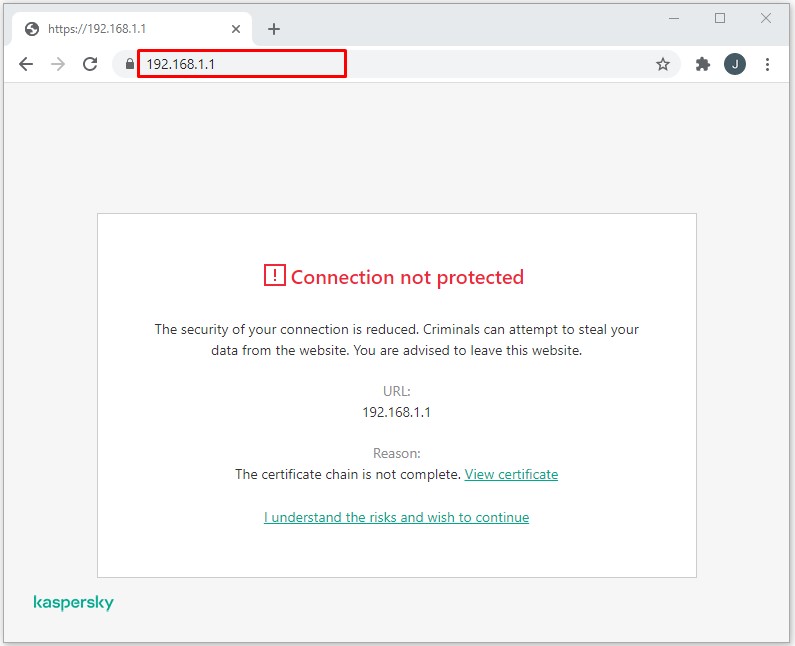
- In the address bar, type in 192.168.1.1 to open the router administration login page.
- On the login page, enter the username and password.
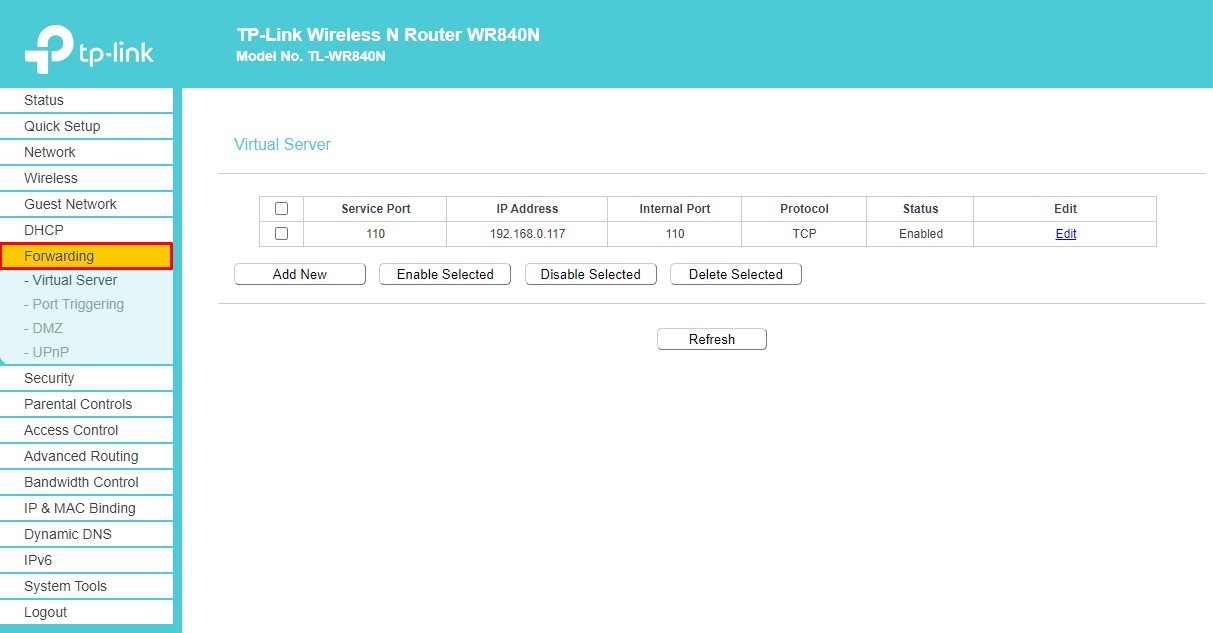
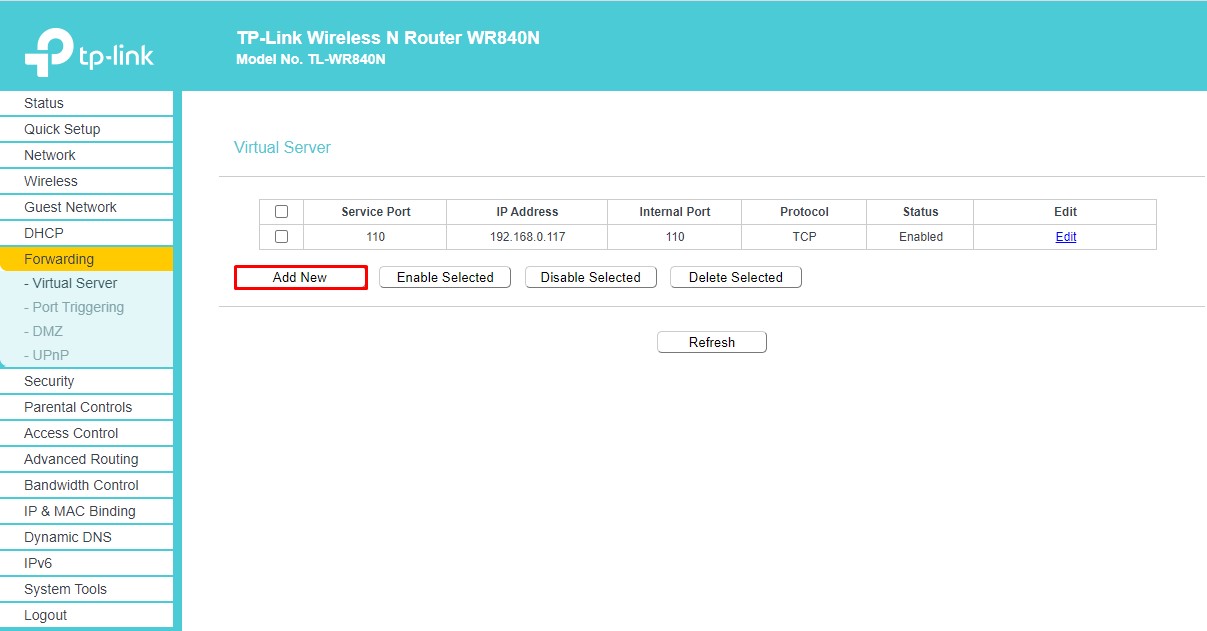
- When you open the router’s home page, locate the port forwarding option and click (or tap) it. The option you’re looking for should read “Port Forwarding” or “Forwarding.” Depending on the manufacturer of your router, you might find this option in the menu to the left or in the tabs at the top of the screen. If you don’t see it on the main page, it might be that it’s hidden in some of the menus. Try “Settings,” “Advanced Settings,” or something similar. If you still can’t find it, you might need to refer to the router’s user manual.
- Once you’re in the Port Forwarding menu, you have to create a new rule for port forwarding. For later reference, you can name the rule “Minecraft,” for example.
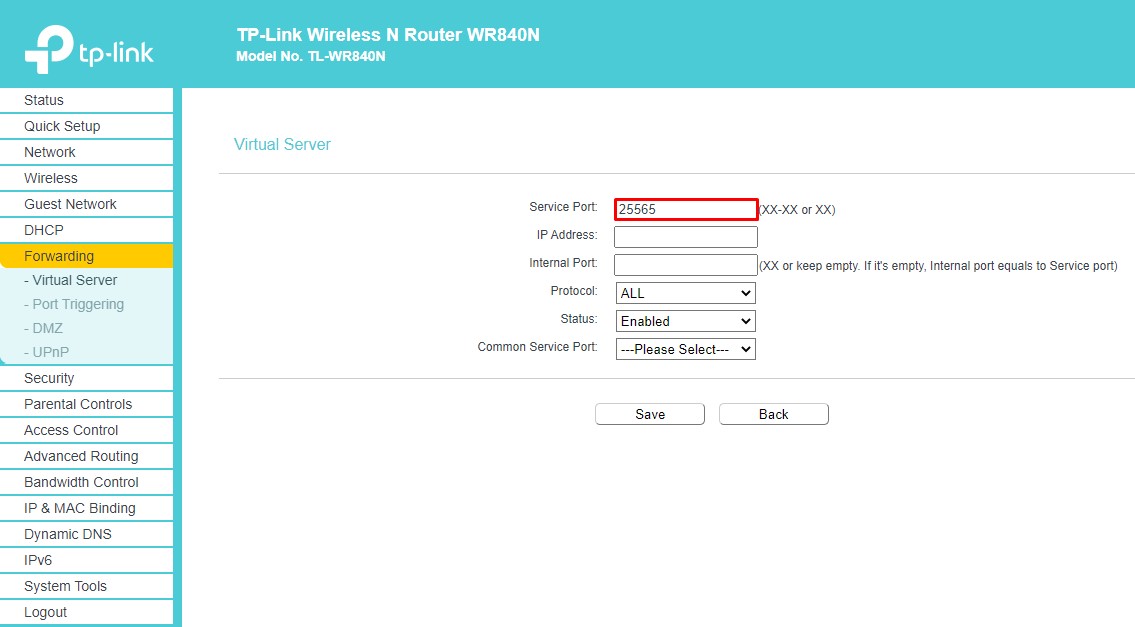
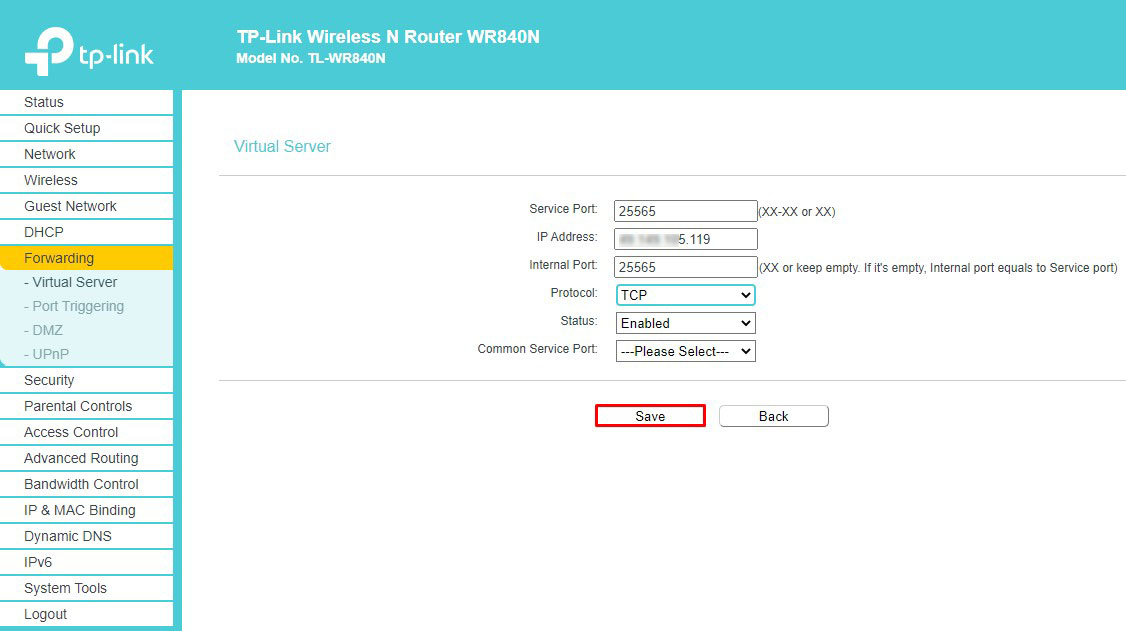
- Now enter 25565 number in the “Service port” field.
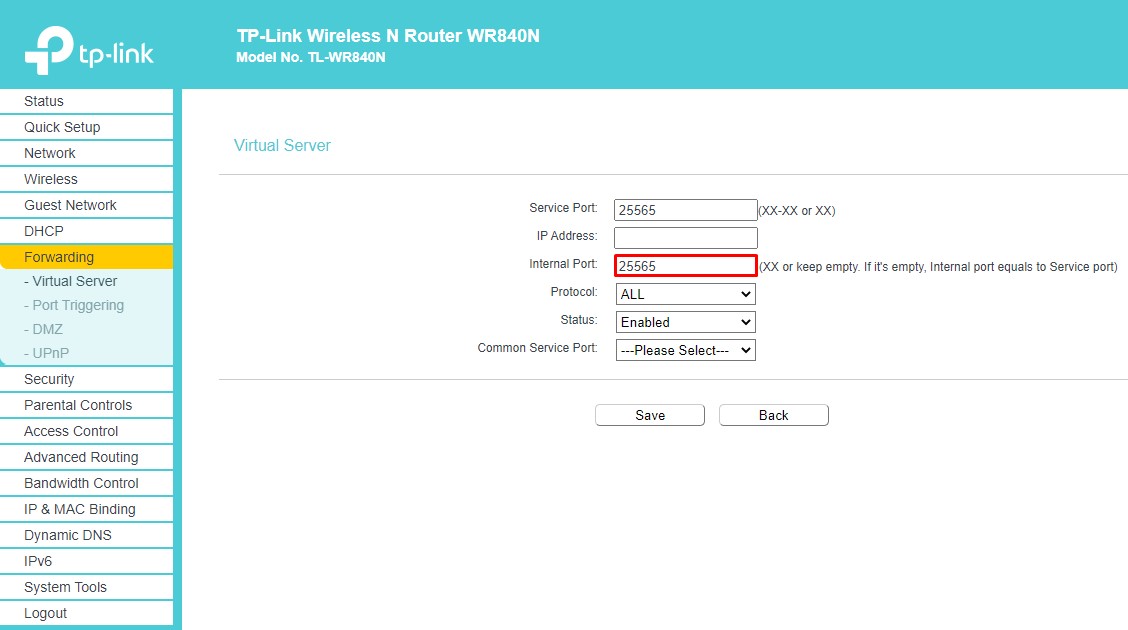
- Again, enter the same number in the “Internal Port” field.
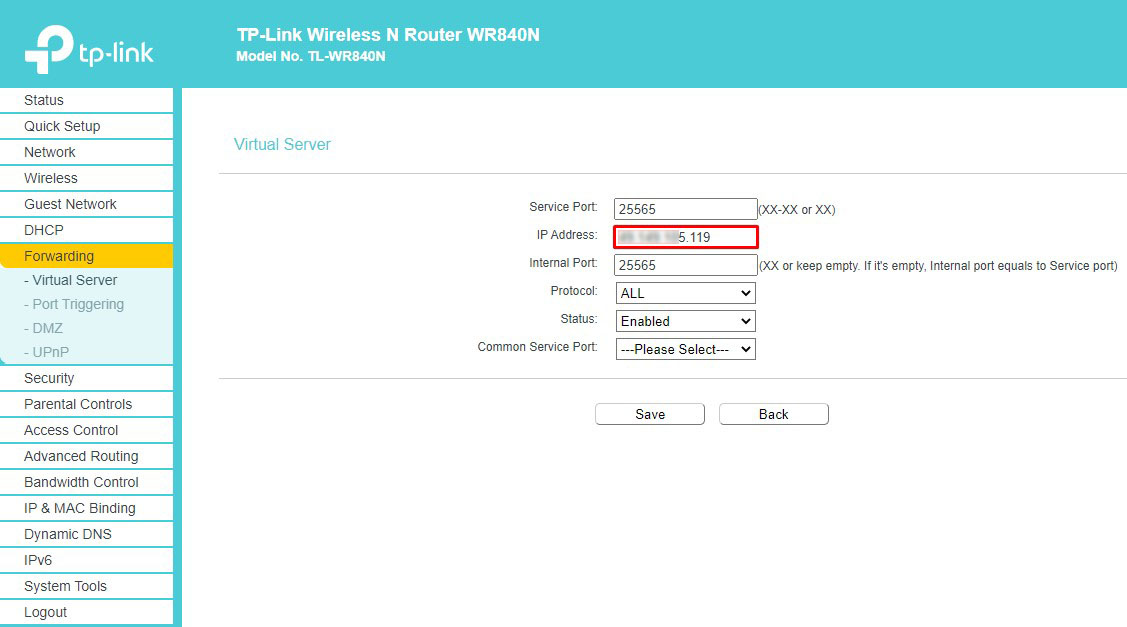
- In the “IP Address” field, enter your computer’s static IP address. If you don’t know your static IP address, simply Google “what’s my IP” and it will appear as the first entry in the search results.
- From the “Protocol” drop-down menu, choose “TCP.”
- If there’s a “Status” field in the menu, set it to “Enabled.”
- Now click/tap the “Save” button to confirm the changes to the “Minecraft” forwarding rule you’ve just created.
- Once you do this, your router might reset, so wait for it to come back online again. If this doesn’t happen automatically, you might have to reset it manually by pressing the physical restart button on the router. Some router models may not have a reset button, meaning you’ll have to turn it off and then back on.


How to Forward Ports on a Netgear Router
Netgear routers use the proprietary NETGEAR genie app to access your router’s settings.
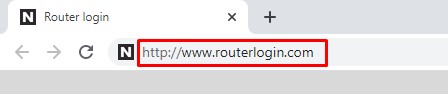
- Open an Internet browser on a computer you’ve connected to a Netgear router.
- In the address bar, enter the following URL: http://www.routerlogin.com.
- Enter the username and password you use to login to the NETGEAR genie. If you haven’t changed the password already, you can use the default parameters. The username is “admin” and for the password use “password.”
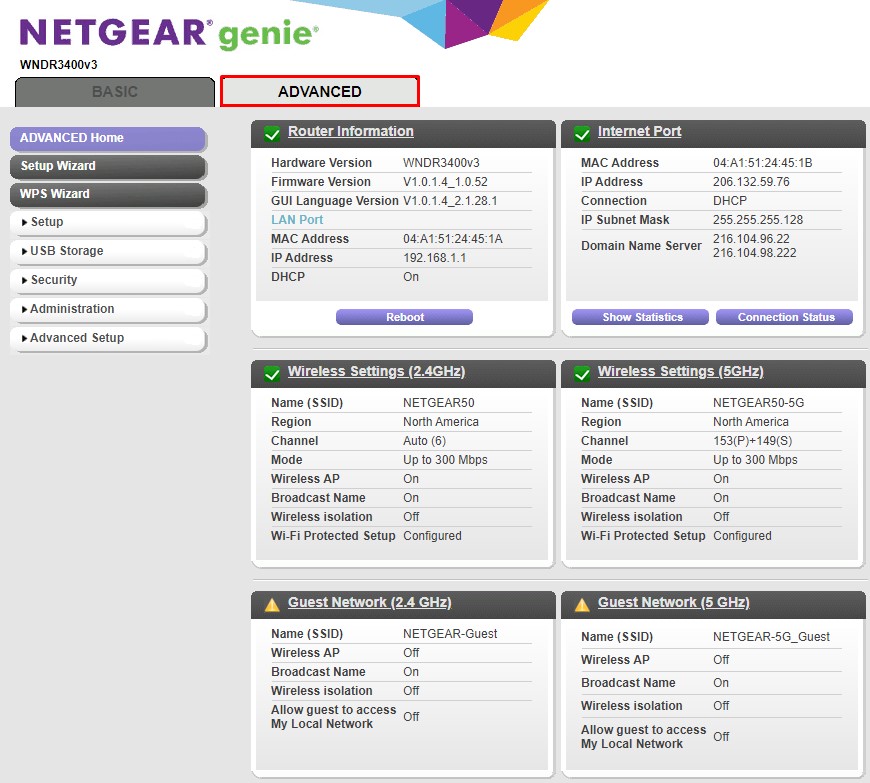
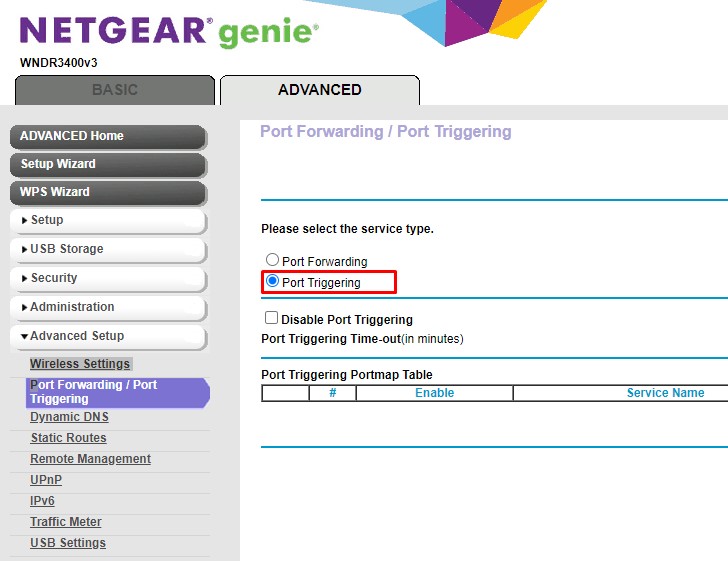
- Once you login to the NETGEAR genie homepage, click the “Advanced” option.
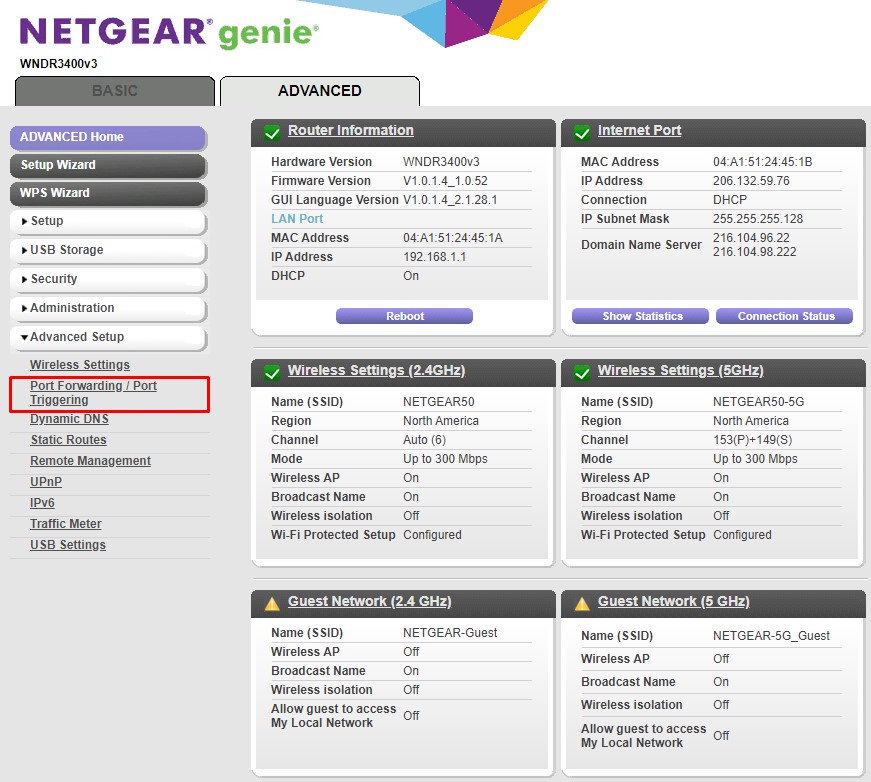
- Next, click “Advanced Setup.”
- Select “Port Forwarding… Triggering.”
- Check the box next to “Port Forwarding.”
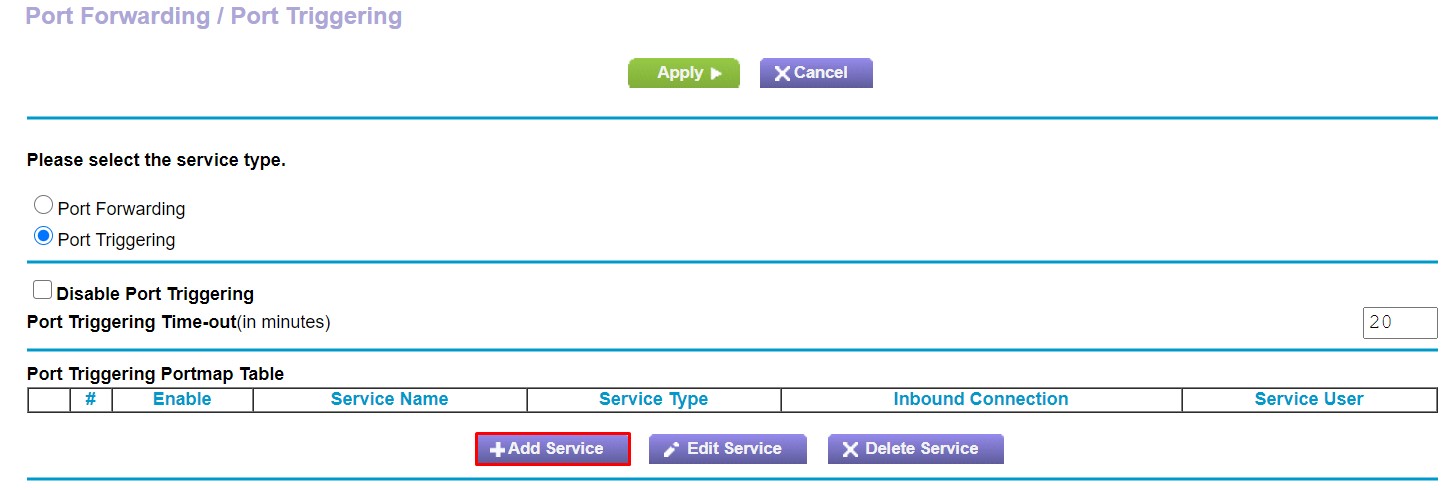
- Click “Add Custom Service.”
- For “Service Name,” simply type in the name you’d like to use for this rule.
- For the drop-down menu under Service Type choose the “TCP/UDP” entry.
- For “External Starting Port,” type in the port number you’d like to use for your service.
- If your service uses a single port, “External Ending Port” should also include the same port used for the “External Starting Port” entry. If it uses a range of multiple ports, enter the last port number in the range.
- If you’re using the same port number for the internal ports as you’ve used for external, check the checkbox next to the “Use the same port range for Internal port” entry. To use different internal ports than you’re using for external ones, don’t check this box.
- To set different internal ports, define them in the “Internal Starting Port” and “Internal Ending Port” fields.
- In the “Internal IP Address” fields, enter your computer’s static IP address. You can also use the IP address suggested in the table below this field by selecting the radio button next to it.
- Finally, click the green “Apply” button at the top of the menu.
- Now your new rule will appear in the rules list of the “Port Forwarding/Port Triggering” menu.

How to Forward Ports on Spectrum Router
Spectrum TV works with many makes and models of routers. One of the most popular that Spectrum suggests to use is Netgear. To learn how to use the port forwarding feature with Netgear routers, check the section above.
If you have a router by another manufacturer, then you can consult the user manual that came with your device. There you should be able to find detailed instructions on how to set up port forwarding.
How to Forward Ports on Xfinity Router
The easiest way to set up port forwarding on an Xfinity router is through the dedicated Xfinity app.
- Open a web browser and enter the following address: http://xfinity.com/myxfi.
- Click the “Connect” tab.
- Under the name of your WiFi connection, click “See Network.”
- In the “More Options” section, click “Advanced Settings.”
- Click “Port Forwarding.”
- Click “Add Port Forward.”
- From the drop-down menu of connected devices, select the one for which you want to set up port forwarding. Please note that if a device you want to use doesn’t appear in the list, it’s probably because it’s not connected to the network. In that case, simply connect the device and reload this page.
- Click “Manual Setup.”
- This menu allows you to enter the port number or a range of numbers you want to use, define which protocols you want to use, and check if the IP address is correct.
- Once you’ve set all that, click “Apply Changes” and that’s it.
How to Forward Ports on ATT Router
Since ATT works with many brands and models of routers from various manufacturers, it’s best to visit its web page on port forwarding. When you open the page, you’ll see a drop-down menu from which you can choose the exact router model you’re using. Once you select the router, the page will reload.
Now scroll down to the “Set up port forwarding” section and click “Show more” at the end of the section. This will expand the instructions allowing you to follow them step by step.
How to Forward Ports on a PlayStation 4 Console
To improve your online gaming experience on PlayStation 4, you can add port forwarding rules to allow for a seamless connection with game servers. To do so, simply follow the steps below.
- On the PlayStation 4 home screen scroll to the “Settings” option.
- Scroll down to the “Network” section and select it.
- Now select “View Connection Status.”
- Here you’ll be able to see the IP and MAC addresses of your console. Write them down for future reference.
- Now log in to your router’s administration page. It’s best to do this on a computer or a smartphone using a web browser. Consult the router manual to learn how to do this.
- Once you open the router administration home page, find the port forwarding menu.
- Now create a new port forwarding rule for the TCP protocol. Here you’ll have to add your PS4 IP address and probably its MAC address as well. Also add the following ports: 80, 443, 3478, 3479, and 3480.
- Now create another port forwarding rule, this time for UDP protocol. Again, add the IP and MAC addresses (if required) and enter port numbers 3478 and 3479.
- Save changes to your new rule and restart the router.
Successful Forwarding
Hopefully, now you know how to enable custom port forwarding on practically any device or router you might use. This will allow you to establish communication between different computers or servers. It’s also important to keep in mind that port forwarding on public networks can compromise the online security of your device or system. That’s why it’s essential to be sure of how you’re doing this and for what purpose.
Have you managed to establish a connection over a specific port? For what purpose do you do this most often? Please share your experiences in the comments section below.
Disclaimer: Some pages on this site may include an affiliate link. This does not effect our editorial in any way.