Most people use Apple Notes to write and sync notes on iCloud. The app simplifies not just your access to notes from various Apple devices, it also makes sharing notes convenient. However, you can’t share notes with everyone in one format. Some people prefer reading PDF documents. Fortunately, scanning and exporting notes in a PDF format is relatively straightforward.
This article explains how to scan and save Apple Notes as PDF files.
How to Scan and Save Apple Notes as a PDF
Apple Notes is a self-reliant application with many practical features. If you plan to share notes as PDFs, you can do it within the app. The only thing the app won’t let you do is export many notes at once. You can scan and export Notes as PDFs no matter what your favorite Apple device.
Scanning Your Apple Notes
You can scan an existing document or create a fresh one like this:
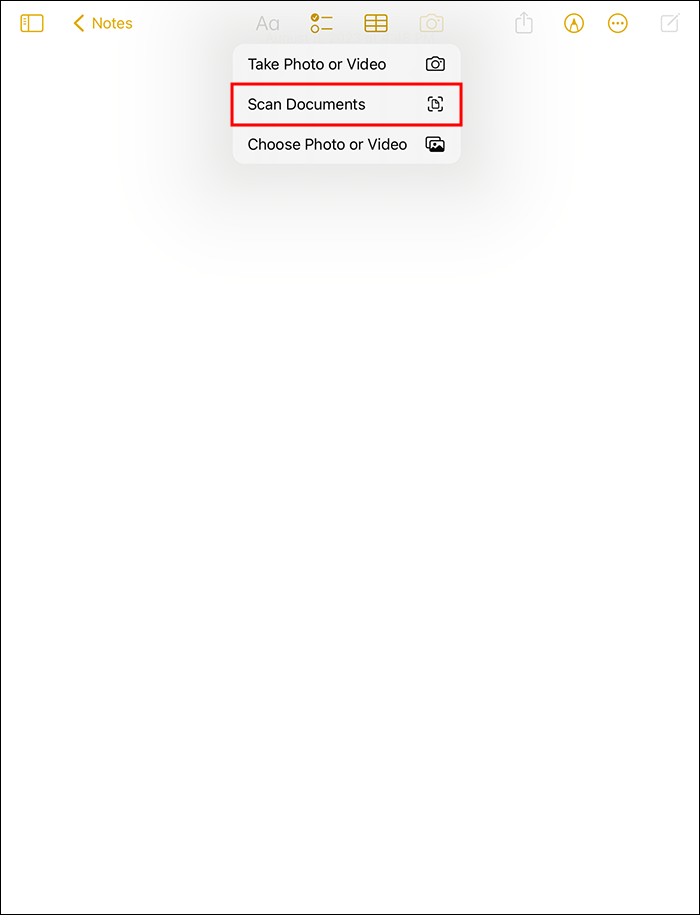
- Launch the Notes app on your iPhone or iPad.

- Move to the toolbar and touch the “Camera” icon.

- Choose the “Scan Documents” option from the pop-up menu.
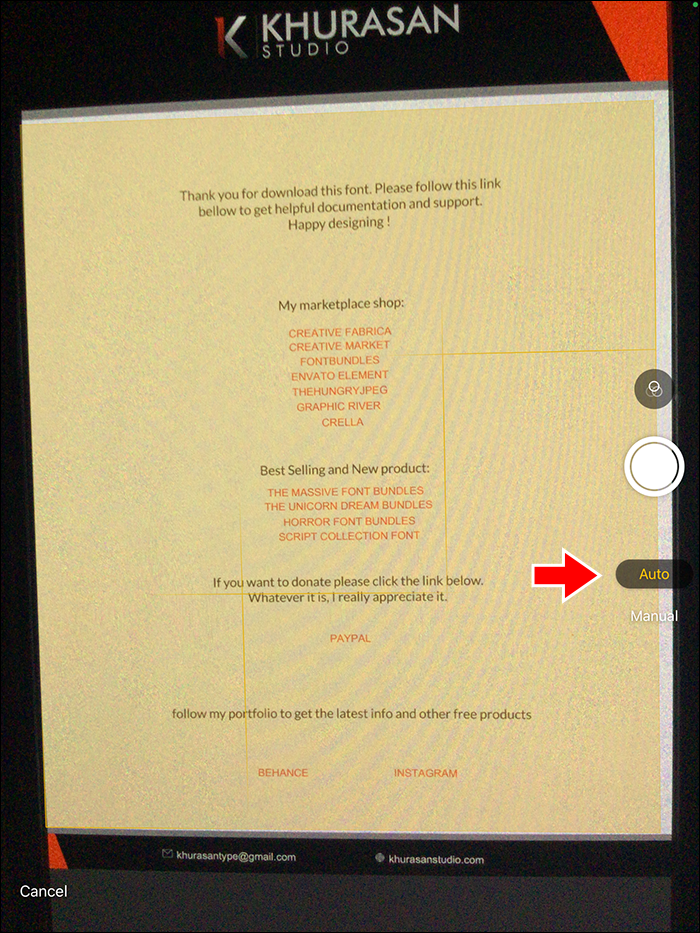
- Position your document in front of the camera once it’s ready. The camera will look for things to scan and show a semi-transparent yellowish box over different area. The camera will start scanning once it finds a perfect view of the entire text
- If you’ve enabled the “Auto mode,” the camera will scan automatically. If not, you should capture a scan manually by tapping the “Shutter” button. Repeat steps 4 and 5 if you have many notes to scan.
- Touch “Retake” in the top right corner if you still don’t like your scan. Move to the top left corner and press “Done” to resume the capture screen.
- Click “Save” to save. If you wish to add more text to the scanned documents, tap “add additional scans to the documents.”
- Go back to the Notes menu by tapping “Folders.”


Exporting a Scanned Document With Many Pages on iPad or iPhone
If your document is more complex and lengthy due to multiple pages, you should export it as PDF this way:
- Launch the Notes app and choose the notes you’ve just captured into a scanned document of many pages.
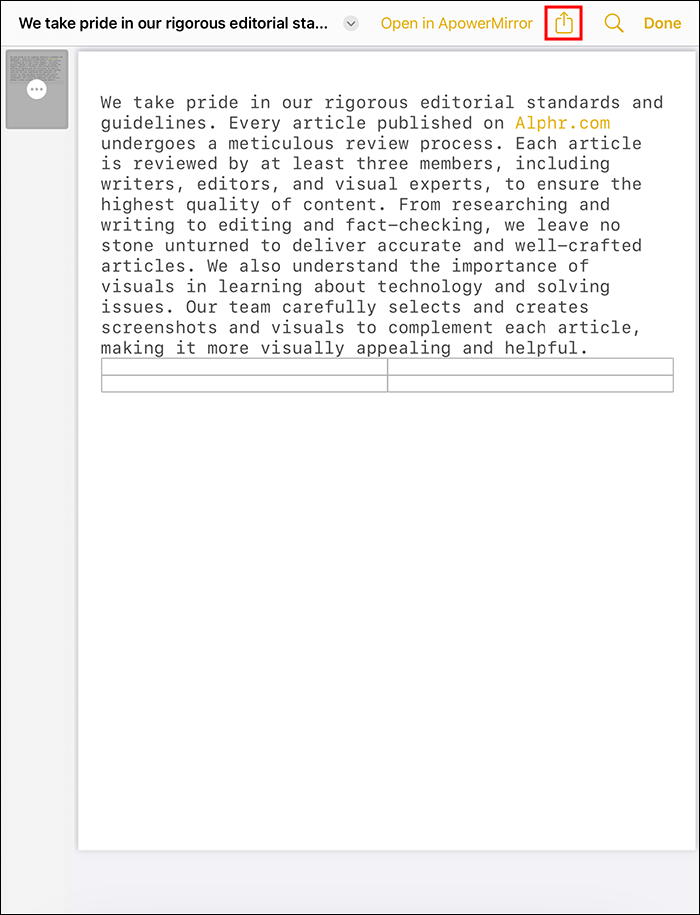
- Touch the scanned document’s image directly to trigger an editing screen.
- Move to the top right corner of the screen, touch the “Share” icon, and tap “Markup.”
- “Annotate” your document as you please.
- Press “Done” and then choose “Save File To” to pick the best storage location for your PDF.
- Touch “Save.”
- To share the PDF, select a contact and send it to them.


Exporting Apple Notes as PDF on iPad or iPhone
You can export your notes directly as PDFs this way:
- Launch the Notes App and move to “Notes.”
- Open the note you wish to share as PDF.
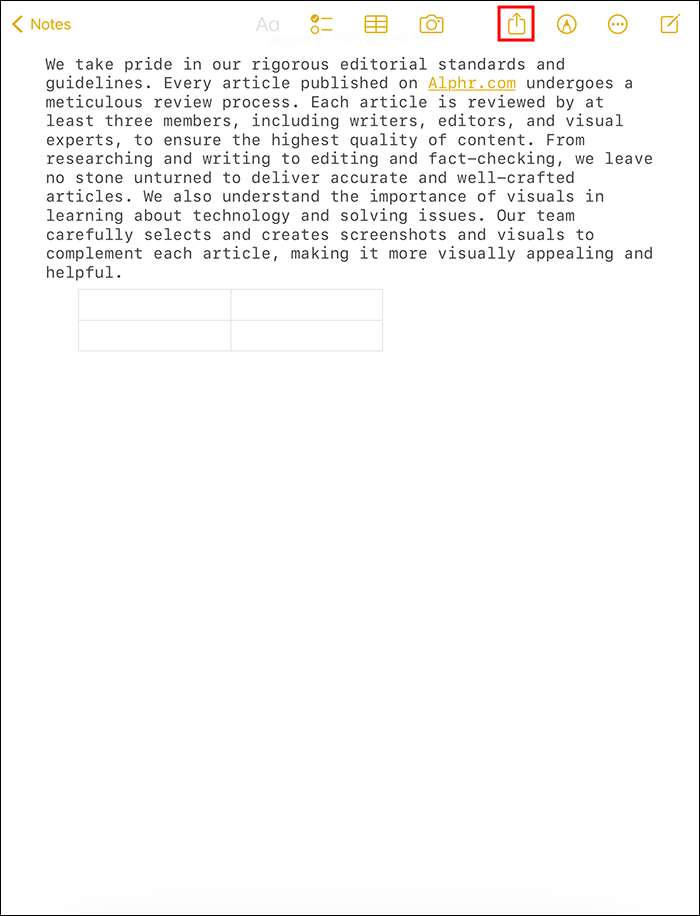
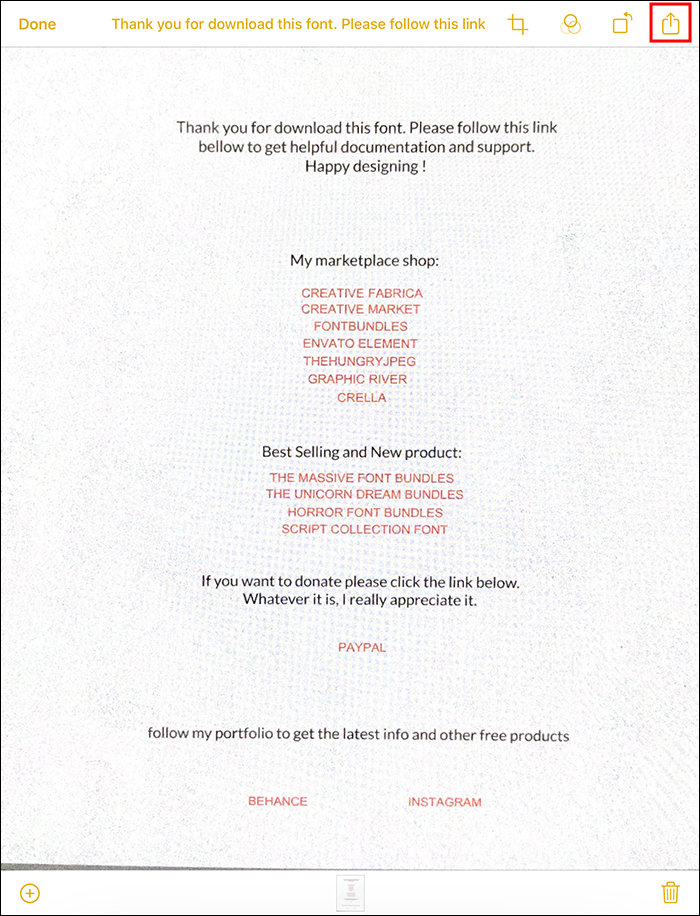
- Touch the share icon at the top menu area.
- Choose “Send a Copy.”
- To produce a PDF copy, press “Markup.” Choose a markup tool, personalize it, and annotate your PDF document.
- Touch “Done” if you like the appearance of your PDF.
- Choose “Save File To” and locate a suitable storage area on your iPad or iPhone.
- Now touch “Save” to finish.


Saving Apple Notes as PDF With the PDF Expert App
Apple recently provided a super easy method of saving your notes as PDFs. The new technique entails using the PDF Expert App. It’s a free app you install directly from Apple’s App Store. Once you install it on your iPhone or iPad, you can save many notes as PDFs.
Here’s how to use the PDF Expert app:
- Launch “App Store” on your device.
- Locate the “PDF Expert” app and download it.
- Start the “Apple Notes” app. Then, open the specific note you wish to convert into a PDF document and then save it.
- Shift to the top right edge of your screen. Touch the share icon.
- Press “Send a Copy” to view the next screen.
- Touch “Print” to trigger the print preview page of your image.
- Enlarge the preview page into a full screen with a two-finger gesture.
- Locate the “Share” button at the bottom area, on the left side, and touch it.
- A “PDF Expert” icon will appear. Tap on it to convert the copy of your note into a PDF file format. Your newly-converted note will save into the “PDF Expert” app as PDF.


After saving a PDF document, you can open your PDF Expert app to view it. If you want to edit the document, do it within the app. It gives you all the editing features, including adding graphs, images, annotations, etc. You can crop, merge, and convert PDF into something else without trouble.
How to Sign a Scanned Document Before Exporting as a PDF
After scanning your Apple notes to prepare them for conversion into PDF, you can add a signature. The people you’ll send the PDF document to will view your signature. You can also leave a blank space for them to add their signature and return the document to you.
Here’s how to sign a document:
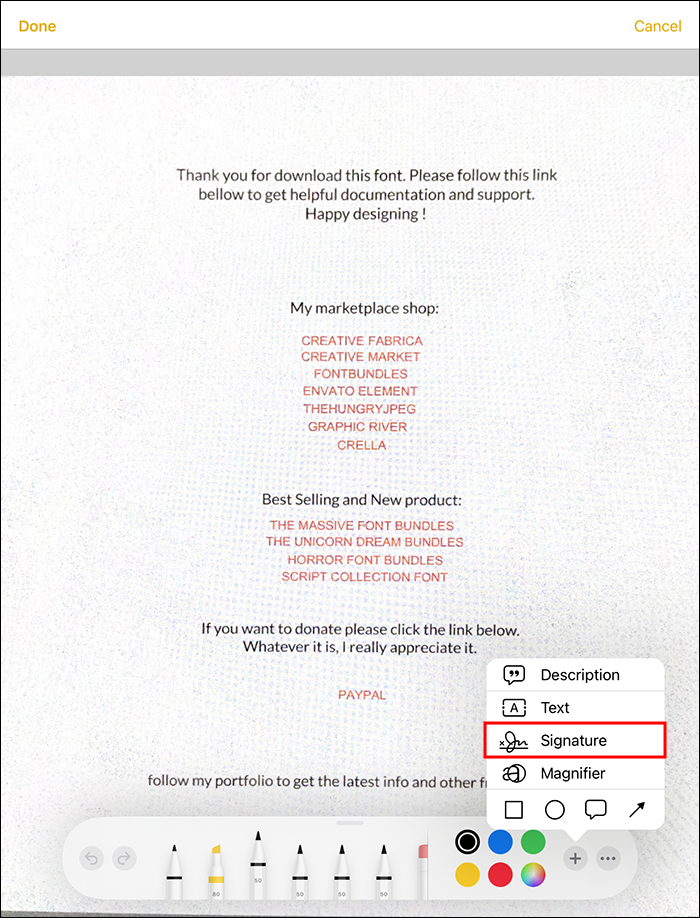
- Touch the “Share” button.
- Select the “Markup” icon.
- Press the “Add” icon and choose “Signature.”
- Enter your signature by adding the one you’ve saved on your device. Alternatively, create a new signature.
- Adjust the size of the signature box. Drag and drop the signature box to where you need it on the document.
- Touch “Done.”


How to Create High-Quality Document Scans
You must prepare neat PDF files when scanning crucial office documents or personal records. These will be easier to read and add a professional touch. The following tips can help you improve the appearance of your Apple Note scans:
- Although newer iPhone models can scan documents in any lighting conditions, it’s better to choose a well-lit environment. This is an environment with the softest natural light, including close to a window. You can also switch on your ceiling lights to improve the lighting conditions.
- Turn off and on the default setting of your flash to ensure it doesn’t fade your document. Simply find the lighting icon on the capture screen and tap it.
- Turn off the automatic scanning mode by touching “Auto” while in capture mode. This will enable the manual mode to give you more control over how the phone captures copies of various notes. When ready to scan, touch the capture button.
FAQs
How can I export my Apple notes to iCloud?
You can export your notes to iCloud by enabling the option. Go to “Settings,” choose [your name] to access iCloud, and switch it on. From then on, your notes will enter iCloud automatically and be available on other Apple devices.
Can I share my PDF Apple notes?
You can share the notes you have turned into PDFs in Apple Notes app by tapping the “Share” button. The menu allows you to decide whether to ask people to come and discuss the note or to send each a copy.
Share Apple Notes as PDFs
Exporting your Apple Notes as PDFs is one way to have copies outside of iCloud. Before you export, you can make scanned documents from notes using the iPhone’s camera. Otherwise, you can directly turn your notes into PDFs and choose a storage location on your device. The task is simple regardless of the type of Apple device you take notes with.
Did you try to share your Apple Notes as PDF unsuccessfully? Will you try again after reading this guide? Let us know in the comments section below.
Disclaimer: Some pages on this site may include an affiliate link. This does not effect our editorial in any way.