The iMac features one of the best displays on the market, and if you are lucky enough to have a 4K retina monitor, the vibrant screen is likely to make your workflow more pleasant. On top of that, you can use Target Display Mode to connect a MacBook with a late 2009 or mid-2010 iMac.
But is it possible to use your Mac as a PC monitor?
To answer the question right away – yes, it is possible to use your iMac as a PC monitor. However, you do need a compatible iMac and PC, plus a special cable/adapter. If your Mac has a Retina Display, this is not possible.
This article will provide a step-by-step guide on how to do it, as well as an overview of the necessary gear. Without much further ado, let’s dive right in.
Requirements
Setting up your iMac for use as a PC monitor is much easier than you might think, but it will only work if you have a compatible iMac model and cable.
Here’s everything you need to connect your iMac to your PC.
Compatible iMac
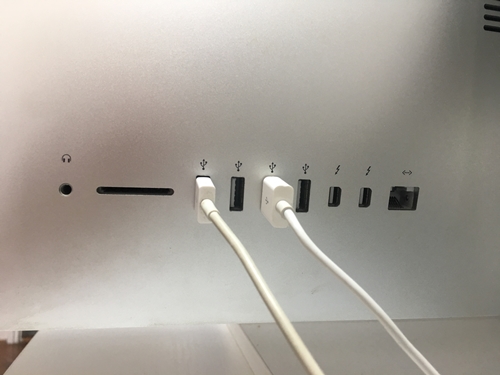
The first thing you need to do is check if your iMac can be used as a secondary monitor. Take a look at the ports, and if your iMac features a Thunderbolt or Mini Display Port, it can be used as a monitor.
However, things aren’t necessarily as simple as that, so check out the compatible models:
- Late 2009 and mid-2010 27-inch iMacs featuring a Mini Display port
- Mid-2011 and 2014 iMacs featuring a Thunderbolt port

Certain other models (up to late 2014) might also be used as a secondary display. However, the late 2014 5K retina iMac doesn’t offer Target Display Mode. As for the other requirements, you also need a PC that features a Mini Display or Thunderbolt port.
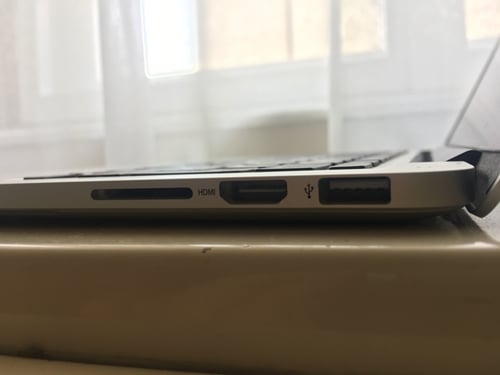
If your PC doesn’t feature these ports, you can use an HDMI or Display port with a suitable adapter. For example, you can use an HDMI to Mini Display adapter or Mini Display to Display Port adapter. Of course, Mini Display, Thunderbolt, or HDMI cable is also required.
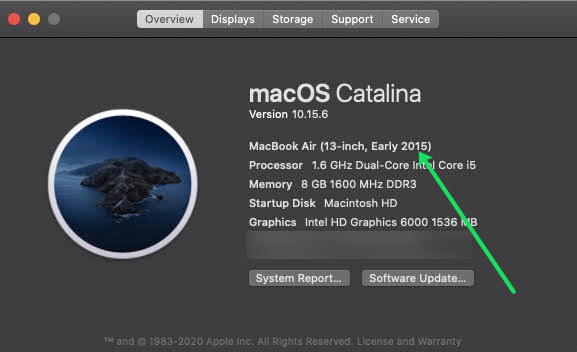
If you aren’t sure about the age of the Mac you’re working with, it’s simple to find. Click the Apple symbol at the top of your Mac and click “About this Mac”. Next, review the pop-up for the necessary information.
Setup Guide
Once you’re certain that your Mac meets the criteria listed above, let’s get to work on setting up your system.
Connect the Cables
Turn off your iMac and PC, then plug the cable into the Thunderbolt, HDMI, or Display port on your PC. Next, plug the cable into the Thunderbolt or Mini Display Port on your iMac.
Note: If you are using an adapter, connect the cable to the adapter first, then insert the male end into the Mini Display/Thunderbolt port on the iMac.

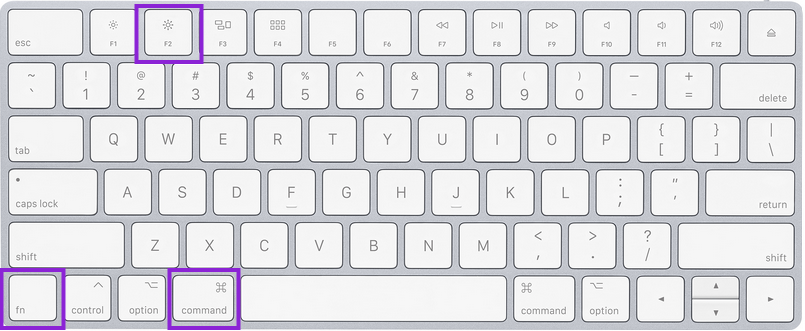
Trigger Target Display Mode
Turn on both the iMac and the PC, then hold Cmd + F2 or Cmd + Fn + F2 on the iMac keyboard to trigger Target Display Mode. In a few seconds, you should be able to see the screen of your PC mirrored on the iMac.
Screen Resolution Concerns
For optimal display quality, it’s important to properly set the screen resolution.
In general, setting the video output to 2560 x 1440 on your PC should match the screen resolution of an older iMac (2009, 2010, 2011, and some 2014 models). However, Apple introduced 4K retina displays across the 27-inch line in 2014. These iMacs have a native resolution of 5120 x 2880, which might be hard to match if you are using a laptop. Plus, Target Display Mode might not be available.
If you want to check the iMac’s resolution, click on the Apple logo in the taskbar, select About This Mac, and choose the Displays tab.

Note: The screenshot was taken on a late 2015 iMac
Use iMac as a Second Display
Regardless of the iMac model you have, it can be used as a second screen for your PC. In other words, you can mirror the PC display to an iMac, even if it’s the latest 5K. But you should know that the iMac needs to run Windows 10 Home or Pro for the trick to work.
Apple has more instructions on running Windows on Mac via Boot Camp here.
Step 1
Make sure your iMac is on and running Windows, then connect to the same network as your PC via Ethernet or WiFi.
Go into Windows Settings on your iMac, choose System, and select Projecting to this PC from the menu bar on the left.
Step 2
Under Projecting to this PC, click on the first drop-down menu and choose Available everywhere. Select First time only under Ask to project to this PC. It is not necessary to Require PIN for pairing, so you can keep the option off.
At the bottom of the window, make sure you give your computer a name, especially if you have multiple machines at your home.
Step 3
Move onto the PC and access the Action Center from the bottom-right corner. Select the Project tile and choose Connect to a wireless display.
The PC will look for available displays, and your iMac should appear in the results. Click on the iMac, and your PC should show both displays.
Step 4
You might need to go into Display Settings and change the resolution so that it appears the same on both machines. For example, if you are mirroring to a 5K iMac, the resolution of 2560 x 1440 should work fine, but this depends on the exact iMac and PC model you are using.
Wrapping Up
If you have the right devices and cables/adapters, using an iMac as a PC monitor is pretty easy.
While you may have difficulty connecting the two if certain criteria are not met, for those with the proper cables and the Target Display Mode equipped, you can use an iMac as a monitor for a PC. Having dual monitors can make gaming, working, and homework much easier, so it’s certainly worth a try.
Have you tried using your iMac as a PC monitor? Share your thoughts and experiences in the comments below.
Disclaimer: Some pages on this site may include an affiliate link. This does not effect our editorial in any way.


