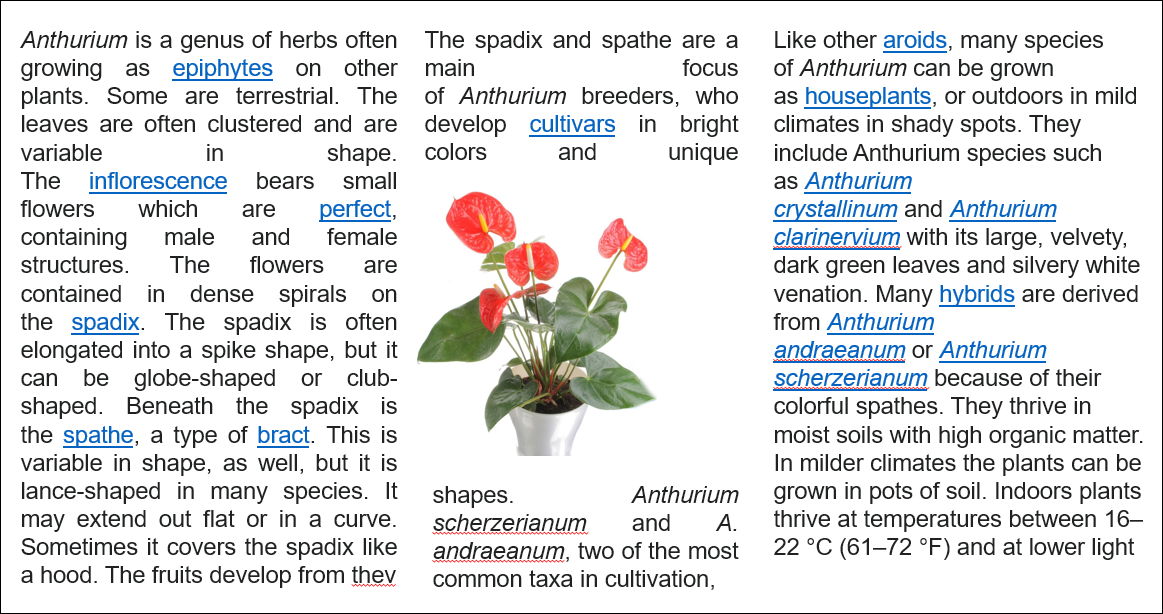
There’s a variety of ways you can make your PowerPoint presentation look even more stunning. One of them is to wrap text around your other elements, such as images, diagrams, charts, and tables. Wrapping text will give the presentation a more organized appearance and improve the readability. But how exactly does this work?
In this article, we’ll show you several ways to wrap text in PowerPoint.
How to Wrap Text in PowerPoint
Considering that PowerPoint doesn’t have a built-in feature to wrap text, you need to resort to other methods. There are several options, including manual text wrapping, using text boxes, and importing data from Word documents.
How to Wrap Text in a Text Box in PowerPoint
This is a fairly easy approach that works in all versions of PowerPoint:
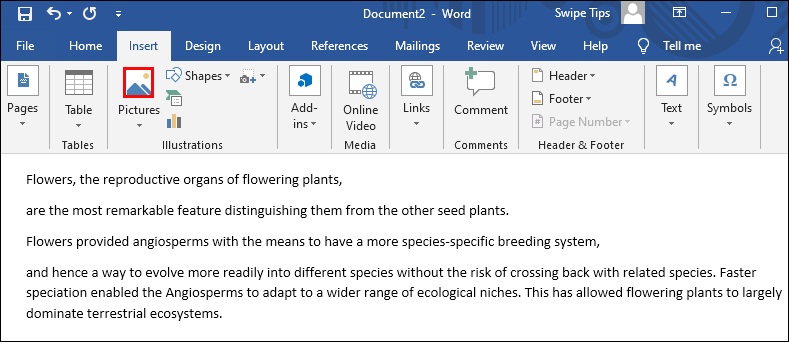
- Press “Insert.”
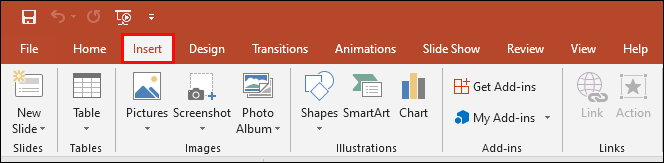
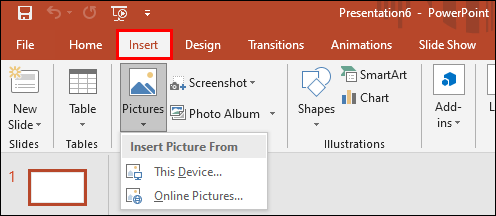
- Hit “Pictures,” and select the “Picture from File” option.

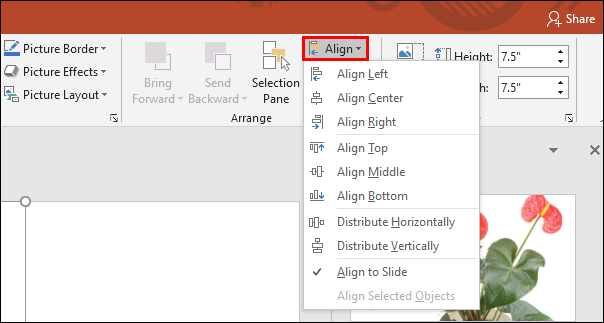
- Find the desired image. Once it appears, press “Align” to set it to the center, right, or left.
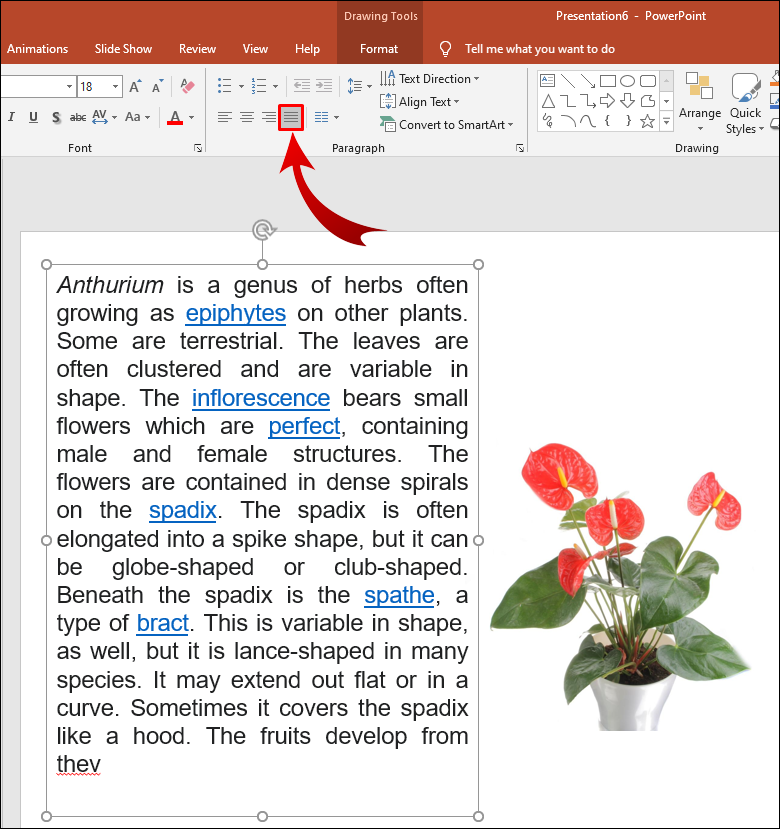
- Press “TextBox” from the “Insert” or “Home” tab and place the boundary where the first text block will go.
- Enter some text and press the “Justify Text” symbol so that it fills the entire box.
- Repeat this approach for all four sides of the image.

How to Wrap Text in PowerPoint on Mac
You can use a different strategy if you have a Mac version of PowerPoint:
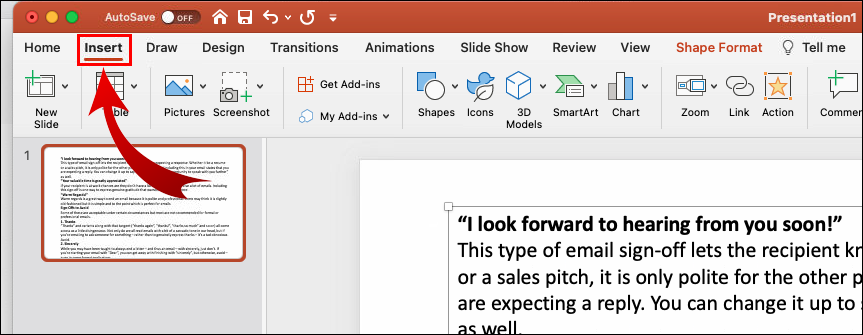
- Open PowerPoint and select the slide that will contain text wrapping.
- Navigate to the menu in the upper part of the display and choose “Insert.”
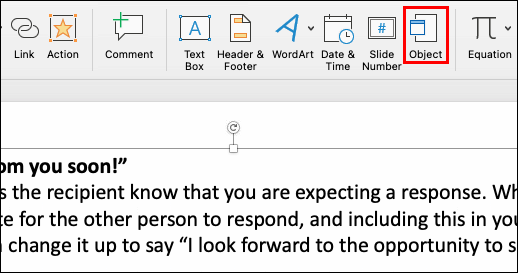
- This will open a dropdown menu. Select “Object,” and another popup will appear.
- Hit “Object Type” and go to “Microsoft Word Document.” Press the “OK” button.
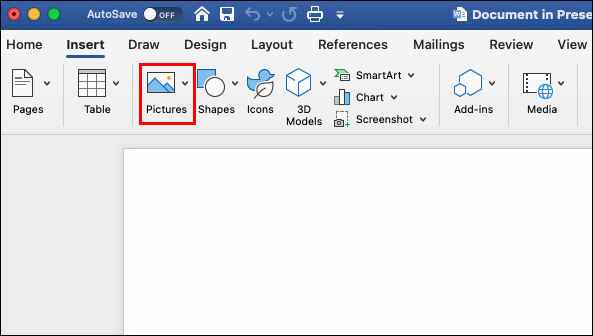
- A Word file will open automatically. To add an image, you can drag and drop it into the file or go to “Insert,” followed by “Pictures.”
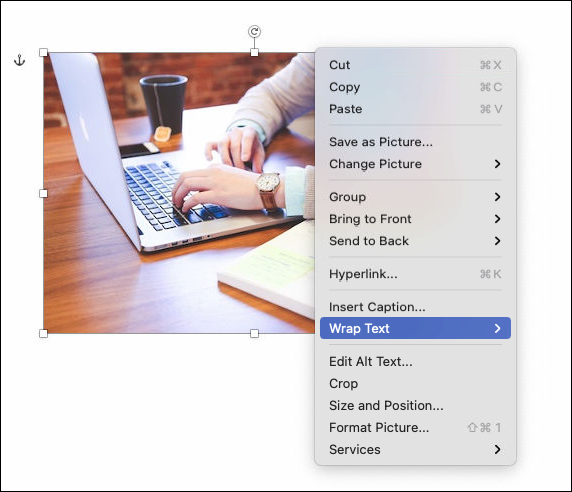
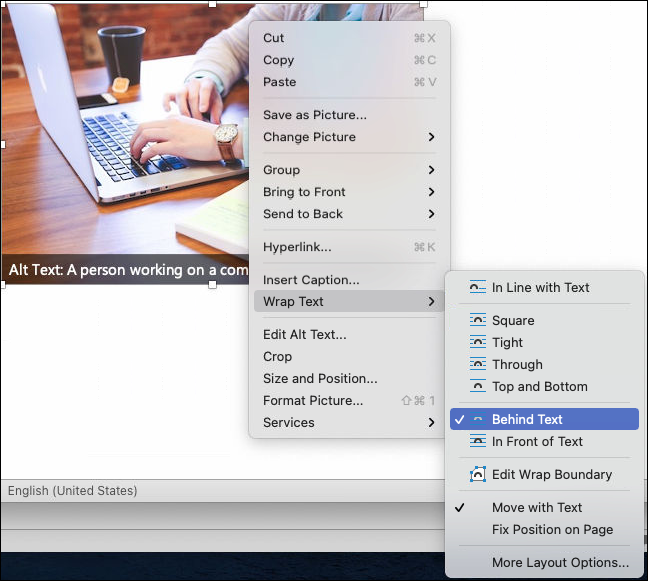
- Right-click on your image to access the options.
- Hover over the “Wrap Text” option to reach the text-wrapping section.
- Set the text-wrapping preferences according to your needs.
- When you return to the presentation, the slide will contain the image and text wrapped from the Word file.
- You can now move or resize the file as you would with any other object.

How to Wrap Text in PowerPoint on Windows
There’s an easy way to wrap text on Windows, too:
- Choose the image or other graphic on your slide the text will wrap around.
- Navigate to “Home,” choose “Arrange,” followed by the “Send to Back” option. Alternatively, you can right-click on the graphic and press “Send to Back.” If this option appears grayed out, it already applies to the graphic.
- Add a text box and enter your text.
- Position the cursor in the box so that it’s located in the top-left section of the graphic.
- Use the tab or spacebar to insert visual breaks in your text. As a line of text gets closer to the object’s left side, use the tab or spacebar multiple times to position the rest to the object’s right side.
- Repeat for the remaining lines of text.


How to Wrap Text in PowerPoint on iPhone
The easiest way to wrap PowerPoint text on iPhone is to employ text boxes:
- Open your presentation.
- Select a slide and press the picture symbol at the bottom of the display. Find an image and add it to the slide.
- Hit the text box icon in the bottom-right corner and type in your text.
- Do the same for any other side of the image you want.


How to Wrap Text in PowerPoint on Android
Since the PowerPoint app on Android and iOS are very similar, you can take the same approach:
- Open PowerPoint and insert a picture to your presentation by tapping the image symbol.
- Press the text box symbol and specify the boundaries of your box.
- Enter your text.
- Repeat the process until you create a proper text-wrapping impression.
How to Wrap Text in a PowerPoint Table
At first, wrapping your text around various images and shapes in a PowerPoint presentation can be tricky. You might think that you’ll face the same problems when adding text to a PowerPoint table.
Fortunately, the program has automatically enabled this feature. As a result, your text will be wrapped within the cells whenever you type text in your table.
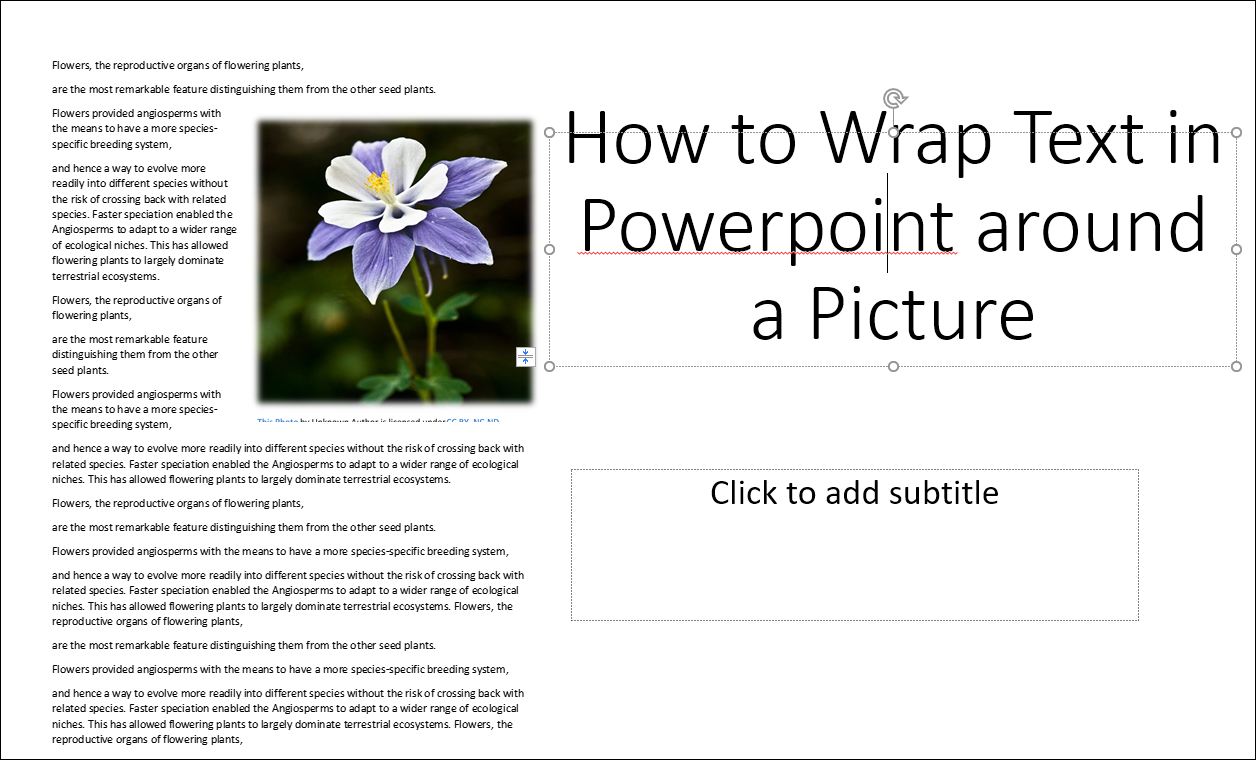
How to Wrap Text in PowerPoint Around a Picture
Again, you can use a fellow program, Microsoft Word, to wrap text in PowerPoint presentations:
- Enter some text in Microsoft Word.
- Insert a picture and place it to the desired location in the file.
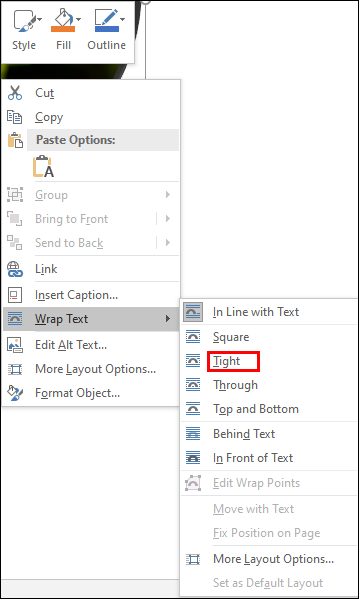
- Right-click on the picture and select “Text wrapping,” followed by “Tight.”
- Save the document and open PowerPoint.
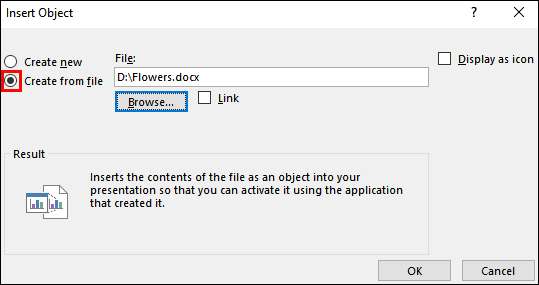
- Navigate to “Insert,” followed by “Object.”
- Check the “Create from File” option and select the word file you previously created.
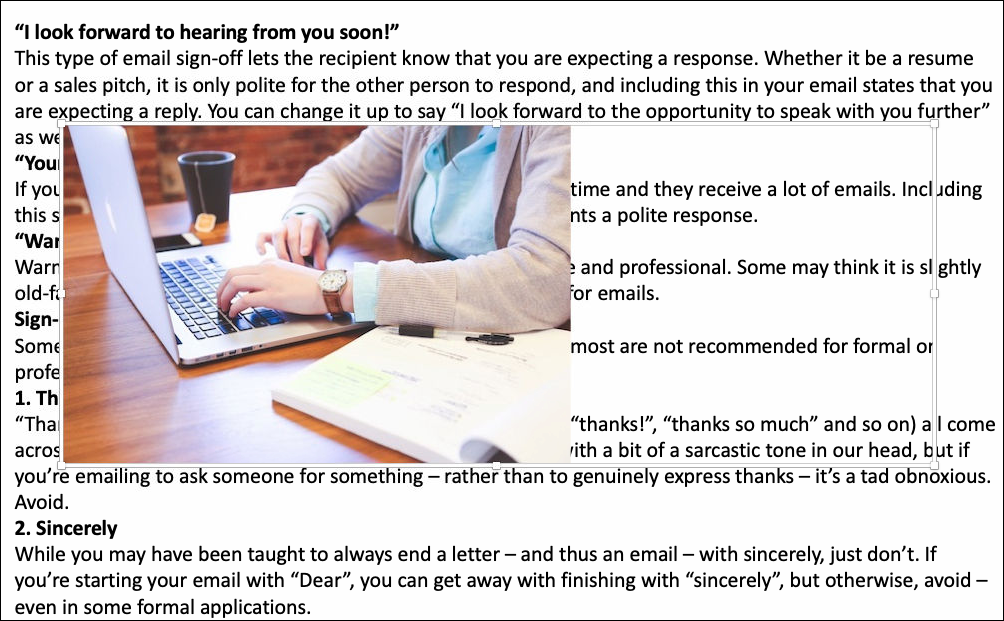
- The text will now be placed around the image the way you arranged it in the Microsoft Word file.
- To edit it, double-click on the box to change the alignment, resize the image or move it to a different position. The text will automatically wrap around the picture. When you click outside your slide, the changes will be reflected in the presentation.

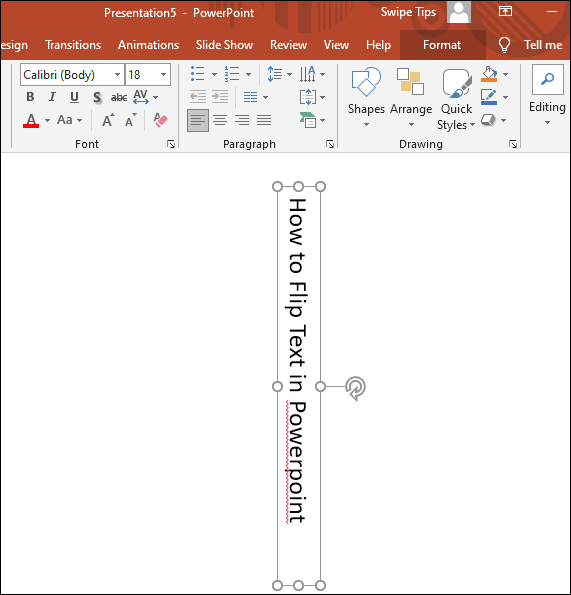
How to Flip Text in PowerPoint
Flipping text is another area where text boxes will come in handy:
- Start PowerPoint and press the “Insert” tab.
- Click “Text Box,” and you’ll now be able to draw your text box using the cursor.
- Type your text.
- To rotate your text, click and start dragging the arrow above your text box.


Rotating your text manually is a good idea if you don’t need to position it at a specific degree. But if you want to be more accurate, PowerPoint allows you to select the exact degree at which your text box will sit:
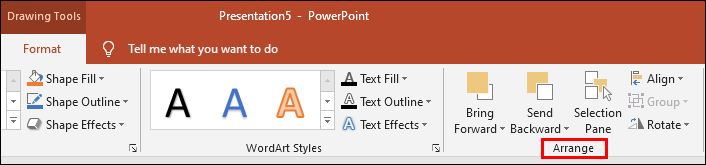
- Highlight the box you wish to rotate.
- Go to the “Format” section and find the “Arrange” option.
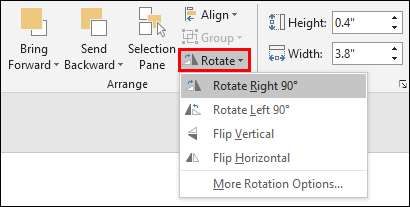
- Press “Rotate” to access a menu with text rotating options. Here, you can choose to turn the text left or right by 90 degrees. Alternatively, you can flip the box horizontally or vertically. To enter a specific degree, press “More Rotation Options.”
- Go to the “Rotation” tab and click the arrows to specify the rotation degree. You can also type in the number representing the degree.
- Your box will now be rotated to the designated degree.
How to Wrap Text in PowerPoint Around a Shape
Wrapping text around a shape is also simple:
- Right-click on the shape you added to your presentation.
- Choose the “Send to Back” option.
- Insert a text box and enter your text.
- Press the back or spacebar on your keyboard until the text fits the shape properly.
Additional FAQs
Here are some more great tips in case the previous sections left
Device Links
me questions unanswered:
How to Get the Text to Wrap Around a Graphic in PowerPoint?
No matter what graphic you insert into your presentation, wrapping text around it will make the slide more organized. This is how to do it:
• Navigate to the slide with the graphic your text will be wrapped around. Alternatively, add a new graphic using PowerPoint’s insert tool.
• Highlight the graphic and place it to the desired location on the slide.
• Go to the “Insert” section on PowerPoint’s menu.
• Choose “Text Box” and draw one on the slide.
• Select the text box and drag its handles to extend it to your preferred height and weight. Paste or enter your text.
• Insert additional boxes on other sides of your graphic and add text. Modify the height and width to make them fit the graphic correctly.
• Repeat the process until you achieve the desired effect.
How Do You Wrap Text Around a Circle in PowerPoint?
Wrapping text around a circle isn’t complicated either:
• Right-click on the circle on your PowerPoint presentation.
• Click the “Send to Back” option and press “Send to Back” again from the list of options.
• Type or paste text over your circle.
• Press the first text line where it converges with the circle.
• Hit the spacebar or tab key on the keyboard to move your text past the circle’s right edge.
• Repeat the procedure for the remaining lines to create the text-wrapping effect.
Become a Master of Presentations
Not being able to wrap your text in PowerPoint as you can in Microsoft Word is frustrating. Nevertheless, you can achieve the desired results by applying the methods described above. Figure out which approach suits you best, and you’ll take a giant step toward creating perfect presentations.
Have you tried wrapping text in PowerPoint? Which approach was the easiest? Tell us in the comments section below.
Disclaimer: Some pages on this site may include an affiliate link. This does not effect our editorial in any way.


