The digital age has all but made “wet signatures” obsolete. These days, you can use your “virtual fingertip” to sign documents from the comfort of your home.
If you want to know how to insert your signature into Google docs, you’re in the right place. In this article, we’ll talk about the two different ways you can do that and explain how e-signatures work.
How to Insert Signature Into Google Docs?
Google Docs has a built-in feature that allows you to sign your document manually. All you need is a functioning computer mouse. Of course, you can also use your laptop touchpad, but it’s slightly less convenient.
Here’s how to insert a signature into Google Docs by using the Drawing tool:
- Open your Google Docs file.

- Move your cursor to where you need to sign the document.

- In the menu bar above, open the “Insert” section.
- Select “Drawing” from the drop-down menu, then click “New.”
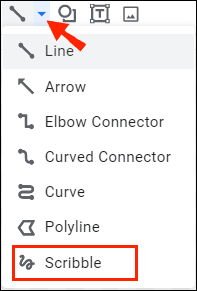
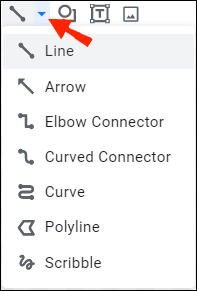
- A new “Drawing” window will appear. At the top of the screen, you’ll see the available tools and features. Click on “Line” to open a drop-down menu.
- Choose “Scribble” from the list of options. Using your mouse, write your signature in the document.
- When you’re done, click “Save and Close.”


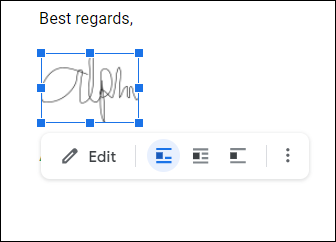
The handwritten signature will now appear in your text as an image. If you’re not happy with how it turned out, you can make adjustments. Here’s how to edit your Google Docs signature:
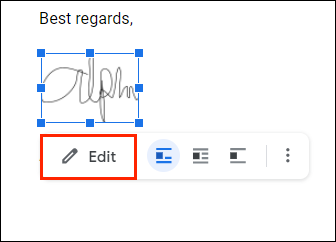
- Select the image by clicking on it.
- A small toolbar will appear under the blue outline. Click “Edit” to tweak your signature.
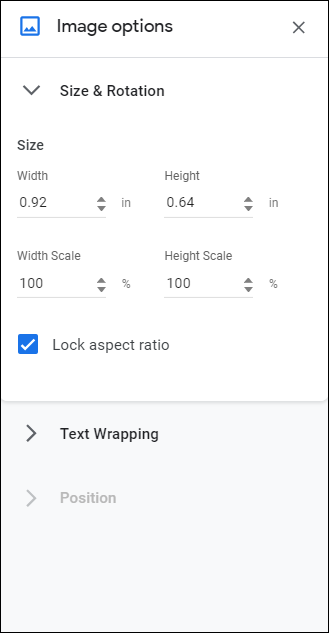
- If you want to make some more advanced changes, click on the three dots on the right-hand side.
- A drop-down menu with three sections will appear. To adjust the height and width of the image, choose “Size and Rotation.” To change the signature’s position within the text, choose “Text Wrapping.” To move the signature to a different place in the document, choose “Position.”

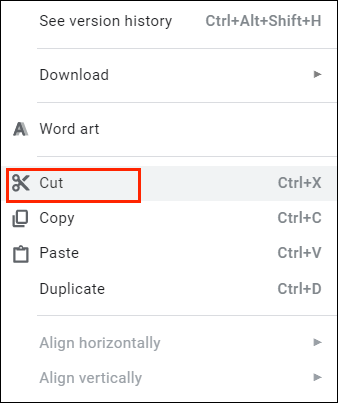
If the editing doesn’t work out, you can remove your signature altogether. Here’s how to do it:
- Select the signature by clicking on it.
- Open the “Edit” section in the menu above the document.
- Select “Cut” from the drop-down menu.
- A quicker way to do it is by using your keyboard. Hold ‘’CTRL + X’’ or press the “Delete” button.
How to Add an Electronic Signature to Google Docs?
You can also use third-party tools to sign your documents. There’s a wide selection of add-ons that are compatible with Google Docs. Here’s a list of extensions you can install:
If you’re a Google user, DocuSign is the best option for you. The custom Chrome extension allows you to sign and manage documents online. Here’s how to add DocuSign to Google Docs:
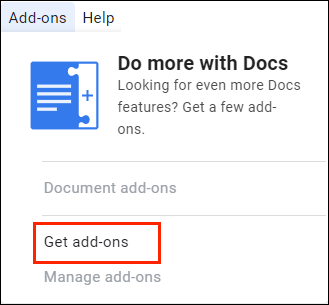
- Open a Google Docs file.
- Click “Add-ons” on the menu bar above to access Google Workspace Marketplace.
- Select “Get Add-ons” from the drop-down menu.
- Find DocuSign by using the built-in search bar.
- Click to install.
- Once you’re done, “Sign with DocuSign” will appear as an option in the Add-ons drop menu.


You can also add DocuSign directly to your Chrome browser:
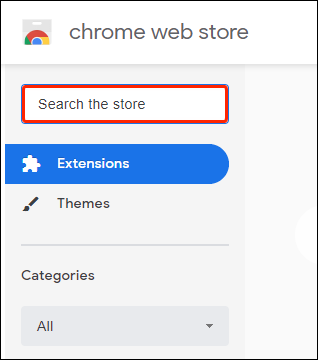
- Open Chrome and go to the Chrome Web Store.
- Use the search bar to find the extension.
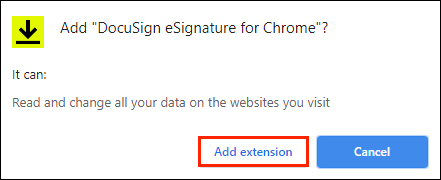
- Click the “Add to Chrome” button on the right-hand side. Then click to “Add Extension.”
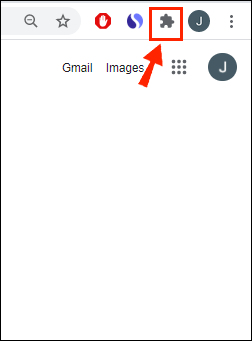
- Go back to your browser. In the top-right corner, click the small puzzle icon to open “Extensions.”
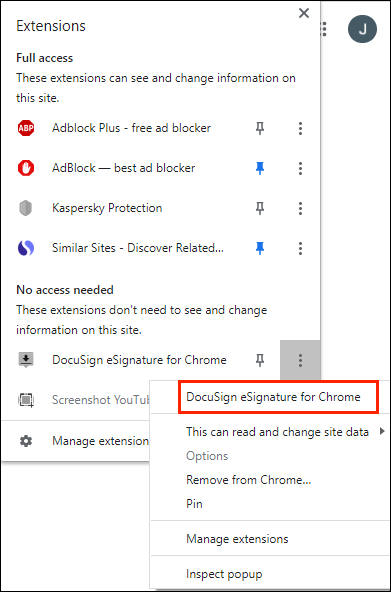
- A request to access will appear. To enable the extension, click “DocuSign eSignature for Chrome.”
- Pin the DocuSign icon to Chrome and click to open.
- Set up a DocuSign account. If you want to test it out first, you can sign up for a free trial.


Once you’re done installing the add-on, you can now use it to sign documents. Here’s how to add an electronic signature to Google Docs by using DocuSign:
- Open your Google Docs file.
- Go to Add-ons > Sign with DocuSign.
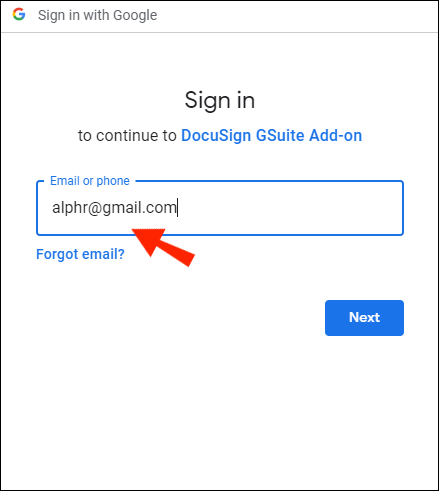
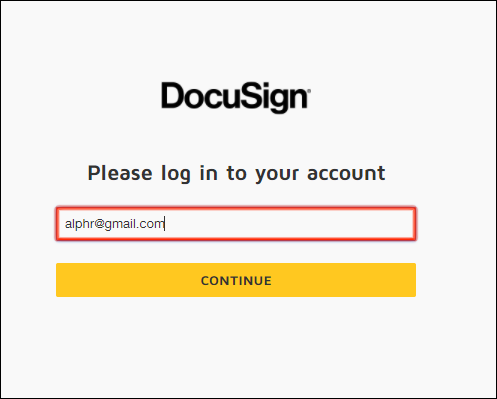
- A new window will appear asking you to log in to your DocuSign account. Enter your username and password and click “Enter.”
- A landing page will appear. Click “Start.”
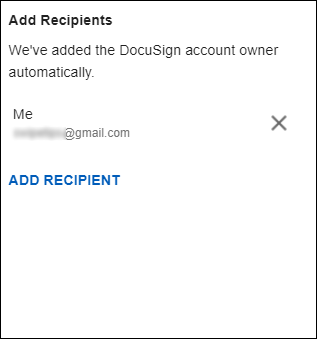
- DocuSign will ask you who you want to sign the document. Choose “Only Me” to do it yourself.
- Sign and drag your signature to where you want to insert it in the document.


Which Method Should You Use?
As you can see, there are two ways of signing your Google Docs file electronically. You can either use the built-in Drawing tool or install a compatible add-on. Both methods are suitable for creating a standard e-signature.
However, certain documents (for example, legally binding contracts), require you to sign with a verified signature. The so-called “digital signature” has an encrypted code that’s unique to every user and acts as a virtual fingertip. It also authenticates and protects any information included in the document.
To create your digital signature, you have to use a specific add-on. For Google apps, you can download the Secured Signing extension from Google Workplace Marketplace. Then you can use it to digitally sign your Google Docs document. Here’s how to do it:
- Open Google Drive and find your Google Docs file.
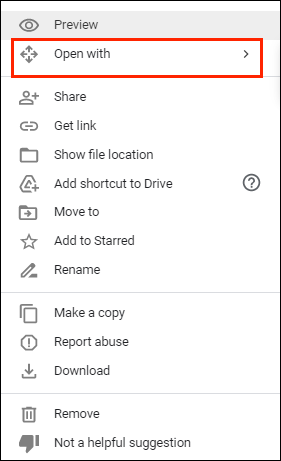
- Right-click to open a drop-down menu. Choose “Open With” from the list of options then “Secured Signing – Secure Digital Signature.”
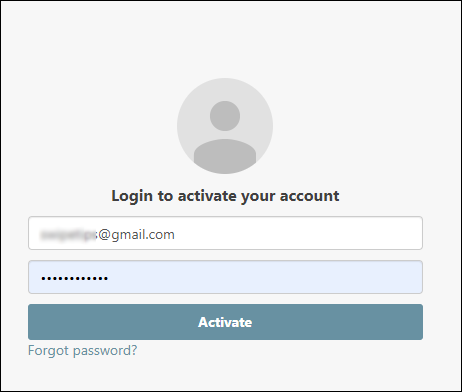
- A pop-up window will appear. Click on your chosen Google Account and then “Allow” to authorize.
- Log in to your Secured Signing account and click to “Authorize.” If you don’t have an account, you have to register before continuing.
- Once you’re done, you can use the add-on to digitally sign the document.
How Electronic Signatures Work?
Electronic signatures are signs, symbols, and other electronic data used as a form of digital identification. Just like handwritten signatures, they’re legally recognized as a form of document authentication.
However, the rules and regulations are different for each country. In some places, only e-signatures with unique encryption codes are legally binding. These “digital signatures” are considered far more reliable. Certain industries also prefer digital to electronic signatures, because of higher security.
You can create both types of signatures by using various add-ons, apps, and even built-in features.
How to Sign PDFs and Forms With Google Docs?
Managing PDFs in Google Docs is a bit tricky, but not impossible. If you want to add an electronic signature to your PDF, there are two ways you can do it.
The first method is to change the file format and then upload it to Google Docs. This will allow you to edit the document and insert your signature. Here’s how to do it:
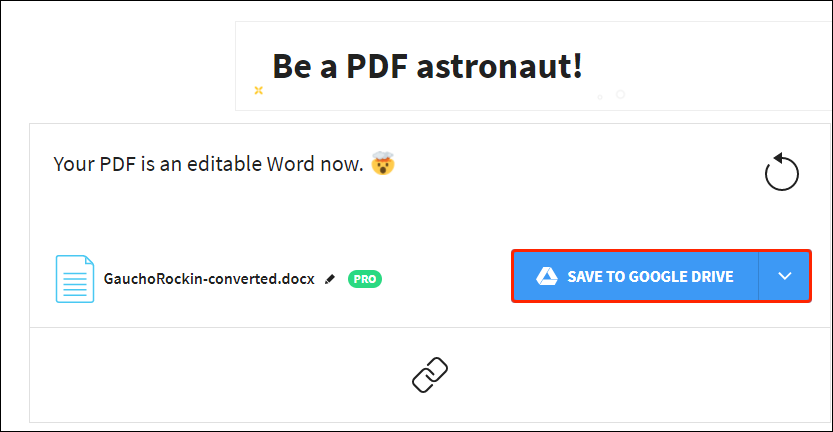
- Convert your PDF file to a Word document using a free online tool. Just type “pdf to word converter” in your search engine and click on one of the results.
- Download the Word file and upload it to your Google Drive.
- Open the file with Google Docs.
- You can now add your e-signature by using the Drawing tool or an add-on.


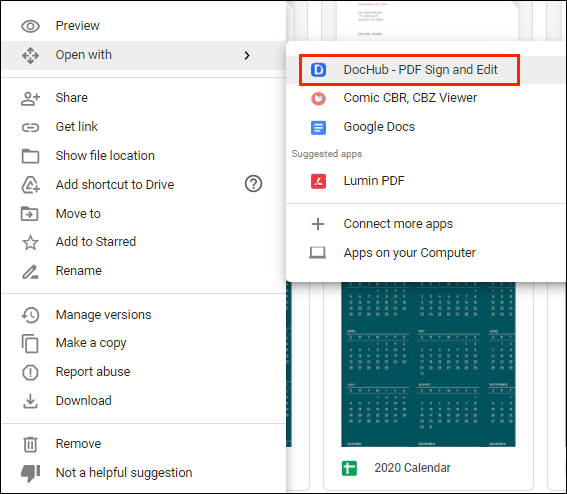
Another way to do it is by using a third-party editing tool. We suggest downloading DocHub from Google Workplace Marketplace. It’s a user-friendly PDF editor that’s compatible with all Google apps. Here’s how to sign PDFs and forms with Google Docs by using DocHub:
- Open your browser and go to docs.google.com.
- Click on the little folder icon in the top-right corner.
- Go to Upload > Select File from Your Computer. Click on the PDF document you want to upload.
- Click on the little downward arrow next to the “Open With” tab. Choose DocHub from the drop-down menu.
- A small pop-up window will appear. Click “Allow” to start the program.
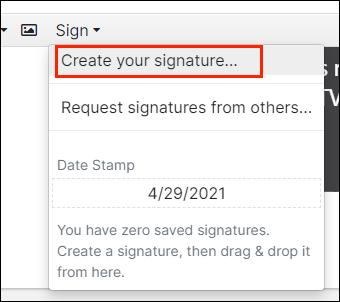
- Go to Sign > Create Signature. There are a few options to choose from. If you already have an e-signature, click “Upload Image.” If you want DocHub to write it for you, click “Type.” If you want to write it yourself, click “Draw.”
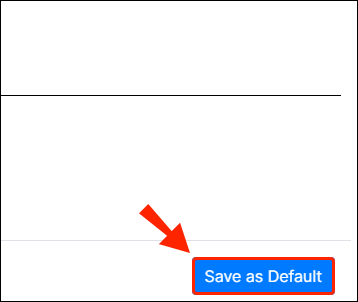
- Once you’re done, click “Save as Default.”
- Move your cursor to where you want to sign. Go back to the toolbar and reopen the “Sign” section. You’ll find your signature in the drop-down menu. Click to insert it into your PDF.


Additional FAQs
How Do I Scan a Document in Google Docs?
Unfortunately, Google Docs doesn’t have a built-in feature for scanning documents. However, you can use Google Drive instead. Here’s how to do it:
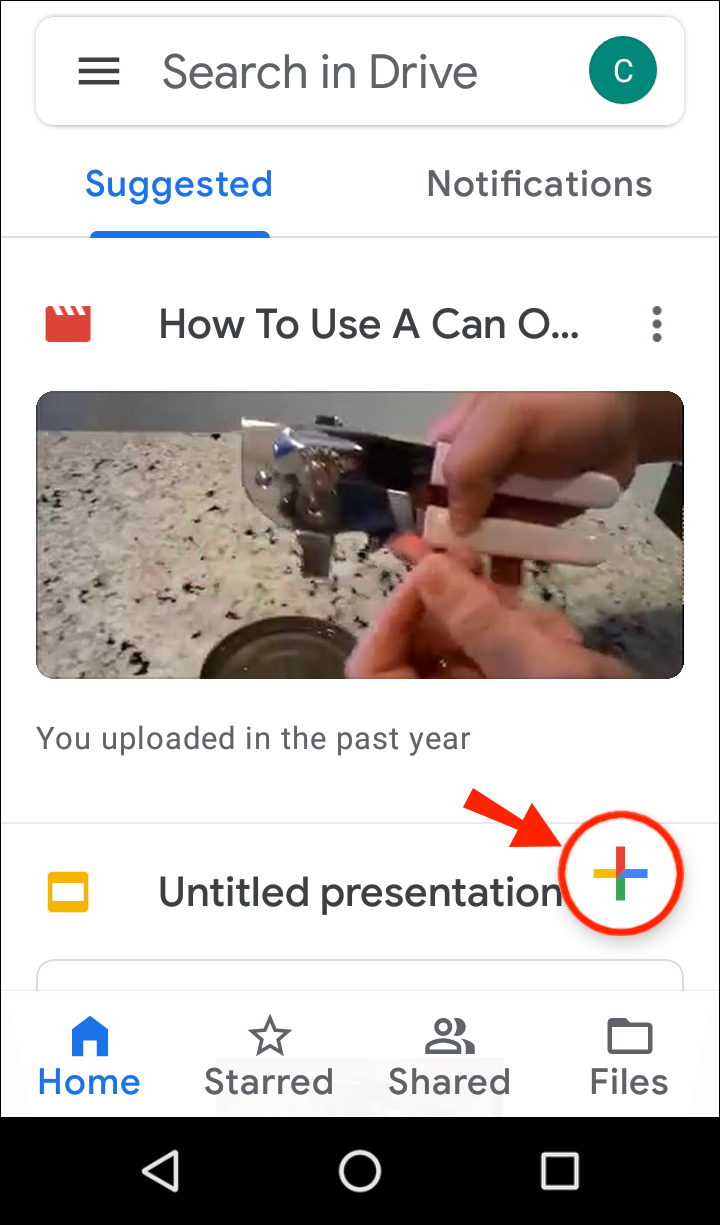
1. Go to the Google Drive app.
2. Click on the small ‘’+’’ icon in the bottom-right corner.
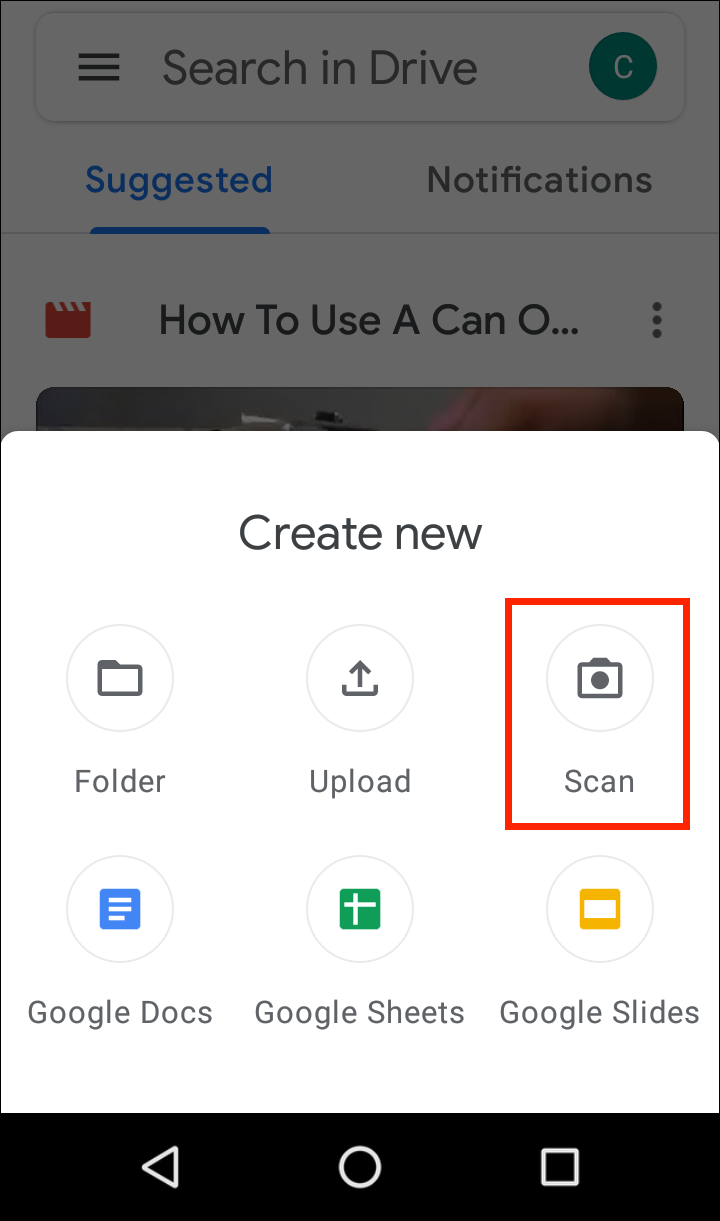
3. Click on the small camera icon.
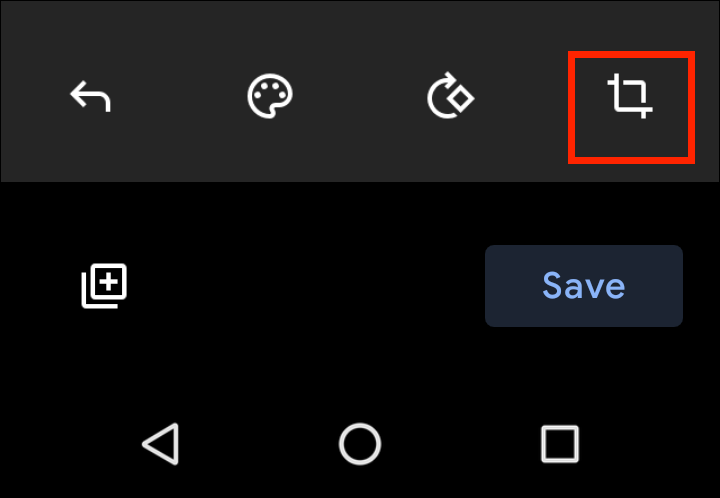
4. Select the document you want to scan from the list. You can use “Crop” for marking by clicking on ![]() the icon. If you made a mistake, you can press the refresh icon to re-scan the page.
the icon. If you made a mistake, you can press the refresh icon to re-scan the page.
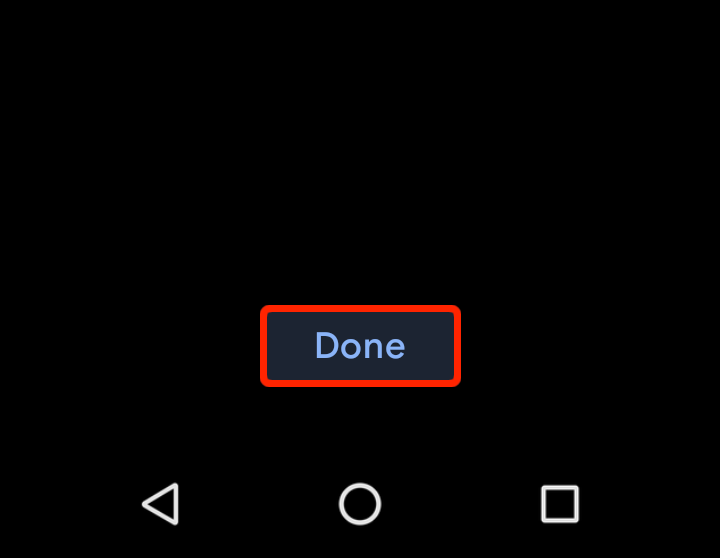
5. Click “Done” to finish scanning.
How to Draw a Google Docs Signature?
Google Docs has a wide range of helpful built-in features. If you’re not a fan of add-ons, you can use the Drawing tool to create an e-signature. Here’s how to do it:
1. Go to Insert > Drawing > + New.

2. The Drawing tool window will appear. Go to Line > Scribble and write your signature using your computer mouse. Touchpads and touchscreens also work.
3. Click “Save and Close.”
Once you create your e-signature, you can use it for other documents as well. You can also edit the size of the signature and move it within the document.
Sign Sealed Delivered
Google Docs provides two user-friendly options for creating e-signatures. You can sign your name with their fantastic built-in Drawing tool or by installing an add-on.
Keep in mind that there are two types of electronic signatures. If the document requires extra verification, you might want to use a digital signature instead.
What do you think about electronic signatures? Which option do you prefer? Comment below and tell us about your favorite tool for signing documents.
Disclaimer: Some pages on this site may include an affiliate link. This does not effect our editorial in any way.