Note-taking on iPad has rendered paper and pencil notes obsolete. First, you can make notes in multiple ways using Apple Notes or third-party tools. Second, organizing and managing your notes takes less time because you have folders and tags. Finally, you can access your notes anywhere using iCloud. But before you enjoy these incredible features, you should know how to make notes on iPad.
This article will explain how to make notes on iPad in different ways. Read on to find out which method works best for you.
How to Make Notes on iPad
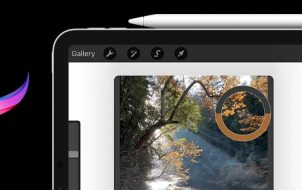
The default note-taking app on iPad is Apple Notes. What sets Apple Notes apart is the features that other note-taking apps would charge for. But iPad doesn’t restrict you to using iPad only. You can download third-party notes apps and use them instead of Apple Notes. However, beware that most of the third-party apps aren’t free.
To illustrate how to make notes on iPad, we’ll use Apple Notes.
Making Freehand Notes on iPad
If you’re old school and like making notes the paper-pencil way, you might find this method convenient for you. You’ll need an Apple Pencil compatible with your iPad version.
There are two types of Apple Pencils: the first-generation and the second-generation.
The first-generation Apple Pencil, released in 2015, is round and charged using a USB. It’s compatible with the following:
- iPad (3rd, 4th, 6th, 8th, and 9th) generations
- 1st and 2nd generation of 12.9-inch iPad
- 10.5-inch and 9.7-inch iPad Pros
On the other hand, the second-generation Apple Pencil is the upgraded version released in 2018. It’s smaller but with advanced functionalities such as a wireless charging system and a magnetic cap that latches on an iPad’s edge. It is compatible with the following:
- iPad Pro 11-inch
- iPad Pro 12.9-inch
If you don’t know which iPad model you’re using, look at the back, and you’ll find all the details. After finding an Apple Pencil compatible with your device, here’s how to make your notes:
- Pair your Apple Pencil with your iPad. If you’re using a first-generation Pencil, attach the lightning connector to your iPad and select “Pair.” For a second-generation pencil, latch it magnetically to your iPad’s edge and tap “Pair.”
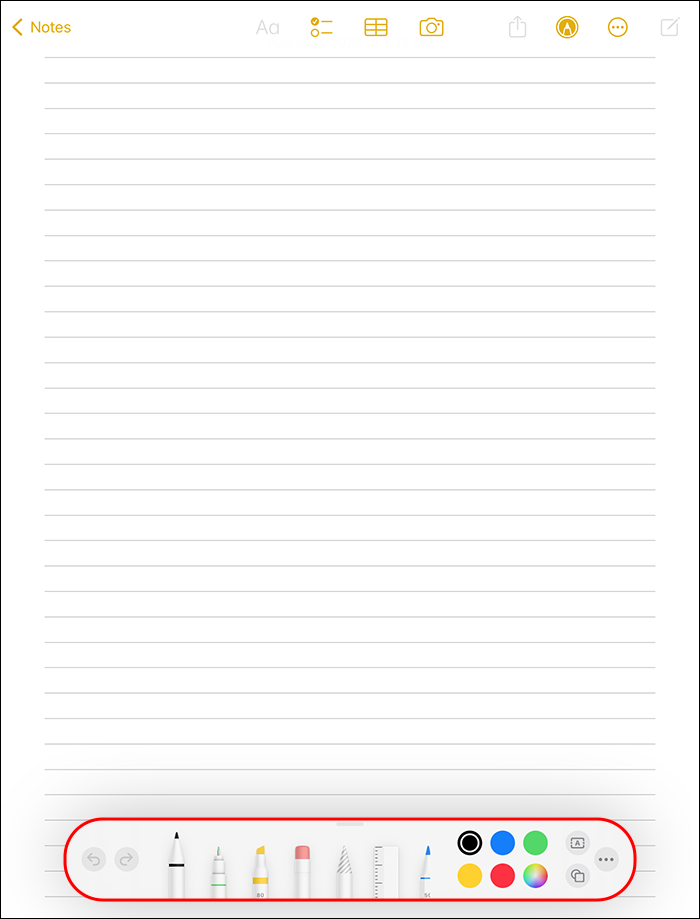
- Launch your Apple Notes app and tap the “New note’ icon.

- To organize your notes neatly, using grids and lines, tap the three dots button in the top right corner. Select the background layout that suits your preferences.

- Dab the tip of your Apple Pencil anywhere on the new note. This signals to the iPad that you want to make handwritten notes.
- Six drawing tools slide up at the bottom of your screen. The first three include a pen, marker, and pencil, which display varying thickness and transparency upon tapping. The next three include an eraser, a Lasso-style selection tool, and a ruler.
- Assuming you want to use a pen to write, tap on it with your Apple Pencil, and select the thickness you want.
- Towards the right of the toolbar, tap the “Color picker” and select the color you want. Start making your notes and tap “Save” once you finish.


Would you like to launch your notes with your iPad locked? If so, you can do so by adjusting your settings to access notes from the screen.
- Open your “Settings” app and select “Notes.”
- Tap “Access notes from lock screen” and tap the “Off” button to turn it on.
- Select if you want to create a new note or resume the last by tapping your lock screen with your Apple Pencil.


Making Typed Notes on iPad
Making typed notes might be necessary if you have poor handwriting or want your notes to look presentable for sharing. Fortunately, iPad features several methods of making typed notes. You can use scribble or use an on-screen keyboard.
Making Typed Notes Using Scribble
Scribble is a feature available in iPadOS 14 or later that adds more functionality to the Apple Pencil. It allows you to take handwritten notes as it converts them into text. This saves you time if you’re not a fast typist with an on-screen keyboard.
Here’s how you use Scribble to make typed notes:
- Pair your Apple Pencil with your iPad.
- Launch your Apple Notes app and create a new note.
- Tap anywhere on the screen with the Apple Pencil to signal your iPad you want to take handwritten notes.
- The above step opens a markup tool palette at the bottom. On iPad OS and later, there’s an added writing utensil with an “A” on it. Select it to convert your handwriting to text automatically.
- If you make a mistake, scratch the text to delete it. To select a word or chunk of text, circle it. Tap the “Return” button on the toolbar to skip line by line. Select the “Aa” button on the toolbar to change font style and size.


Making Typed Notes Using Keyboard
Use these steps to make notes using the on-screen keyboard:
- Open your Apple Notes and create a new note.
- Locate the floating keyboard on your screen and place two fingers on it. Spread the fingers apart to make the keyboard full-size.
- Start typing your notes and save them once you finish.

Making Dictated Notes on iPad
Making notes on iPad by dictating is useful when using your hand to do something else like driving or cooking. Though this method might not be efficient for editing, it is faster than the others.
If you run iPad OS 15 or later, you can take your notes through dictation as follows:
- Start Siri by tapping the “Side button” or saying “Hey Siri.”
- Ask Siri to make a new note and give it a title. For example, “Hey Siri, make a new note and name it groceries.”
- Dictate your notes to Siri, including punctuation marks. For example, “On the new groceries note, write vegetable semicolon spinach comma onions comma cabbage comma and carrots full stop.
- Once you finish dictating the notes, Siri saves them to your Apple Notes. Review to correct errors.
Making Multimedia Notes on iPad
If you have a collection of videos, images, and voice notes that you want to reference from a single place, you can make them into notes.
- Launch your Apple Notes and create a new note.
- Tap the camera icon and select your video or image from your device. Alternatively, you can take a photo, record a video, or copy and paste it into your note.
- Repeat the process to add more files and save your note.

Elevate Your Note-Taking on iPad
Apart from having a large screen suitable for taking notes, iPad offers tons of features that make note-taking a breeze. It mimics the traditional paper-pencil and typing feel to accommodate everyone. You can try each of the above methods and see which one is best suited to you.
Have you ever made notes on iPad? If so, which method do you prefer? Tell us in the comments section below.
Disclaimer: Some pages on this site may include an affiliate link. This does not effect our editorial in any way.