Roblox allows players to freely customize clothing items – which is great, otherwise, all the characters would look the same. However, to upload your creation to Roblox, you need to purchase the Premium membership and send your work for evaluation first. If you’d like to make a custom shirt design for Roblox, read our guide.
In this article, we’ll explain how to make Roblox shirts in GIMP and paint.net, and how to upload them to Roblox. Additionally, we’ll answer some of the most common questions related to Roblox UGC item creation and trading.
How to Make Roblox Shirts Using GIMP?
Let’s dive right in – one of the programs you can use to customize Roblox shirts in GIMP, which can be downloaded from the official website. Once you’ve installed the software, follow the steps below:
- Sign in to Roblox and get the Builder’s Premium membership. This is necessary to upload your creation to Roblox.

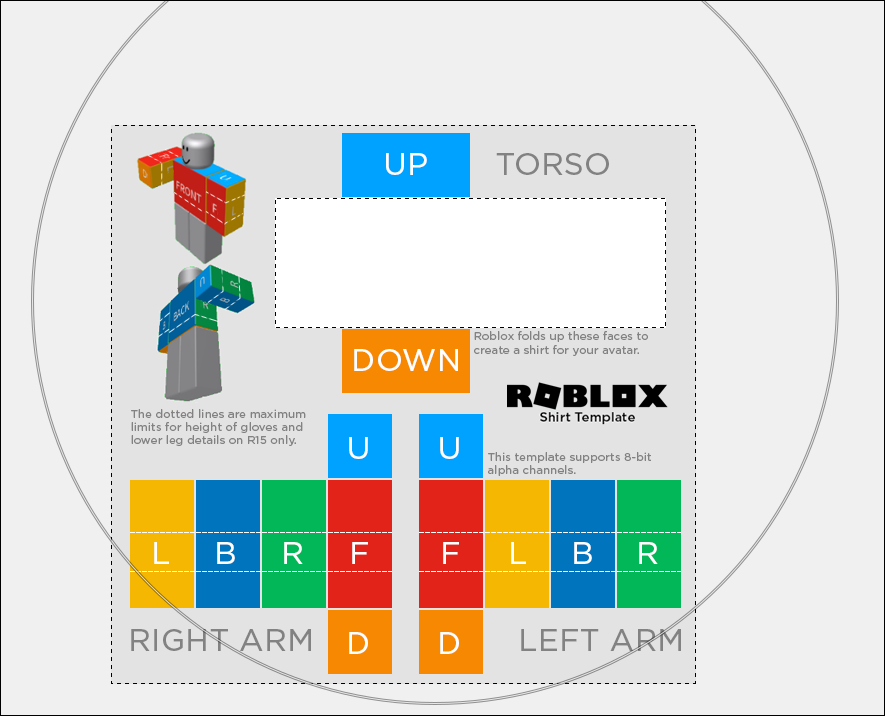
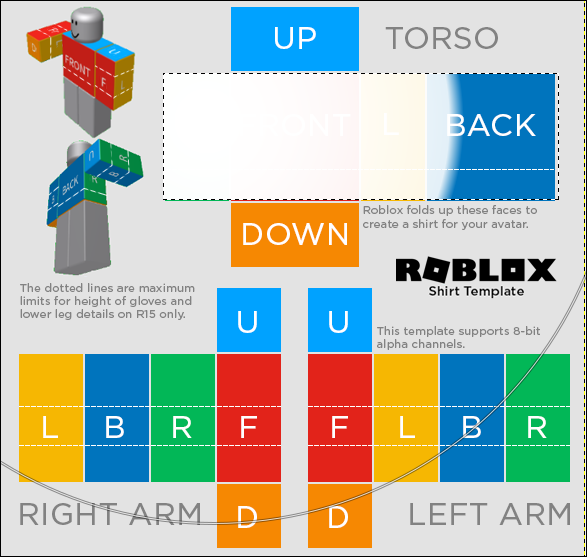
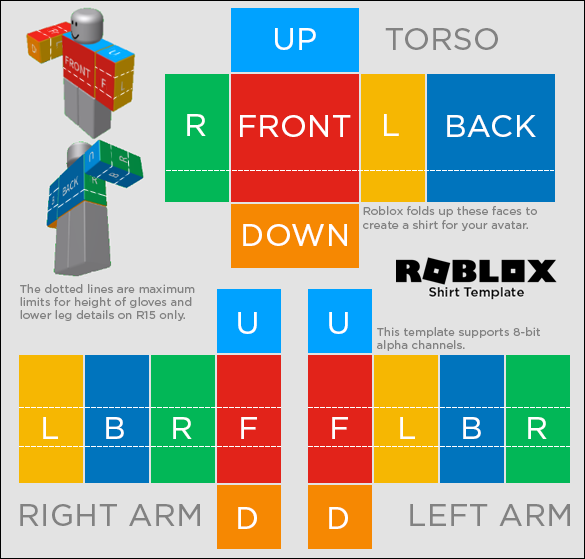
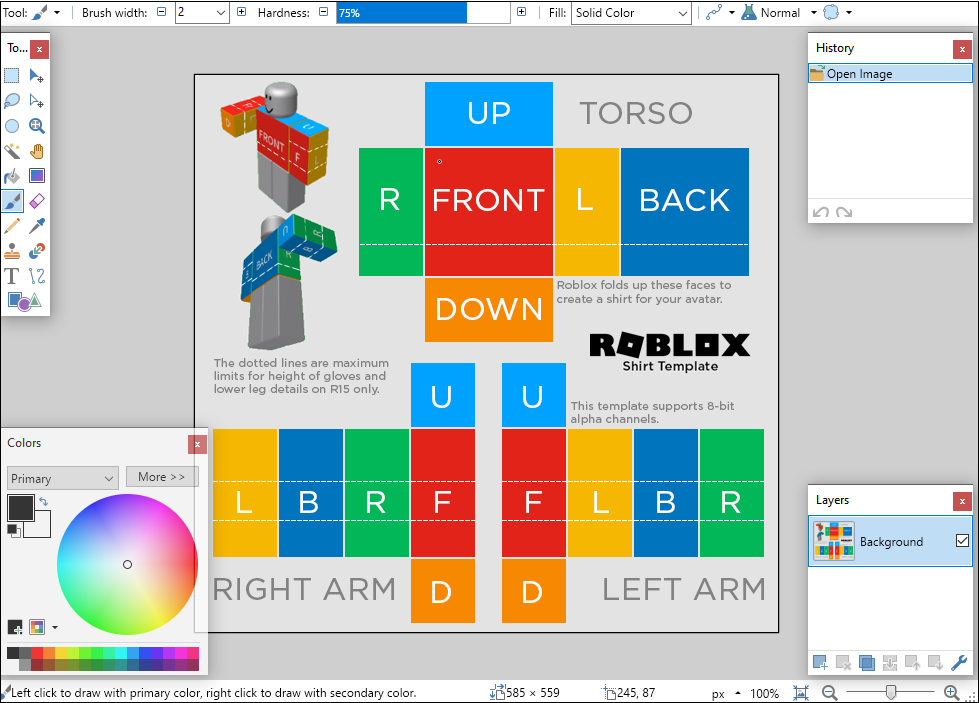
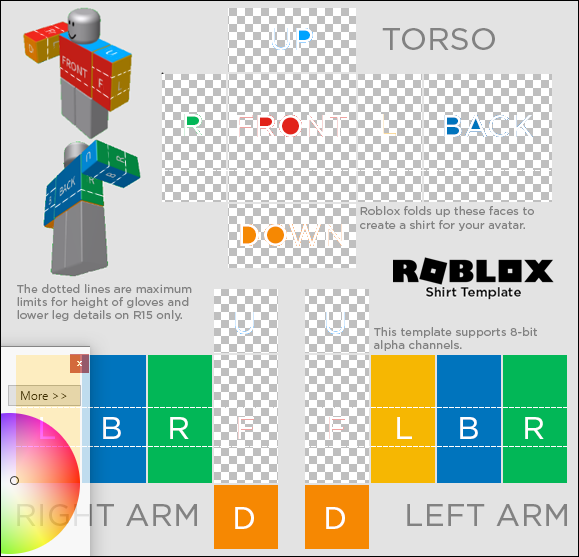
- Download the official Roblox shirt template here – simply save the image as PNG to your device.

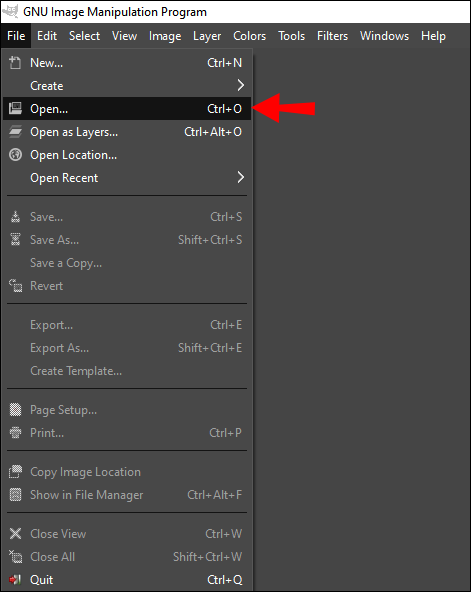
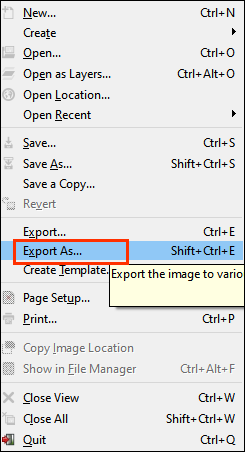
- Launch GIMP, click “File” at the top of your screen and select “Open as Layers” from the dropdown menu.
- Find your PNG template and open it.

If you’d like to make a shirt with an image on it, find a picture you like online, save it, and follow the instructions below to place it on your template:
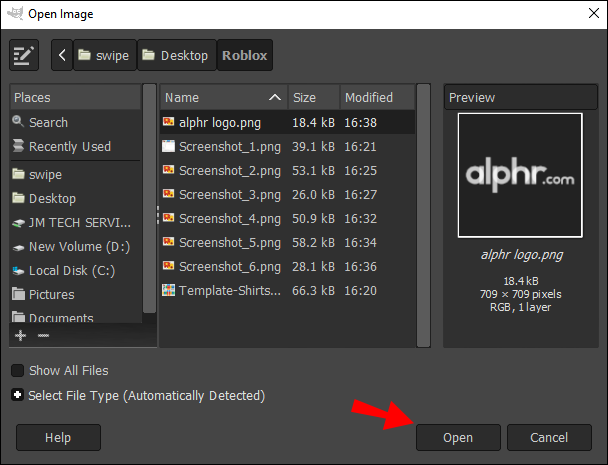
- Click “File,” then select “Open” from the dropdown menu and find the desired image. It will open in a new tab – you can see all tabs at the top of your screen.
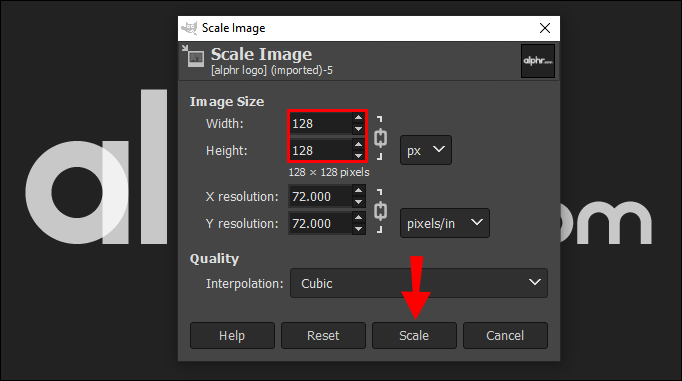
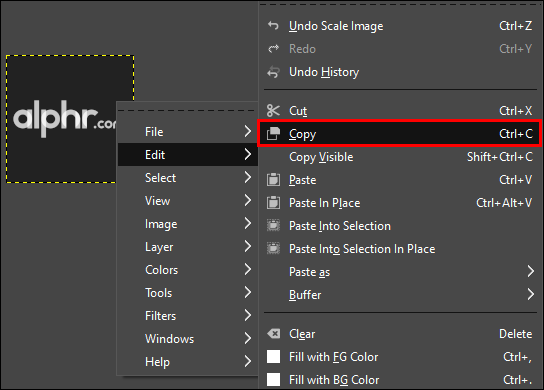
- Navigate to the tab with your image and right-click on it. Select “Scale Image” and adjust the dimensions to fit the template if needed – the front and back sides of the shirt template are 128×128 pixels. Then, click “Scale.”
- Right-click your image again and select “Copy.”
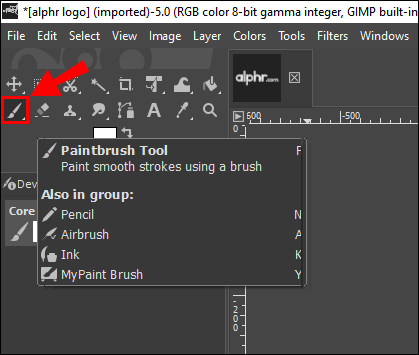
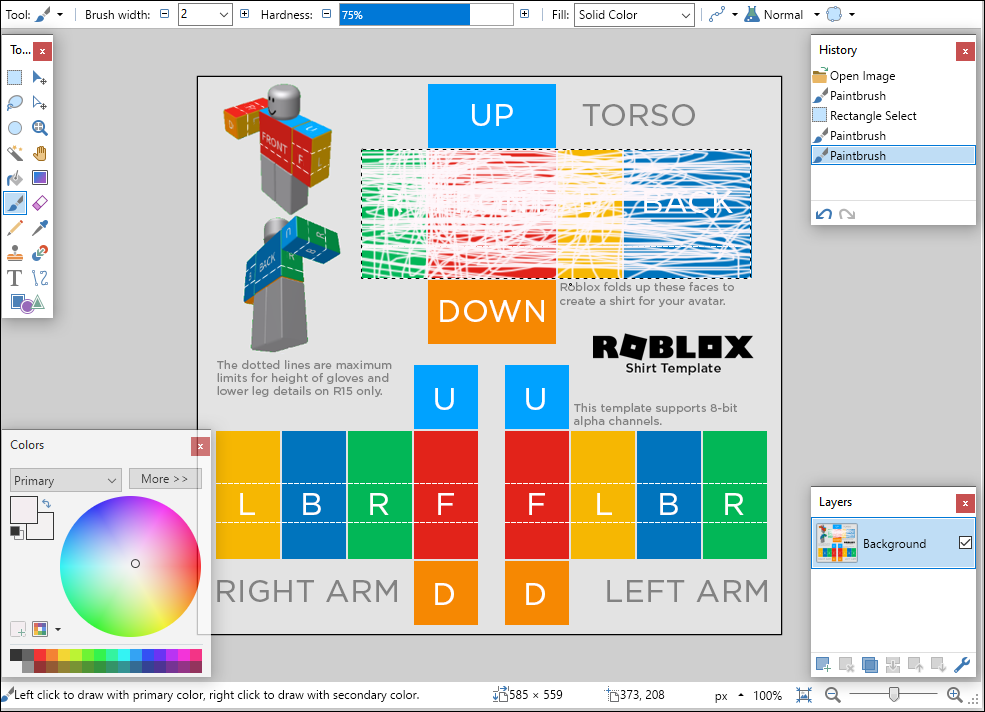
- Navigate back to the template tab and click the brush icon from the left sidebar.
- Click the black circle icon next to the “Brush” menu. Your copied picture should appear there – select it.
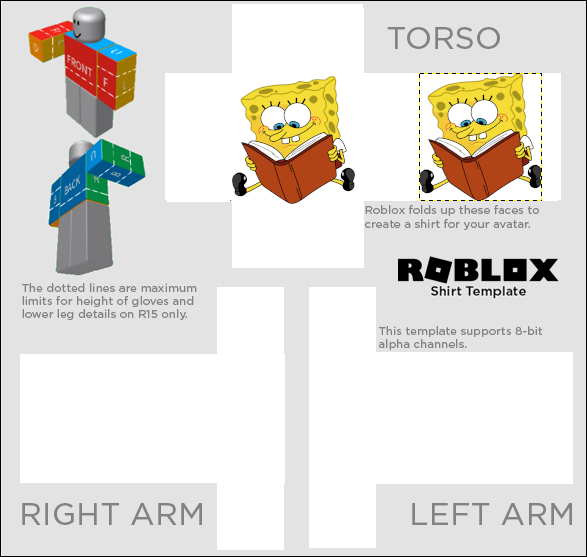
- Select an area on the shirt template where you’d like to place the image. To do that, click anywhere and drag the corners of the dotted box.
- Click anywhere inside the highlighted area to place your image there.

If you wish to simply change the color of your shirt template, here’s how to do it:
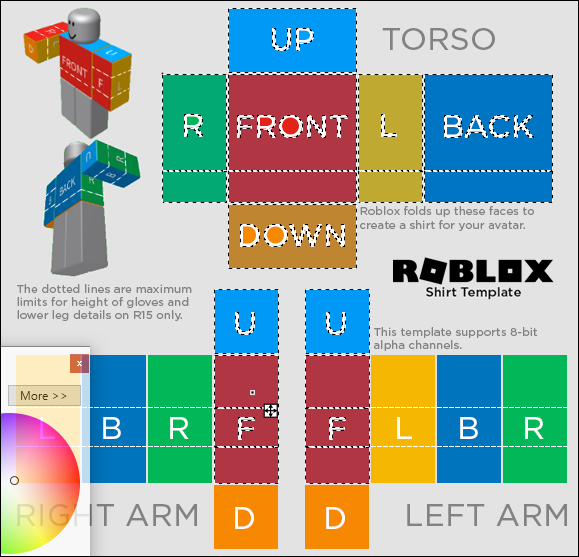
- From the left sidebar, select the brush icon.
- You will see a colored square appear in the sidebar. Click on it and choose a color you like.
- Select an area on the shirt template to color. To do that, click anywhere and drag the corners of the dotted box.
- Click anywhere inside the highlighted area to color it.
- If you wish to create a free drawing, click the third-left icon in the top row of the left sidebar. Click and hold your mouse while drawing, then release it.


If you’d like to leave any part of your shirt transparent, for example, the sleeves, follow the steps below to do that:
- From the left sidebar, click the eraser icon.
- Select an area on the shirt template which you wish to leave transparent. To do that, click anywhere and drag the corners of the dotted box.
- Click and hold your mouse and move it across the highlighted area to erase everything inside it. It may appear black, but it will become transparent after you upload it to Roblox.
Now that you’re happy with your design, it’s time to export it. Here’s how to do that:
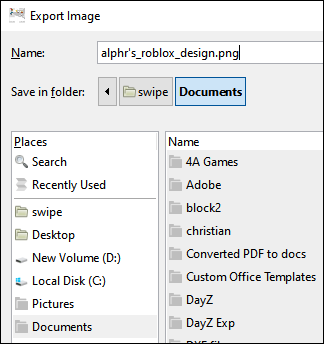
- Click “File,” then “Export As…”
- Name your project, choose a folder, and click “Export.”
How to Make Roblox Shirts Using Paint.net?
Paint.net is another popular software commonly used to customize Roblox clothing items – it can be downloaded from the official website and is free, just like GIMP. Once you’ve installed it, sign in to Roblox and get the Builder’s Premium membership. This is necessary to be able to upload your creation to Roblox. Then, follow the steps below:
- Download the official Roblox clothing template.
- Open your template in paint.net.
- Draw the outline of your clothing piece. Press and hold the “Shift” key, then left-click your mouse and drag the line. Release the mouse, then repeat. Don’t forget about details, such as a collar, buttons, etc.
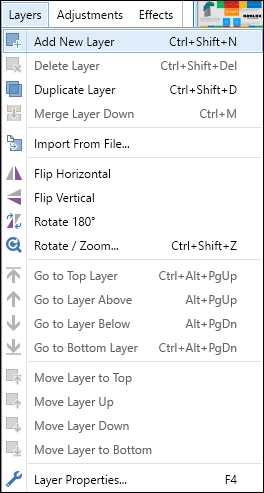
- If you need to reflect any items, select an item and click “Layers” at the top of the page. From the dropdown menu, select “Flip Horizontal” or “Flip Vertical.”
- Click “Layers” at the top of the page, then select “Add New Layer.”
- Add trim lines. They should repeat the outline but be moved to the side by a pixel and be white.
- If you wish to add stitching, change your line type to dotted, dashed, or any other and draw more lines. Add small details. Here, you have to be creative – the instructions vary depending on which details you want to make.
- Add another layer.
- Select a part of your clothing piece with a magic wand tool and color it using any tool you find the most convenient (paintbrush, fill, etc.).
- Hold down the “Ctrl” key. With the magic wand tool, select the background and all the areas where the skin should be showing. Make sure the magic wand tool mode is on Global.
- In the menu at the top of the page, switch the Flood Mode to Local.
- Delete selected areas.
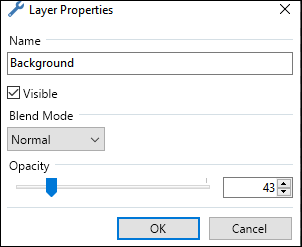
- Adjust the layer opacity. Set the first layer’s opacity to approx 40, second – to 20, and third – to 10.
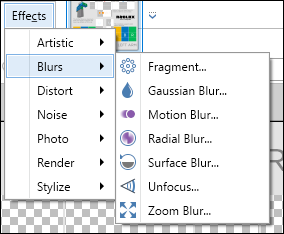
- To create a texture, click “Effects” at the top of the page, then “Blurs” or “Noise.” Select the preferred effect type.
- Save your clothing piece.


How to Add Custom Shirts Into Roblox Using the Create Page?
Uploading your custom shirt to Roblox is quite straightforward – however, you’ll have to wait for the admin team to approve your creation. Here’s how to do that:
- Make sure you’ve purchased the Roblox Premium membership.
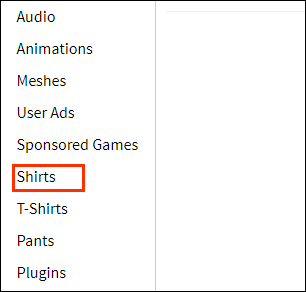
- Sign in to Roblox and navigate to the “Create” tab.
- Under “My Creations,” select “Shirts.”
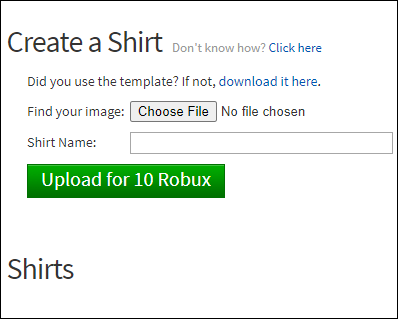
- Under “Create a Shirt,” click “Browse…” to view your files.
- Select your edited shirt PNG file and open it with Roblox.
- Name your creation and click “Upload.”
- Wait until the admin team approves and converts your PNG file into a proper shirt – you should get an email when this happens. It normally takes a couple of hours.
Frequently Asked Questions
Read this section to find out more about creating and selling custom shirt designs in Roblox.
Is Builder’s Club Required to Make Roblox Shirts?
Builder’s Club membership isn’t necessary to create a shirt, but rather to upload it and sell it. Of course, there’s no sense in customizing clothing if you can’t use it in the game. But if you only plan on making one shirt, you may ask someone who already has a membership to upload it for you instead of paying $4.99 – $20.99 for it.
Are There Fees to Add Shirts to Roblox?
Yes – there’s a monthly fee for purchasing the Builder’s Club membership which is necessary to upload your creations to Roblox. The membership ranges from $4.99/mo to $20.99/mo. The only difference between the three membership ranks is the amount of Robux you get for purchasing it – 450, 1,000, or 2,200 respectively. All of the other advantages remain the same – you gain access to trading UGC items, can buy exclusive Avatar Shop items, and get benefits within games.
Can I Publish My Roblox Shirts for Sale?
You can trade your custom shirts on Roblox if you’ve purchased the Builder’s Club membership. You can’t upload your creations for free – the minimum price is five Robux for pants, and t-shirts – two Robux. To place your shirt on sale, follow the steps below:
1. Once you’ve uploaded your shirt to Roblox, navigate to the “Create” tab.
2. Under “My Creations,” select “Shirts.”
3. Find the shirt you wish to put on sale and click the gear icon next to it.
4. Select “Sales,” then shift the toggle button next to “Item for Sale.”
5. Set the price of your shirt in Robux.
6. Click “Save.”
Create and Earn Robux
Now that you know how to personalize Roblox shirts, you can get creative and play a fashion designer. The best part is, if other players like your design, your Premium membership purchase may pay for itself and even leave you with profit. If you enjoy creating UGC on Roblox, you may also try making games in Roblox Studio – however, bear in mind that you can’t sell them.
What’s your opinion on Roblox developers limiting access to creating UGC? Share your thoughts in the comments section below.
Disclaimer: Some pages on this site may include an affiliate link. This does not effect our editorial in any way.