Easily reposition your data in Microsoft Excel using the Insert Sheet Rows (and Columns) feature. By stacking additional rows on top of the current ones in the spreadsheet, you can push the current data further down the list while creating new rows for additional information. It’s one of the simpler methods you can take when it comes to shifting your cells downward.
There is also the dragging method, which tends to cause more issues than it does resolve them. It’s a method that is far too prone to errors on top of being very inconvenient in comparison to just adding a few rows.
Then there is the ability to simply cut and paste a few Excel cells, repositioning them to where they fit more comfortably. Probably the more efficient method for a less busy worksheet where you have less information to move around.
If you’re looking to reposition your work to add additional information or just to center it on a page, this article will help you through the process.
Shifting Cells Downward in Excel
Shifting a full row of cells downward is the easier method for most situations. To shift a row of cells down in Excel, all you have to do is simply add a few additional rows above them. In order to pull it off:
- Launch Excel and open your spreadsheet by clicking on the “File” tab and selecting Open from the menu.

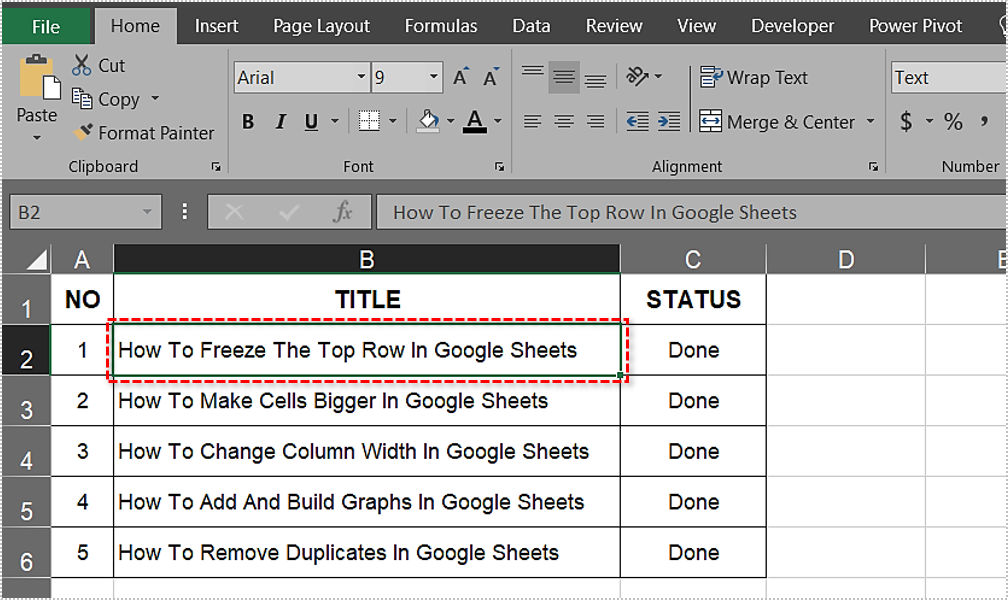
- Once your sheet is in front of you, click on any cell in the highest row that you want to shift downward.
- For example, highlight cell B2 if you want everything below row 1 to be moved down.
- For example, highlight cell B2 if you want everything below row 1 to be moved down.
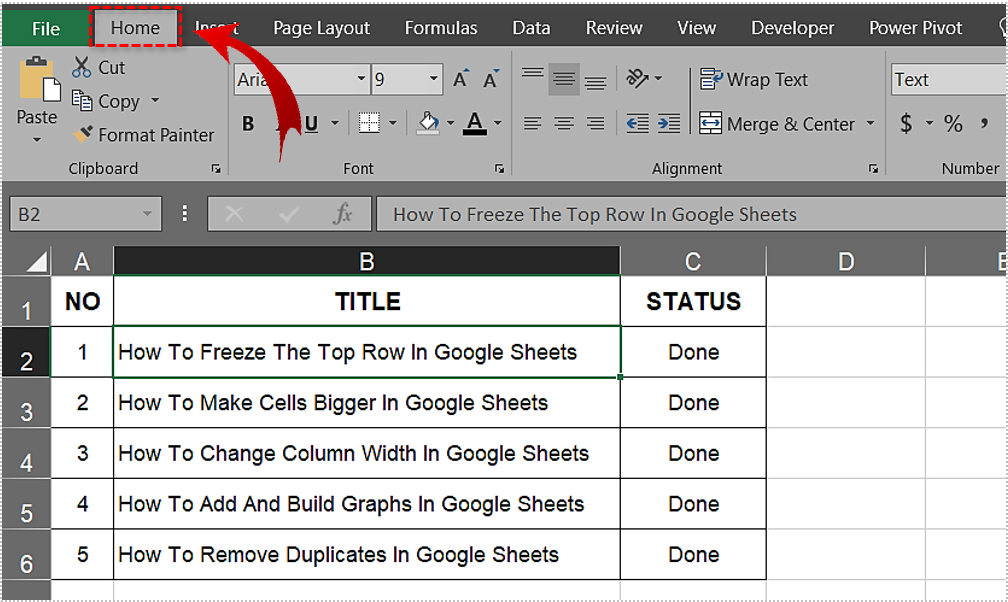
- It should already be the default tab, but if not, make sure that you’re currently in the “Home” tab.
- Locate the “Cells” section and click on “Insert”.
- From the drop-down, select Insert Sheet Rows.


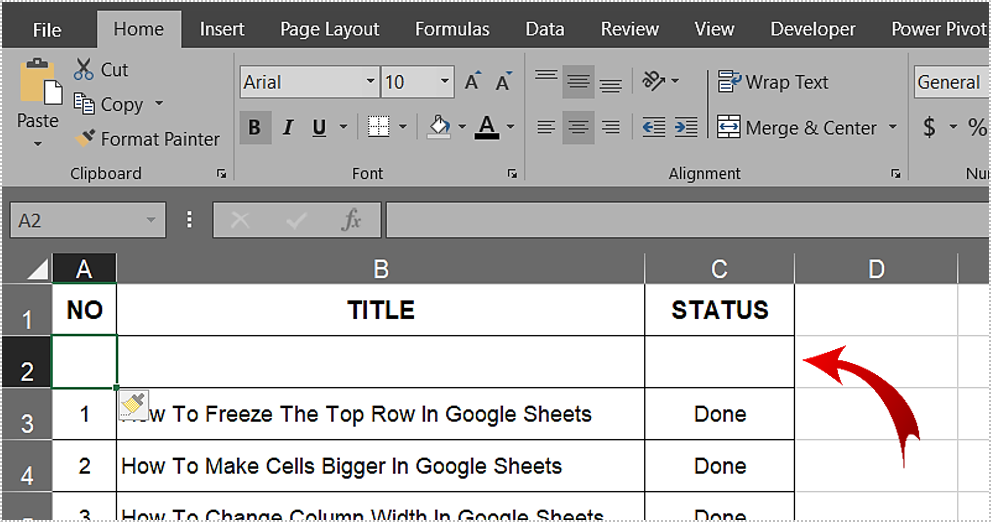
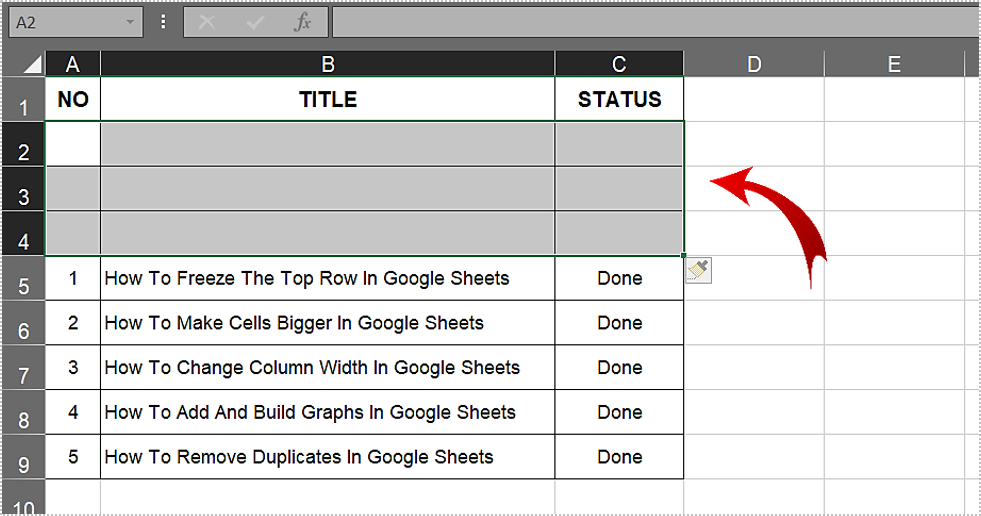
The new row should have been added. Make sure it has been added to where you wanted. If not, hit the Undo icon at the top-left of the window and try again. You can continue to replicate steps 4 and 5 if you need the data moved down further. You can also highlight multiple rows to have them all move down based on the number of rows selected.
To add multiple rows at once in Excel:
- Drag your mouse to highlight all cells you want to move that are currently touching.
- Start from a cell in the row that sits above the one you want cells added and drag it down below any row you don’t want to be moved.
- Start from a cell in the row that sits above the one you want cells added and drag it down below any row you don’t want to be moved.
- Head back to the “insert” option in the “Cells” section of the “Home” tab.
- Choose Insert Sheet Rows to shift your work downward by multiple rows.


Shifting By A Single Cell
What if you don’t need an entire row shifted and instead just want a single cell moved down? Is this even possible? Of course, it is. It’s also very simple, just as moving an entire row downward was.
Yes, you could just cut and paste a single cell into another cell further down the sheet, but that doesn’t necessarily push the cells down uniformly. To shift a single cell downward:
- Left-click the cell that you want to be moved in order to highlight it.
- Next, right-click that cell to pull up a menu.
- From the menu, select Insert…
- This will prompt an “Insert” window to pop-up.
- From this window, select Shift cells down, and then click OK.

The highlighted cell will now be shifted downward, including the rest of the cells in that column, leaving the rest of the row untouched. Just to be clear, only the highlighted cell and those below it will be moved down. All other cells above the highlighted cell will remain as they were.

Shifting Cells Up By Removing Rows
You also have the power to move cells upward in Excel by removing a few rows. The thing to look out for is cells containing data. If the cells you plan on removing contain data, that data will be lost. The only possible way to recover the lost data is through the Undo feature or by backing up any material before deleting any cells.
To remove cells:
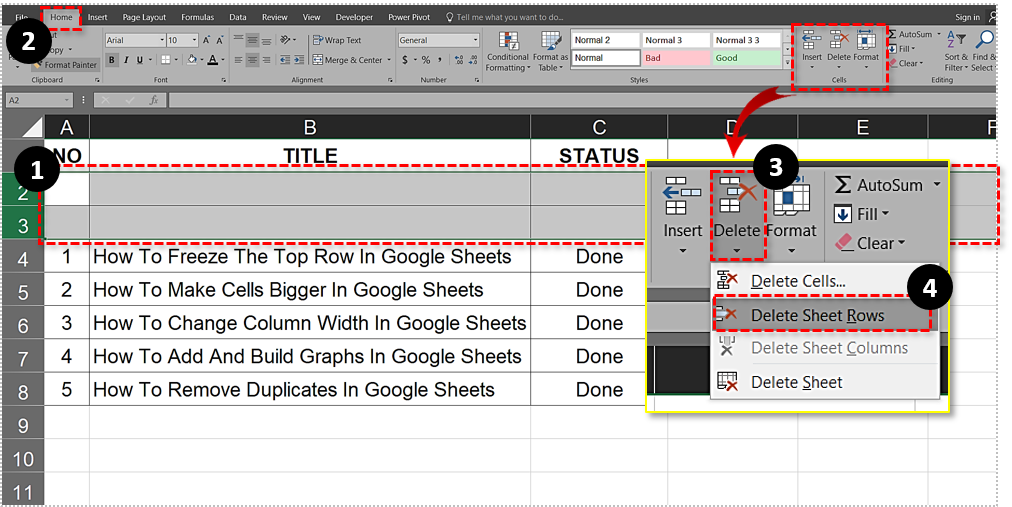
- Highlight the row(s) that you want to delete.
- Drag your mouse to highlight multiple rows.
- You can also highlight the beginning row, hold down the Shift key, and click on the final row you want to delete in order to select all rows within the highlighted area.
- Next, click the “Home” tab on the ribbon menu.
- It should already be selected by default.
- Click “Delete,” which can be found in the “Cells” section.
- Select Delete Sheet Rows to delete all selected rows.
Another way to pull this off:
- Highlight the rows that you want to be deleted.
- Right-click on one of the highlighted rows to open a menu.
- Select Delete… from the menu.
- From the new window, select Entire row and then press OK.

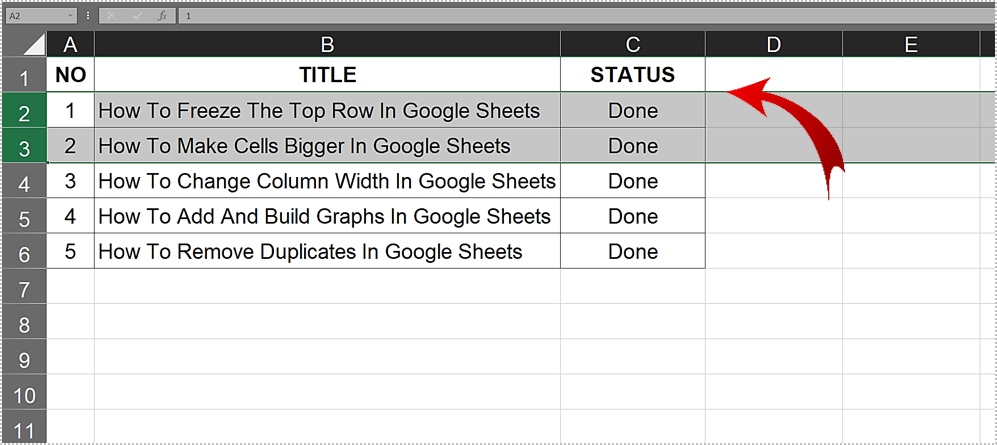
Now the row(s) are removed and all rows below those selected have been shifted upward.
Similar to how you can move a single cell down, you can technically do the same thing for moving cells up. However, you’ll need to delete the above cell in the process.
What you do is:
- Highlight the cell you want to delete.
- Right-click that cell.
- From the menu, select Delete…
- In the “Delete” window, select Shift cells up and then click OK.


That’s all there is to it. Keep it up and you’ll be a cell-shifting pro in no time.
Disclaimer: Some pages on this site may include an affiliate link. This does not effect our editorial in any way.


