Windows 11 is the latest operating system from Microsoft, and the tech giant promises gamers that it offers some new features they’ll enjoy. So far, there’s no convincing reason to upgrade to the latest OS yet, seeing as there are some issues and many promised features haven’t arrived. However, if you have already made the jump, you can still make the most out of it.
Users can perform several steps to boost their gaming experience, especially with Game Mode, which has been ruthlessly polished for a long time. Read on for more details.
Activate Game Mode
In the past, Game Mode used to be more of a hindrance than a gaming experience booster. It would cause issues such as stuttering and increasing input lag. These issues affected gamers from casuals to professionals, as even tiny problems like this can matter in a lightning-speed competitive setting.
However, Microsoft listened to the people and fine-tuned Game Mode. Today, it’s safe to say that it doesn’t prevent you from enjoying your games anymore. It would be best if you turned it on before playing games.
- On your PC, click on the Windows Start button at the bottom-left corner.
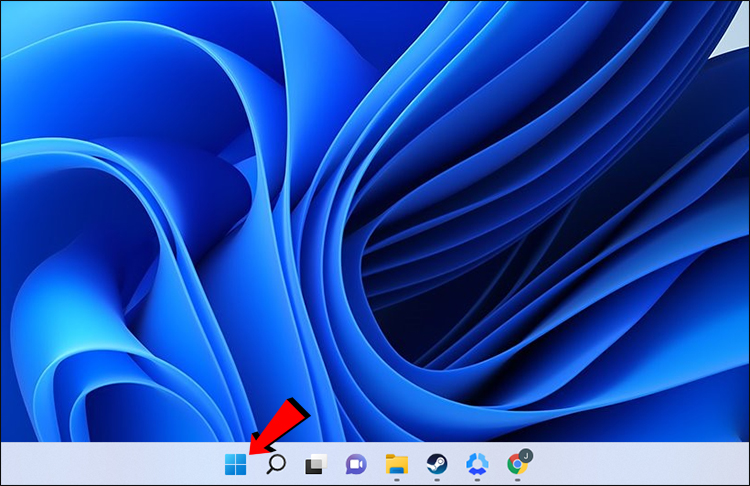
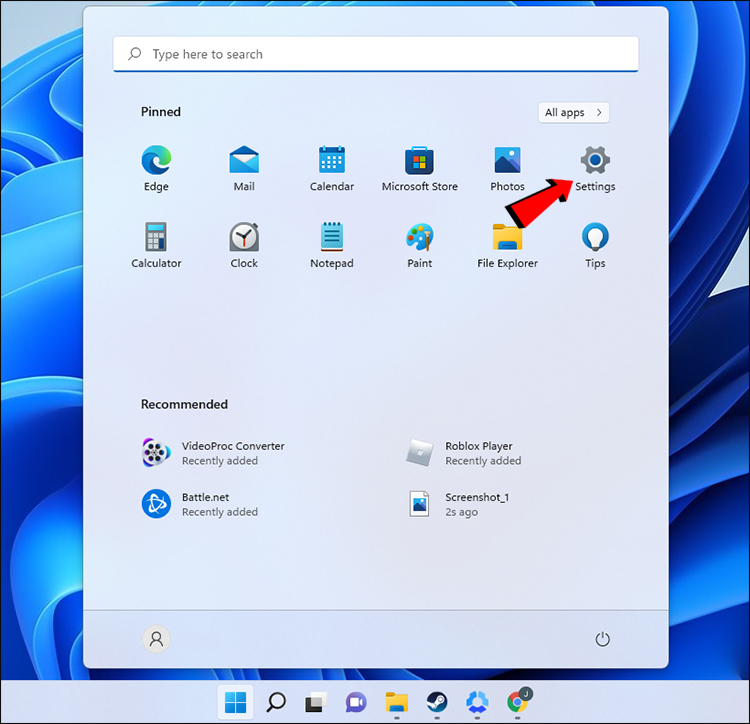
- Click on the gear icon, which brings you to the “Settings” menu.

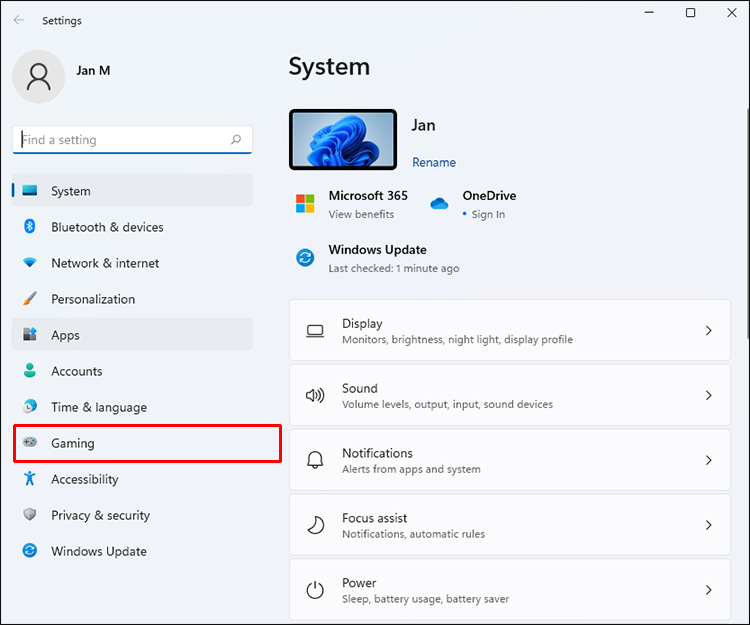
- Select “Gaming” from the options.
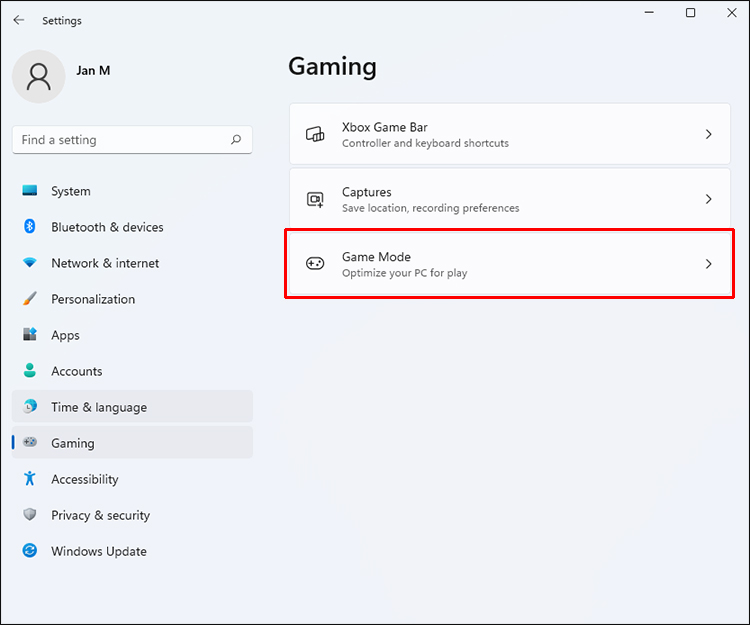
- Go to “Game Mode.”
- Toggle Game Mode on, which makes the switch appear blue.
- Start playing games.
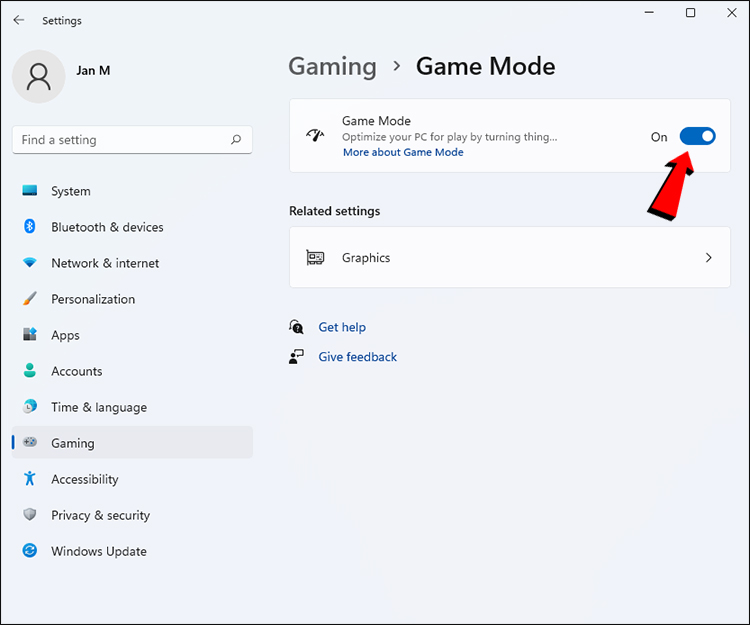
Turning on Game Mode will usually result in a performance boost, but the results will vary across titles, as each game is different. You can compare and contrast the performance and look for any substantial improvements.
Use the Latest Version of Windows 11
The latest version of an operating system usually offers slightly better performance, but that’s not all. Newer versions also introduce new security patches, which can help protect those who play online games and socialize.
To help optimize your gaming experience, we recommend updating your Windows 11 OS as frequently as possible.
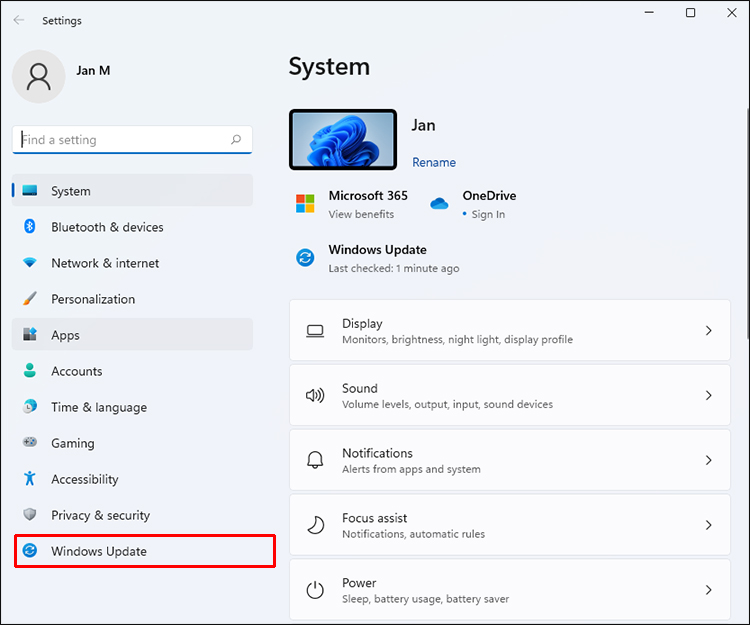
- Open the Start Menu on the bottom-left of the screen.
- Click on “Settings.”
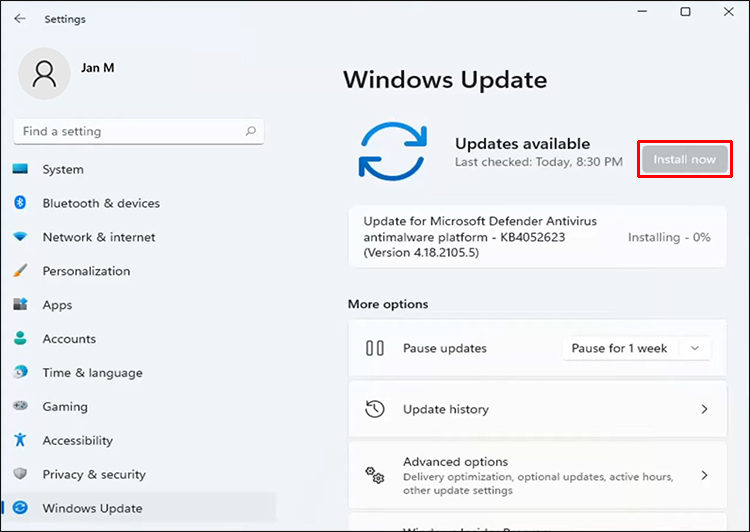
- Look for “Windows Update” on the left bar.
- In the update section, select “Check For Updates.”
- If there’s a new update, allow Windows to install it.
- Restart your PC.
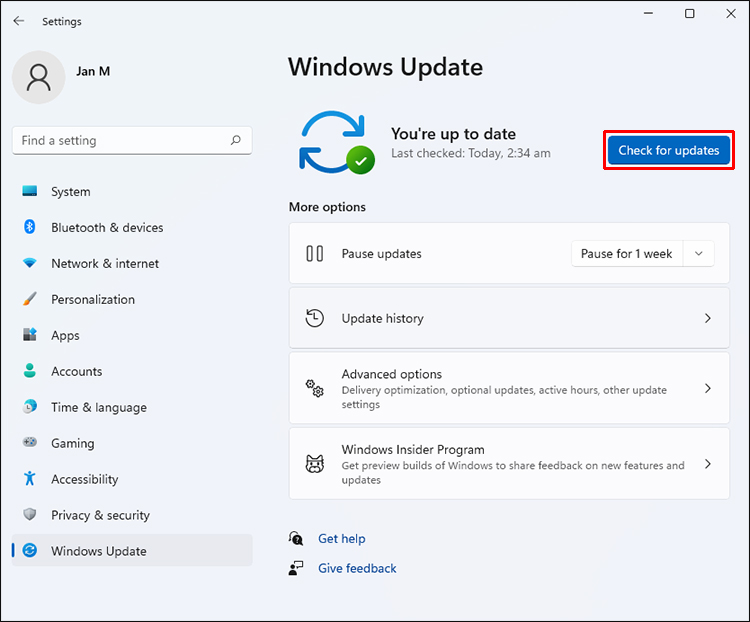
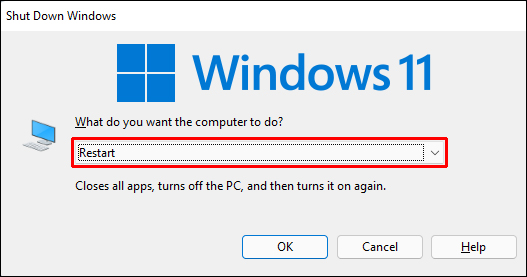
The best way to handle the newest Windows 11 builds is to enable auto-updates. The system will automatically install them, and all you have to do is restart your computer for the changes to start working.
Update Your Graphics Drivers
Every gaming PC worth its salt will contain a dedicated GPU, which handles the brunt of gaming tasks. However, laptops with integrated graphics or APUs receive updates from Windows Update.
No matter if your PC has an AMD or NVIDIA GPU, you’ll need to use the proper dedicated software.
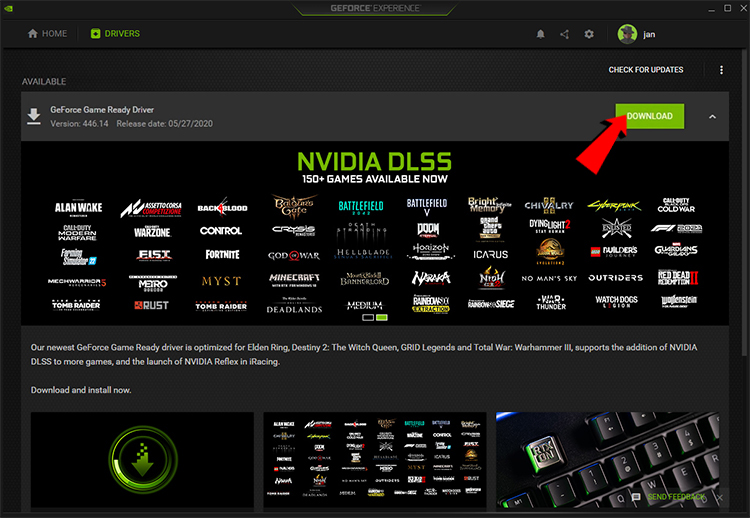
Here’s how to update your NVIDIA drivers.
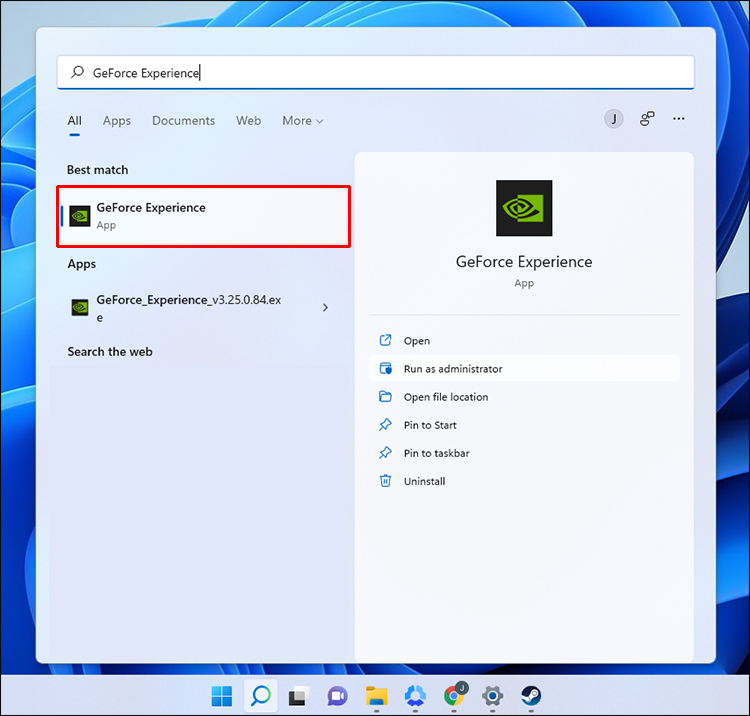
- Launch NVIDIA GeForce Experience.
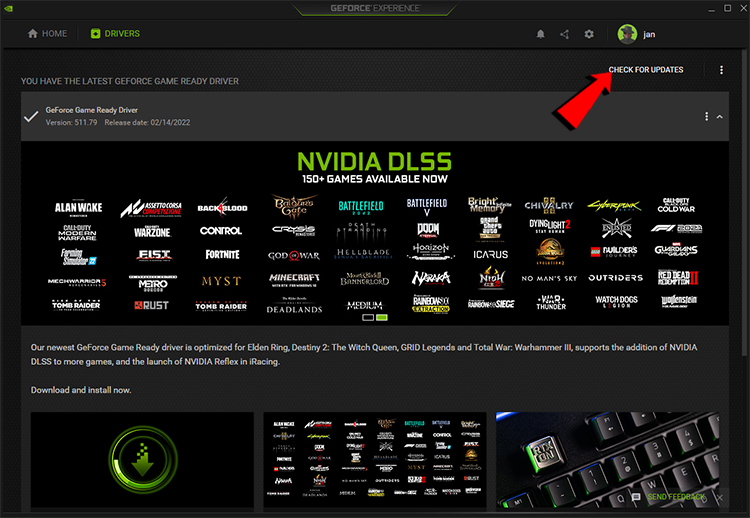
- Click on “Check For Updates.”
- Download the latest driver.
- Install the driver.

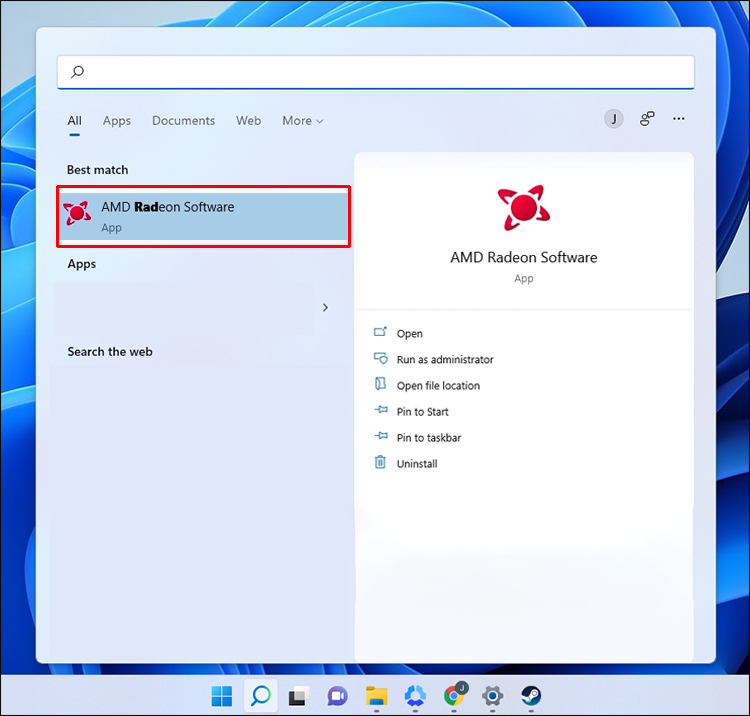
For AMD GPUs, you’ll need the AMD Radeon software.
- Launch AMD Radeon Software.
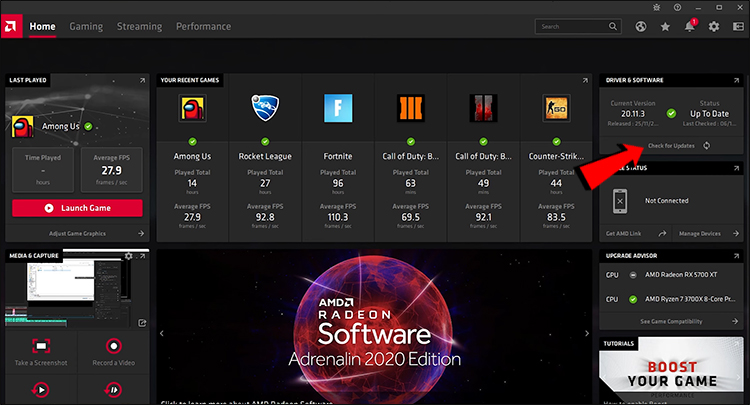
- Select “Check For Updates.”
- Go to “Drivers & Software.”
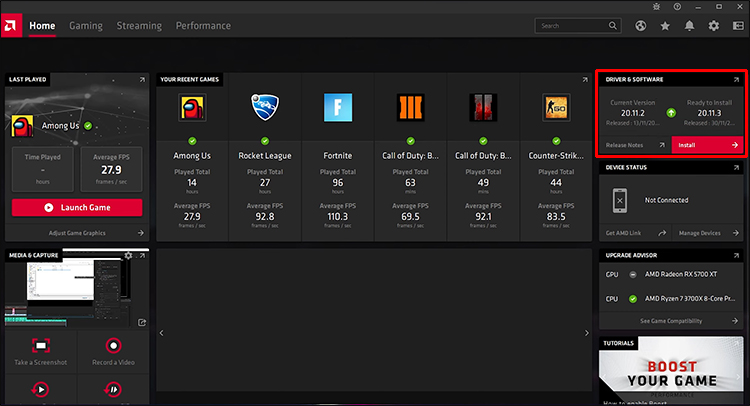
- Download and install any new updates.

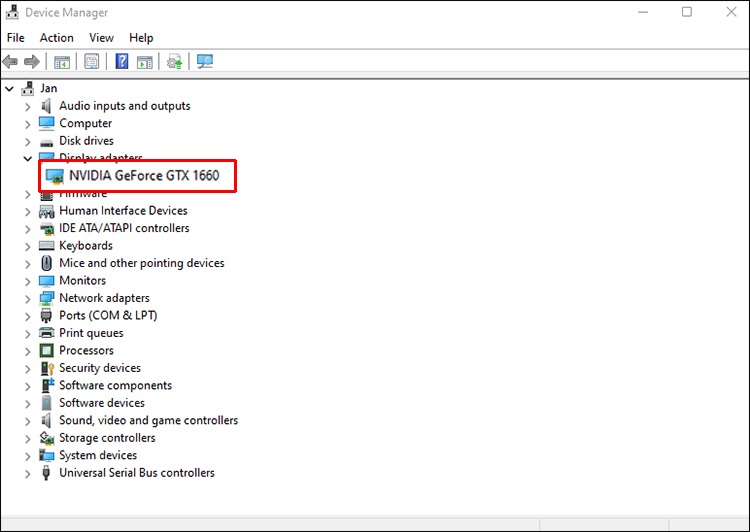
Follow these steps if you’re using a PC or laptop with integrated graphics.
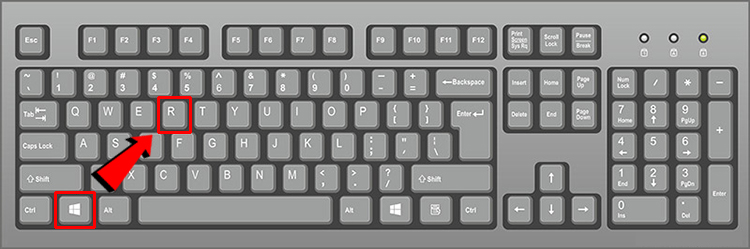
- Press the Windows Key + R.
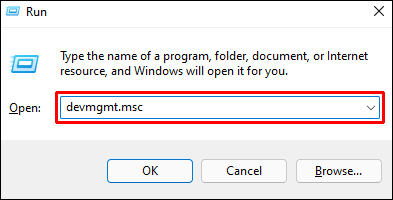
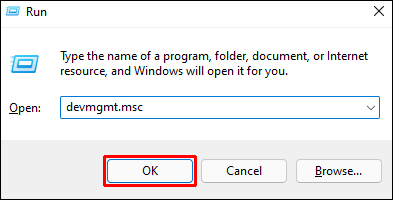
- Type “devmgmt.msc” without extra symbols or letters.
- Click on “OK” to bring up the Device Manager.
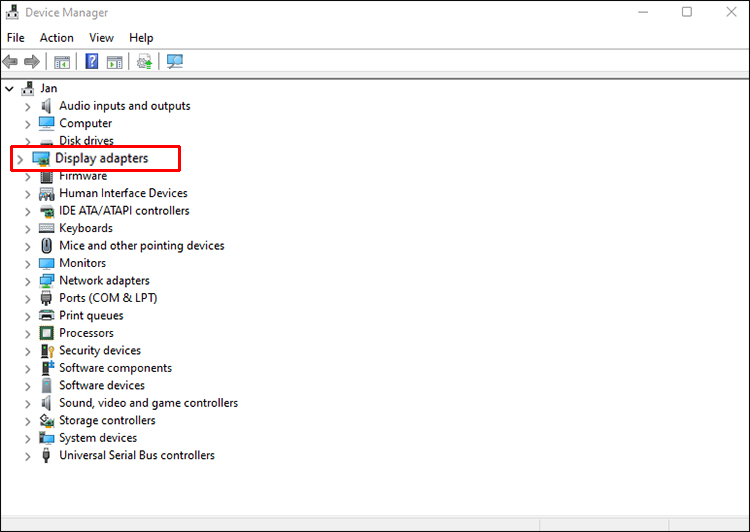
- Scroll down and look for “Display Adapters.”
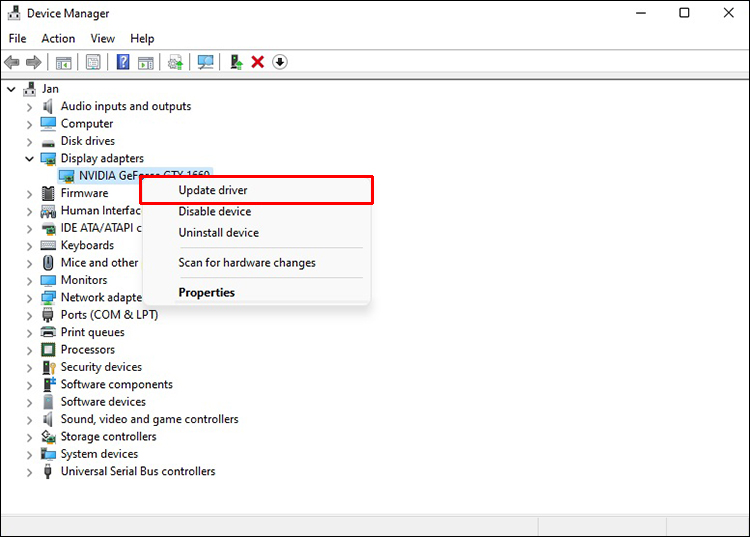
- Expand it and find the integrated graphics drivers.
- Right-click it and select “Update Driver.”
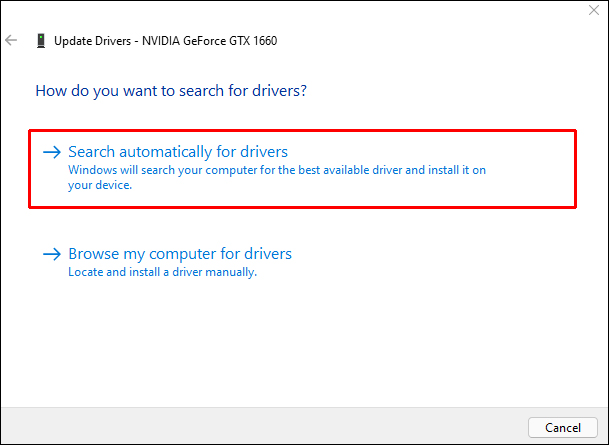
- Click on “Search Automatically For Drivers.”
- After the drivers install, restart your computer.
Keeping your graphics drivers up to date has been standard practice for all gaming computers, and Windows 11 will benefit more if you ensure everything is updated.
Enable Per-App GPU Selection Settings
This feature has been included with Windows PCs since Windows 10, and it allows users to assign a GPU to any application manually. With proper management, you’ll allocate the better GPU to the most demanding tasks while giving just enough to less-important processes. There may be a performance boost after you finish with the settings.
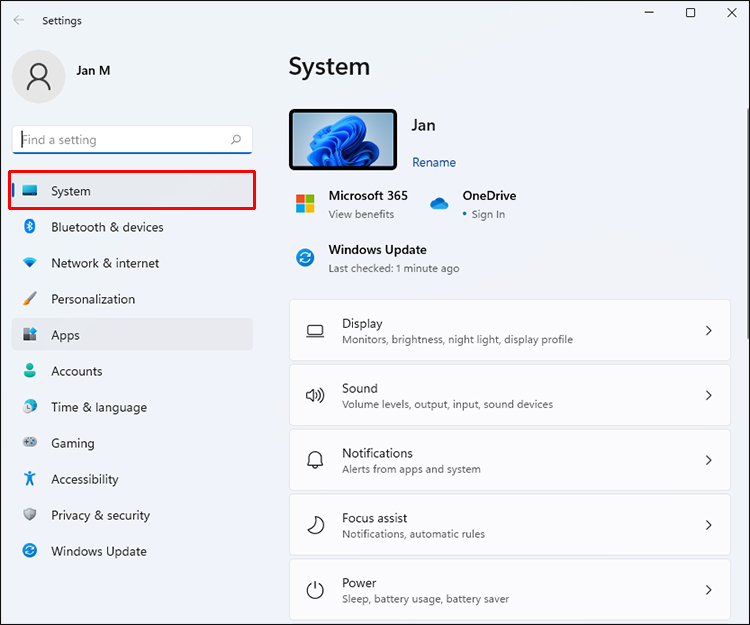
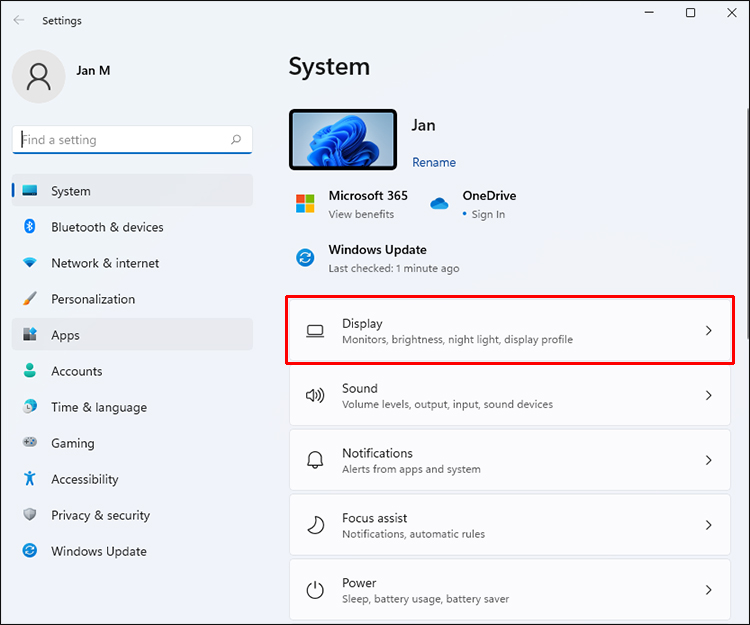
- Open the Windows Start Menu.
- Go to the “Settings” menu.
- Select “System” on the left.
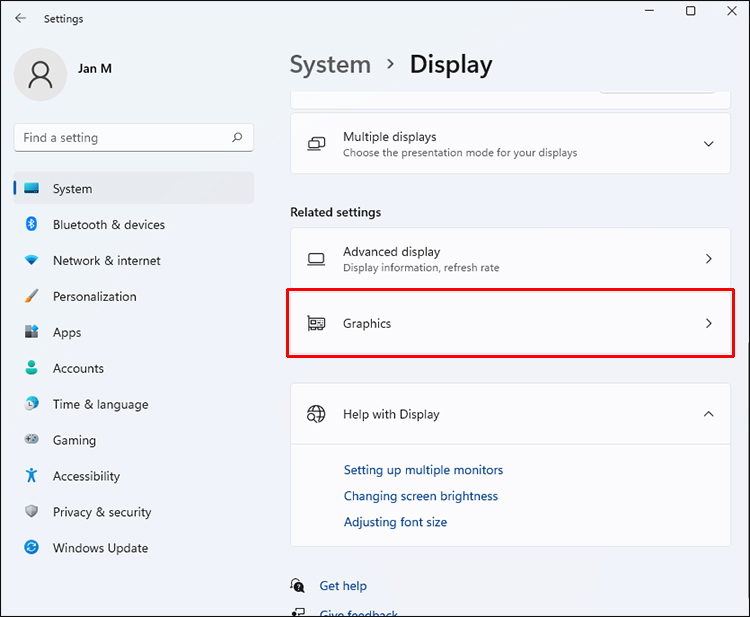
- From the list on the right, click on “Display.”
- Look for “Graphics.”
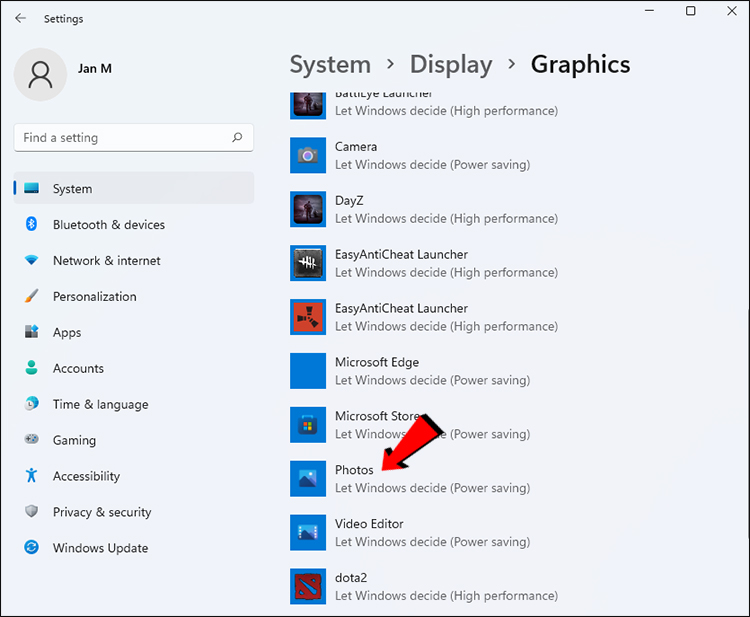
- Go to any app you want to modify and click on its name.
- Select the “Options” button that appears.
- Select the GPU you want it to use.
- Repeat for any other apps you have.
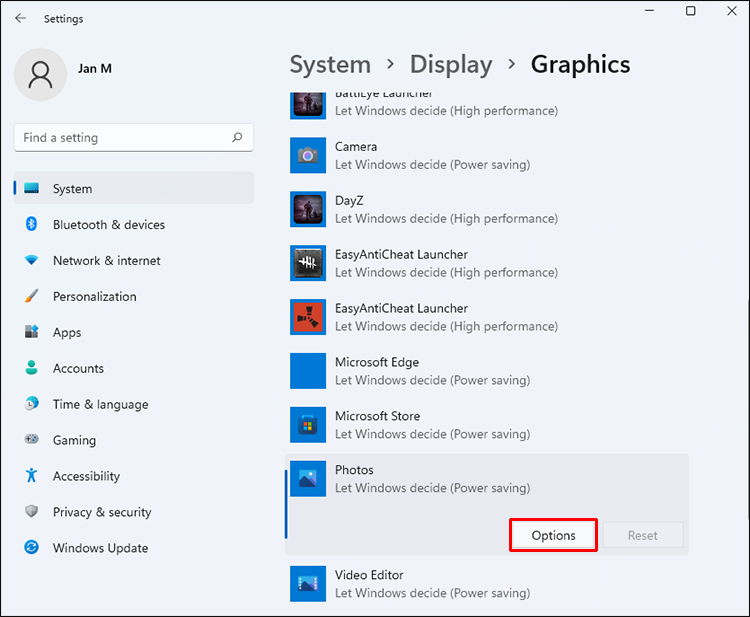

There are three choices.
- Let Windows decide
- Power Saving
- High Performance
If you have more than one GPU, the power-saving mode will use the weaker one. High performance will be your gaming NVIDIA or AMD GPU. It’s best to let games run on the superior option for the best results.
The app you’re changing settings for shouldn’t be running when performing these changes. If it is, restart it to apply the changes.
Turn on High Performance Mode
The difference between Power Saving and High-Performance modes is staggering, as the latter will burn through your battery at speeds you may never expect. If you’re gaming at home, it’s always the best choice to turn High Performance Mode on. It makes Windows 11 prioritize gaming processes and diverts the majority of power for these tasks.
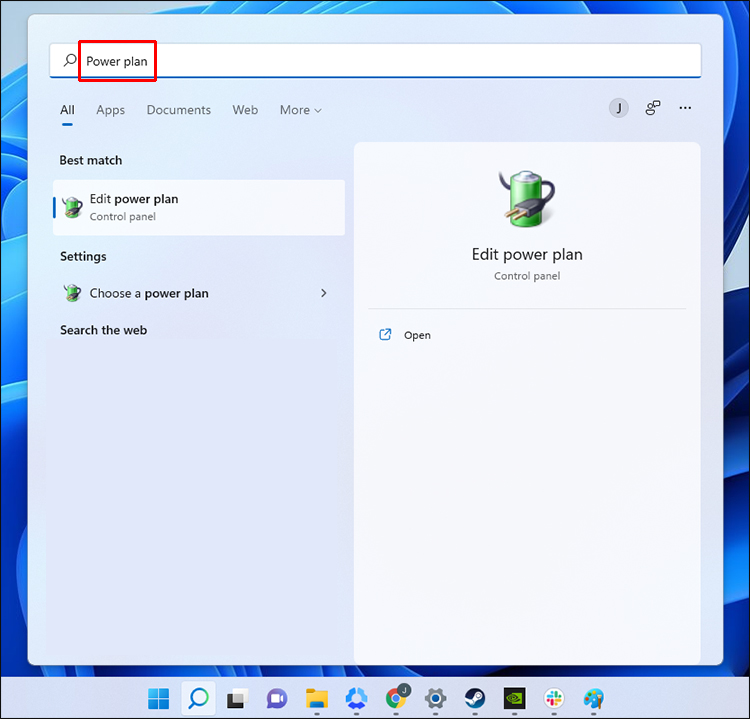
- Click on your search bar.
- Type “Power Plan.”
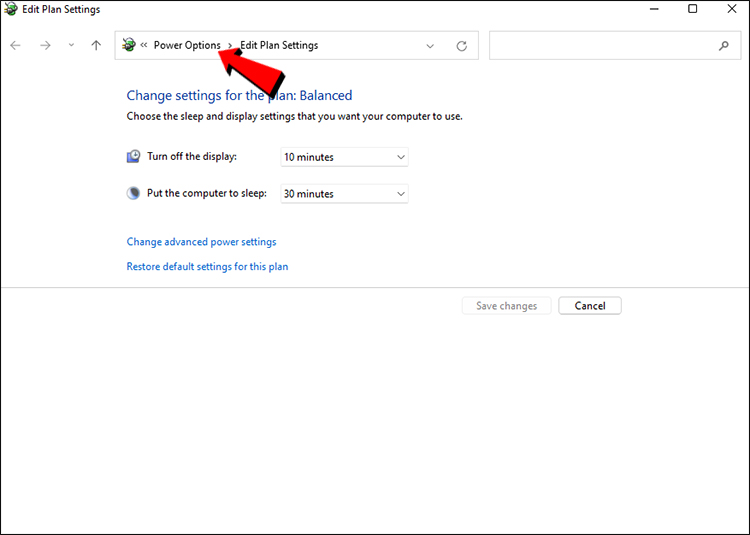
- Click on “Edit Power Plan.”
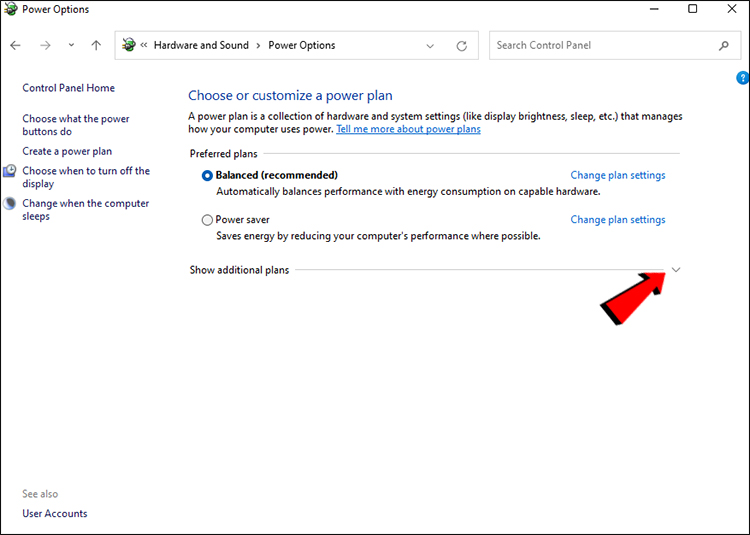
- Once the window opens, select “Power Options.”
- Show the additional plans if High Performance isn’t visible.
- Select “High Performance” from the list.
- From then on, Windows 11 will use all power for performance.

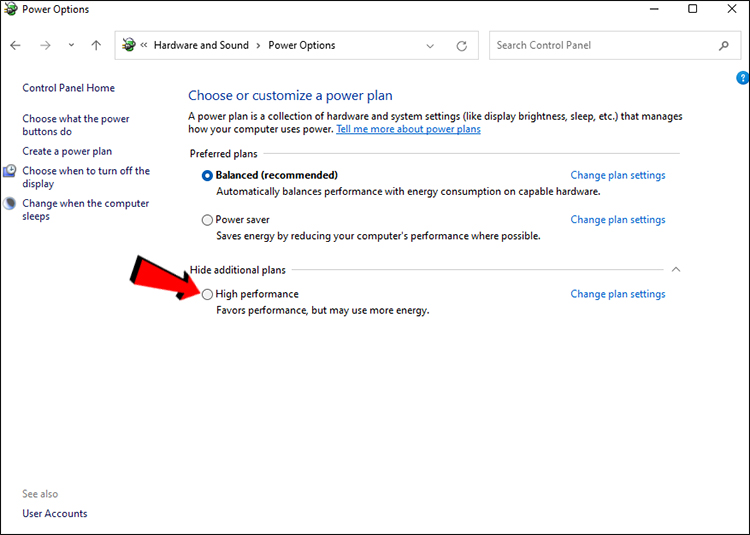
This setting is primarily for laptops, as PCs won’t need internal batteries to run.
Disable Record What Happened
Windows 11 comes with the Xbox Game Bar, which allows users to record clips that happened a certain amount of time ago. As this setting can decrease performance, it’s best to disable it. Better driver-based recording options are available for both AMD and NVIDIA GPU users.
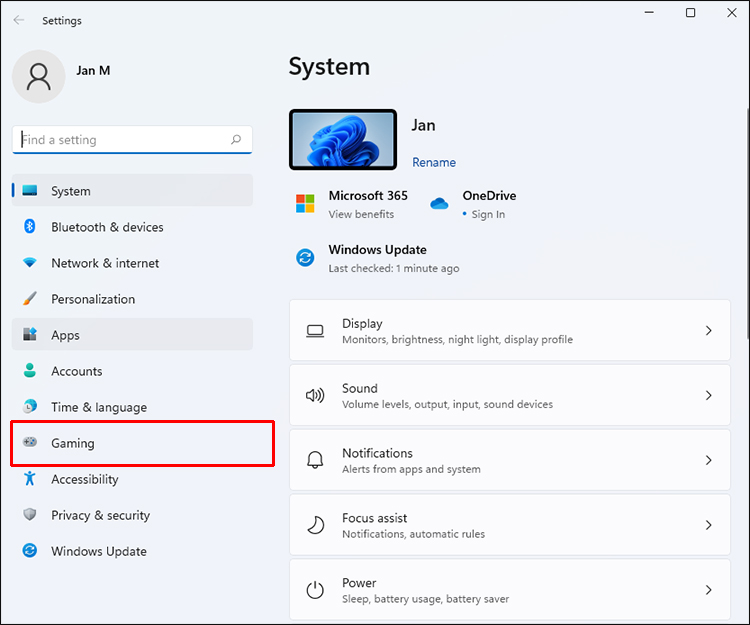
- Go to the Start Menu.
- Open the Settings menu by clicking on the gear icon.
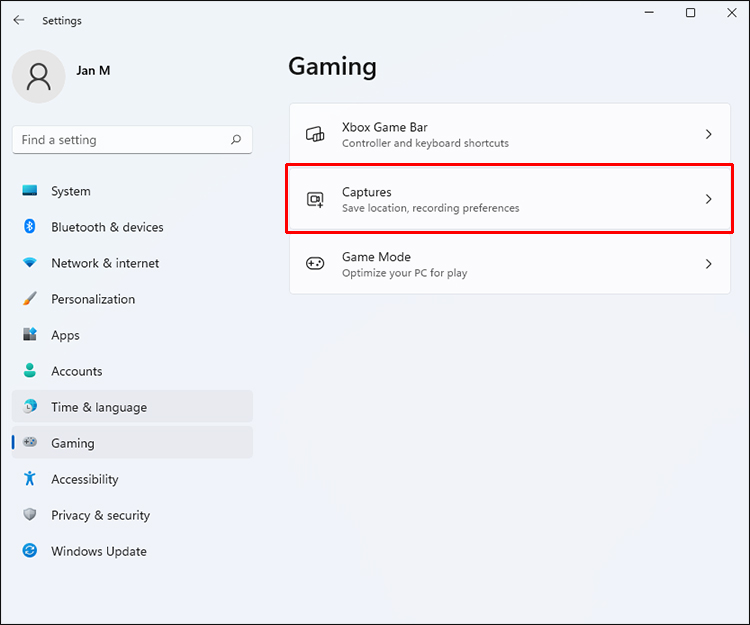
- Select “Gaming.”
- Click on “Captures.”
- Toggle “Record What Happened” off.
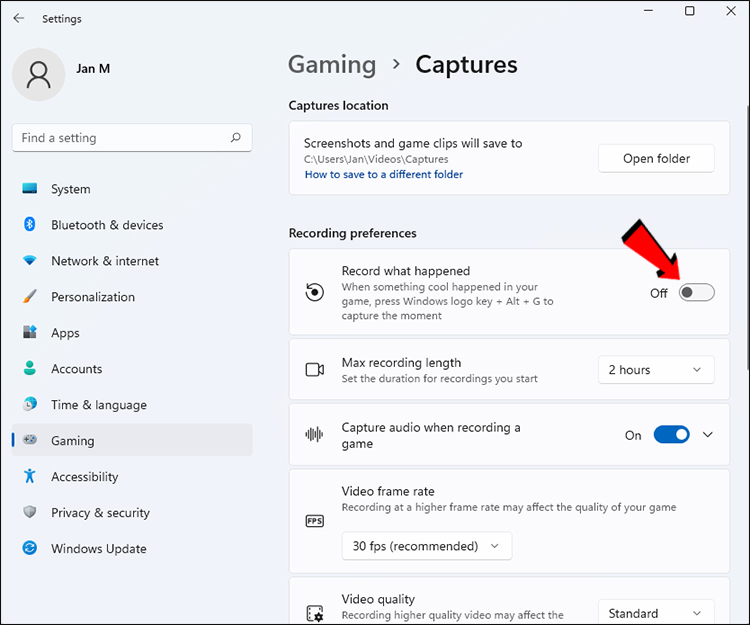
If you still want it on, you can consider reducing the framerate and quality these replays are saved at. That way, you can still record clips of your gameplay without compromising gaming smoothness. That said, it’s best to turn the setting off.
NVIDIA Shadowplay is much lighter on your PC’s hardware when running in the background, and many streamers use it to capture PC gameplay. On the other hand, AMD users can use ReLive, which is the company’s answer to Shadowplay. Both also have instant replay features, which are great for recording clips at high quality.
Disable Apps From Launching During Startup
You might be familiar with this trick as it dates back to older Windows versions. Too many apps launching at once can slow down your PC, so it’s always good to limit them.
- Click on the Windows Start button at the bottom-left corner.
- Select the gear icon and go to the Settings menu.
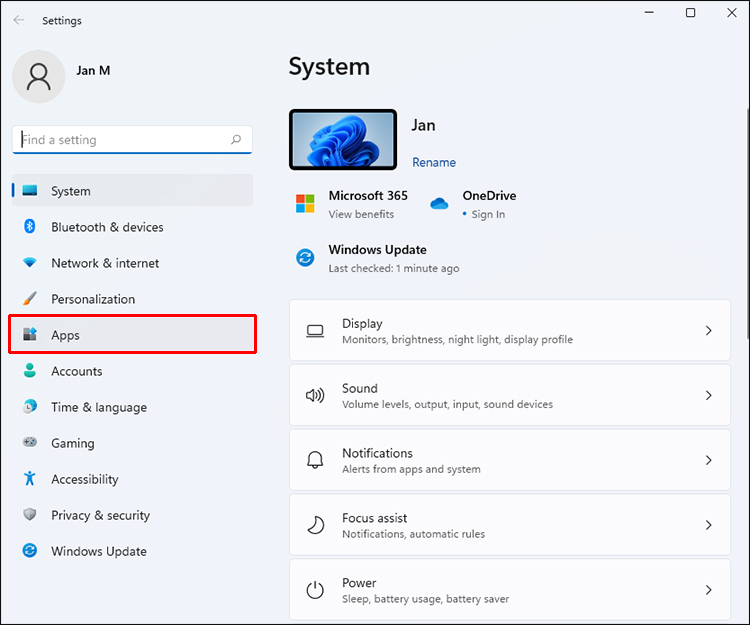
- Select “Apps.”
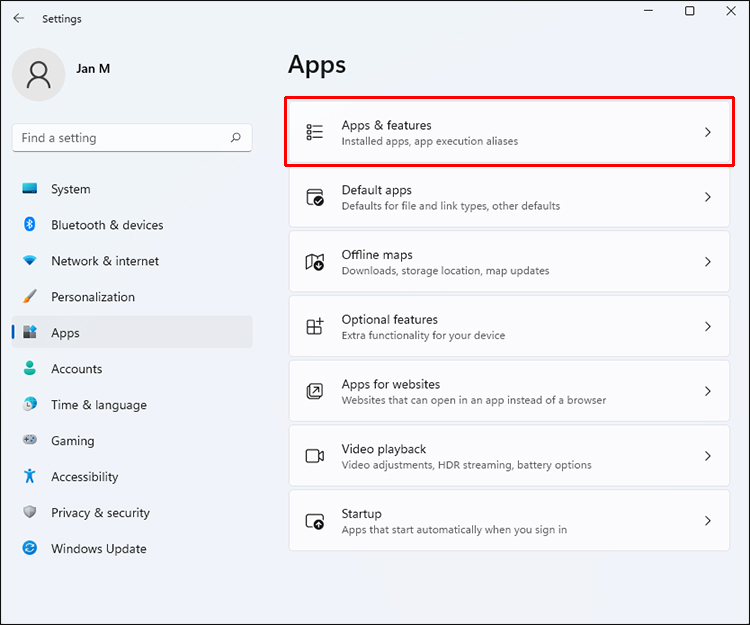
- Go to “Apps & Features.”
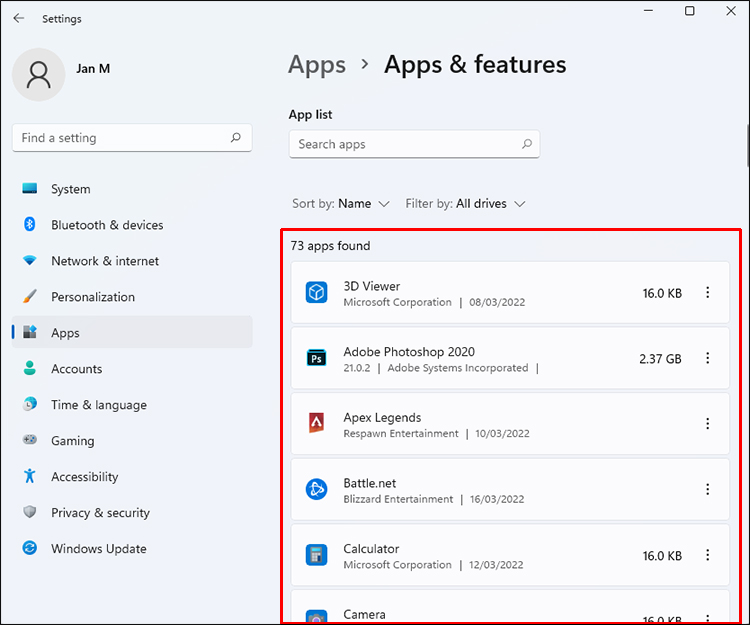
- From the list of installed apps, disable those you don’t need.
Besides boosting gaming performance, you can also experience faster startup times when turning your PC on. It’s no secret that having too many apps running the moment you want to play games will slow everything down. Thus, you can limit the processes that run when gaming.
Disable Enhance Pointer Precision
Today, many gaming mice have drivers and software to increase sensitivity or enable pointer acceleration. Windows 11 has built-in mouse acceleration features as well, but it’s best to disable it. That way, you can adjust your mouse precisely without outside interference.
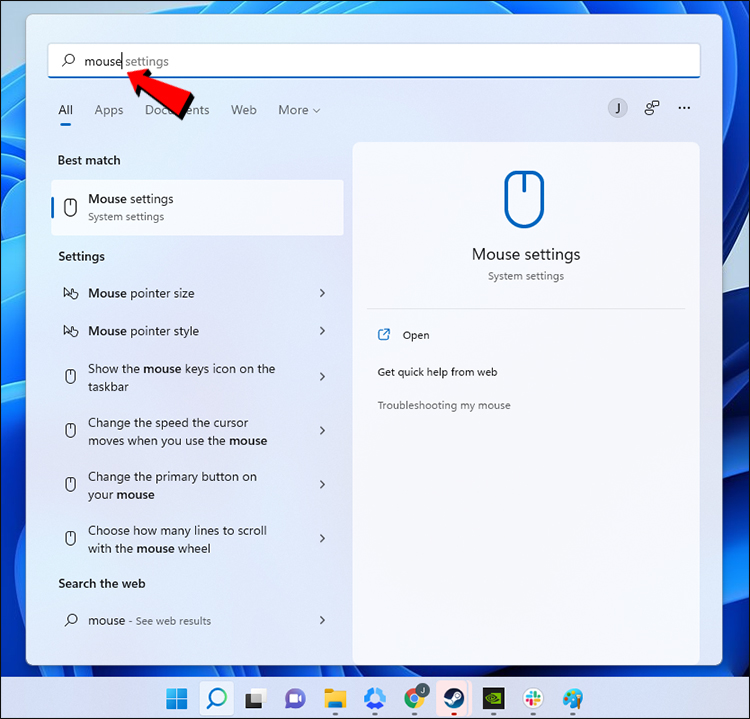
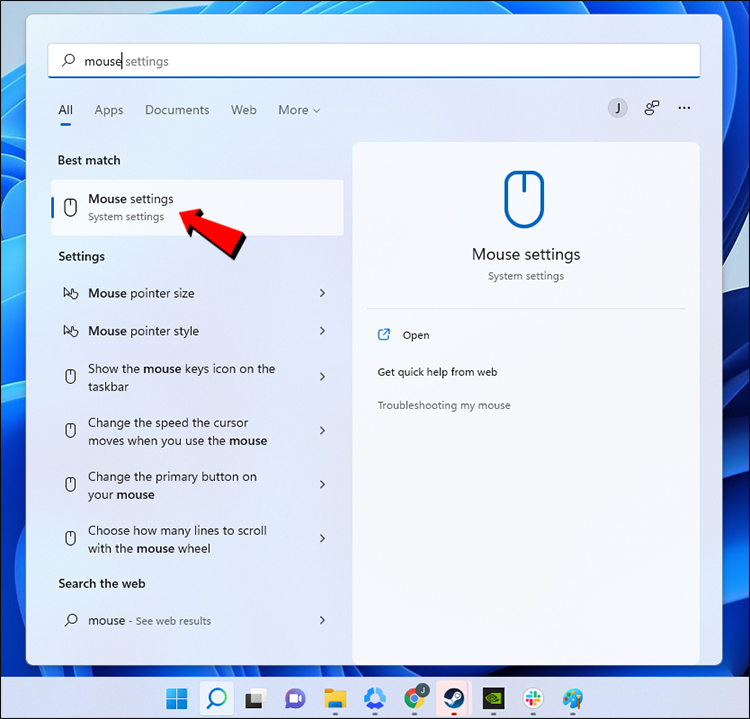
- Search for “Mouse” on the Windows search bar.
- Go to “Mouse Settings.”
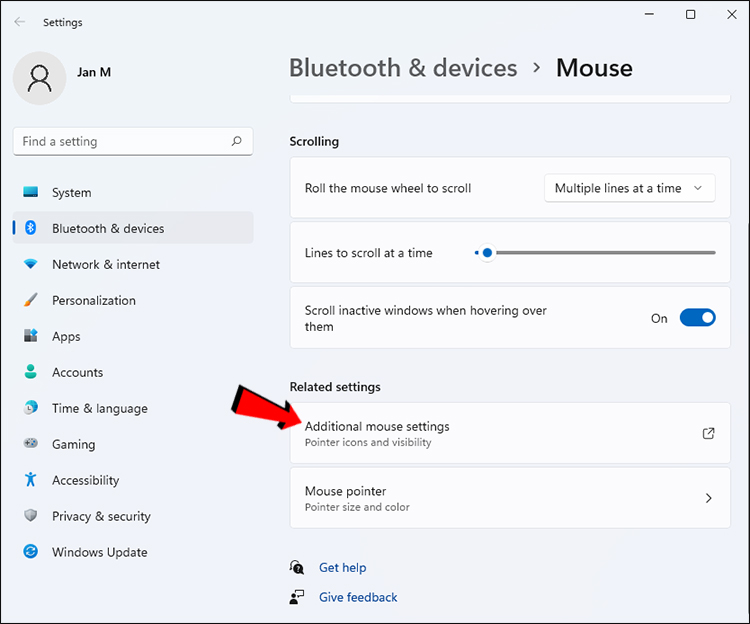
- Click on “Additional Mouse Settings.”
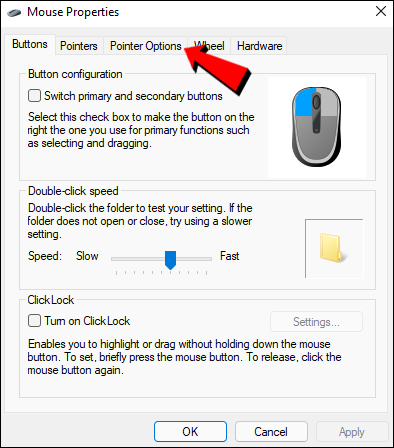
- Move to “Pointer Options.”
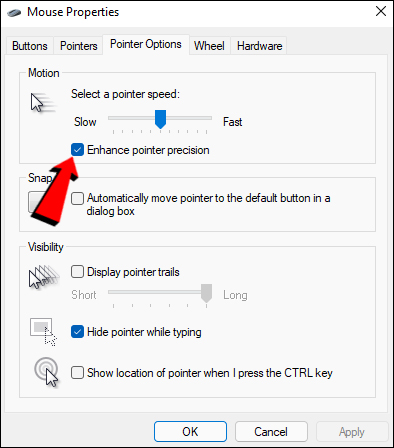
- Under “Motion,” disable “Enhance Pointer Precision.”
- Apply the settings.

After you follow these steps, you can configure your gaming mouse settings. Everything should feel better without a strange acceleration that you didn’t want.
More Improvements to Come
At this time, it’s not the best idea to move on to Windows 11 just yet, but you can still run graphics-intensive titles on the operating system flawlessly. With these settings adjusted, your PC is now more capable of running demanding games at higher settings. Feel free to experiment for the best results.
Which of these settings are new to you? Have you performed any of these before reading our article? Let us know in the comments section below.
Disclaimer: Some pages on this site may include an affiliate link. This does not effect our editorial in any way.


