You’ve switched to Windows 11, but something doesn’t feel right. The interface might not suit you, or you just can’t get used to the new position of the Start menu. Either way, you want to go back to Windows 10, but how do you do so?
In this entry, we’ll give you a detailed guide on how to downgrade to Windows 10 from Windows 11. We’ll show you how to return to your favorite operating system and enjoy your PC experience once again.
How to Downgrade to Windows 10 from Windows 11
Reconfiguring your Windows 10 shouldn’t be too difficult. However, you can only do so within 10 days after upgrading to Windows 11. Doing so in this timeframe allows you to keep your data and files. After the expiration, you’ll need to back up your system and install the OS from scratch.
First, let’s see how you can downgrade to Windows 10 within the first 10 days:
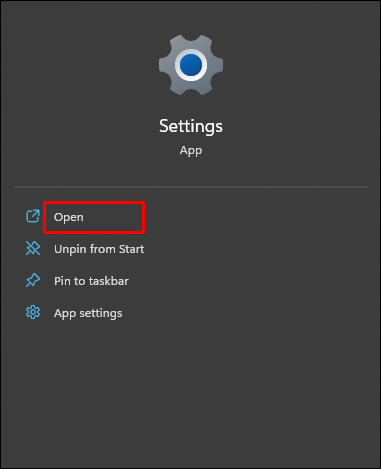
- Launch “Settings.”
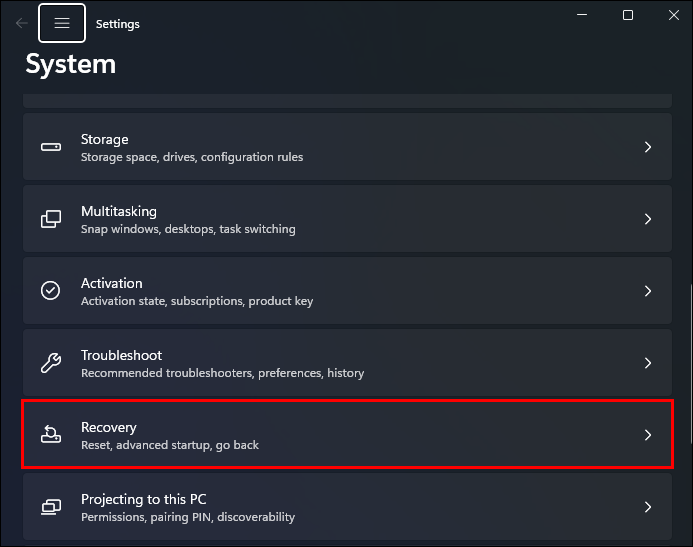
- Navigate to “Systems,” followed by “Recovery.”

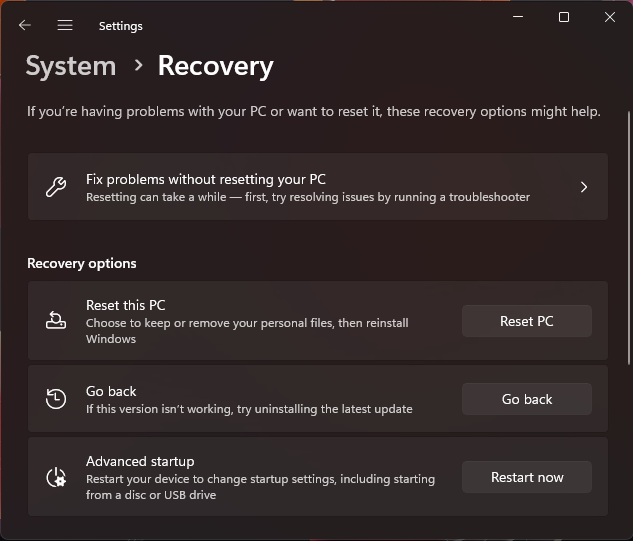
- Press the “Go Back” button.
- In this screen, choose a reason you want to go back to Windows 10 and press “Next.”
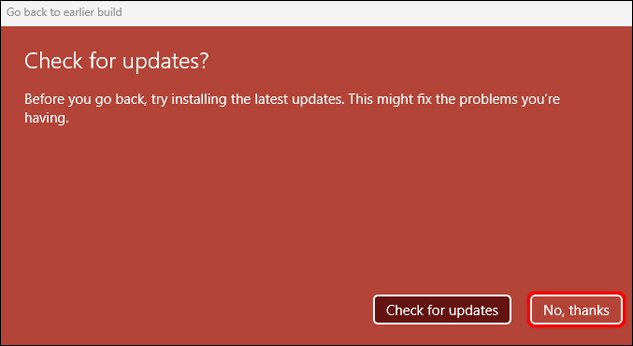
- Click the “Check for updates” button. If this doesn’t work, hit “No thanks.”
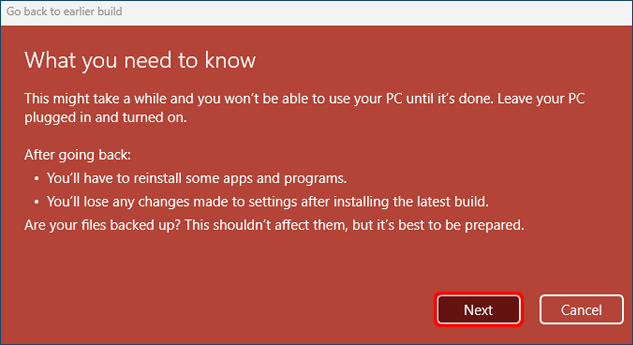
- Go through the information on the next window carefully and press “Next” when you’re ready to move on.
- Memorize your Windows password to prevent the system from locking you out. Select “Next.”
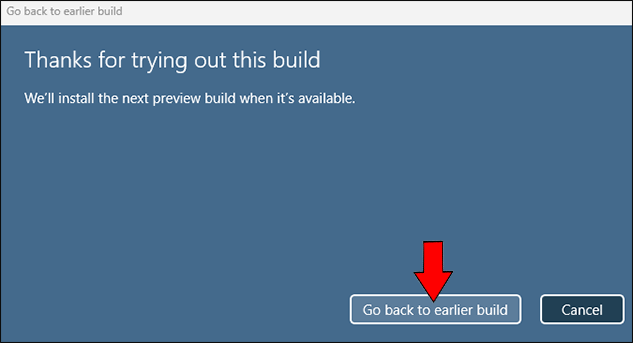
- Press the prompt to return to Windows 10.
- Wait for the system to restart. This may take some time, depending on your data and PC.
- The boot screen should now appear, allowing you to enter your log-in credentials.
- After logging in, check your version using the “winver” command.


If these steps aren’t available, the 10-day window has probably expired. Fortunately, you can still go back to your old OS by reinstalling the system. Here’s how to do so:
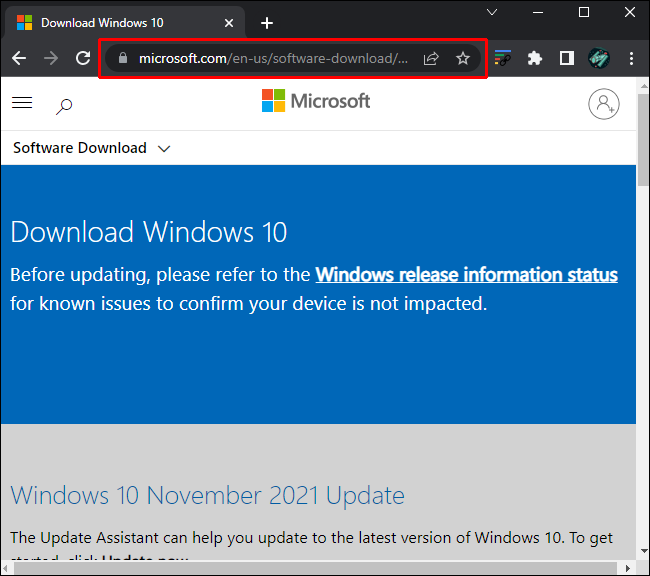
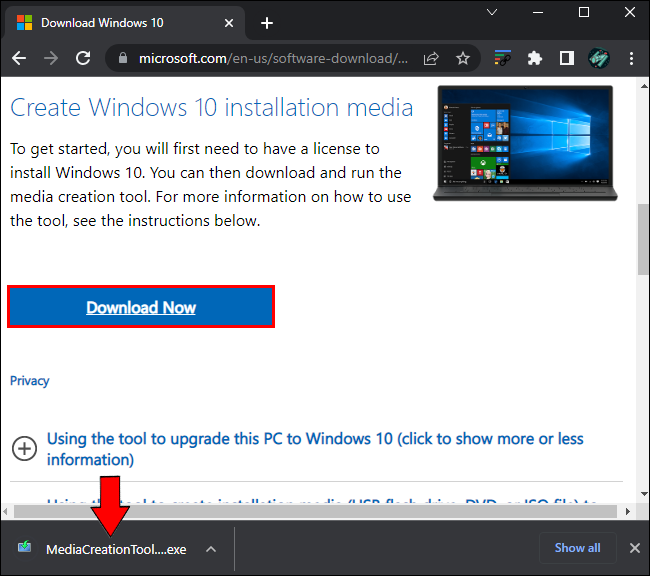
- Launch your browser and go to Microsoft’s website. Navigate to this download page.
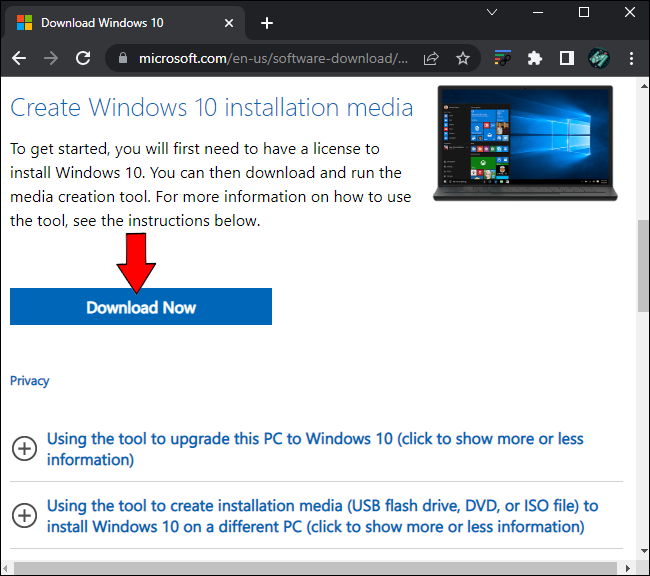
- Press the prompt to download the Windows installation tool.
- Wait for the file to download and click it.
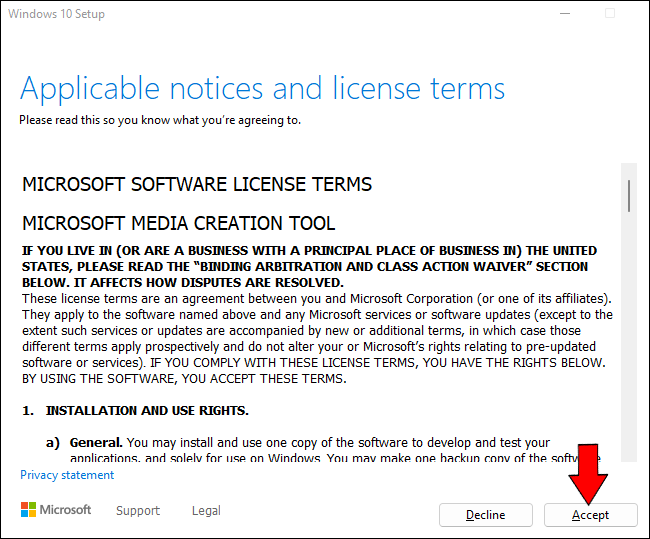
- Allow the program to make changes to the computer by pressing the “Yes” button. This should open the setup window.
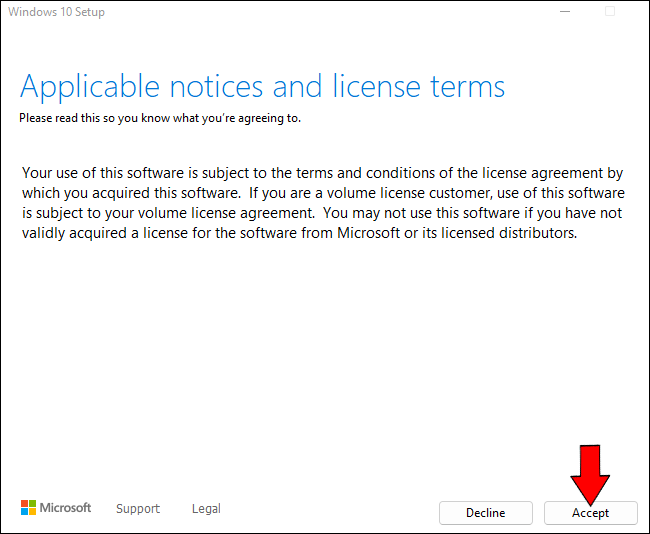
- Accept the app’s terms.
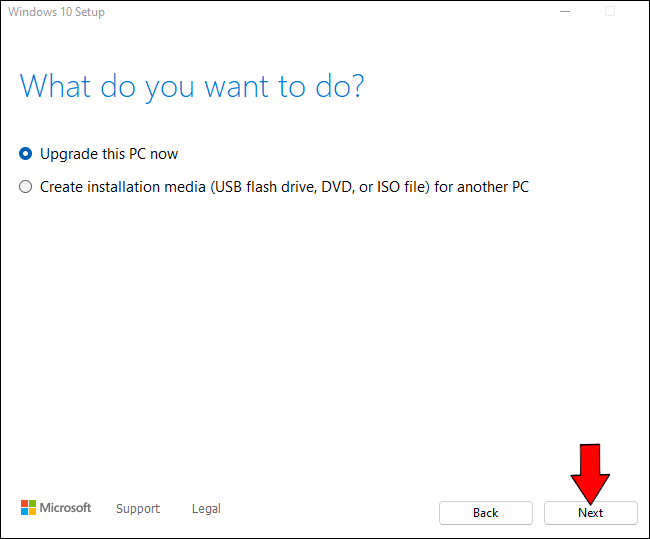
- Press the prompt to upgrade your PC and choose “Next.”
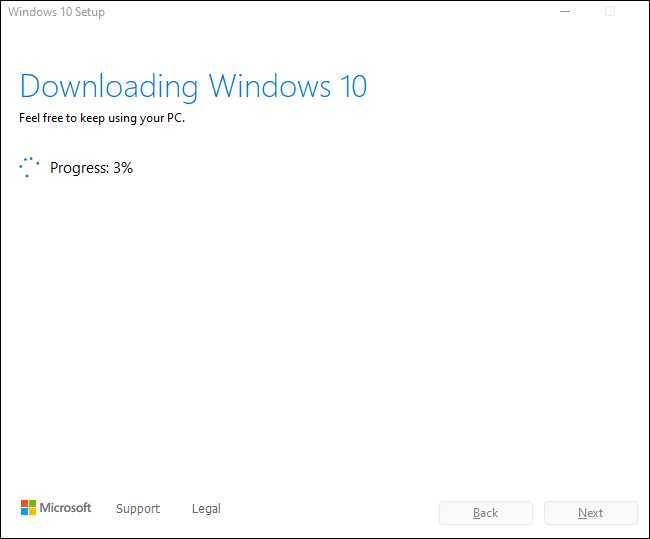
- The software will now download the latest Windows 10 version.
- Hit the “Next” button and choose “Accept.”
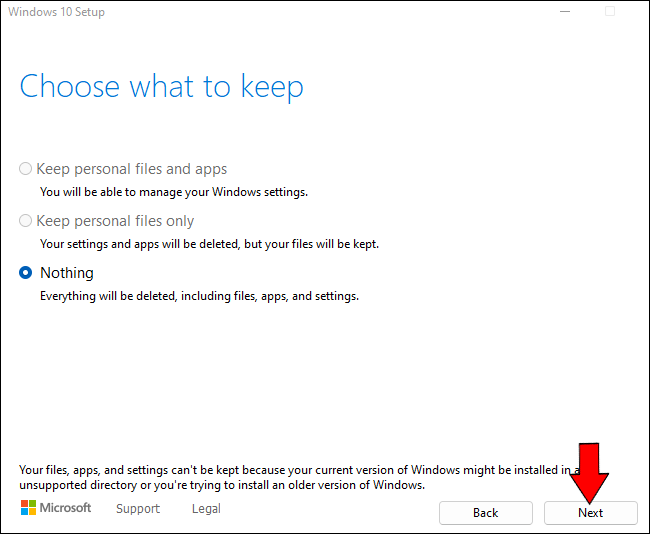
- Select “Nothing” on the following screen and pick “Next” again.
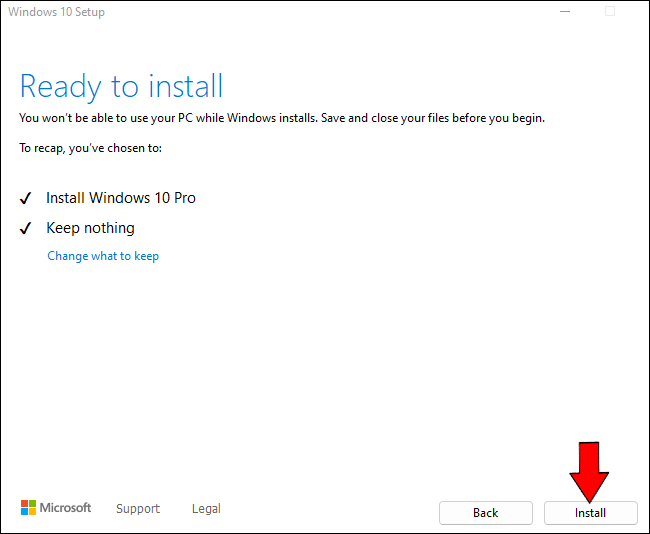
- Hit the “Install” button to start the installation. Keep in mind that you can’t go back from here. If you haven’t backed up your files, they’ll be deleted.
- Let the installation complete and use the on-screen instructions to set up your device.
How to Downgrade to Windows 10 from Windows 11 with a USB Drive
If you’re an advanced user, you may want to try a more complicated process. It involves downgrading from Windows 11 to Windows 10 using a USB drive. Keep in mind that you’ll need two PCs to complete the task:
- Open your browser and go to the Windows 10 download page.
- Download the tool and save it to your PC.
- Once the download is over, start the program and press “Accept” to authorize the launch.
- Choose the prompt to set up installation media for another computer.
- Press “Next.”
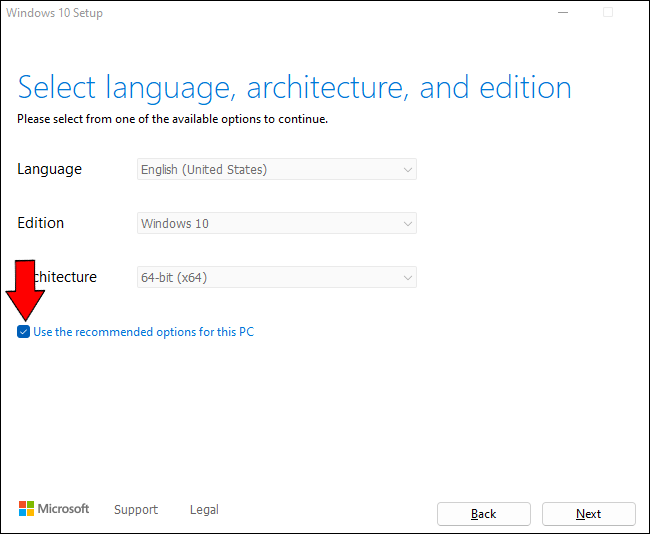
- Select your preferred Windows 10 version, system architecture, and language. If you’re not allowed to alter the settings, use the PC’s recommended options to proceed.
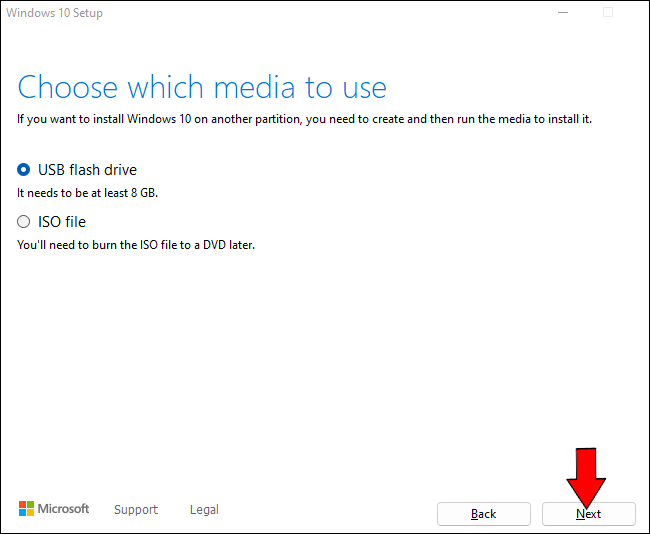
- Pick the USB drive option and press “Next.”
- Choose your USB from the drop-down list. The system should now download the files onto your drive. This may take a while if your internet speed is low, but don’t interrupt the process because you’ll have to start from scratch.
- Plug the USB drive into the appropriate port and boot your computer. If prompted, press the corresponding key to initiate the boot from your USB.
- Choose your keyboard settings, currency, time zone, and language.
- Press “Next,” followed by “Install Now.”
- Choose your Windows 10 version and hit “Next” again to begin the installation.
- Choose the installation type. The “Upgrade” option lets you keep your files, apps, and settings, whereas the “Custom” feature initiates clean installation. Go for the latter to format the system according to your preferences.
- Installing Windows 10 requires a partition to store system files, which will become your main (C) drive. You can select and format one of your existing partitions or delete them to create new storage.
- If you delete all partitions, you’ll create unallocated space on your hard drive, and you’ll need to set up new ones. To do so, press the “New” button and select the size of the partition. Pick “Next,” wait for the process to complete, and click “OK.”
- Choose the partition to install Windows 10 and select “Next.” The installation will start, and your PC may restart several times.
- Once the process is over, your PC will reboot again. The device will launch, and you’ll now need to customize your settings or use the recommended settings.
- Log in to your account to access the latest Windows 10 features. Alternatively, skip the step and create a local account by following the on-screen instructions. You should now be able to use Windows 10.


Seamless Transition
Windows 11 was released a few months ago and is a work in progress. It usually works great, but downgrading to Windows 10 might be a wise decision until Microsoft resolves certain issues.
We’ve explained several ways to make the transition. The first method is the easiest one, but it’s only available for 10 days after your upgrade. However, this doesn’t mean all is lost if the period expires. You’ll still be able to return to the previous OS, but make sure to back up your files beforehand.
How would you rate your Windows 11 experience? Are you considering downgrading to Windows 10? Tell us in the comments section below.
Disclaimer: Some pages on this site may include an affiliate link. This does not effect our editorial in any way.


