If there’s an important email you need to send later but want to ensure you don’t forget about it, you’ll be happy to know Microsoft Outlook has a scheduling option. It can give you peace of mind knowing your recipient will get the email, and you don’t have to worry about remembering to send it.
You can set everything up in just a few clicks, and the email will be delivered when you select it. This article will discuss scheduling an email in Outlook using different platforms.
How to Schedule an Email in Outlook on the Web Version
If you’re using Outlook on the Web in a browser, you can easily compose your email and schedule it to be delivered at a time of your preference. Here’s how to do it:
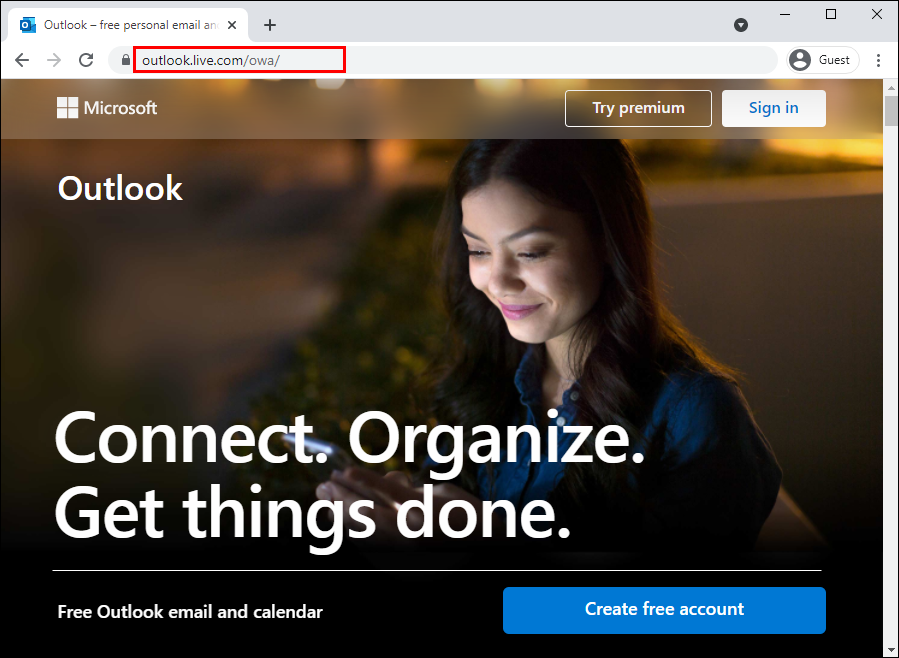
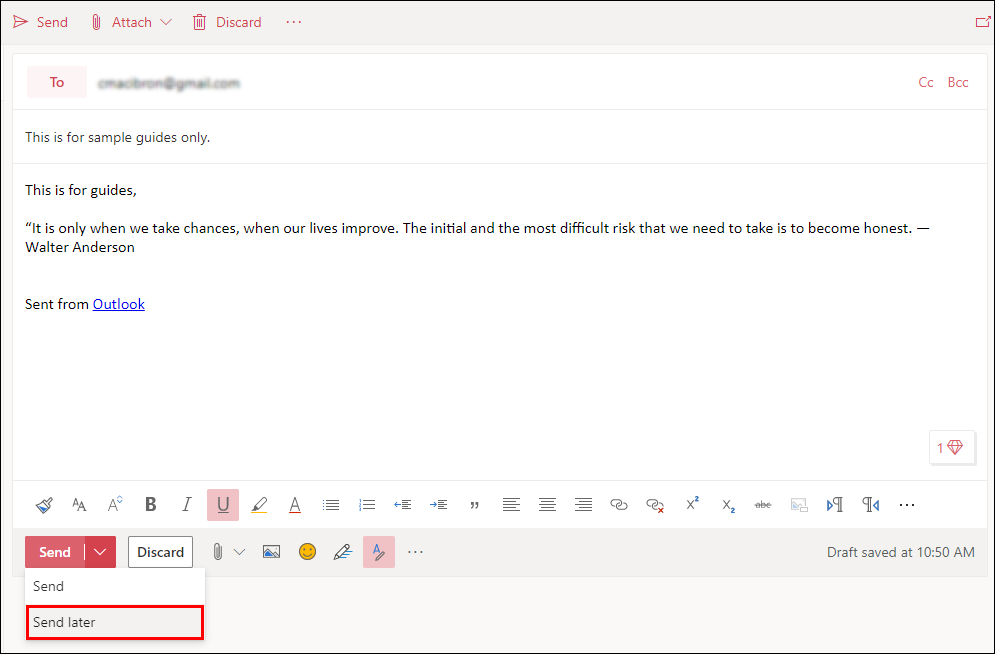
- Open your browser, click the Outlook website, and sign in.
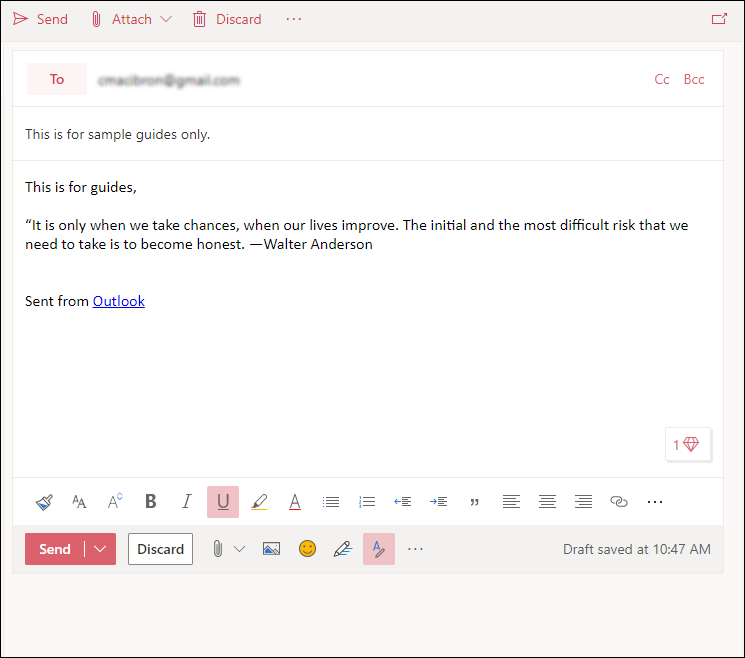
- Compose your email as usual.

- Tap the dropdown arrow next to the Send button.
- Choose Send later.
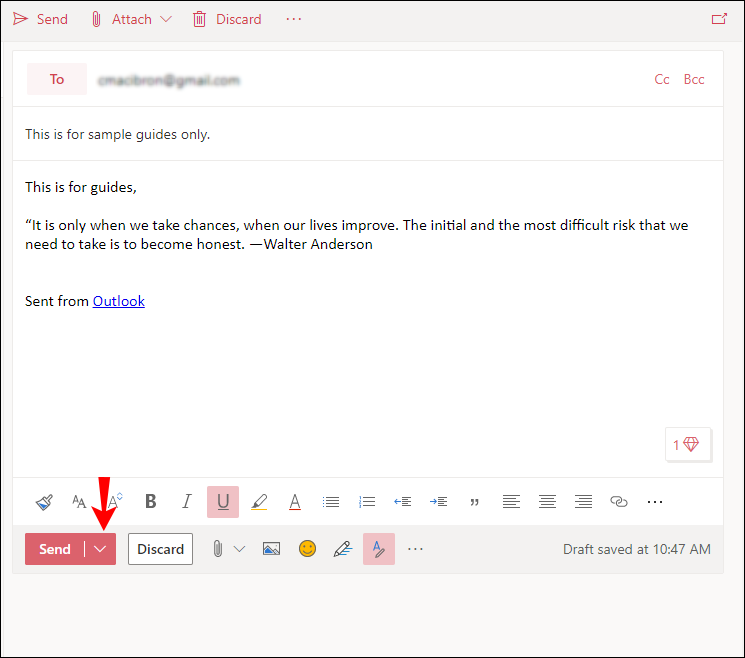
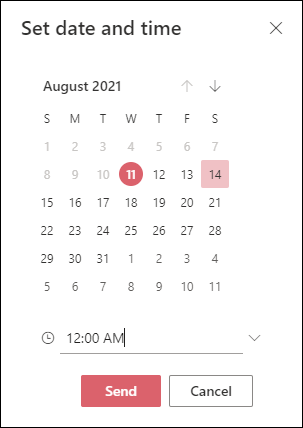
- Set the date and time when you would like to send the email.
- Click on Send.

Your email will show up in the “Drafts” folder. If you change your mind and want to send the email immediately, go back to the Drafts folder, select Cancel Send, and then send it like normal.
How to Schedule an Email in Outlook on a Windows PC
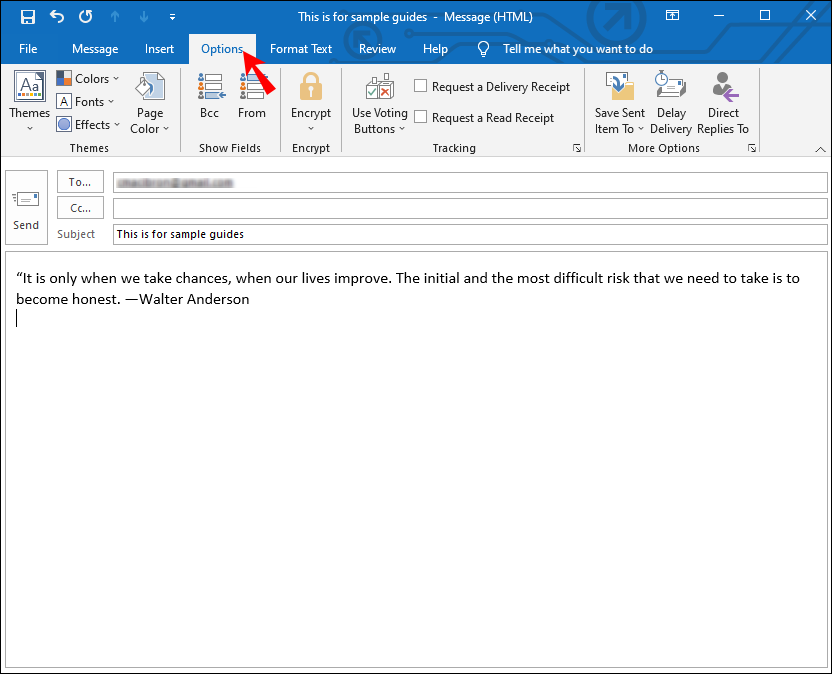
If you’re using a Windows PC, scheduling an email in Outlook is simple and can be done in a few clicks. Just follow these steps:
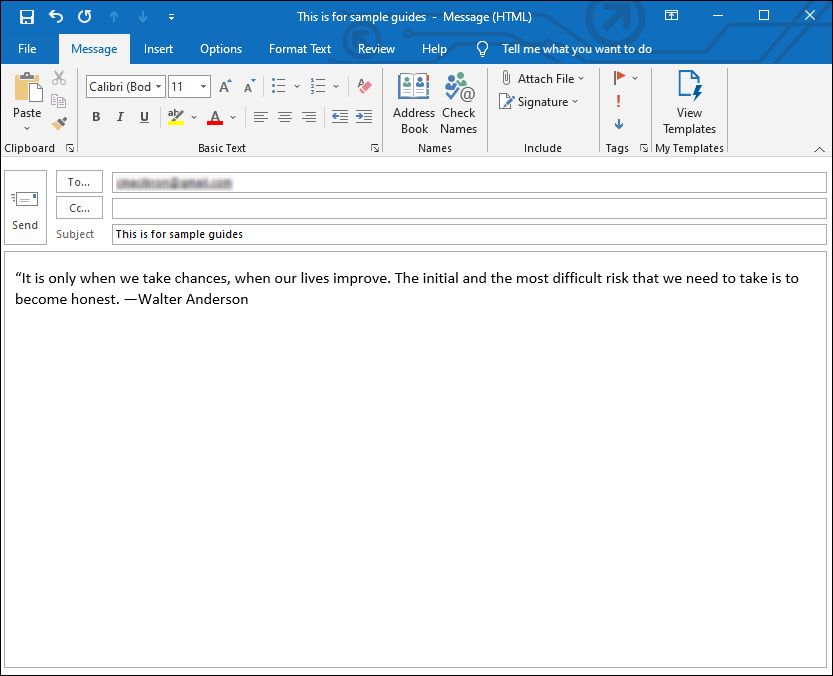
- Open the Outlook app.
- Compose your email as usual.
- Open the Options tab.
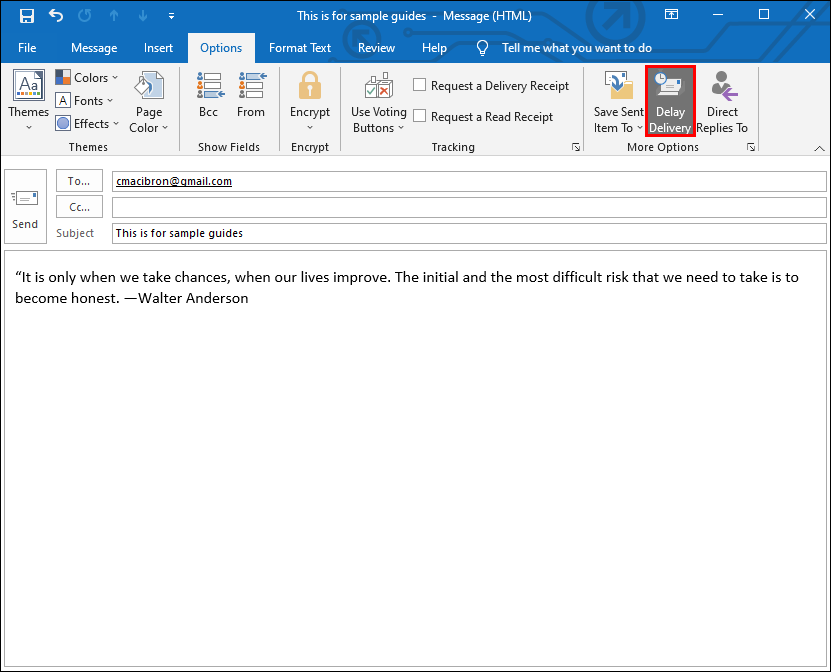
- Click on Delay Delivery.
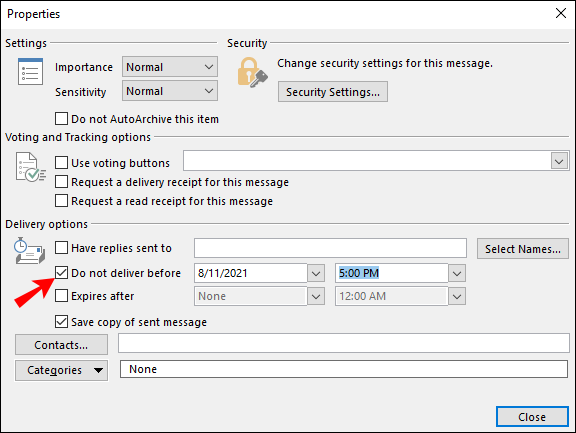
- Add a checkmark to do not deliver before.
- Specify the date and time when you want the email to be sent, then click Close.
- Click on Send.

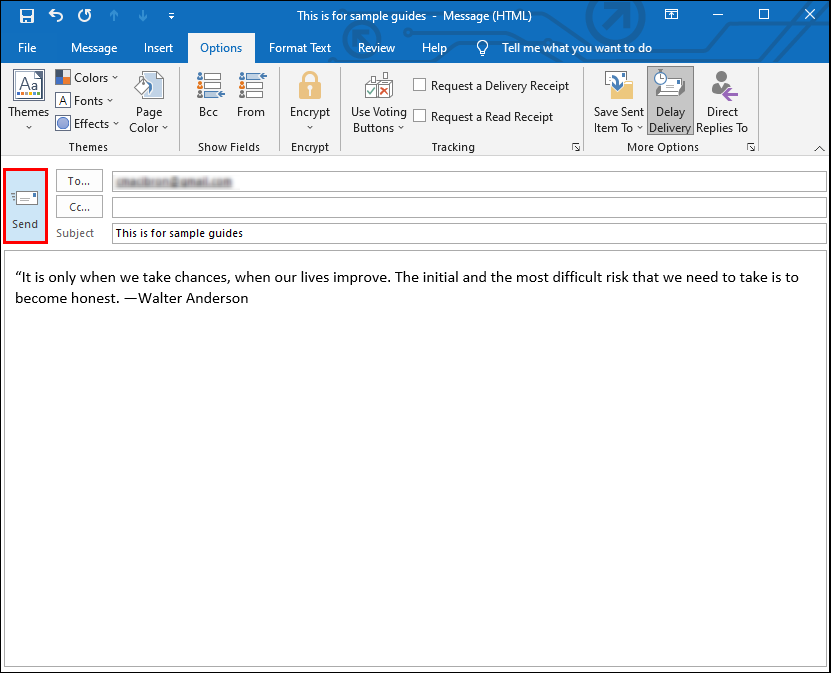
The email will be sent at the time you specified and will remain in Outlook’s “Outbox,” not “Drafts,” until then.
How to Schedule an Email in the iPhone/iOS Outlook App
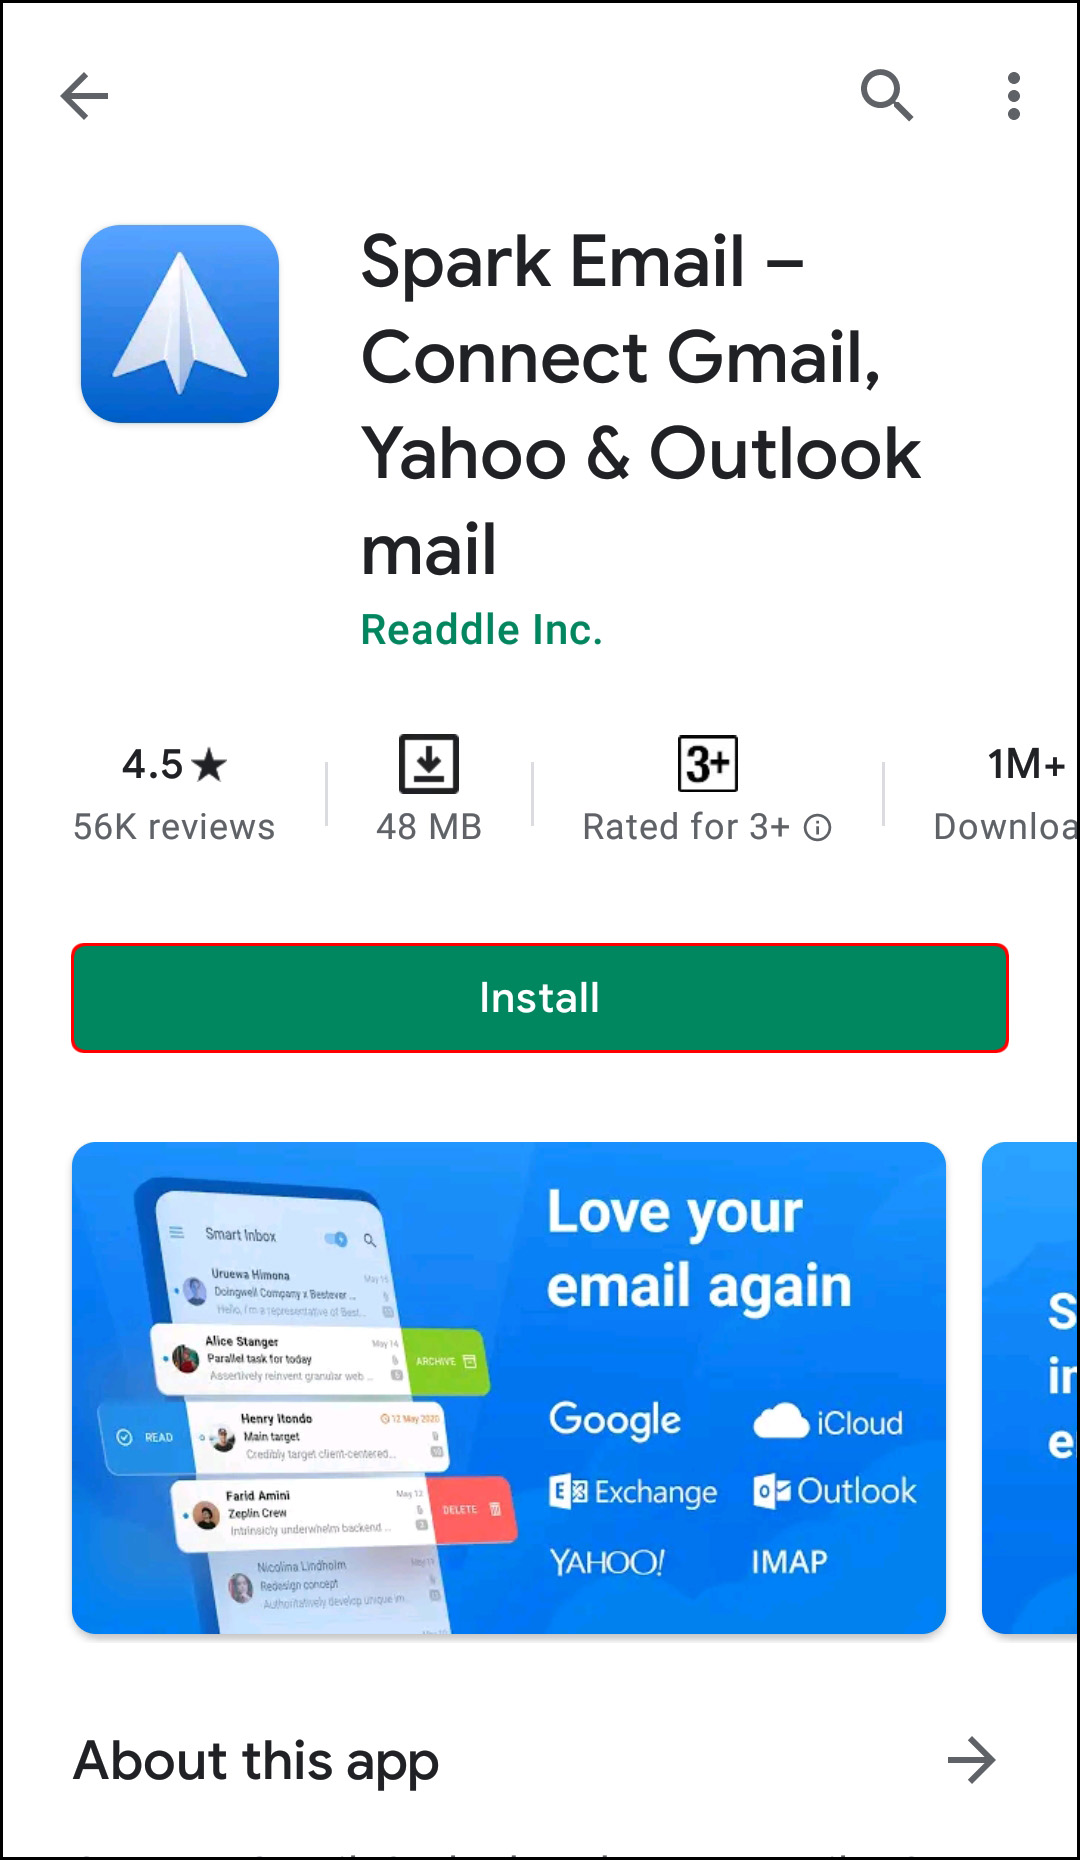
Unfortunately, scheduling an email in Outlook using the iPhone app is currently impossible. But other third-party apps such as Spark or Gmail have this option available. If you’re often on the go and want to schedule emails using your iPhone, you should consider installing one of these apps.
Schedule Emails using the iOS Spark App
If you opt for Spark to schedule an email, here are the steps to follow:
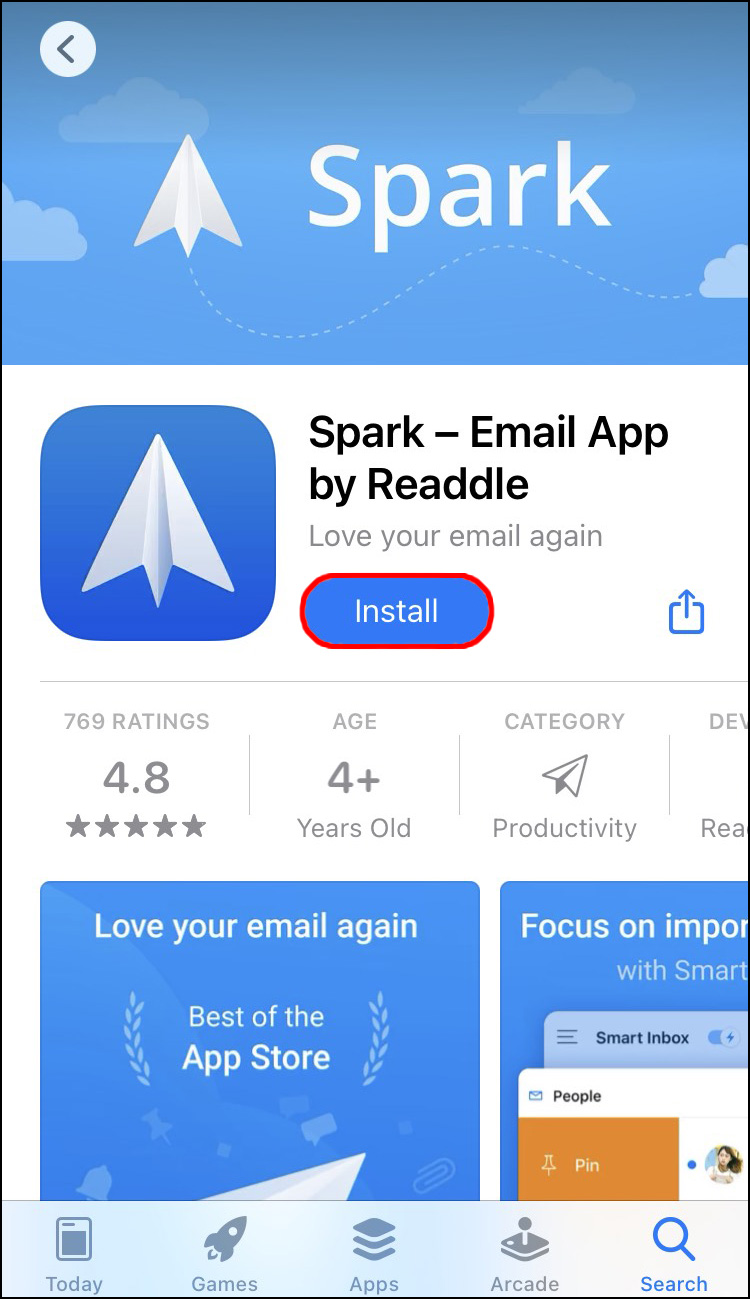
- Download the iOS Spark app from the App Store.
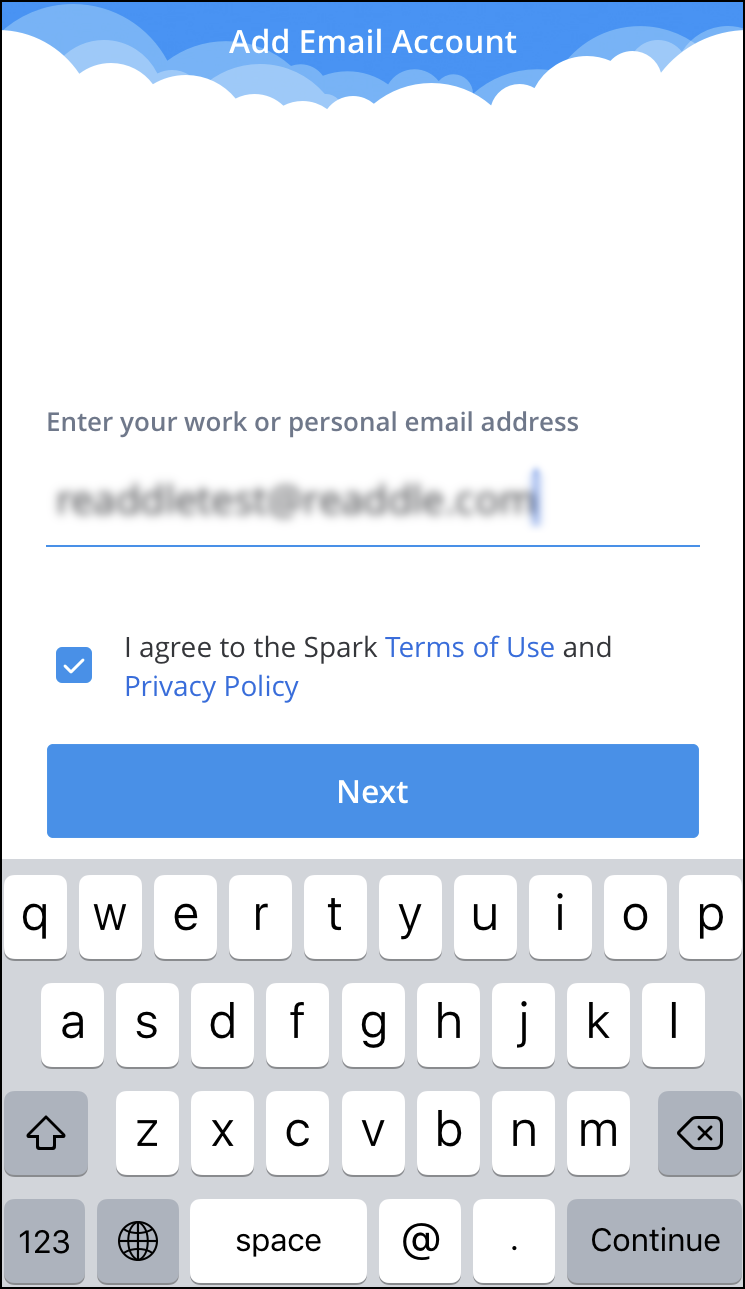
- Enter your Outlook ID and password.
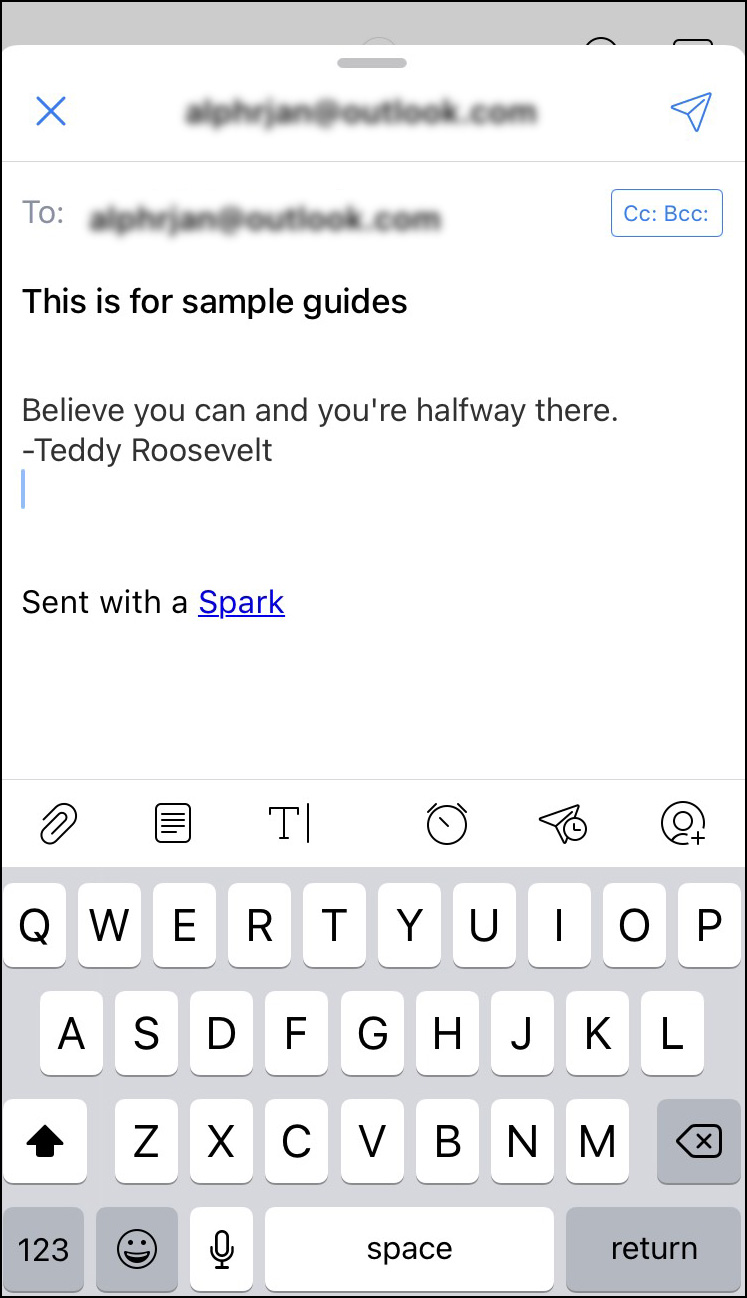
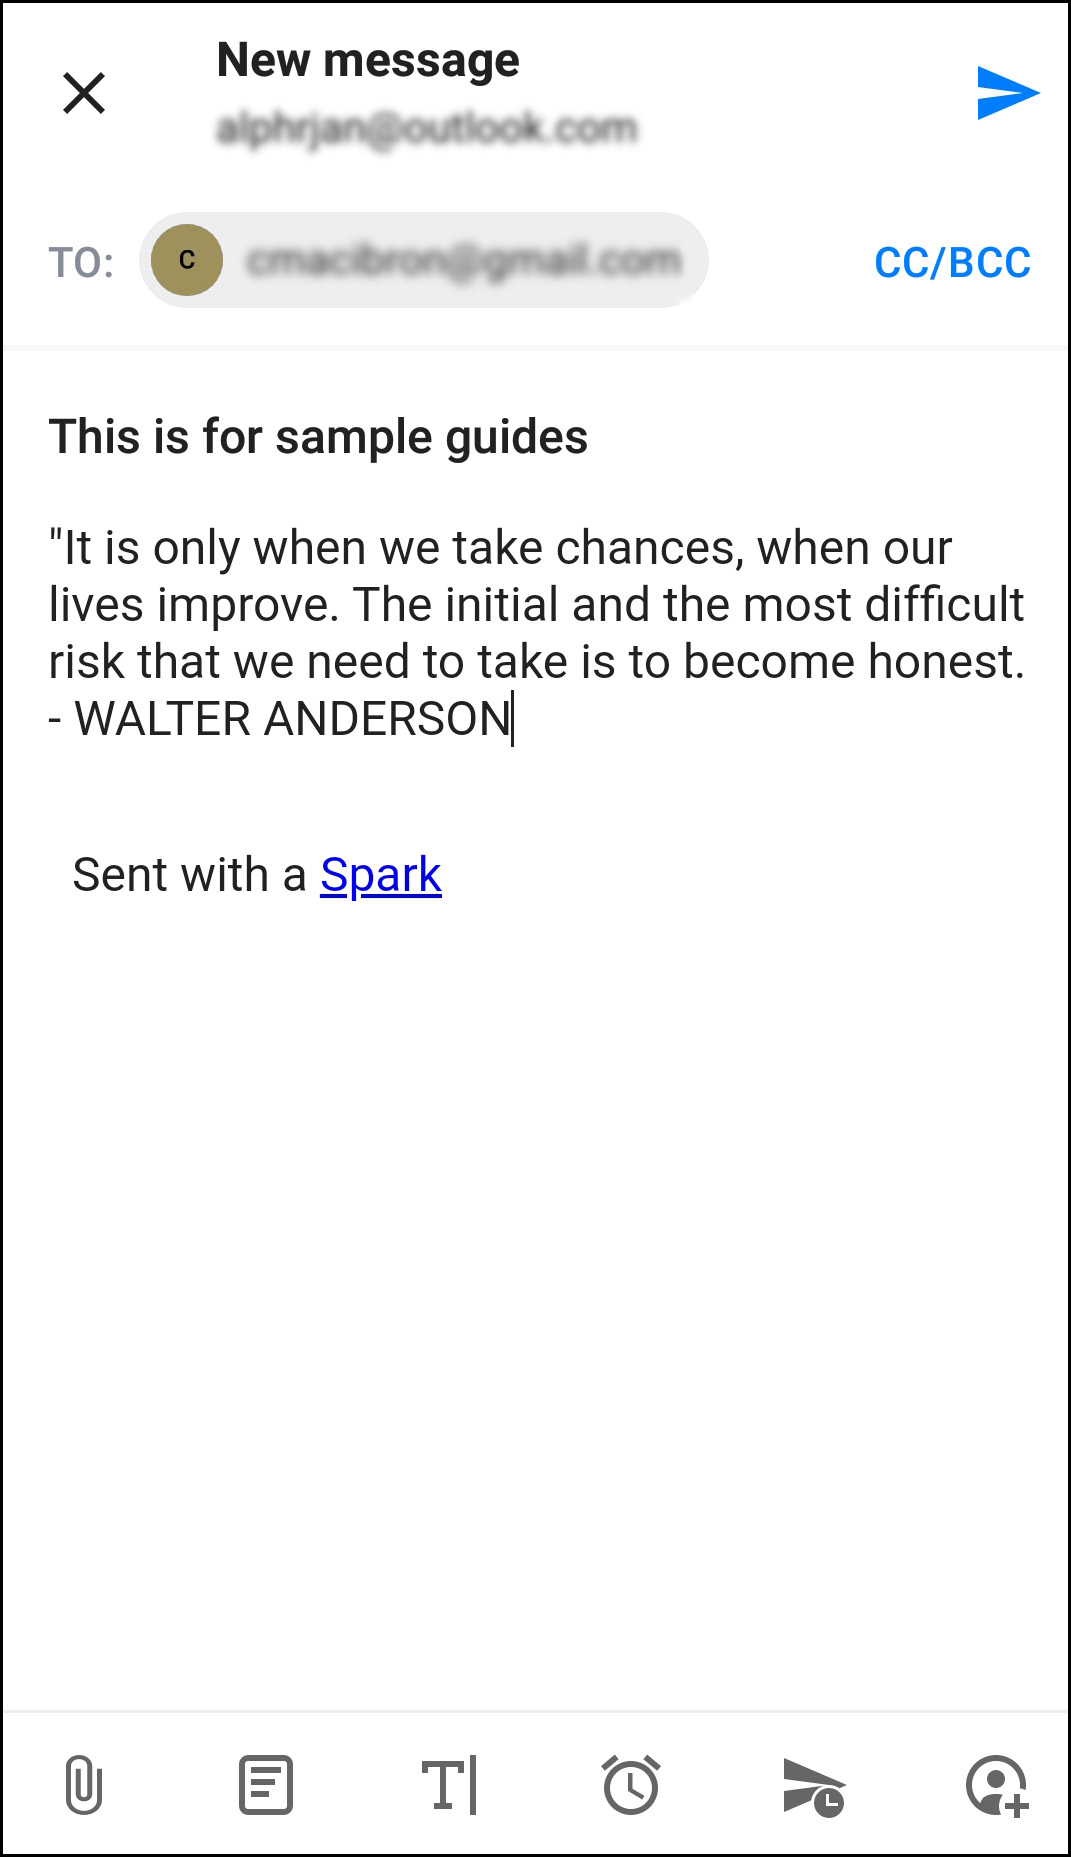
- Set up your account by following the instructions and compose a new email.
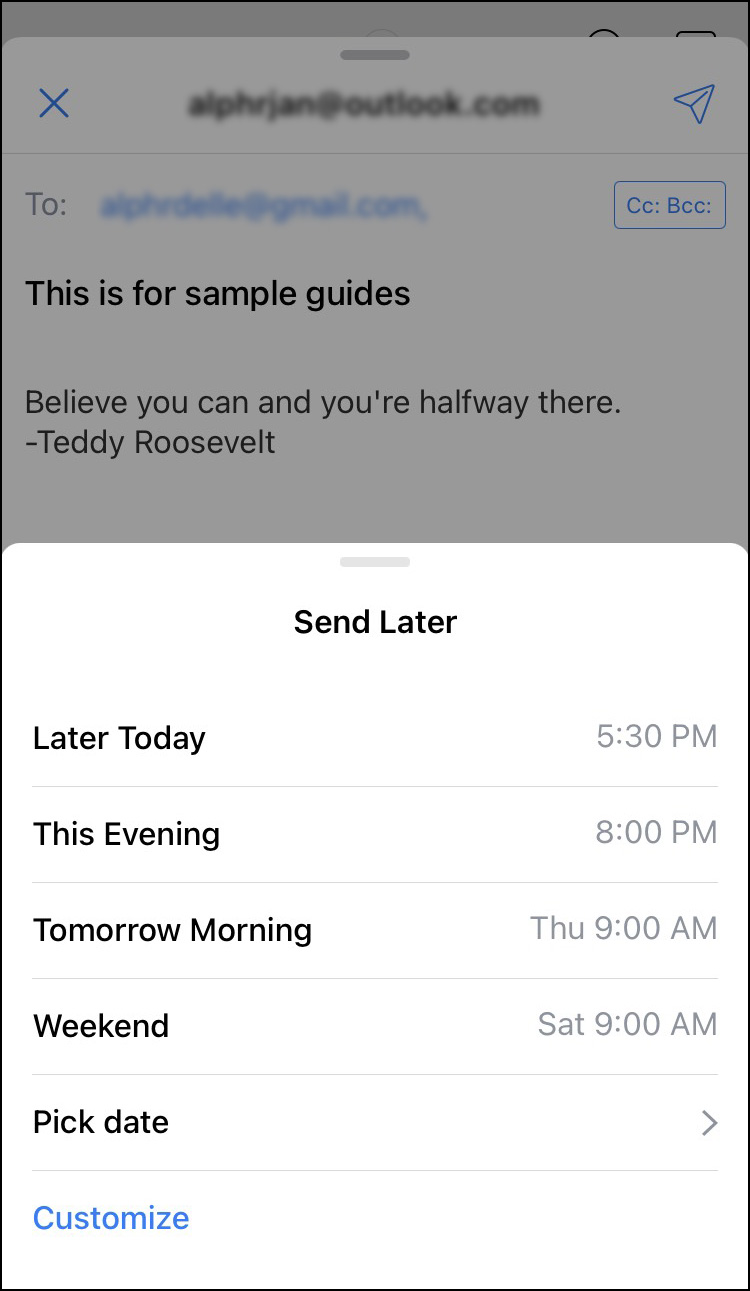
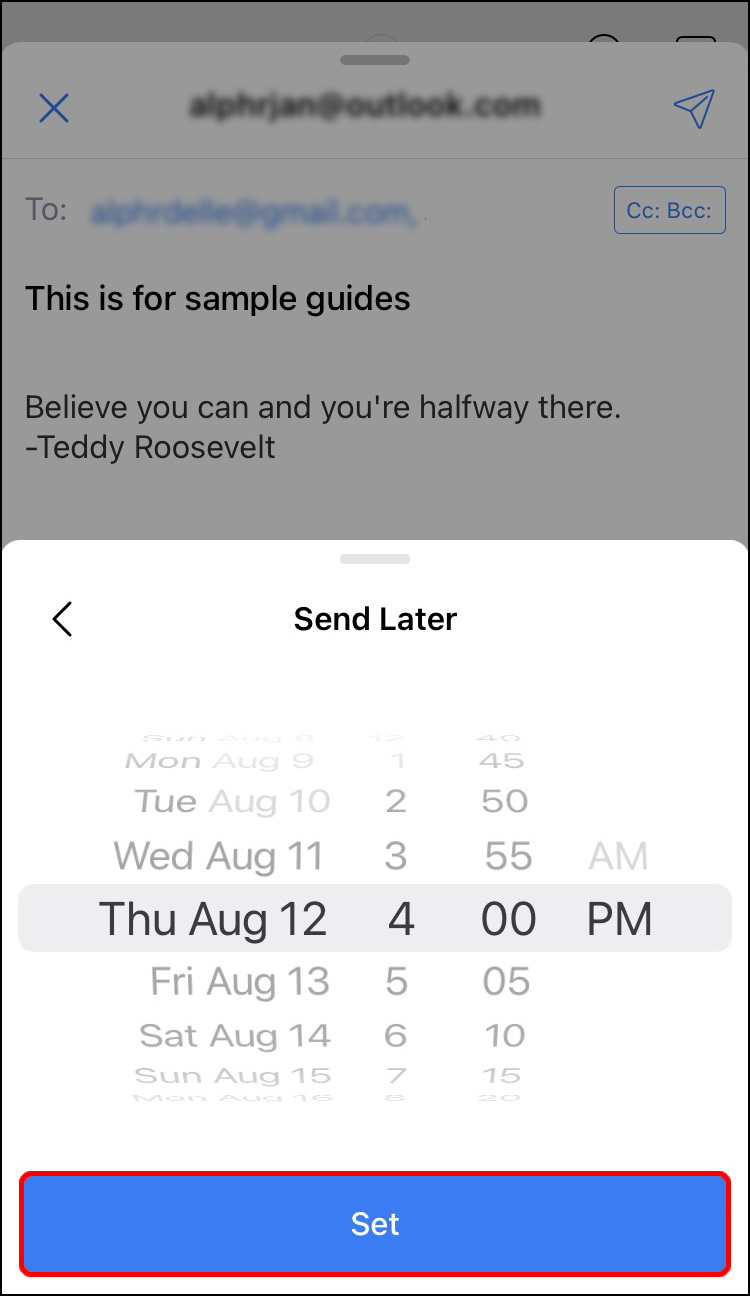
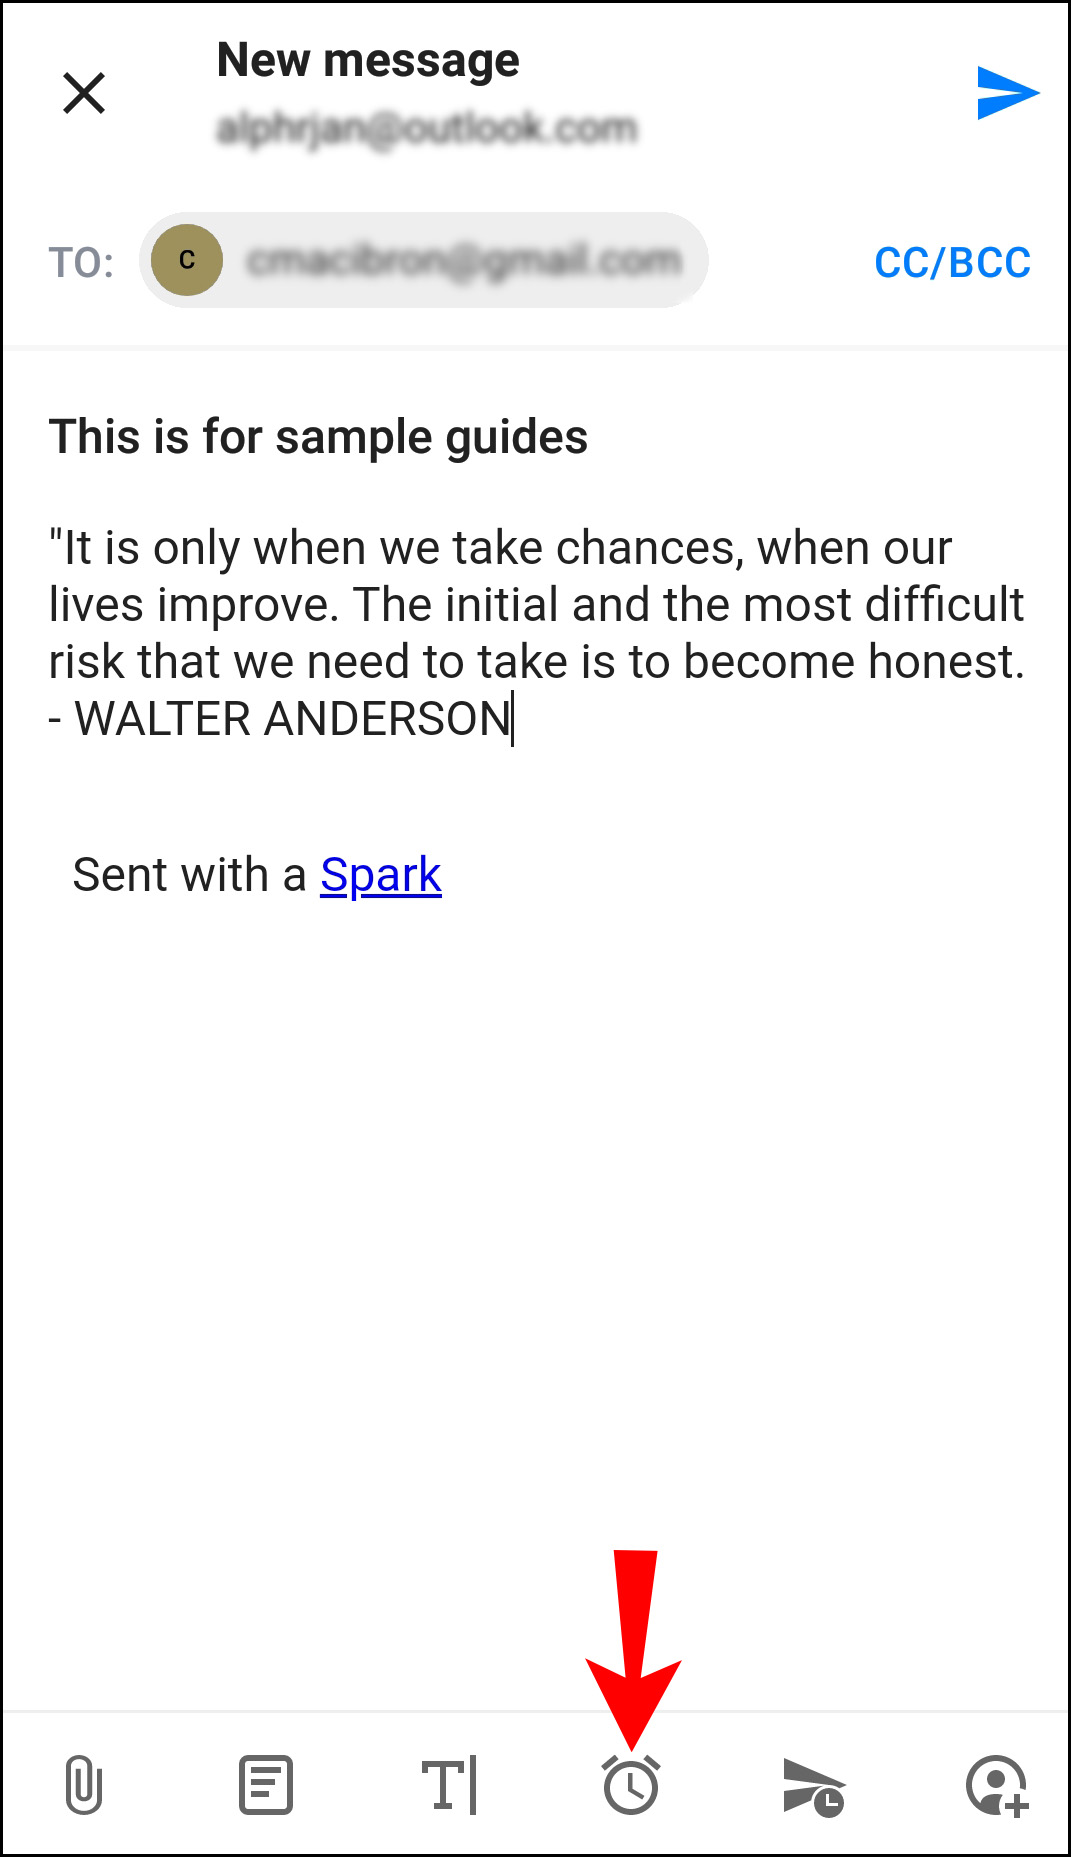
- Tap the airplane with a clock icon right above your keyboard.
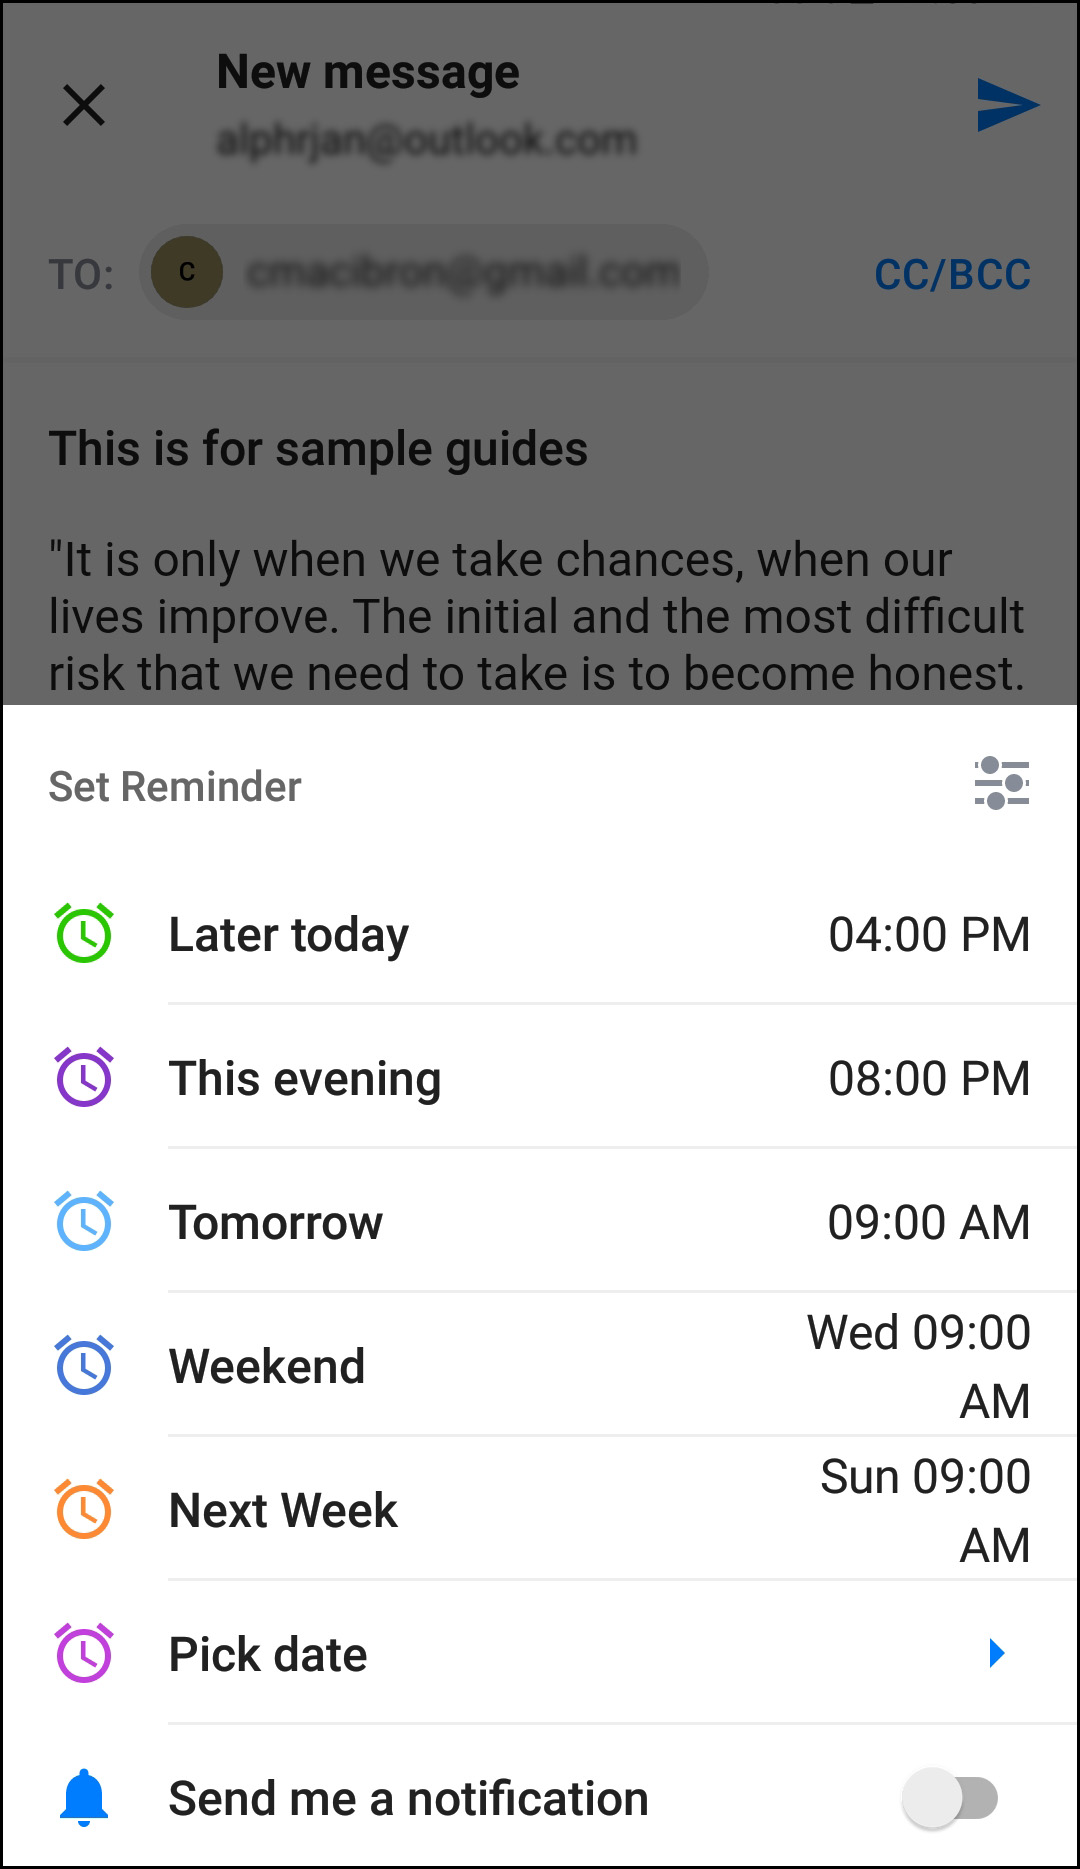
- You can choose between a few default options: Later Today, This Evening, Tomorrow, or Tomorrow Eve.
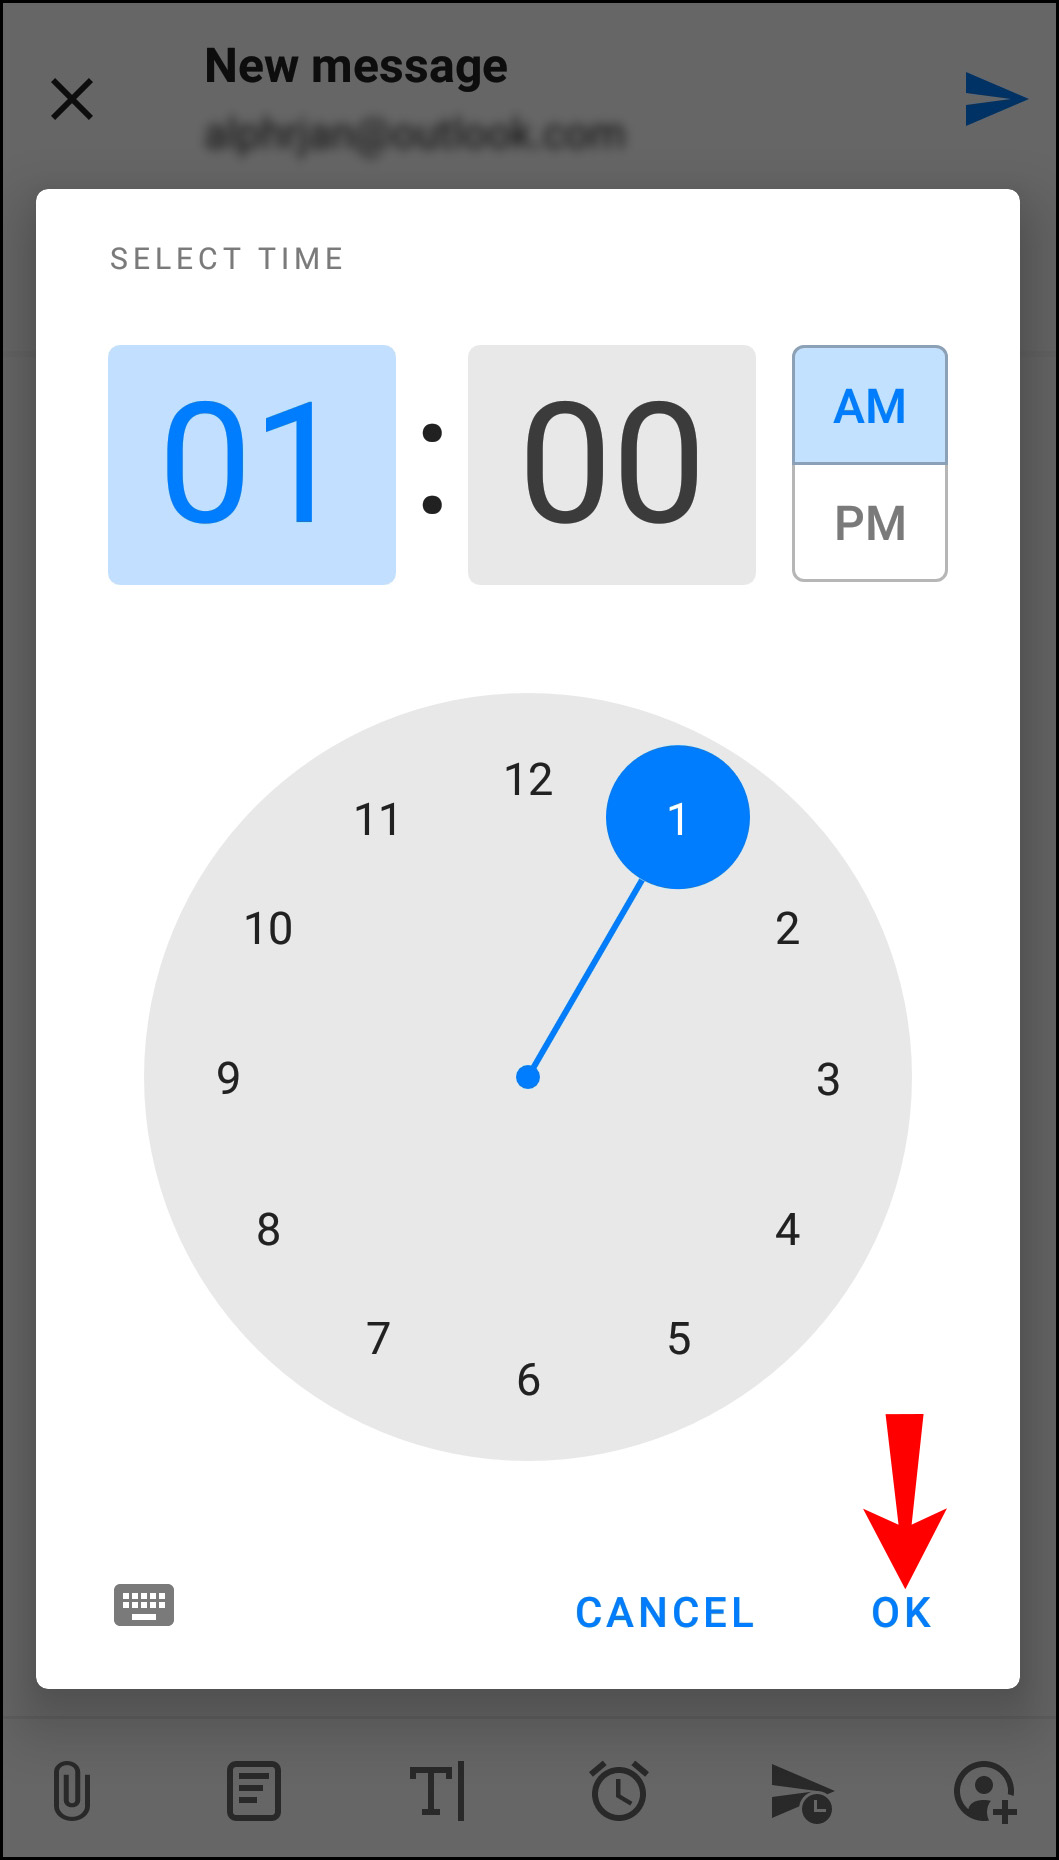
- If you want to customize the date and time, tap Pick date.
- Once you’re done, tap Set.


Schedule Emails using the iOS Gmail App
If you want to use Gmail, follow the steps below:
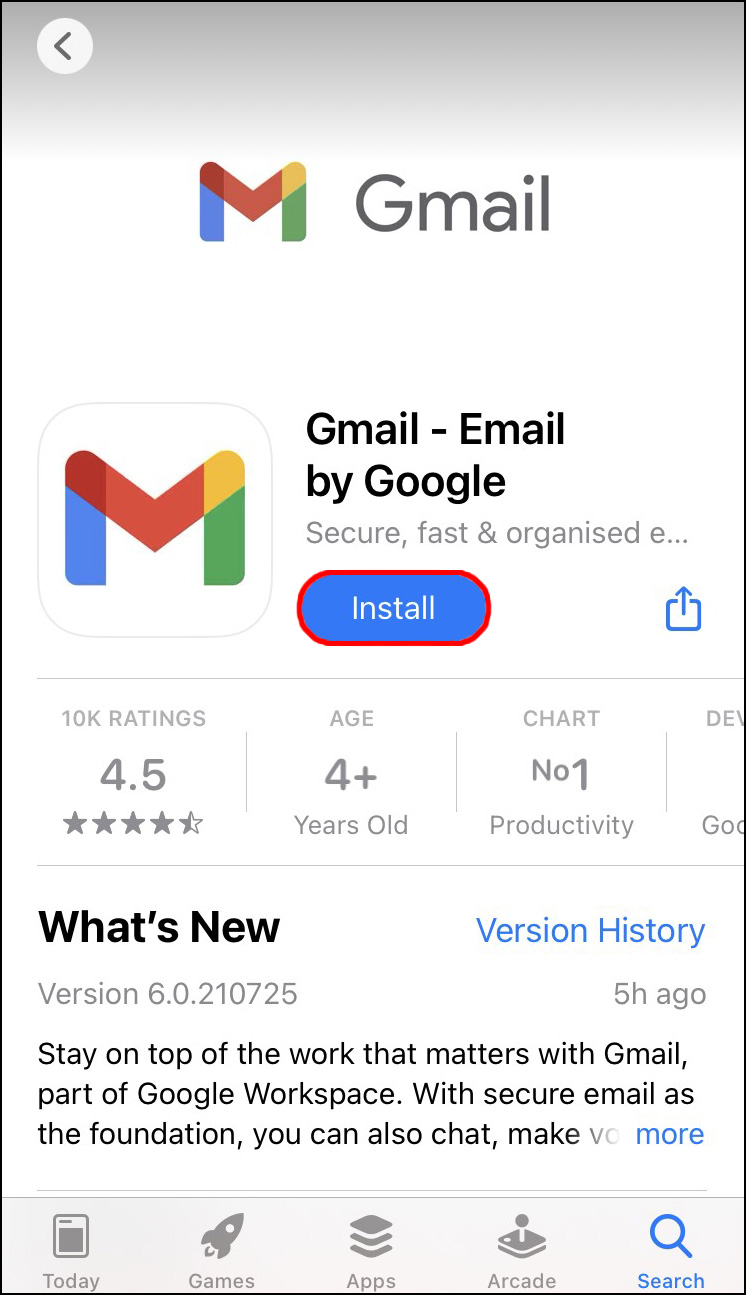
- Download the iOS Gmail app from the App Store.
- Sign in using your email and password.
- Compose a new email as usual.
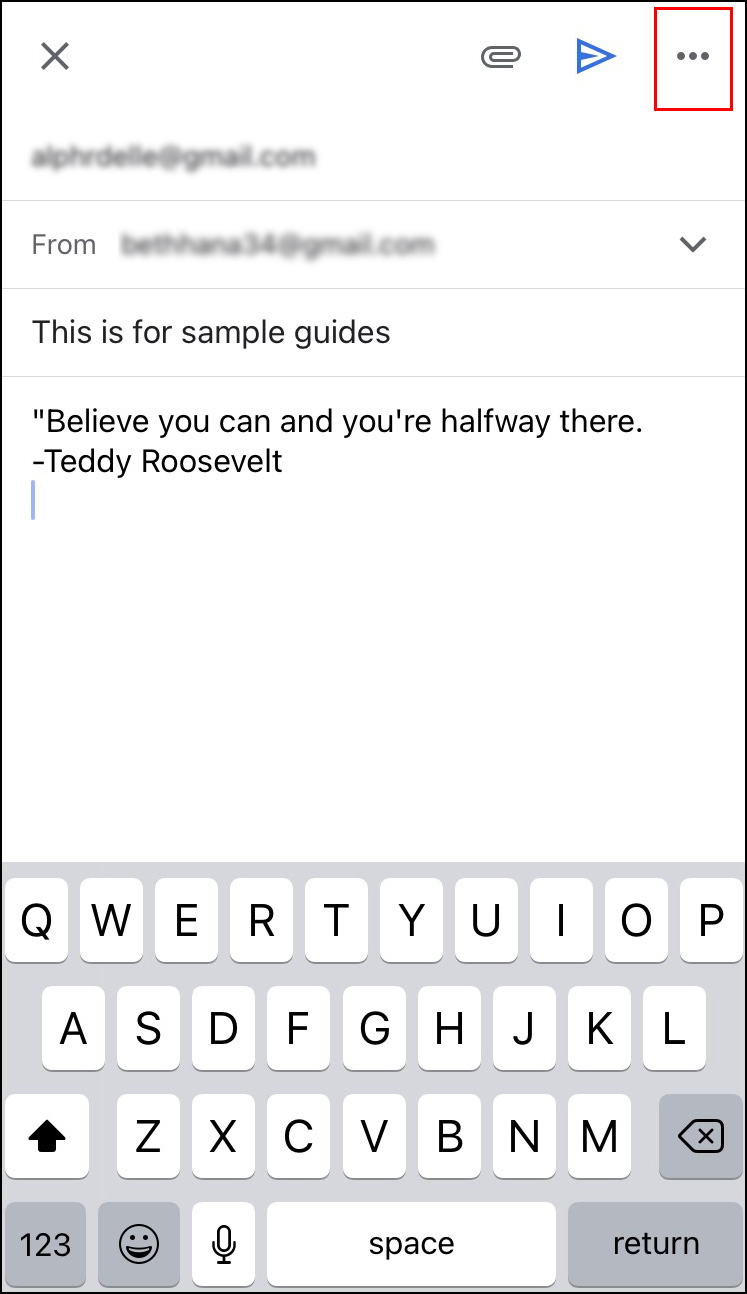
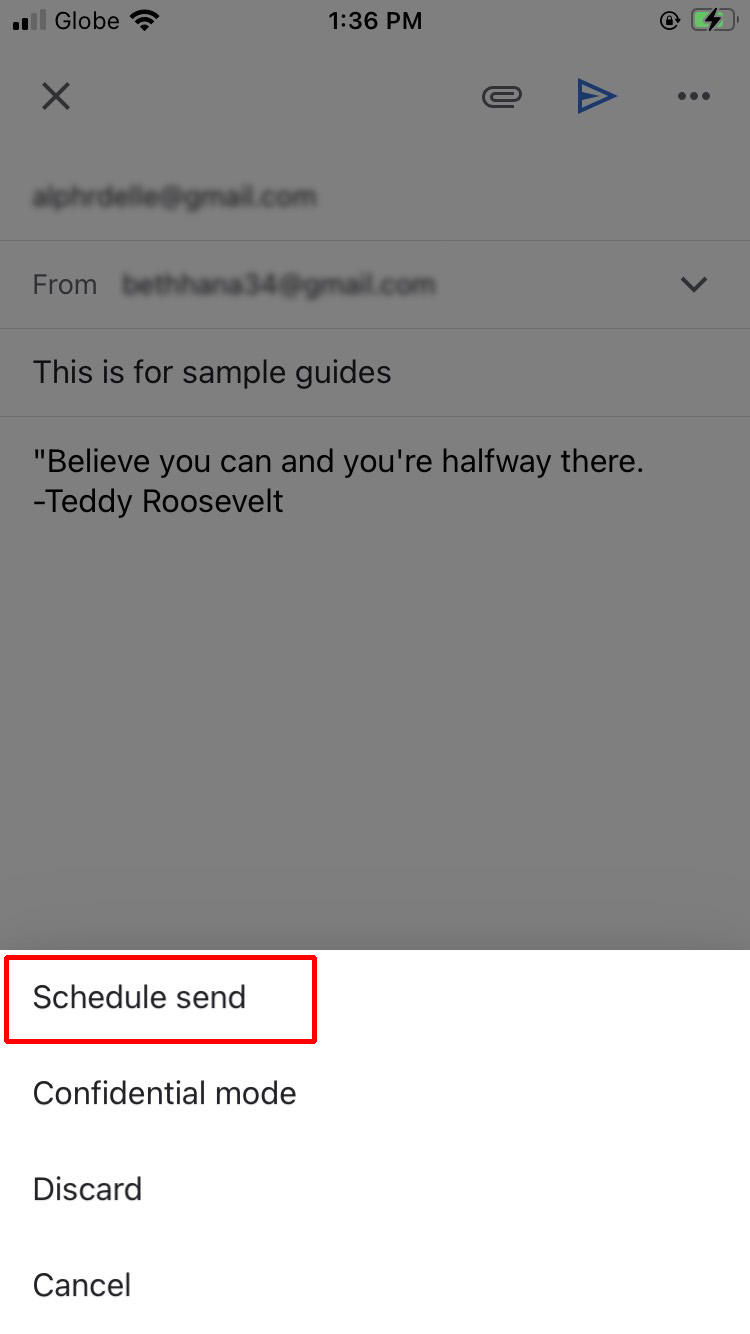
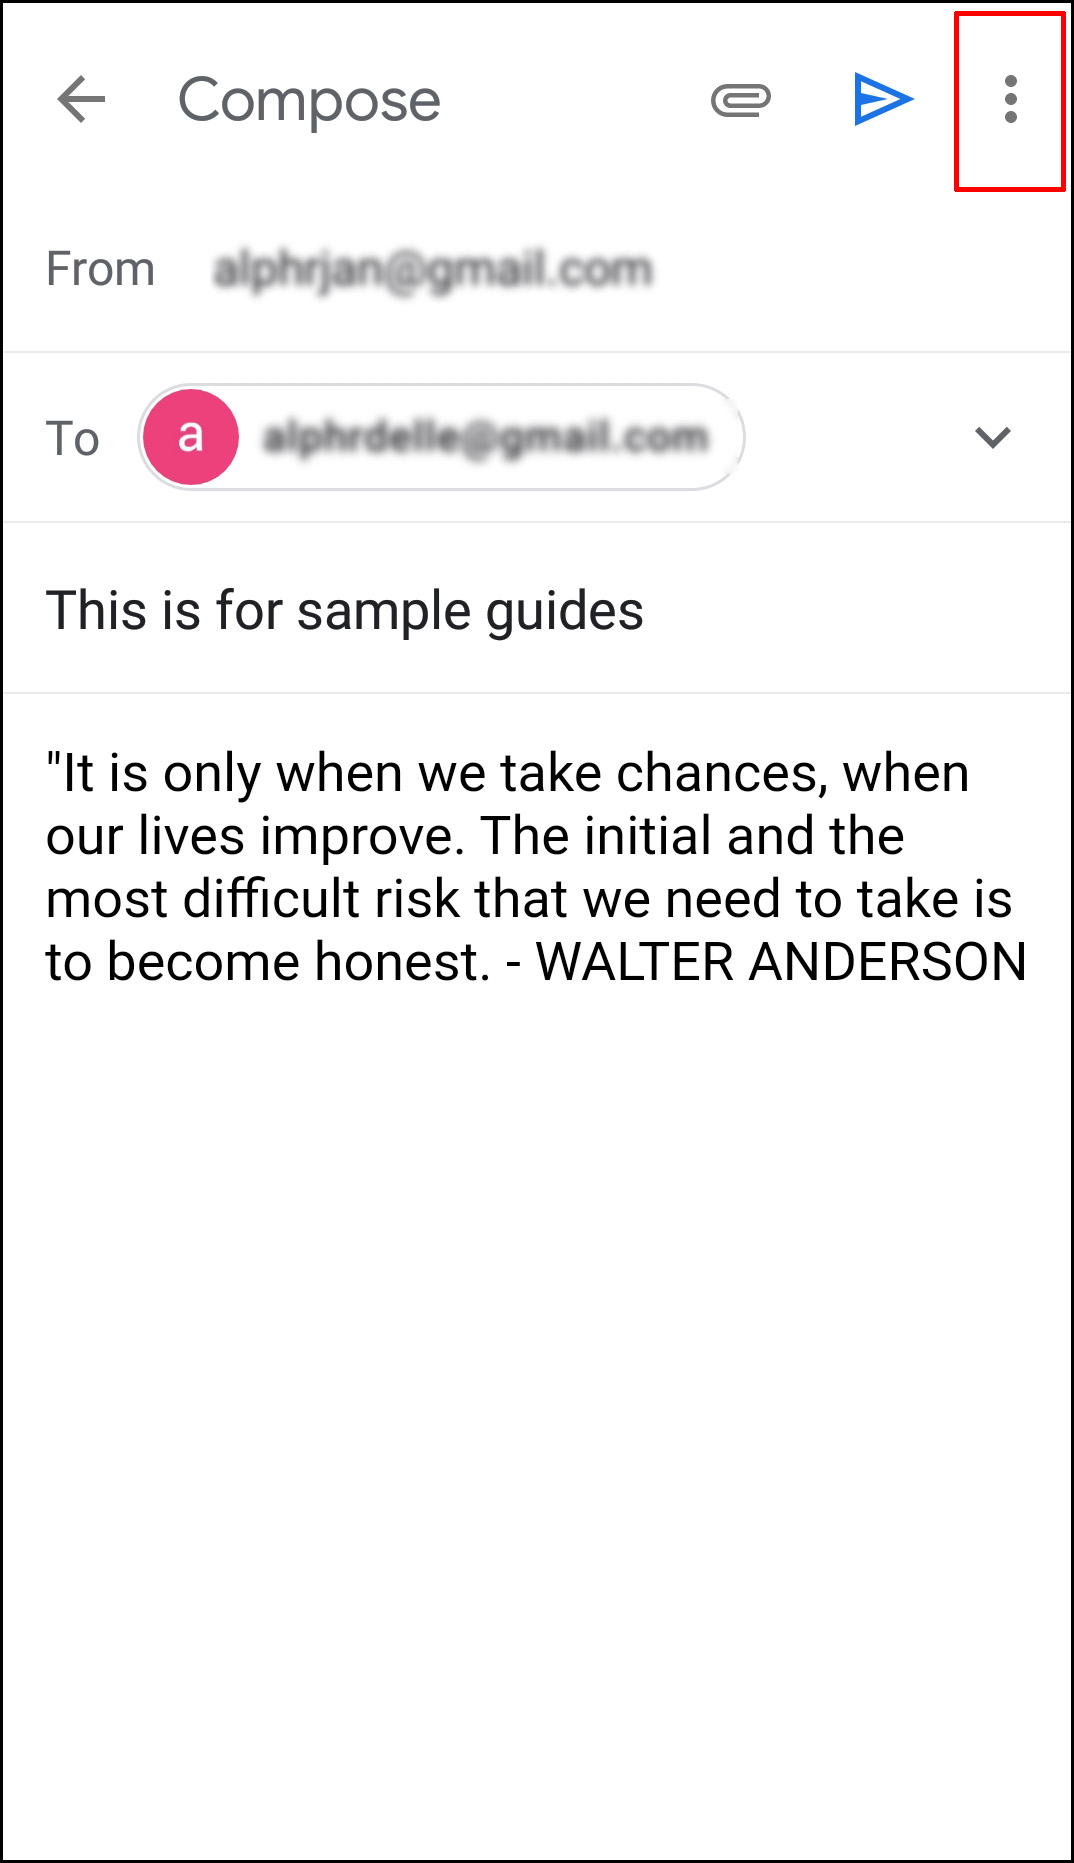
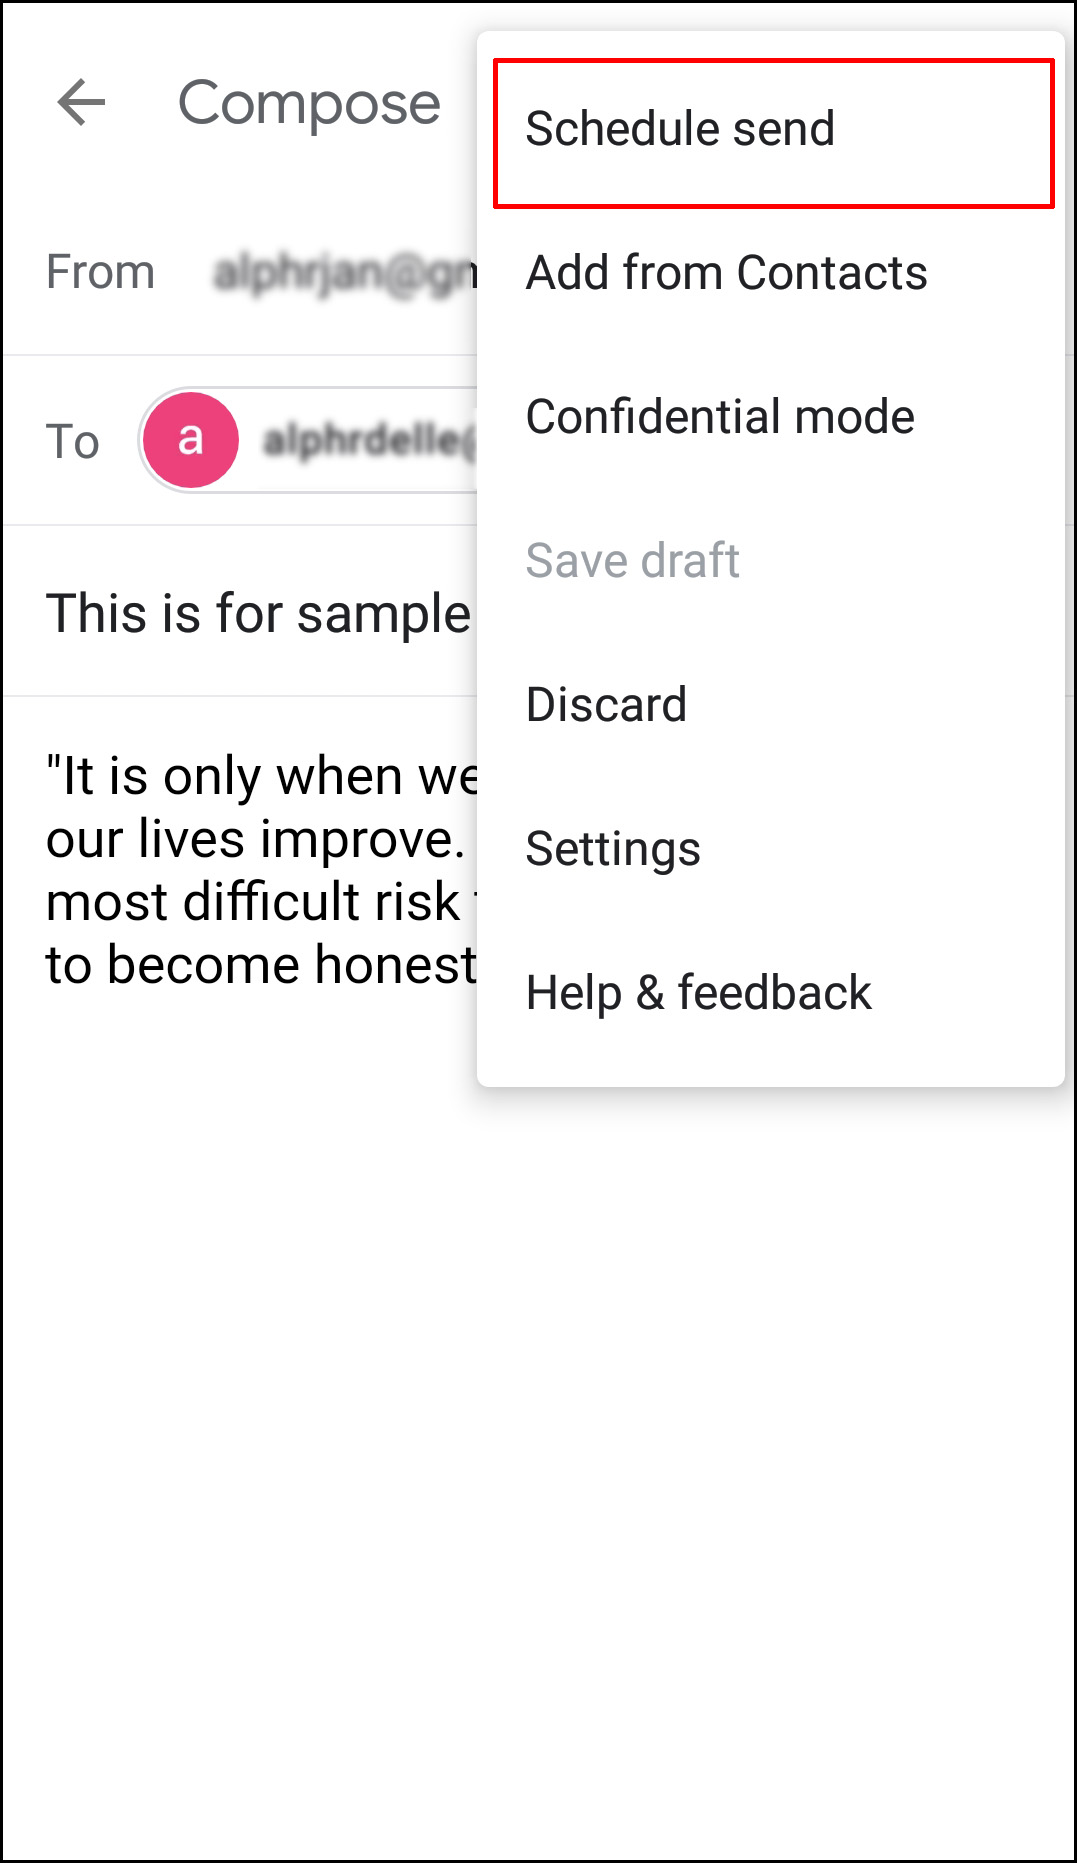
- Tap the horizontal ellipsis (three horizontal dots) in the top-right corner.
- Tap Schedule send.
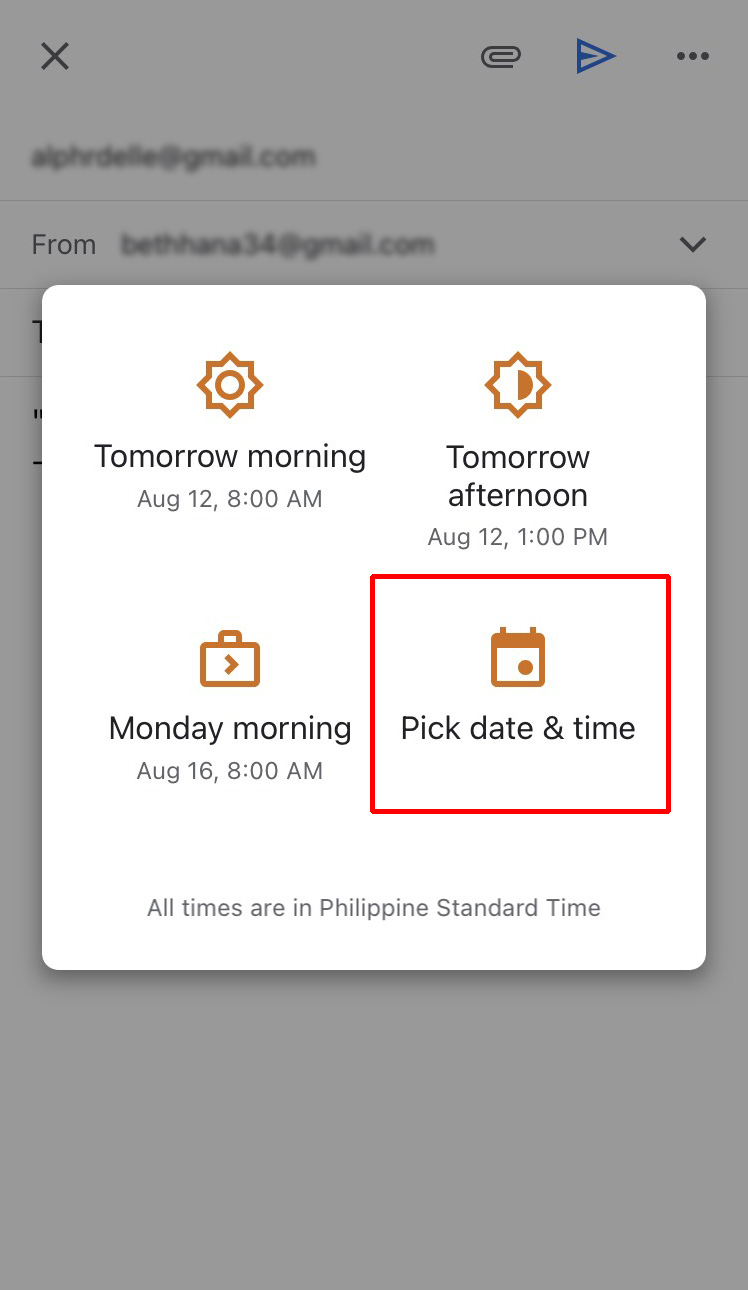
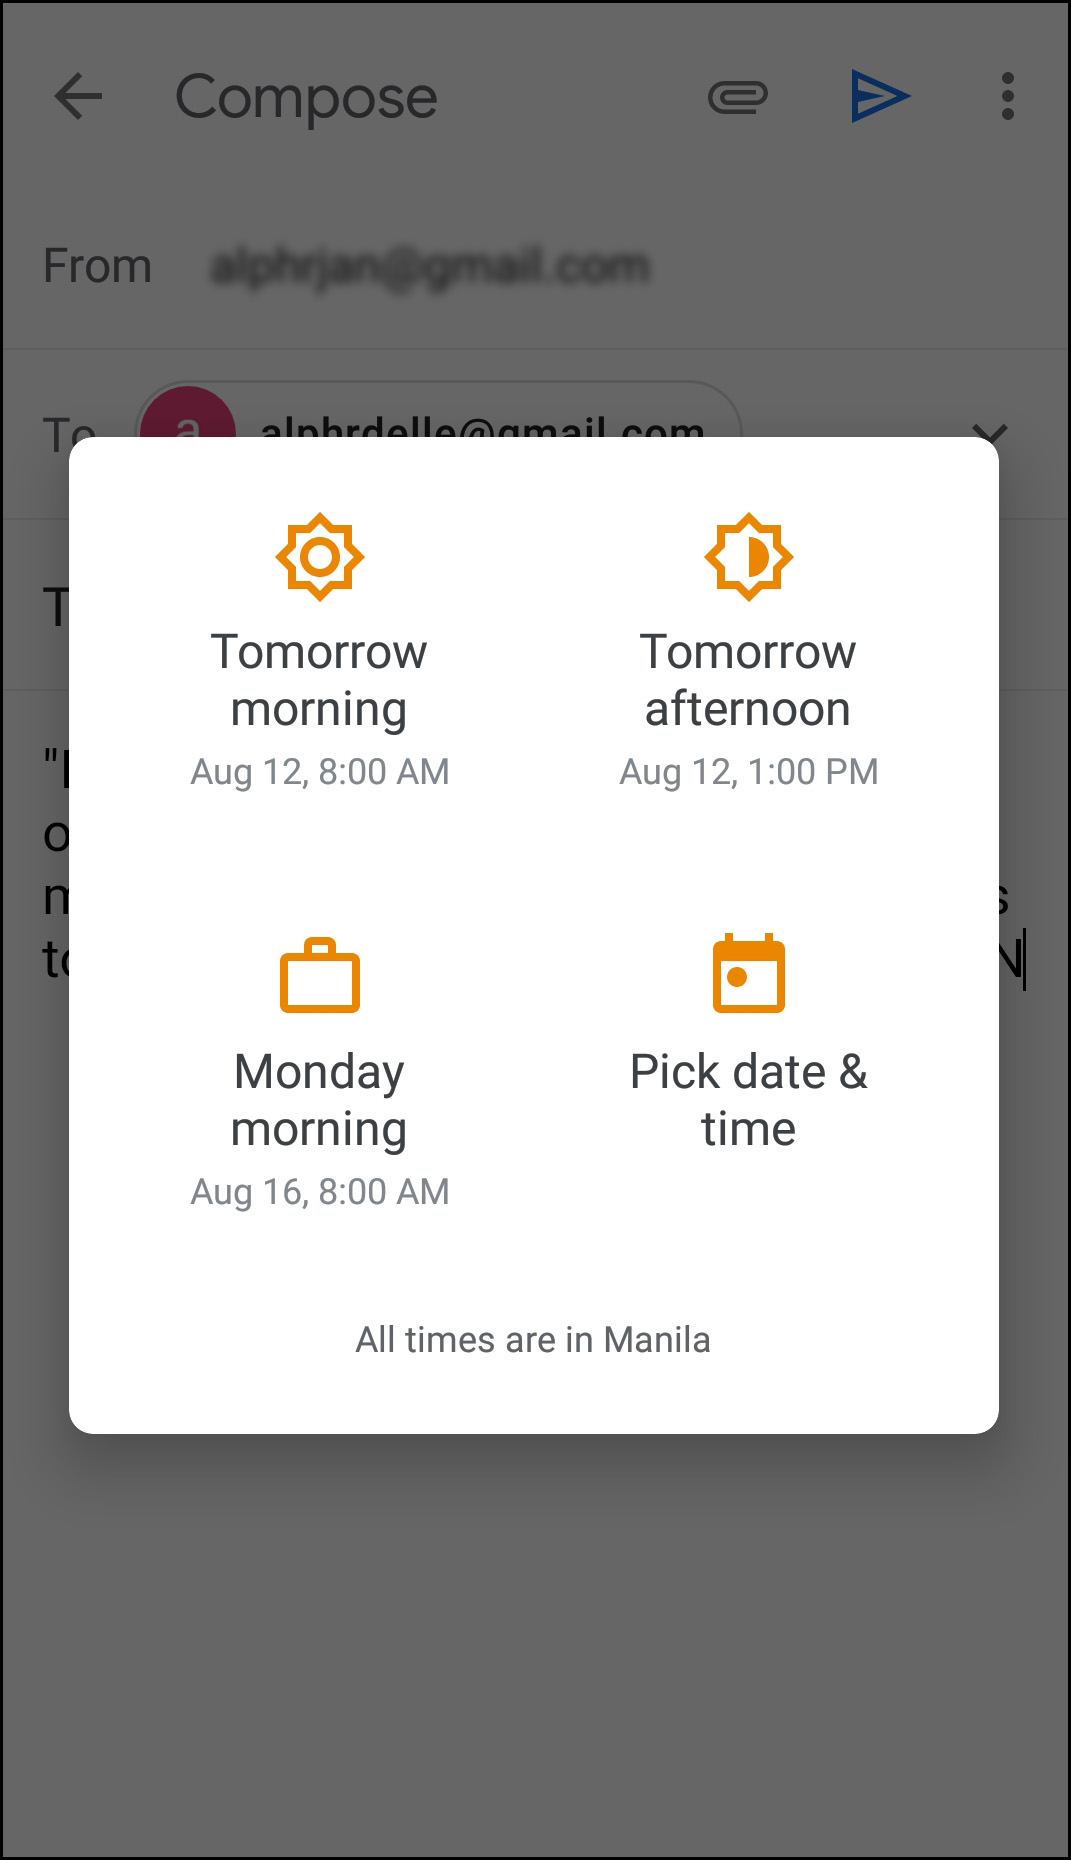
- You can choose between three default options: Tomorrow morning, Tomorrow afternoon, or the next available Monday morning. If you want to set a different date and time, tap Pick date & time.
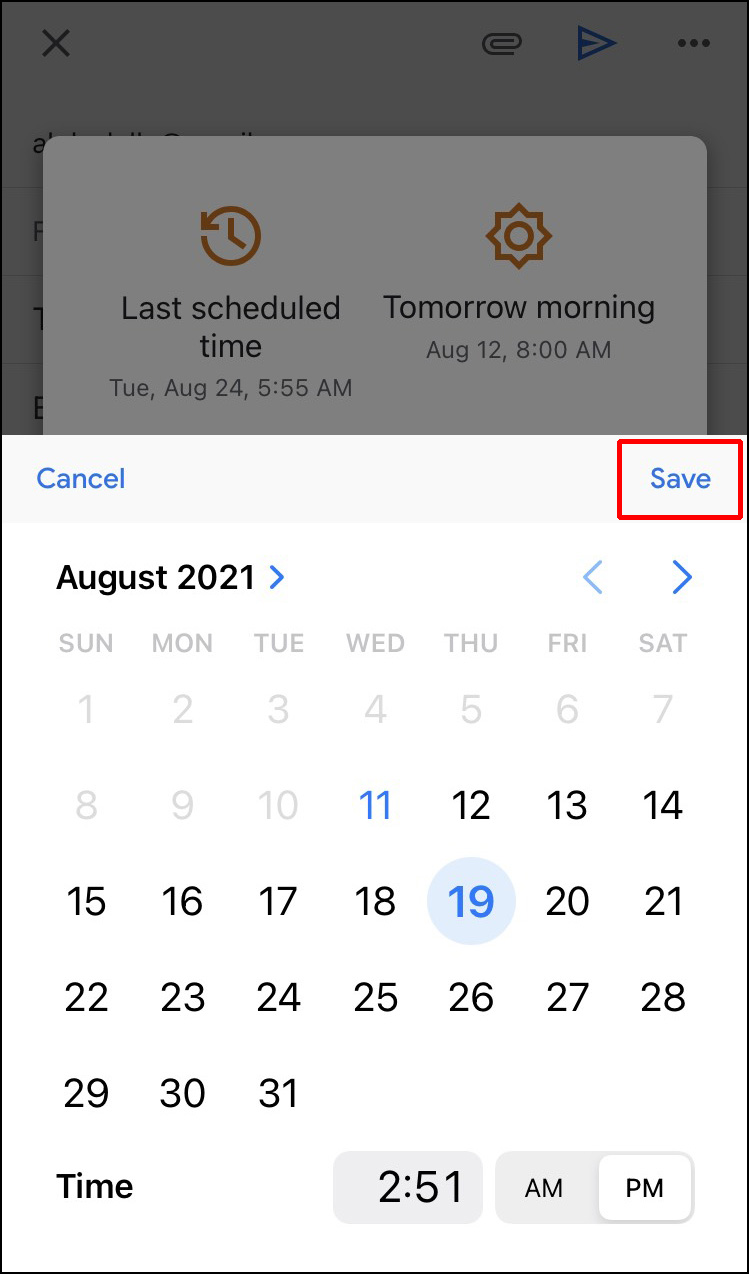
- Once you’re done, tap Save.

How to Schedule an Email in Outlook on the Android App
If you’re using the Outlook Android App, you won’t be able to schedule your email since this option isn’t available. You can use other third-party apps, such as Spark or Gmail, just like iOS/iPhone. Both allow you to customize when your email will be delivered.
Schedule Emails using the Android Spark App
If you want to use Spark in Android, follow the steps below:
- Download the Android Spark app from the Play Store.
- Sign up using your Outlook ID and password and follow the instructions for setting up your account.
- Compose a new email.
- In the bottom option, tap the airplane icon with a clock.
- Choose among several default options for scheduling your email: Later today, This evening, Tomorrow, or Tomorrow eve.
- You can customize the date and time by tapping Pick date.
- When you’re done, tap OK.

Schedule Emails using the Android Spark App
If you opt to use Gmail, follow these steps for scheduling an email:
- Open the Android Gmail app on your phone.
- Compose a new email.
- Tap the vertical ellipsis (three vertical dots) in the top-right corner.
- Tap Schedule send.
- Choose among three default options: Tomorrow morning, Tomorrow afternoon, or Monday morning.
- If you want to set a different date and time, tap Pick date & time.
- Once you’re done, tap Schedule send.


How to Schedule an Email in Outlook on the Mac App
You can use Outlook on your Mac device and schedule emails. However, this option won’t be available if you use Gmail, iCloud, or Yahoo accounts. Follow the steps below to schedule an Outlook email on a Mac:
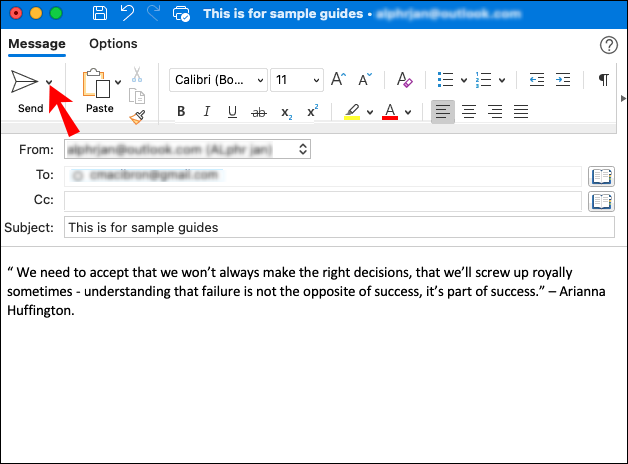
- Open the Outlook app and write your email.
- Click the dropdown arrowhead next to the Send icon in the top-left corner.
- Choose Send Later.
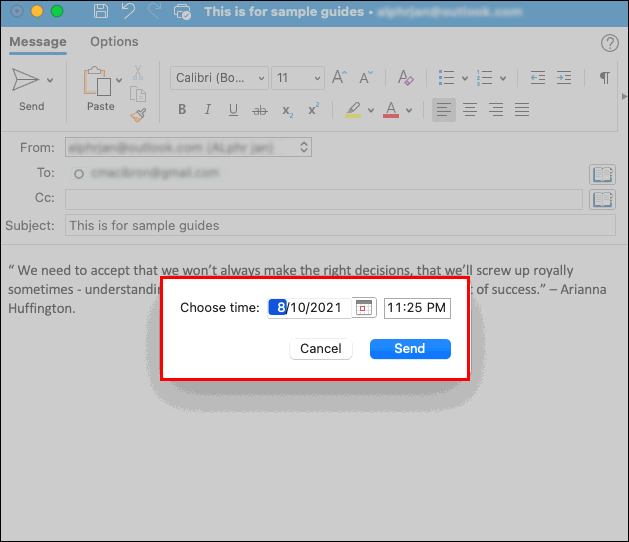
- Enter the time and date when you would like to send the email.
- Select Send.


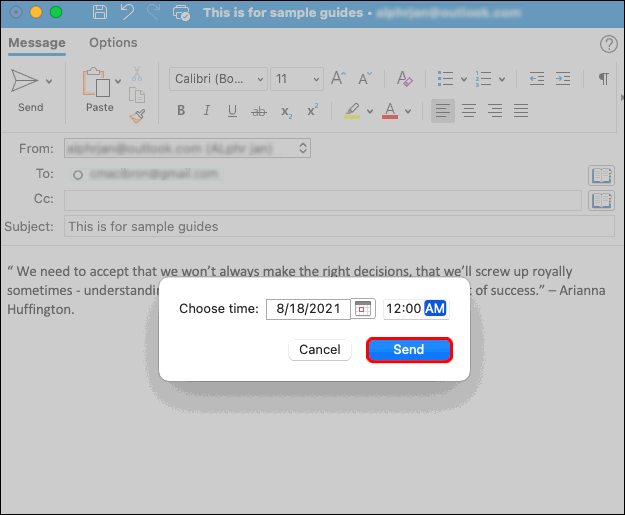
Your email will be saved in the Drafts folder until the scheduled time, and then it will be sent even if Outlook isn’t open on your Mac device at the specified time. However, you need to be connected to the internet.
If you change your mind and want to cancel the email, go to your Drafts folder and select Cancel Send. The email will remain open so that you can delete or reschedule it.
Compose Your Emails Now, and Send Them Later
Since Outlook lets you write your emails and schedule them to be sent anytime, it also allows you to return to the emails if you realize you need to add something or to give yourself peace of mind and finish your day early. The only downside is that you can’t use this feature without the Windows or macOS Outlook app.
Device Links
’ll have to use a different email app like Spark for mobile scheduling.
Scheduling Outlook Emails FAQs
How can I add a delay to all emails in Outlook?
If you often make mistakes when sending emails or forget to send attachments, you should consider delaying them. This gives you enough time to revise and add what you’ve forgotten. Outlook allows you to create a rule and delay your emails by up to two hours.
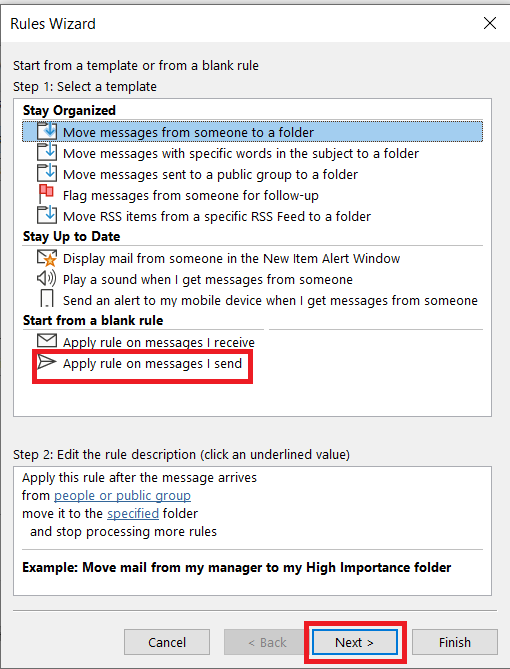
Creating a rule is simple, and you can do it with a few clicks:
1. Open Outlook and tap File.

2. Select Manage Rules & Alerts.

3. Click New Rule.

4. In the Step 1: Select a template section, click Apply rule on messages I send, then tap Next at the bottom.
5. In the Select condition(s) list, mark the checkboxes next to the options you want and tap Next.
6. In the Select action(s) list, check off Defer delivery by a number of minutes.
7. In the Edit the rule description (click an underlined value) box, select a number of.
8. Select how many minutes you want. The maximum amount is 120.
9. Tap OK and then tap Next.
10. Customize potential exceptions if you want.
11. Give a name to the rule.
12. Check off Turn on this rule.
13. Click Finish.
Once you’ve created this rule, all the emails you send will be held in your outbox folder for the number of minutes you specified.
Disclaimer: Some pages on this site may include an affiliate link. This does not effect our editorial in any way.