Photopea is an online photo and graphics editor that allows users to edit their images without the need for expensive app subscriptions. It can work as a fair alternative even to high-end apps like Photoshop with its advanced features. Although Photopea is user-friendly, some of its features may not be as obvious, like removing a background.
If you need to remove an unsightly background from an otherwise perfect photo, Photopea offers several easy solutions. Read on to learn more about removing backgrounds with this online image editor.
How To Remove an Image’s Background
Learning how to remove the background of an image is a useful skill. You’ll end up with a transparent PNG of your subject that you’ll be able to use for many purposes, including other graphics. How difficult removing the background is depends on the complexity of your image. However, there is an appropriate solution for any photo.
You can remove your image background in the Photopea app in the following ways:
Use the Magic Wand Tool
If your background is a mostly solid color, removing it will be a breeze.
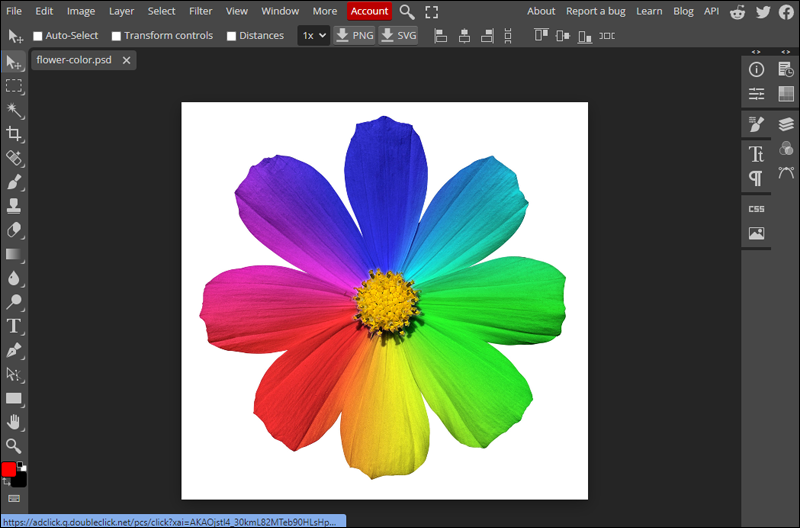
- Head to the Photopea website and open your image. You will see all the importing options right on the main page.
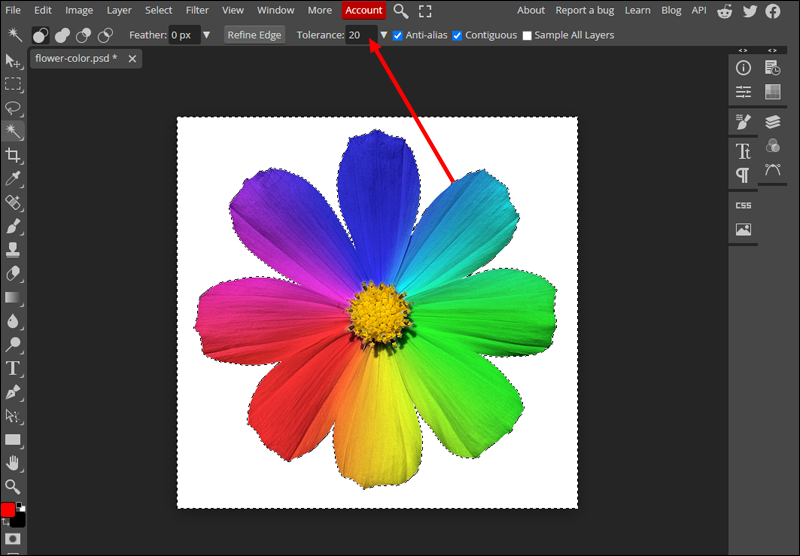
- Select the Magic Wand tool in the sidebar.

- Click the background to select it.


If the Magic Wand didn’t select parts of your background, adjust the settings:
- Undo the selection.
- Find Tolerance in the top menu. It appears when the Magic Wand is active.
- Increase the number, and try selecting the background again until you find the appropriate value.


Conversely, lower the Tolerance value if the Magic Wand selected parts of your image you didn’t want to select. Once satisfied with the selection, simply press “Delete” on your keyboard and watch your background disappear.
Use Magic Cut
Removing the background of an image used to be tedious work. However, Photopea has a smart tool specifically for removing backgrounds, making this task much easier. If the Magic Wand doesn’t work due to a complicated background, turn to the Magic Cut. Here’s how to use it:
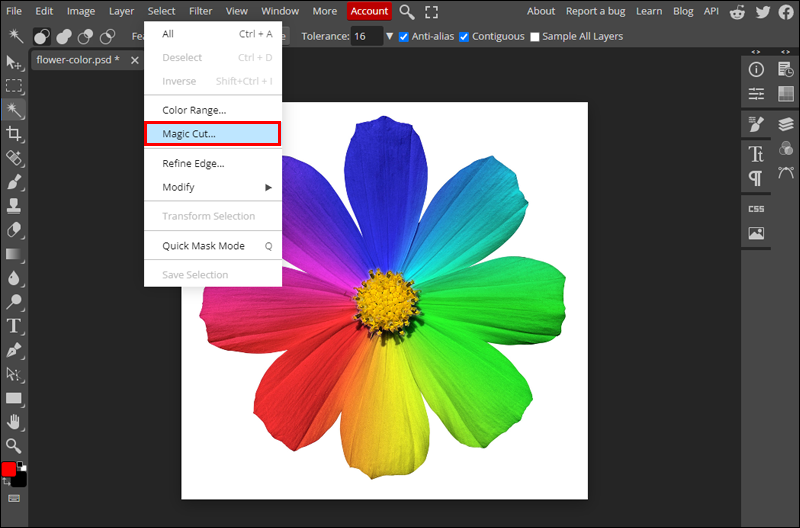
- Open the Photopea website and import your image.
- Click Select in the menu bar and find Magic Cut…
- Create your selection in the new window. Use the red brush to mark your background, the green brush to mark your subject, and the grey brush to erase the app-generated automatic selection.
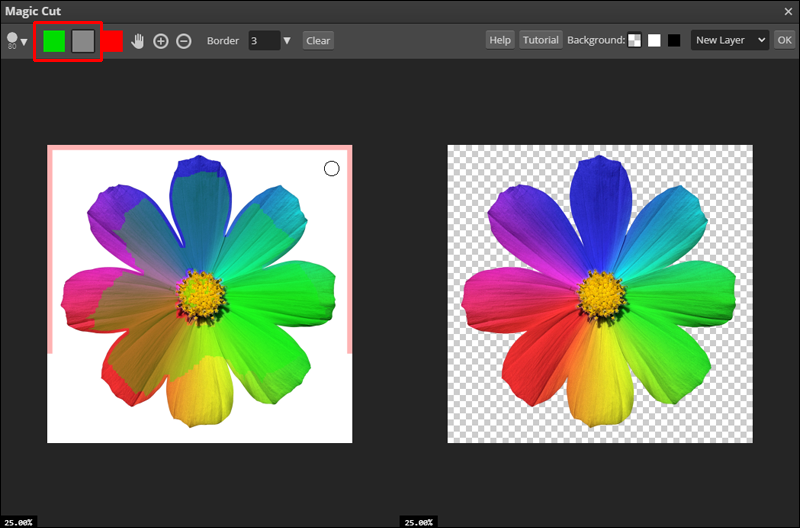
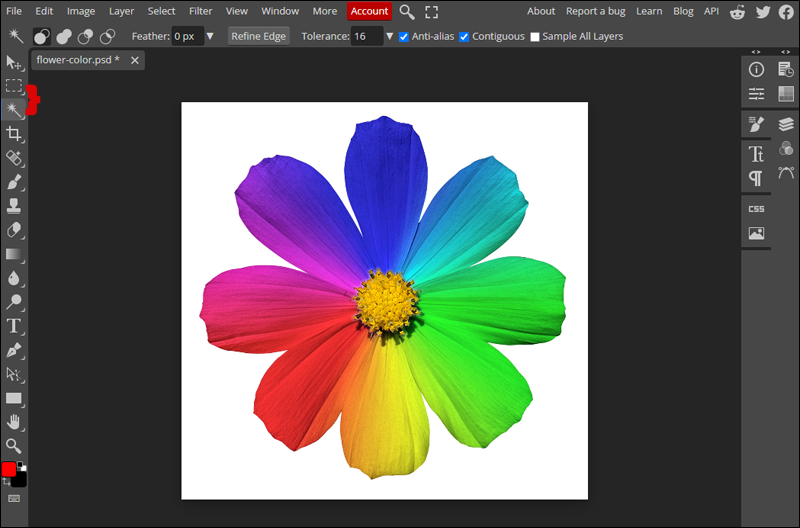
You will see the preview in the right-side window and can adjust your selections accordingly. Click “OK” in the upper right corner when you are ready. Your selection will be on a new transparent layer with the original layer hidden underneath.
Here are a few tips that will help you get the most out of the Magic Cut tool:
- Your selection will have a hard edge by default. You can adjust it by increasing or decreasing the number by Border at the top. Increase the number to get a fuzzy edge.
- You don’t have to be precise with your selection. It’s enough to make a mark in the desired area, and the app will intuitively separate your background and your subject.
- If you’re having difficulty seeing the preview, switch its background by clicking one of the boxes by Background in the upper right corner.
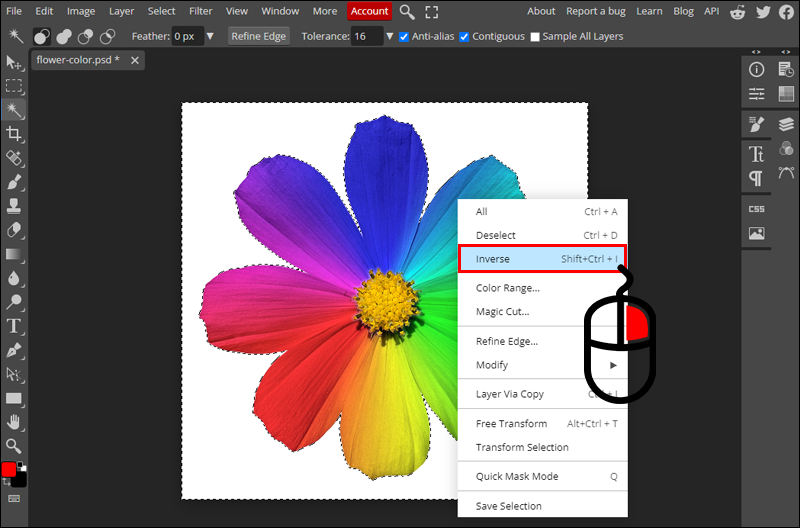
Select Your Subject Manually
While Magic Cut works well even with challenging images, there are also more precise tools. You can remove the background of your photo through manual selection. However, you will need some patience if your image is very detailed.
There are several manual selection tools, and you’ll need to decide which one suits your picture best. You can find them under “Rectangle Select” and “Magic Wand” in the sidebar. Right-click these tools to see the sub-tools under each.
- Go to the Photopea website and open your image.
- Choose a selection tool from the Rectangle Select or the Magic Wand menu.
- Select your subject as precisely as you can.
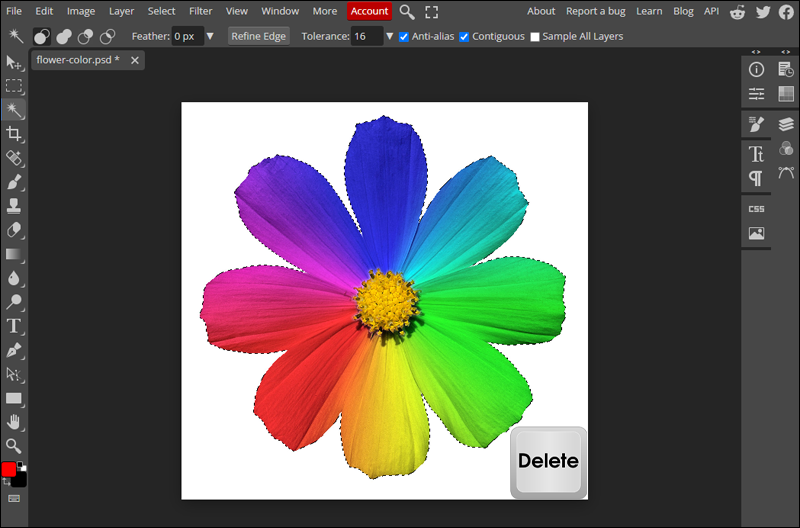
- Right-click on your selection and choose Inverse.
- Press the Delete button to erase the background.
There are many options you can adjust while manually selecting your subject. Here are some tips:
- You can always add to or subtract from your selection by changing the selection mode. Click the intersecting circle icons in the top menu when the selection tool is active.
- Control how hard the edge of your selection is by adjusting the Feather value or by clicking “Refine Edge” in the top menu.
- Make selection easier by tweaking the photo first. Increase contrast or lower brightness to see your subject more clearly. You can do that on a duplicate layer and switch back to your original image once you’ve completed the selection.
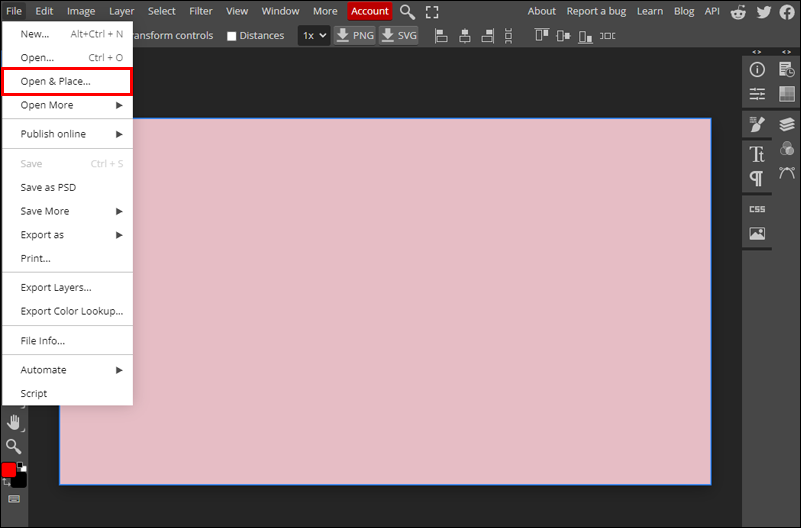
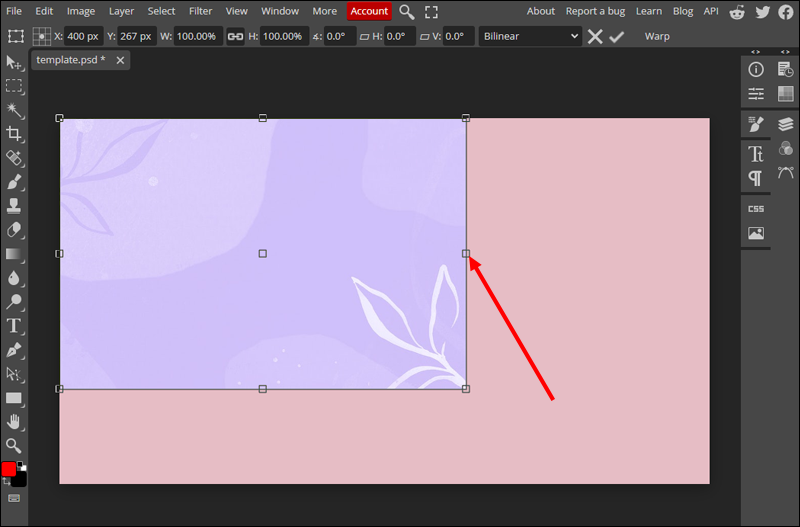
How to Add a New Background
Once you’ve removed the original background of your image, you might want to add your own. You can do that in these easy steps:
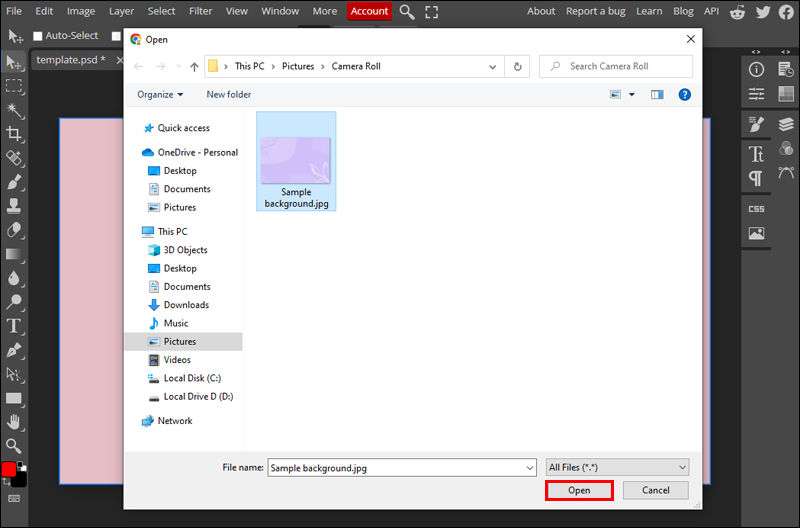
- Click File and find the option Open and Place…
- Browse your computer for the new background and click Open to insert the image on your canvas.
- Resize the image and press Enter or click the checkmark in the top menu to accept the changes.
- Drag the new image layer underneath your subject’s layer in the Layers menu on the right.

Edit Professionally, Free of Charge
Web-based apps like Photopea make photo editing accessible to everyone. Removing the background of your image doesn’t have to be a hassle either, thanks to smart tools like the Magic Cut. Let the app do the heavy lifting for you or erase your background with manual tools for more control.
Have you used Photopea before? Which tools and features are your favorites? Don’t hesitate to tell us in the comments.
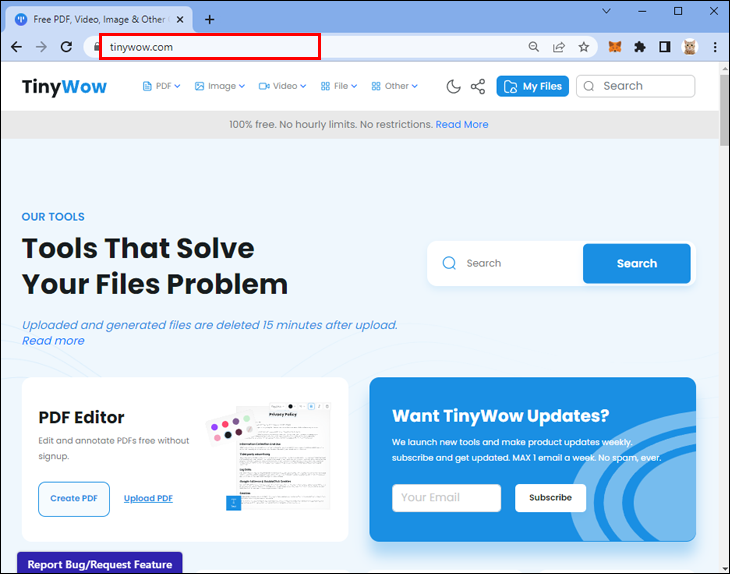
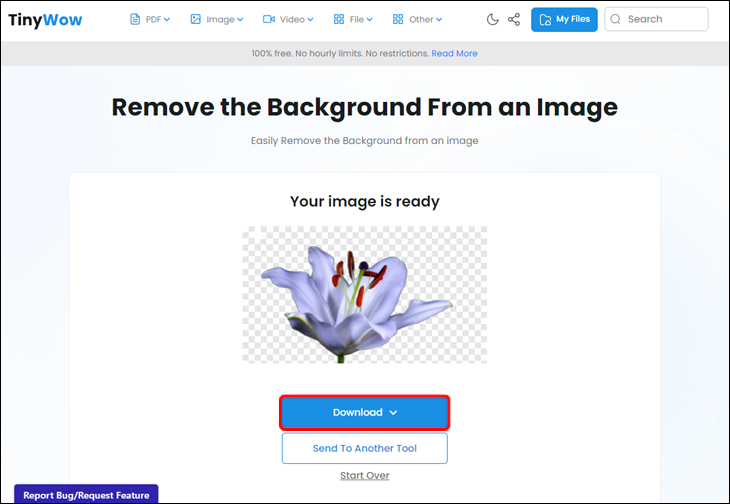
TinyWow
Tinywow is a hassle-free online tool that works like a charm in removing background images. Why bother with the paid software when you can do it for free using TinyWow? Here’s how to do it:
- Visit Tinywow.com on your browser.
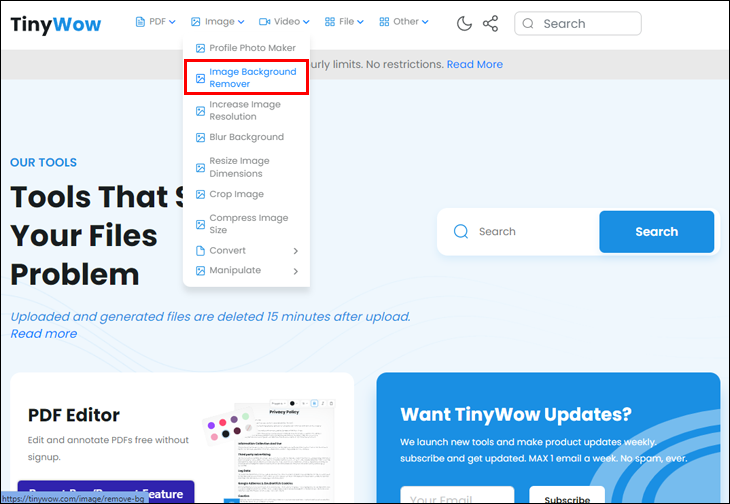
- Hover your mouse over the Image tab and click Image Background Remover.
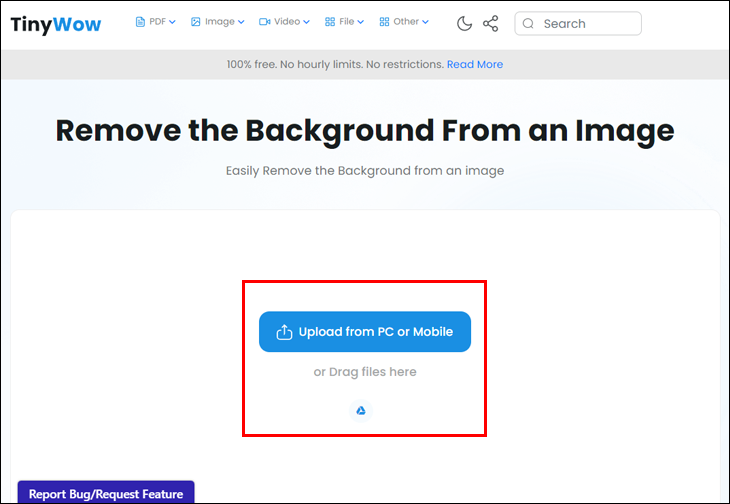
- Click Upload from your PC or Mobile or Drag some files.
- Once the photo is uploaded, you can now click the Remove button.
- You can now Download the image that has successfully removed the background image.

Disclaimer: Some pages on this site may include an affiliate link. This does not effect our editorial in any way.