When it comes to graphics editing, Procreate is one of the most popular options out there for iPad. However, if you’re starting with the app, learning key features, like adding an image to a layer, is essential.
This guide will explain everything you need to add an image to a layer in Procreate.
If you’ve been having difficulty getting started with Procreate, learning how to add an image to a layer can be helpful. Luckily, this is a relatively simple process.
There are several different options. First, you can import an image directly from your iPad’s photo library. However, importing photos from other sources, such as Dropbox, is also possible.
How to Add Image to Layer in Procreate
The primary way to add an image to layers in Procreate is to upload it from your image library. You’ll need to have the picture saved in your image library to do so.
- Open Procreate on your iPad or iPhone.
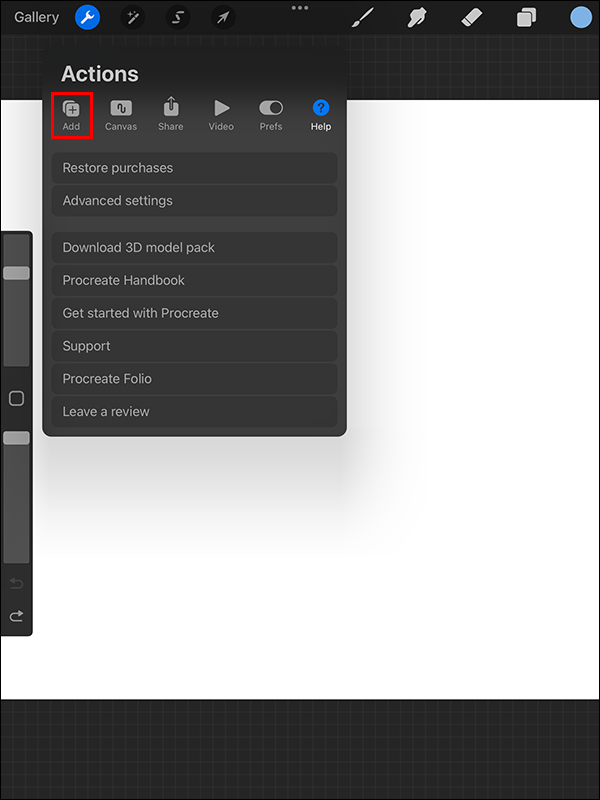
- Select the wrench icon in the top left of your screen.
- Choose the Add tab below the title Actions.
- Select Insert a photo.
- Select the photo you would like to upload from your image library.


Now, you can move the image around or adjust its opacity in Procreate to suit your needs better.
You can also import images from the Files app and other cloud storage services like Dropbox or Google Drive to Procreate. Select Insert a file in Step 4 instead of adding a photo.
Alternatively, if you don’t have an image saved already, you can click a photo to use on your Procreate canvas. For this, follow the steps outlined above but choose Take a Photo rather than Insert a file in step 4.
Adding Image to Layer Using Copy/Paste
A fourth option is to copy and paste the desired image.
- Find the desired image and hold down on it until the selection options appear.
- Select Copy.
- Open the Procreate app on your iPhone or iPad.
- Select the wrench icon from the top left of your screen.
- Select Add and tap Paste.


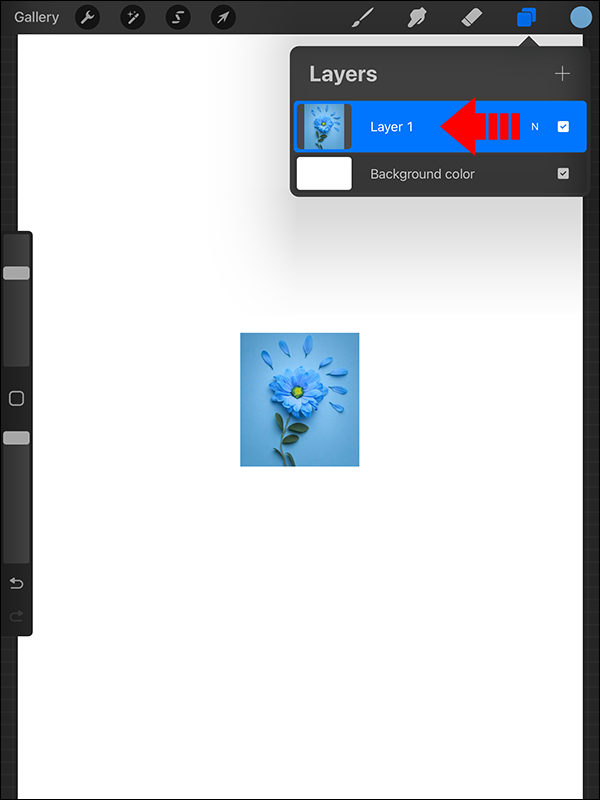
You can also view the different layers of your canvas. Simply tap the overlapping squares button in the top-right of the screen to bring up the layers panel, allowing you to customize and manage all of the layers on your canvas directly.
How to Delete a Layer in Procreate
Deleting a layer is also a relatively simple process. You may need to do this for several reasons. For example, if you decide the image you uploaded isn’t suitable for the design, you may want to remove it from the final product.
Here’s what you need to do:
- Tap the Layers icon.
- Select the layer you want to erase.
- Swipe left on the layer in question. This should bring up the option to delete the layer.
- Tap on Clear to remove the layer from the menu.


Have Fun Experimenting with Layers in Procreate
Procreate offers an exceptionally powerful tool for artists and graphic designers. However, getting started can take a little time. Once you’ve done so, you can quickly insert images from your photo library or files onto the Procreate canvas – or even photograph and upload an image directly if you wish.
You might now want to learn how to remove the background from an image in Procreate.
FAQs
If you want to stop the layer from appearing in your gallery preview or time-lapse, the best option is to delete the layer (if it’s for a reference you’ll no longer need) or insert a private layer. Alternatively, you can make it a private layer.
Will private layers in Procreate show up in layers?
If you’ve added a private layer in Procreate, they will still appear in your layers list. However, it won’t show in your gallery, making this a good option to consider if you want to prevent references from showing the gallery previews.
There are numerous reasons for using layers with Procreate. Some of the main benefits of layers include allowing design components to be reordered as needed, making it easier to edit individual components without accidentally erasing the main design, making artwork deeper and more visually appealing overall, and enabling tests to be carried out without necessarily impacting the final design.
Disclaimer: Some pages on this site may include an affiliate link. This does not effect our editorial in any way.