RemotePC allows you to remotely access your desktop computer from any device. Both your desktop and the device you’re using must be connected to the internet and have the RemotePC app installed to use the platform. Through RemotePC you can transfer files, invite others to temporarily access your computer, and create documents using the mouse and keyboard at your current location.
At least, you can create documents as long as your keyboard works. RemotePC allows you to connect to a Windows PC using Remote Desktop Protocol (RDP), meaning many of the issues that affect keyboards using RDP connections also affect keyboards in RemotePC. This article looks at how to enable RDP in RemotePC and some of the methods you can use to fix a keyboard that isn’t working on the platform.
How to Enable RDP in RemotePC
Before you can use RDP to connect a keyboard to RemotePC, you need to enable the platform’s RDP Connector. This feature allows you to remotely access a Windows PC without using a Virtual Private Network or Microsoft RD gateway. Follow these steps to use RDP within RemotePC to access your Windows desktop.
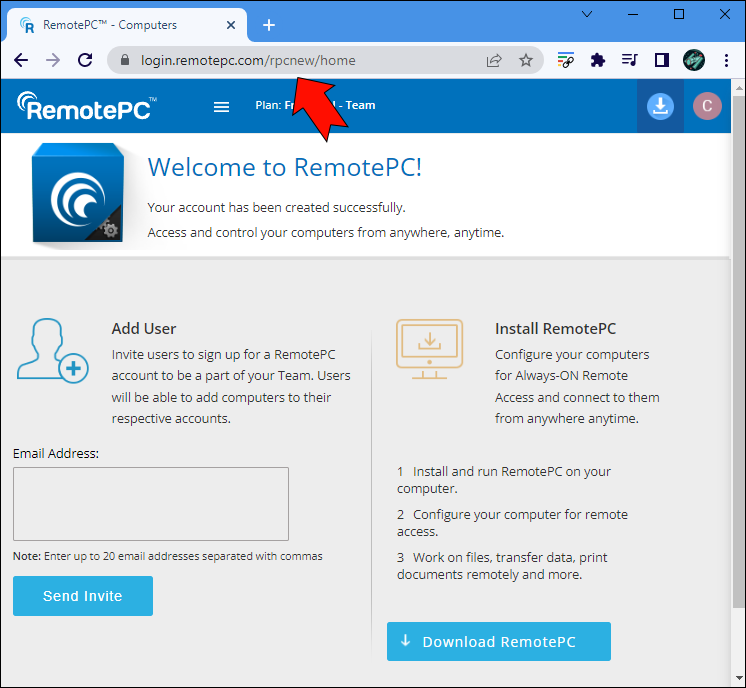
- Open RemotePC on your Windows desktop.
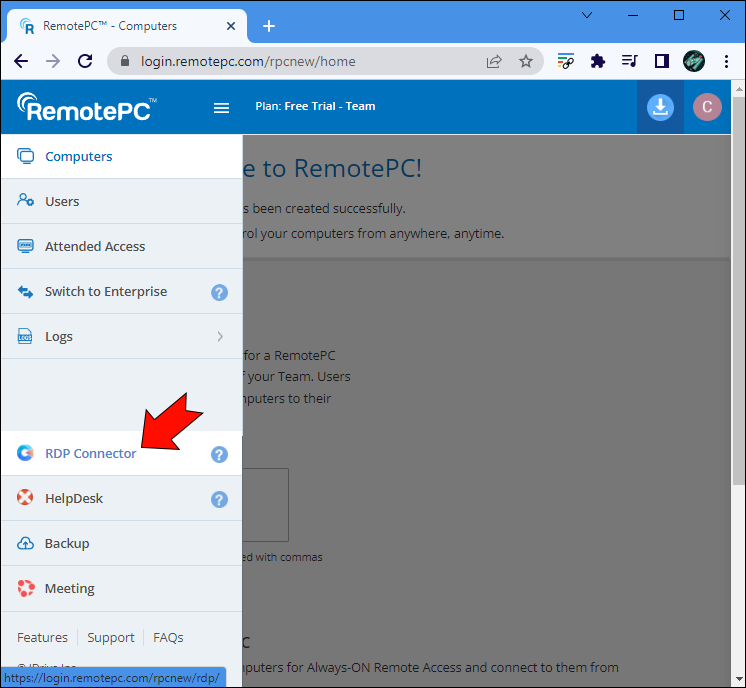
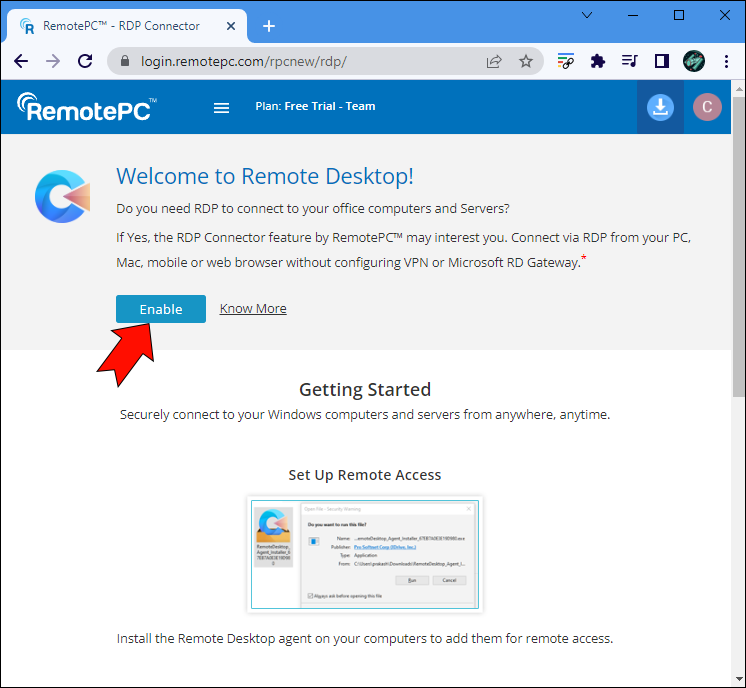
- Navigate to the “RDP Connector” tab and select “Enable.”

- Install the Remote Desktop agent onto the desktop you wish to access.
- Sign in to the device to add it for remote access.
- Install RemotePC’s Remote Desktop viewer onto the device you’re using to access your desktop.
- Sign in and select the desktop you wish to access.
- Click the “Connect” button next to the chosen computer and enter your system credentials.
- Select “OK.”
You have now established an RDP connection between your device and the desktop you want to access remotely. You can also repeat the first four steps to add further devices, which you can access separately using the Remote Desktop viewer.
Note that RemotePC charges $10 per computer, per year for installing and creating RDP connections.
Altering Your RDC Settings to Fix a Broken Keyboard
This method is for when none of your keyboard’s keys work. A complete lack of functionality suggests a problem with the RDC configuration, which you can fix by using these steps.
- Close your RemotePC session to sever the remote connection.
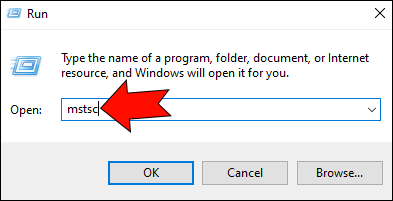
- Type “Run” into the Windows search box.
- Enter “
mstsc” and press “OK.” - Select “Show Options” and head to the “Local Resources” tab.
- Select “On this computer” from the Keyboard dropdown.


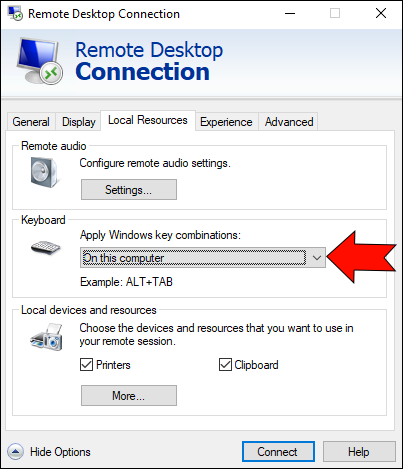
The device you’re using can now read your keyboard inputs and transmit them to your remote desktop. Open RemotePC again and try typing.
Keyboard Shortcuts Aren’t Working in RemotePC
You may find that your keyboard works fine but you can’t use common shortcuts, such as CTRL+C and CTRL+V. There are several ways to fix this issue. One uses RemotePC and the others involve fixes at the RDP connection level.
The RemotePC Solution
Fixing broken shortcuts using RemotePC itself is the simplest way, though it might not work if there’s a problem with your RDP connection. Follow these steps to activate keyboard shortcuts in RemotePC.
- Log in to RemotePC and create a connection with your remote desktop.
- Navigate to the application’s top menu and click “Actions.”
- Click “Send Key Combinations.”
Fixing Shortcut Issues via Your Desktop
There are six techniques to try if you can’t use keyboard shortcuts in RemotePC.
Method No. 1 – Restart Your RDP Clipboard Monitor
A configuration issue in your local device’s RDP Clipboard Monitor may cause RemotePC to stop reading keyboard shortcuts. Restarting the Clipboard Monitor may solve the problem.
- Press CTRL+ALT+Del.
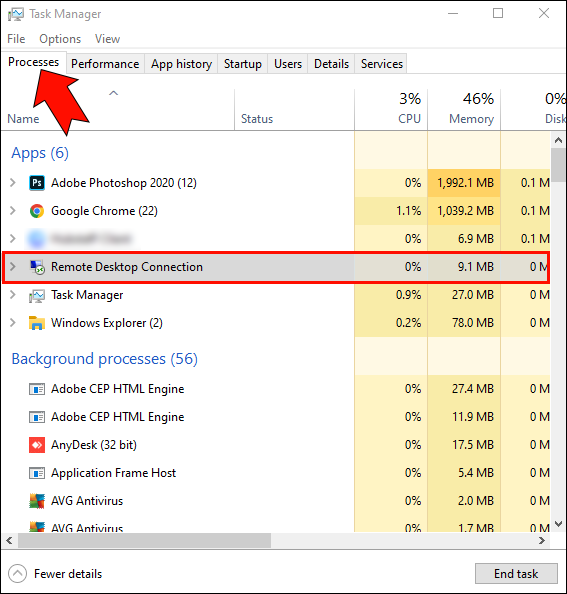
- Select “Task Manager.”
- Navigate to “Processes” and locate the “RDP Clipboard Monitor” task.
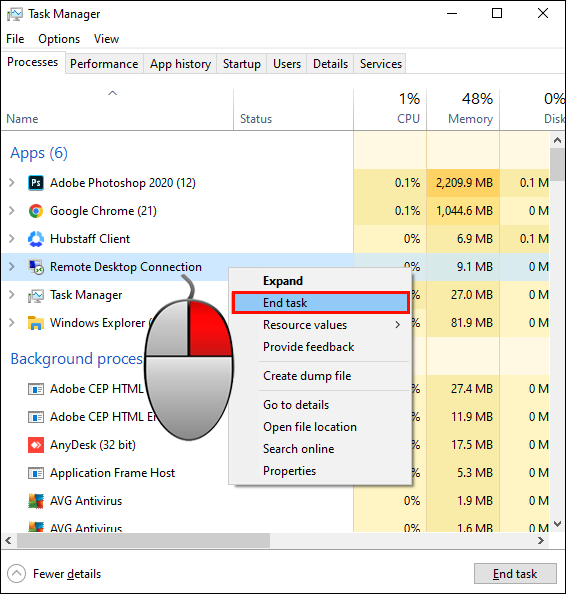
- Right-click “RDP Clipboard Monitor” and select “End Task.”
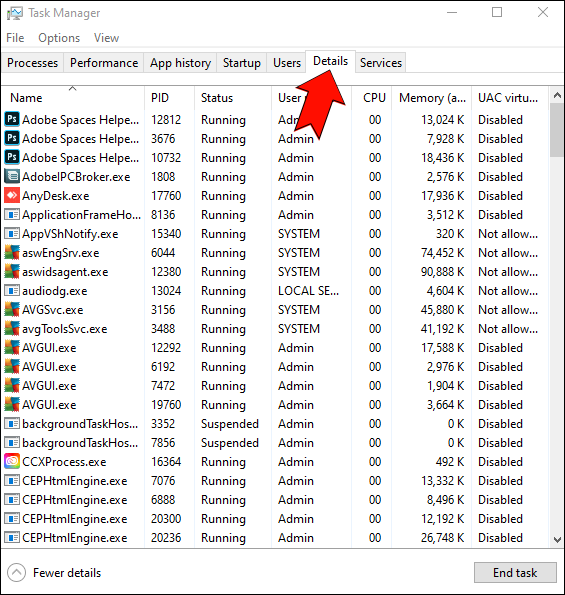
- Select the “Details” tab.
- Locate “rdpclip.exe” and right-click to select “End Task.”.

These steps end the Clipboard Monitor task, setting the stage for a restart.
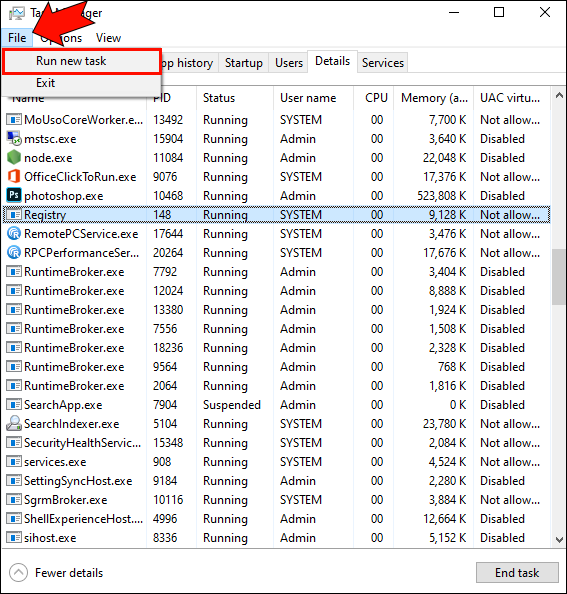
- While still in the “Details” tab in Task Manager, click “File” and select “Run new task.”
- Enter “rdpclip.exe” into the window and click “OK.”
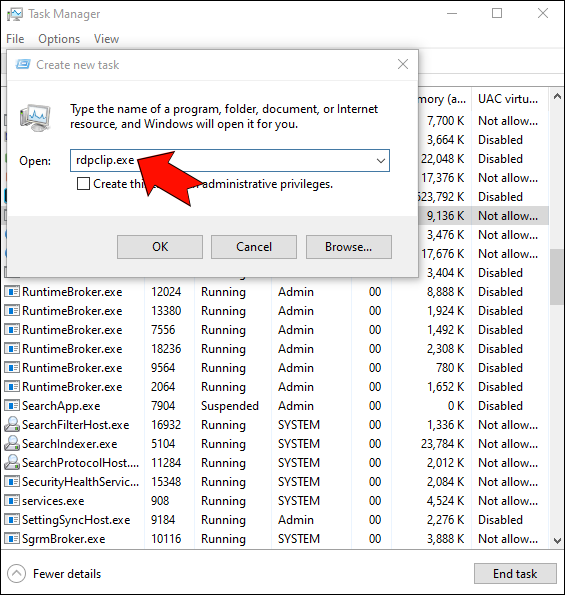
This restarts the RDP Clipboard Monitor. Try reconnecting to RemotePC and using shortcuts.
Method No. 2 – Restarting Windows Explorer
This method may also help if your keyboard isn’t working at all in RemotePC. Disconnect from RemotePC before following these steps.
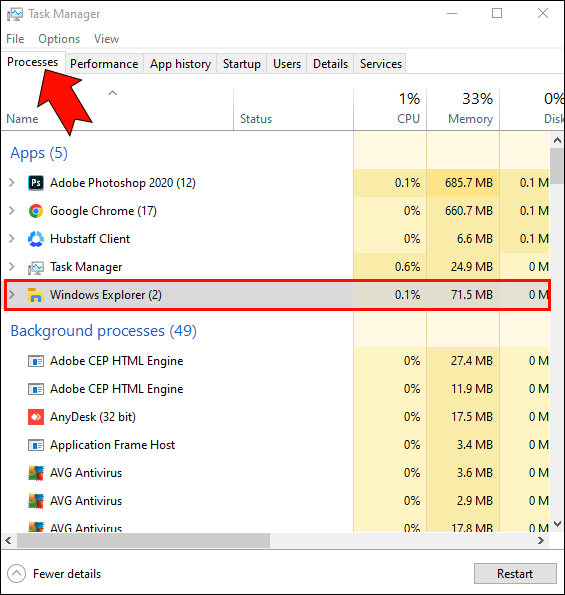
- Press CTRL+ALT+Del and click “Task Manager.”
- Head to the “Processes” tab and find “Windows Explorer.”
- Right-click “Windows Explorer” and click “Restart.”

Wait for your computer to reboot and attempt to establish an RDP connection with RemotePC again. In many cases, a simple restart fixes configuration issues and allows you to use your keyboard properly.
Method No. 3 – Enable Redirections Using Local Group Policy Editor
Enabling drive and clipboard redirection may also fix your keyboard issue.
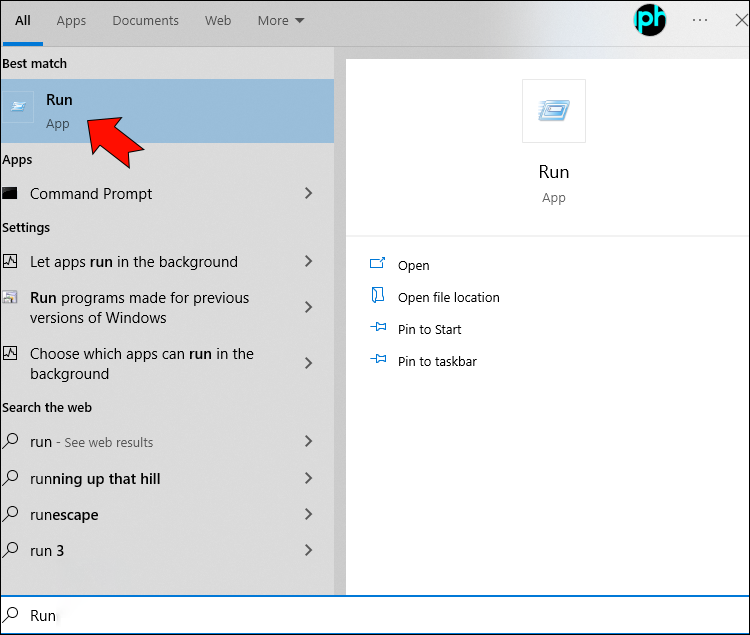
- Type “Run” into the Windows search box.
- Select the “Run” application.
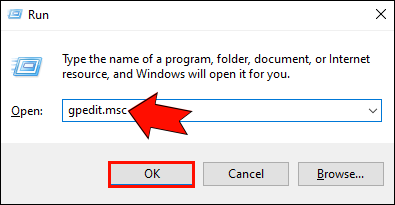
- Type “
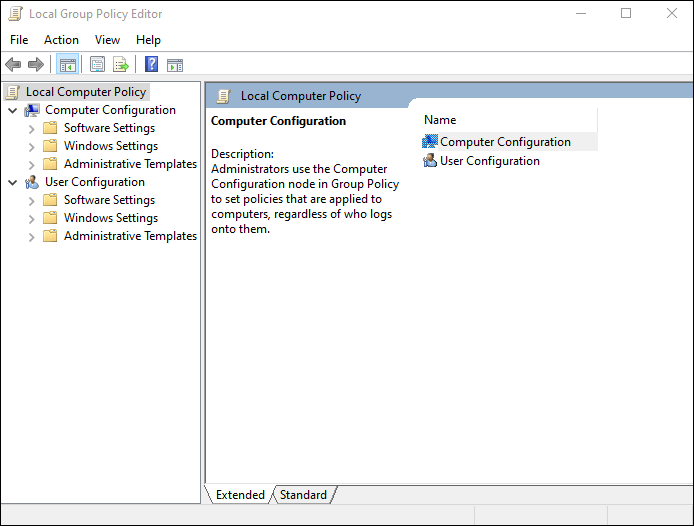
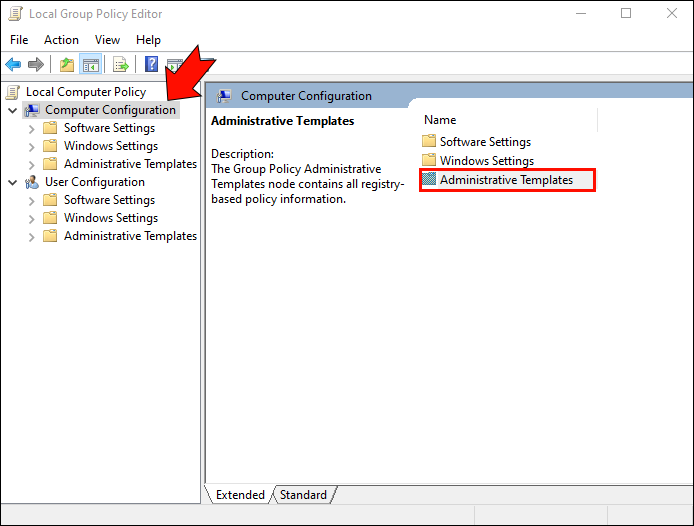
gpedit.msc” and click “OK” to open the Local Group Policy Editor. - Navigate to “Computer Configuration” and select “Administrative Templates.”
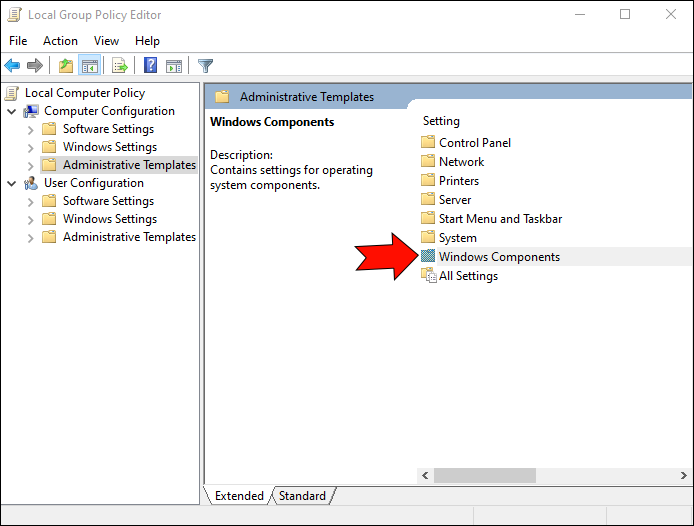
- Click “Windows Components.”
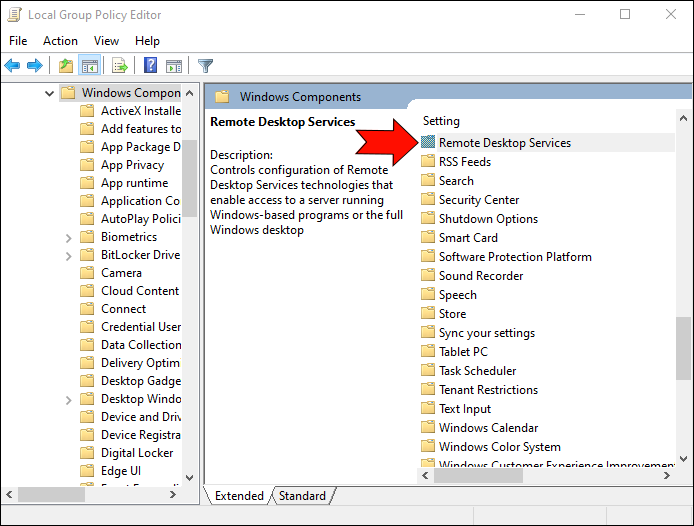
- Select “Remote Desktop Service.” followed by “Remote Desktop Session Host.”
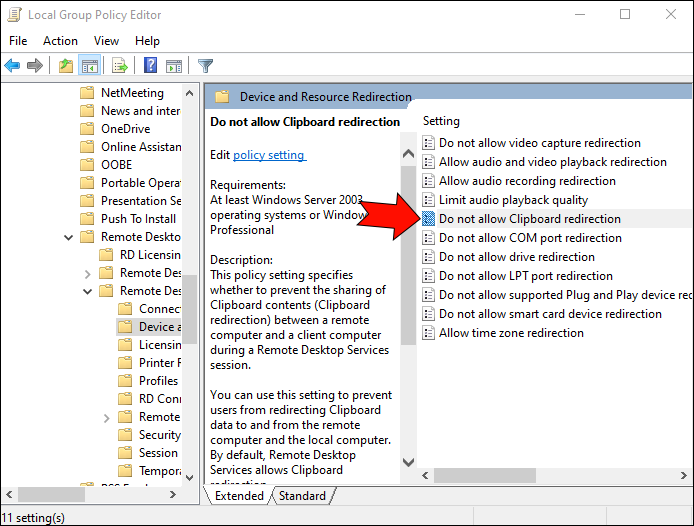
- Select “Device and Resource Redirection.”
- Click “Do not allow Clipboard redirection.”
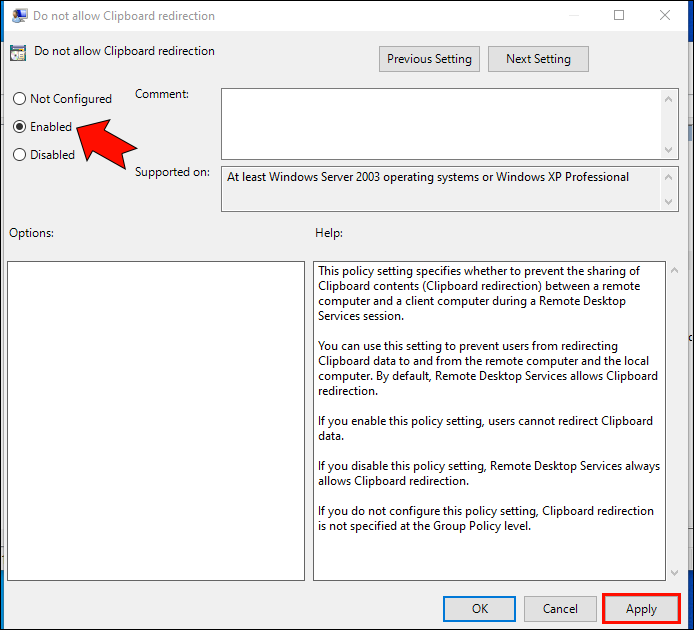
- Select “Enabled” and click “Apply.”
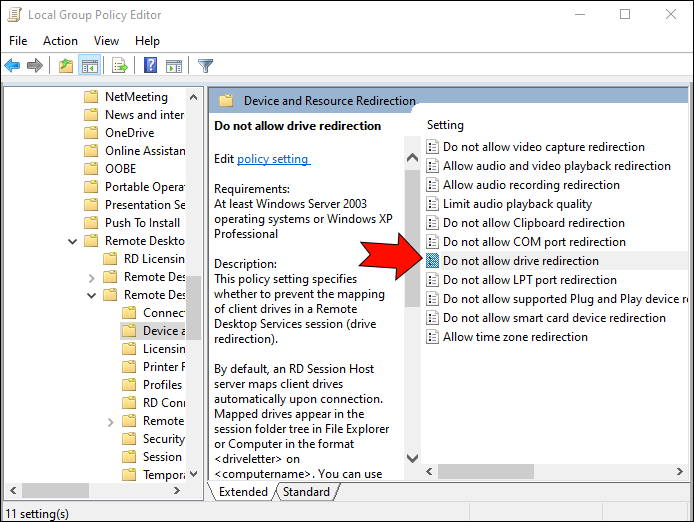
- Navigate back to “Device and Resource Redirection” and click “Do not allow drive redirection.”
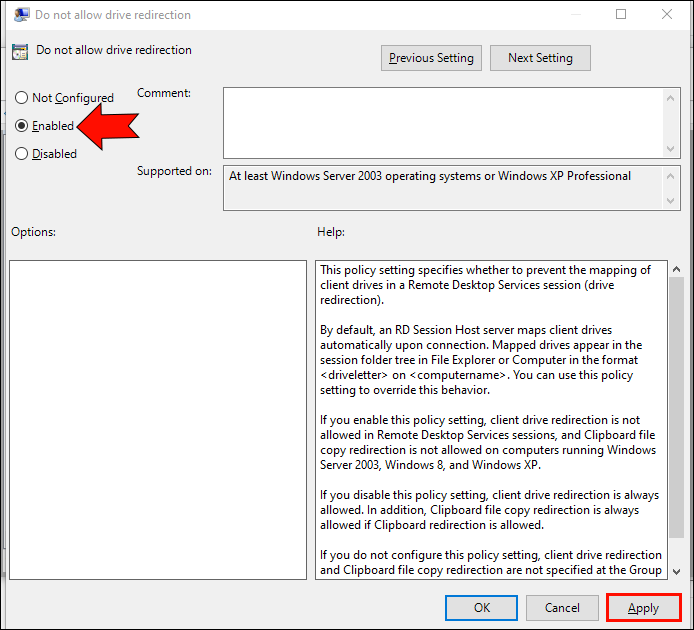
- Check the “Enabled” option and click “Apply.”


Method No. 4 – Change the RDP Client Settings
Your keyboard may not work in RemotePC if you haven’t enabled the clipboard and drives in your RDP client settings. Follow these steps to quickly enable both.
- Type “R” into the Windows search box and select Run.
- Open the Remote Desktop Connection by typing “
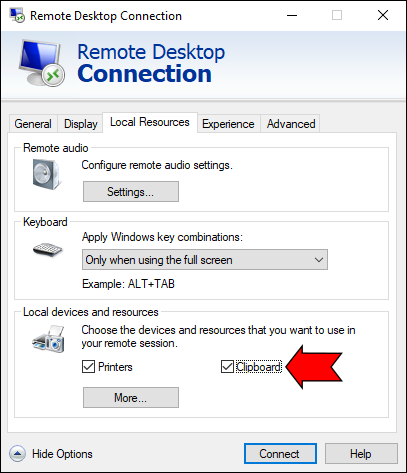
mstsc” into the Run application. - Select “Show Options” and head to the “Local Resources” tab.
- Check the “Clipboard” option.
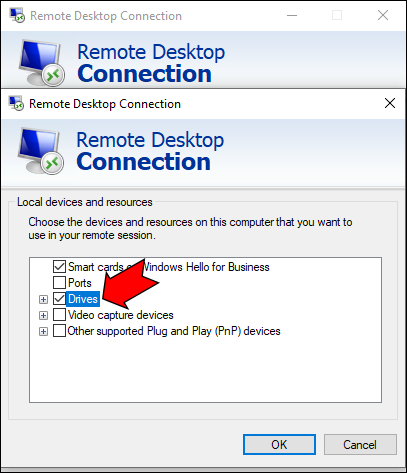
- Click “More…” and check the “Drives” option.
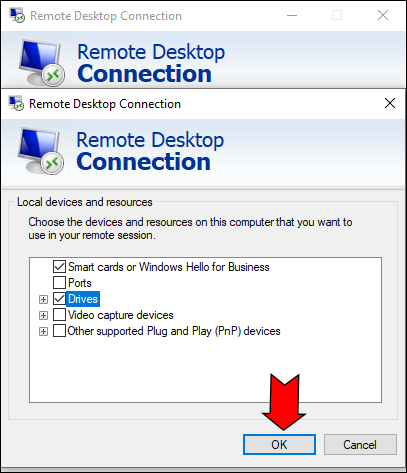
- Click “OK” and test your keyboard.

Method No. 5 – Use Registry Editor to Change File Values
If no other solution works, try altering the connection settings at the registry level.
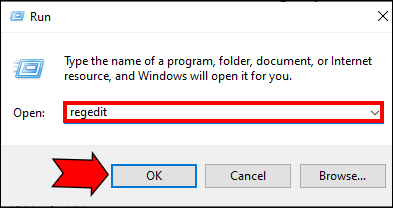
- Enter “Run” into the Windows search bar and open the application.
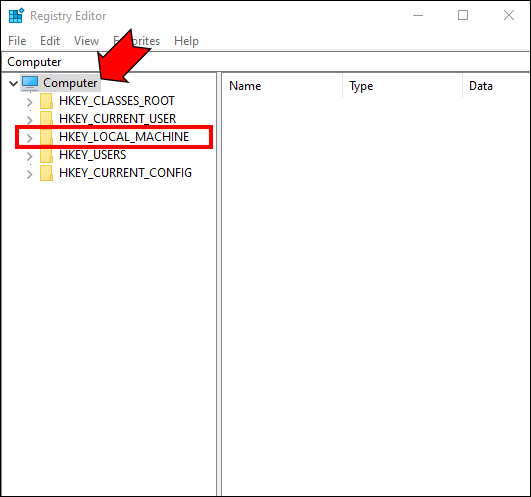
- Type “regedit” and hit “OK.”
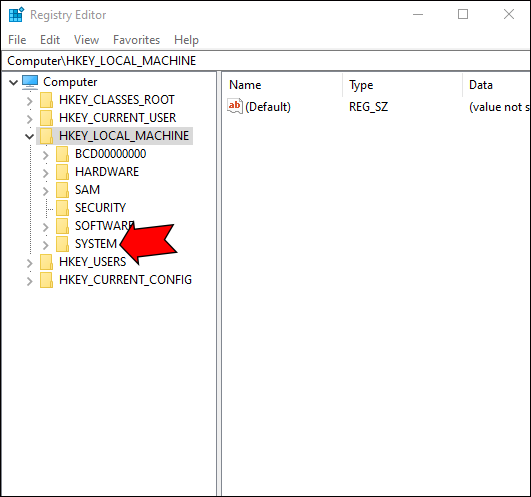
- Once inside the Registry Editor, select “Computer,” then “HKEY_LOCAL_MACHINE.”
- Click “SYSTEM.”
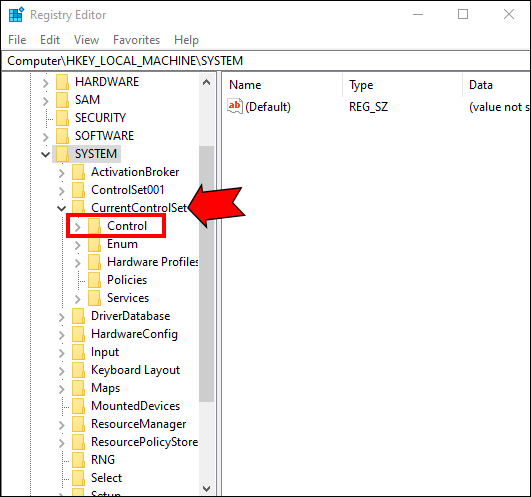
- Select “CurrentControlSet” followed by “Control.”
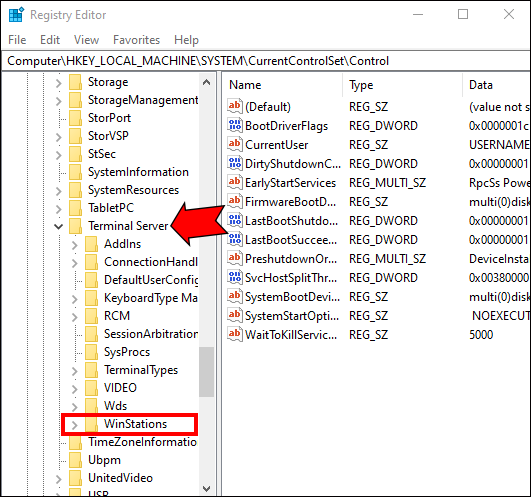
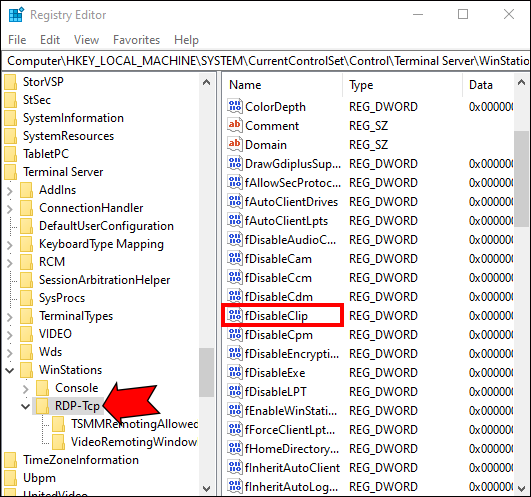
- Click “Terminal Server” and select “WinStations.”
- Select “RDC-Tcp” and double-click the “fDisableClip” registry entry.
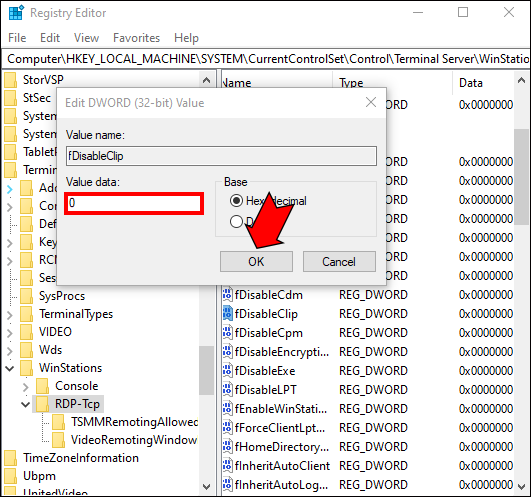
- In the editing window, set the Value to 0 and select “OK.”
Switching to an On-Screen Keyboard if Your Physical Keyboard Doesn’t Work
If you’re able to send some keys to RemotePC but find that others don’t work, switching to an on-screen keyboard offers a quick fix.
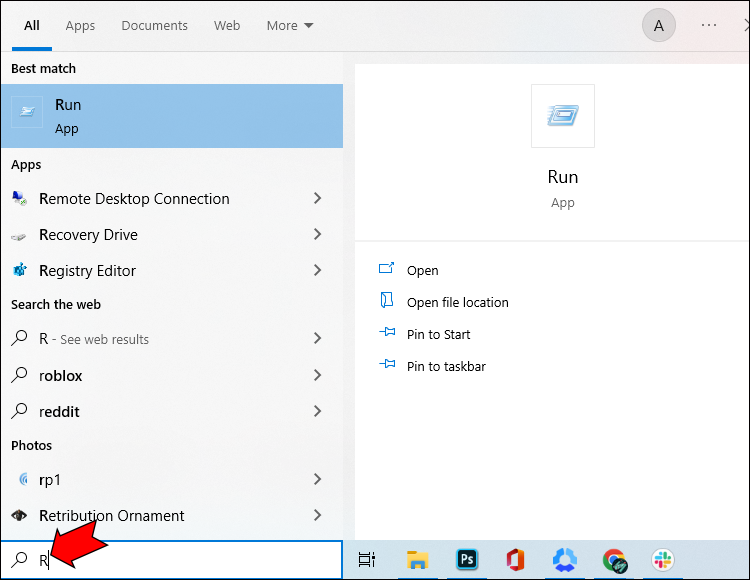
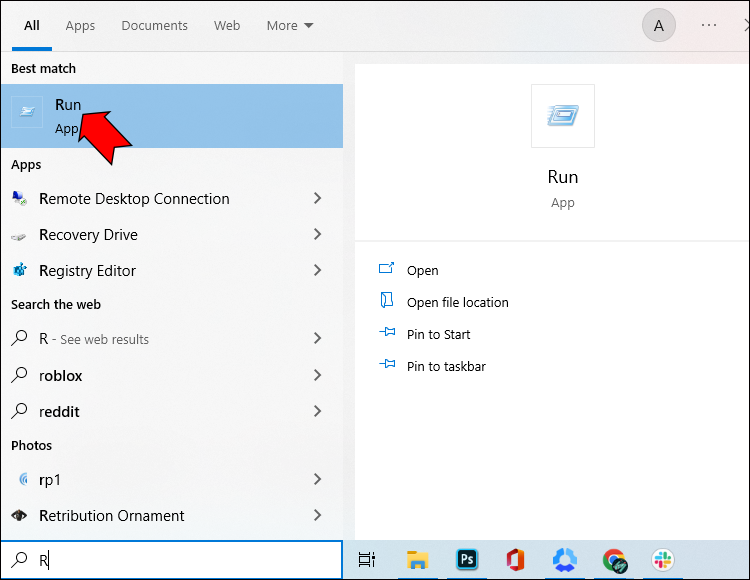
- Type “R” into the search box at the bottom-left of your screen.
- Select “Run” from the “Best Match” list.
- Type “osk” and click “OK.”
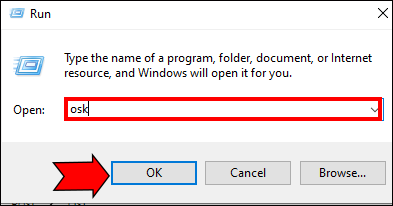
This causes the on-screen keyboard to appear. Hold CTRL and ALT on your physical keyboard while using your mouse to click Del on the on-screen keyboard. This switches you to the on-screen keyboard, allowing you to type using a mouse or touchscreen.
Get Your Keyboard Working
While RemotePC generally offers plug-and-play compatibility for most keyboards, technical issues can occur. The above fixes restore full keyboard and keyboard shortcut functionality, allowing you to type and work efficiently.
We want to know what you think. If you’ve used RemotePC, how do you think it stacks up to the other remote desktop applications available? Are there any other keyboard-related issues you’d like us to cover? Tell us in the comments section below.
Disclaimer: Some pages on this site may include an affiliate link. This does not effect our editorial in any way.