One feature of an Adobe Creative Cloud subscription is online storage and syncing of a user’s Creative Cloud documents and settings. While many users find this feature useful — like a Dropbox exclusively for Photoshop and other Creative Cloud assets — others don’t use this service and prefer to store and sync their files via another method.
Unfortunately, Adobe’s Creative Cloud installer places a Creative Cloud Files entry in the Windows File Explorer sidebar when you install any Creative Cloud app, regardless of whether you plan to actually use the file storage feature. Even worse, there’s currently no way to remove that sidebar entry via File Explorer or the Creative Cloud settings. For those who don’t like File Explorer to be needlessly cluttered with useless entries, here’s how to remove Creative Cloud Files from the File Explorer sidebar.

First, it’s important to note that following the steps here to remove Creative Cloud Files from the File Explorer sidebar doesn’t actually remove the Creative Cloud Files folder itself. You can still manually access that folder, which by default is located at C:Users[User]Creative Cloud Files. These steps also don’t disable the actual Creative Cloud Files storage or syncing features; to do that, you’ll need to launch the Creative Cloud desktop app, click the gear icon, and navigate to Preferences > Creative Cloud > Files, where you can set “Sync” to Off. Finally, our screenshots in this article were taken in Windows 10, but the steps apply equally to Windows 8.1 as well.

With that said, let’s get started. To remove Creative Cloud Files from the File Explorer sidebar, you’ll need to modify a entry in the Windows Registry. Launch the Registry Editor by pressing Windows Key + R on the desktop and typing regedit into the Run box. Press Enter on your keyboard to launch the utility and authorize any User Account Control prompts.
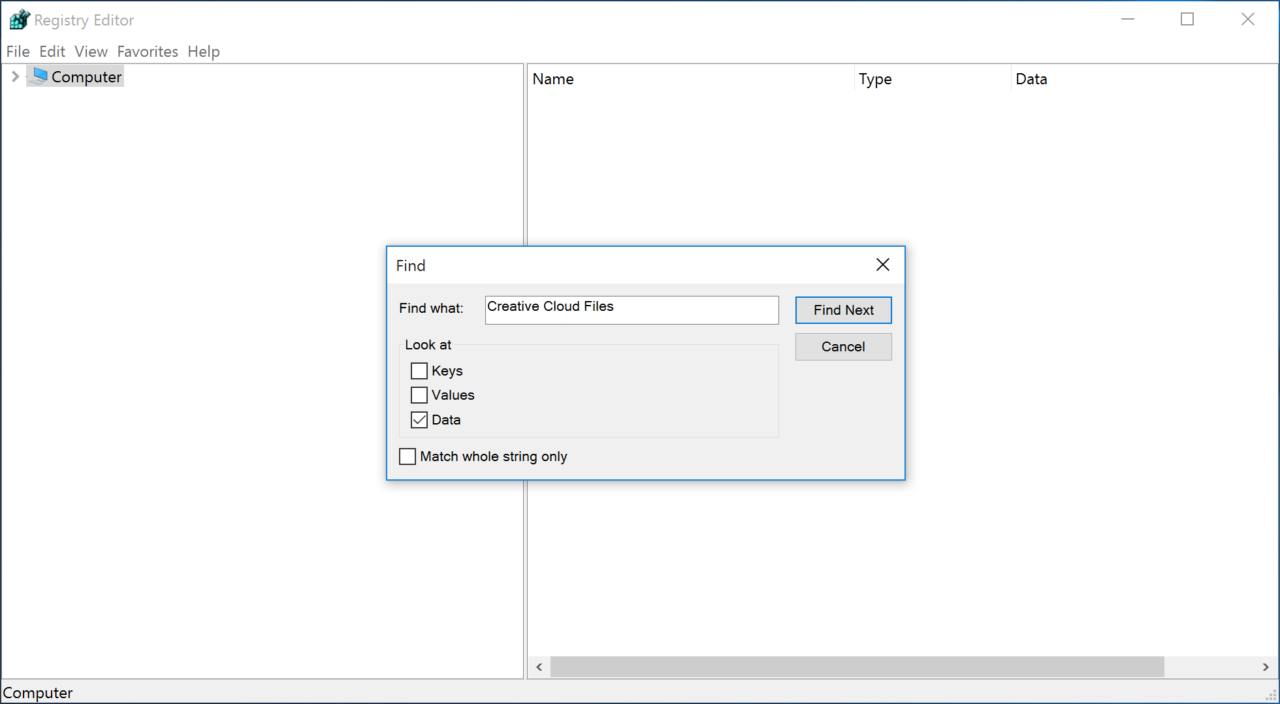
We now need to find the correct registry key, which will vary based on your specific Windows configuration, but will be located somewhere in HKEY_CLASSES_ROOTCLSID. The fastest way to find the correct location is to search for it with the Find command. With the Registry Editor selected, press Control + F on your keyboard to open the Find window. Type Creative Cloud Files into the “Find what” box, and then uncheck the “Keys” and “Values” boxes. Click Find Next to continue.

Your first result will likely be an entry that looks like the screenshot above. If you receive a different result, keep pressing F3 on your keyboard to search through other entries until you arrive at one that looks like the example screenshot.
The DWORD we need to modify to remove Creative Cloud Files from the File Explorer sidebar is System.IsPinnedToNameSpaceTree. Double-click it to edit its value, and set “Value data” from the default 1 to 0 (zero). Click OK to save the change.
Now, quit and relaunch File Explorer. You should see that the entry for Creative Cloud Files is no longer present in the sidebar. If you still see it, reboot your computer, which will ensure that File Explorer is fully shut down and reloaded, allowing the change to take effect.

As mentioned above, you can still use Creative Cloud file syncing by manually navigating to the folder in your primary user folder; the steps here simply remove its shortcut from the File Explorer sidebar. Along those same lines, if your intent was to kill Creative Cloud file syncing entirely, you’ll also need to turn the feature off in the Creative Cloud preferences.
If you ever want to restore the Creative Cloud Files sidebar entry in File Explorer, just repeat the steps above to find the correct entry in the Registry, change System.IsPinnedToNameSpaceTree back to “1,” and then restart File Explorer or reboot your PC.
Disclaimer: Some pages on this site may include an affiliate link. This does not effect our editorial in any way.


