Most people think that Mac applications are only available on Mac devices. But what if your Intel-based PC wants in on the fun?
Running Mac apps on a Windows computer may not seem possible, but there are ways to overcome any obstacles. Read on to learn about your options.
How to Run Mac Apps on a Windows PC
Just like you can’t open Windows apps on a Mac, no Windows PC will be able to run a macOS app without taking a few extra steps. However, note that Mac-exclusive apps are exclusive for a reason. Nothing will beat the experience of using them on the platform they were designed for. In addition, installing Apple apps on non-Apple devices is against their terms of use. If you need to run a Mac app on a Windows PC regardless, you have the following options:
- Install a virtual machine on your computer
- Use a virtual machine on the cloud
- Look for the Windows version of the application in question.
Here’s how to tackle the issue.
Install a Virtual Machine
Installing a virtual machine is the best way to overcome any problems between you and the Mac application you want to run on your Windows PC. Imagine a virtual machine like an operating system within your operating system. It will allow you to open the macOS interface in a window on your PC and access all the apps only available on Mac.
Virtual machines can be a bit demanding for PCs with lower specs, so make sure you use a capable device for this task for the smoothest experience.
Besides a PC with strong specs, you’ll need to download two things to get started:
- A virtualizer – The best open-source, actively developed virtualizer out there is VirtualBox by Oracle Corporation. Head to the VirtualBox website and grab the software from their page.
- A copy of the macOS of your choice – You can download any still supported macOS version. Make sure there’s enough space on your computer as the file will be quite hefty.
Once you’ve installed VirtualBox and your macOS file is ready, create a Mac interface within your Windows in the following way:
- Launch VirtualBox and click the “New” button to create a new virtual machine.

- Name your virtual machine and choose its destination folder.

- Make sure you select “Mac OS X” as the system type and “Mac OS X 64-bit” as the system version.
- Allocate some of your RAM for the new virtual machine. Don’t go under 4GB.
- Select the hard disk file you downloaded earlier on the next screen and click “Create.”


The virtual machine is now added to your PC. But you still need to configure the settings before you can start using it:
- Select the macOS you just installed on the VirtualBox main screen.
- Click the “Settings” button.
- Select “System” from the sidebar and configure the following settings:
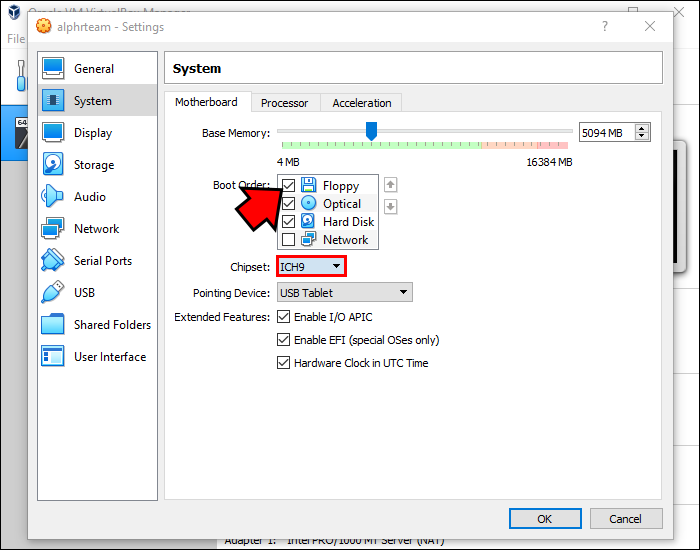
- In the “Motherboard” tab, uncheck “Floppy” from the Boot Order list and select “ICH9” for your chipset.
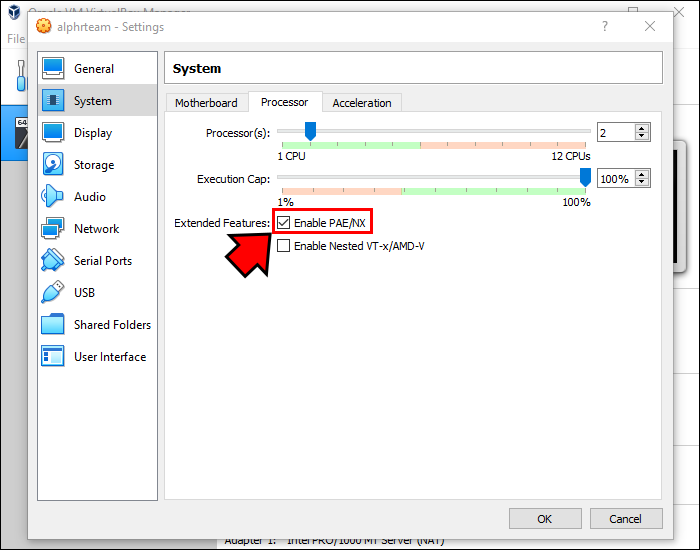
- In the “Processor” tab, assign at least two processors to your virtual machine and check the “Enable PAE/NX” box.
- In the “Motherboard” tab, uncheck “Floppy” from the Boot Order list and select “ICH9” for your chipset.
- Switch to the “Display” menu in the sidebar and allocate 128MB to Video Memory.
- Click “Storage” in the sidebar, select the empty disk from the list, and add your macOS virtual optical disk to “Optical Drivers.”
- Press the “USB” menu and select USB 3.0.
- Save the settings by clicking “OK.”
- Close VirtualBox.


Your virtual Mac is still not fully ready. The next step in the setup process involves executing a few command prompts.
- Open Command Prompt on your Windows and select “Run as administrator.”
- Find your VirtualBox directory with the command below. Make sure to change the path in case you didn’t install VirtualBox in the default directory.
- cd “D:\VirtualBox\”
- cd “D:\VirtualBox\”
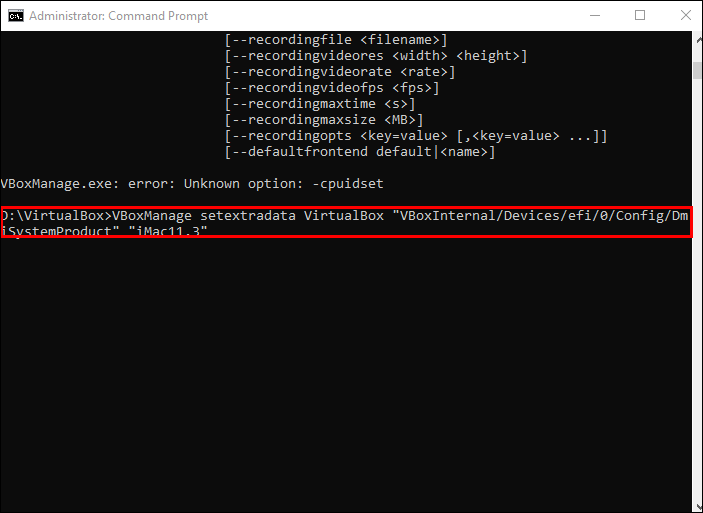
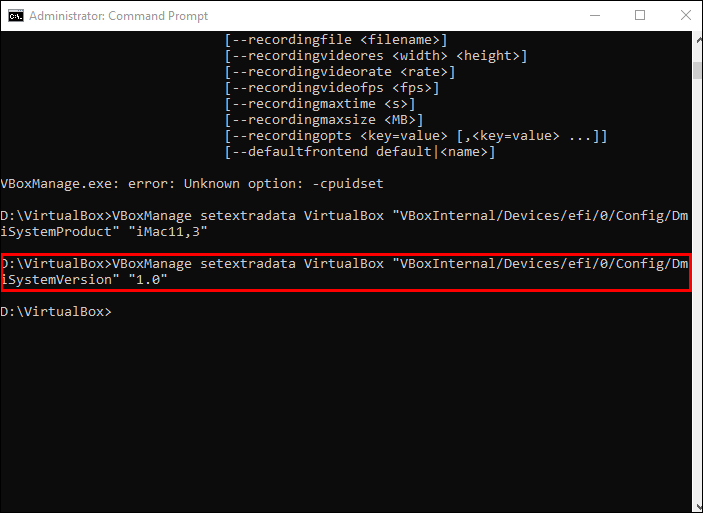
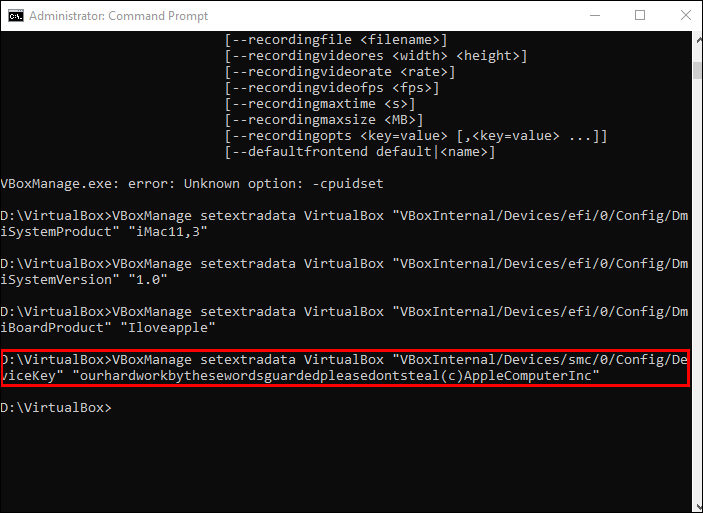
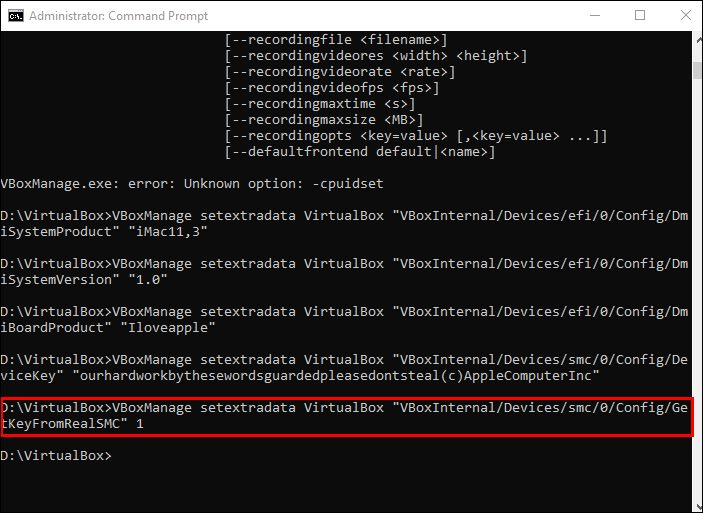
- Execute the following commands. Replace the name of your virtual machine in each code with the appropriate name.
VBoxManage.exe modifyvm “virtual machine name” –cpuidset 00000001 000106e5 00100800 0098e3fd bfebfbffVBoxManage setextradata “virtual machine name” “VBoxInternal/Devices/efi/0/Config/DmiSystemProduct” “iMac11,3”VBoxManage setextradata “virtual machine name” “VBoxInternal/Devices/efi/0/Config/DmiSystemVersion” “1.0”VBoxManage setextradata “virtual machine name” “VBoxInternal/Devices/efi/0/Config/DmiBoardProduct” “Iloveapple”VBoxManage setextradata “virtual machine name” “VBoxInternal/Devices/smc/0/Config/DeviceKey” “ourhardworkbythesewordsguardedpleasedontsteal(c)AppleComputerInc”VBoxManage setextradata “virtual machine name” “VBoxInternal/Devices/smc/0/Config/GetKeyFromRealSMC” 1
- Exit the Command Prompt window.


Having executed these commands, you can now boot your macOS using VirtualBox.
- Launch VirtualBox.
- Select your virtual machine and hit “Start.”
- Select your language.
- Press “Disk Utility” on the next screen to create a clean drive for your macOS.
- Choose “VBOX HARDDISK Media” in the sidebar.
- Hit the “Erase” button. Adjust the settings in the new window according to the following instructions, and then press “Erase.”
- Name your drive.
- Make sure “Scheme” is set to “GUID Partition Map.”
- Name your drive.
- Exit the Disk Utility menu and proceed to install Mac on your newly created drive. Follow the instructions in the installation wizard.


The installation process can take from several minutes to several hours, but eventually, you’ll be greeted by a Mac interface. Log in to your Apple ID, and you’ll be able to download any macOS app on your Windows PC by doing the following:
- Launch the App Store and find the app you want to download.
- Click the “Get” button and then “Install.” For paid apps, click the price button and then “Buy App.”
- Go to your Applications folder to find the app you just installed.


When you’re done using your Mac apps on your Windows PC, be sure to shut down your virtual Mac by clicking the Apple logo and selecting “Shut Down.”
Use a Cloud Server
Installing a virtual machine locally can be demanding for your device. On the lowest recommended settings, you might notice your computer lagging. You can leverage the same idea by using a cloud service to save your device from such hardships. A virtual machine on the cloud gives you the same options as a local one without taking up valuable space.
However, this option is not ideal either. Lags can still occur between your device and the servers, especially if your internet speed isn’t stellar. In addition, cloud services can be costly, so consider carefully whether this option is worthwhile for you.
Find an Alternative for Windows
Virtual machines do the job, but they aren’t without their drawbacks. You can skip lengthy installation processes and expensive cloud subscriptions by simply looking for an alternative to the app you need.
Many macOS apps also have Windows versions, and finding these apps may be the simplest solution to your problem. Look up the developers’ website to find the version you need. If you can’t see a Windows version, you should message the developers to ask whether one will be released in the near future. If no Windows version is available for the app you need, you can also Google an alternative to the app that will provide a similar experience.
Weigh Your Options
If running Mac apps on Windows were an easy and compromise-free process, the apps would hardly be exclusive. But nothing is impossible, and there are several ways to run Mac apps even without a Mac device when you really need to. Install a virtual machine on your device to get access to Apple’s ecosystem without the hardware. You can also choose the easier route and look for an alternative app available for Windows.
Which Mac apps do you wish were available on Windows? Do you think it’s worth going out of your way to get them on your Windows PC? Let us know in the comments section below.
Disclaimer: Some pages on this site may include an affiliate link. This does not effect our editorial in any way.


