Although it’s created by TikTok’s parent company, CapCut offers far more control over a video than TikTok. You can use CapCut’s excellent editing tools to create dynamic movies on your smartphone that you can publish on any platform.
However, even though CapCut offers a variety of features, one is noticeably missing. Namely, users can’t select all the clips or photos on the editing timeline.
If you’ve been looking for a way to do this, keep reading, as we’ll show you what you can do as an alternative.
How to Select All Photos in CapCut
Suppose you prefer a simpler style of videos, or you’re following the latest TikTok photo challenge. In that case, you can use the CapCut app to string photos together. Add some text, transitions, and music, and you’ve got yourself a banger of a TikTok.
When you import all the photos into your editing timeline, you might want to add the same detail to all of them instead of one by one. Unfortunately, at the moment, it’s not possible to select all the photos at once. As an alternative, you can export your collage and then start a new project with it.
Before exporting it, don’t forget to rearrange your photos in the order you wish them to appear in the final video. Here’s how you can do that:
- Tap and hold the photo you want to move.
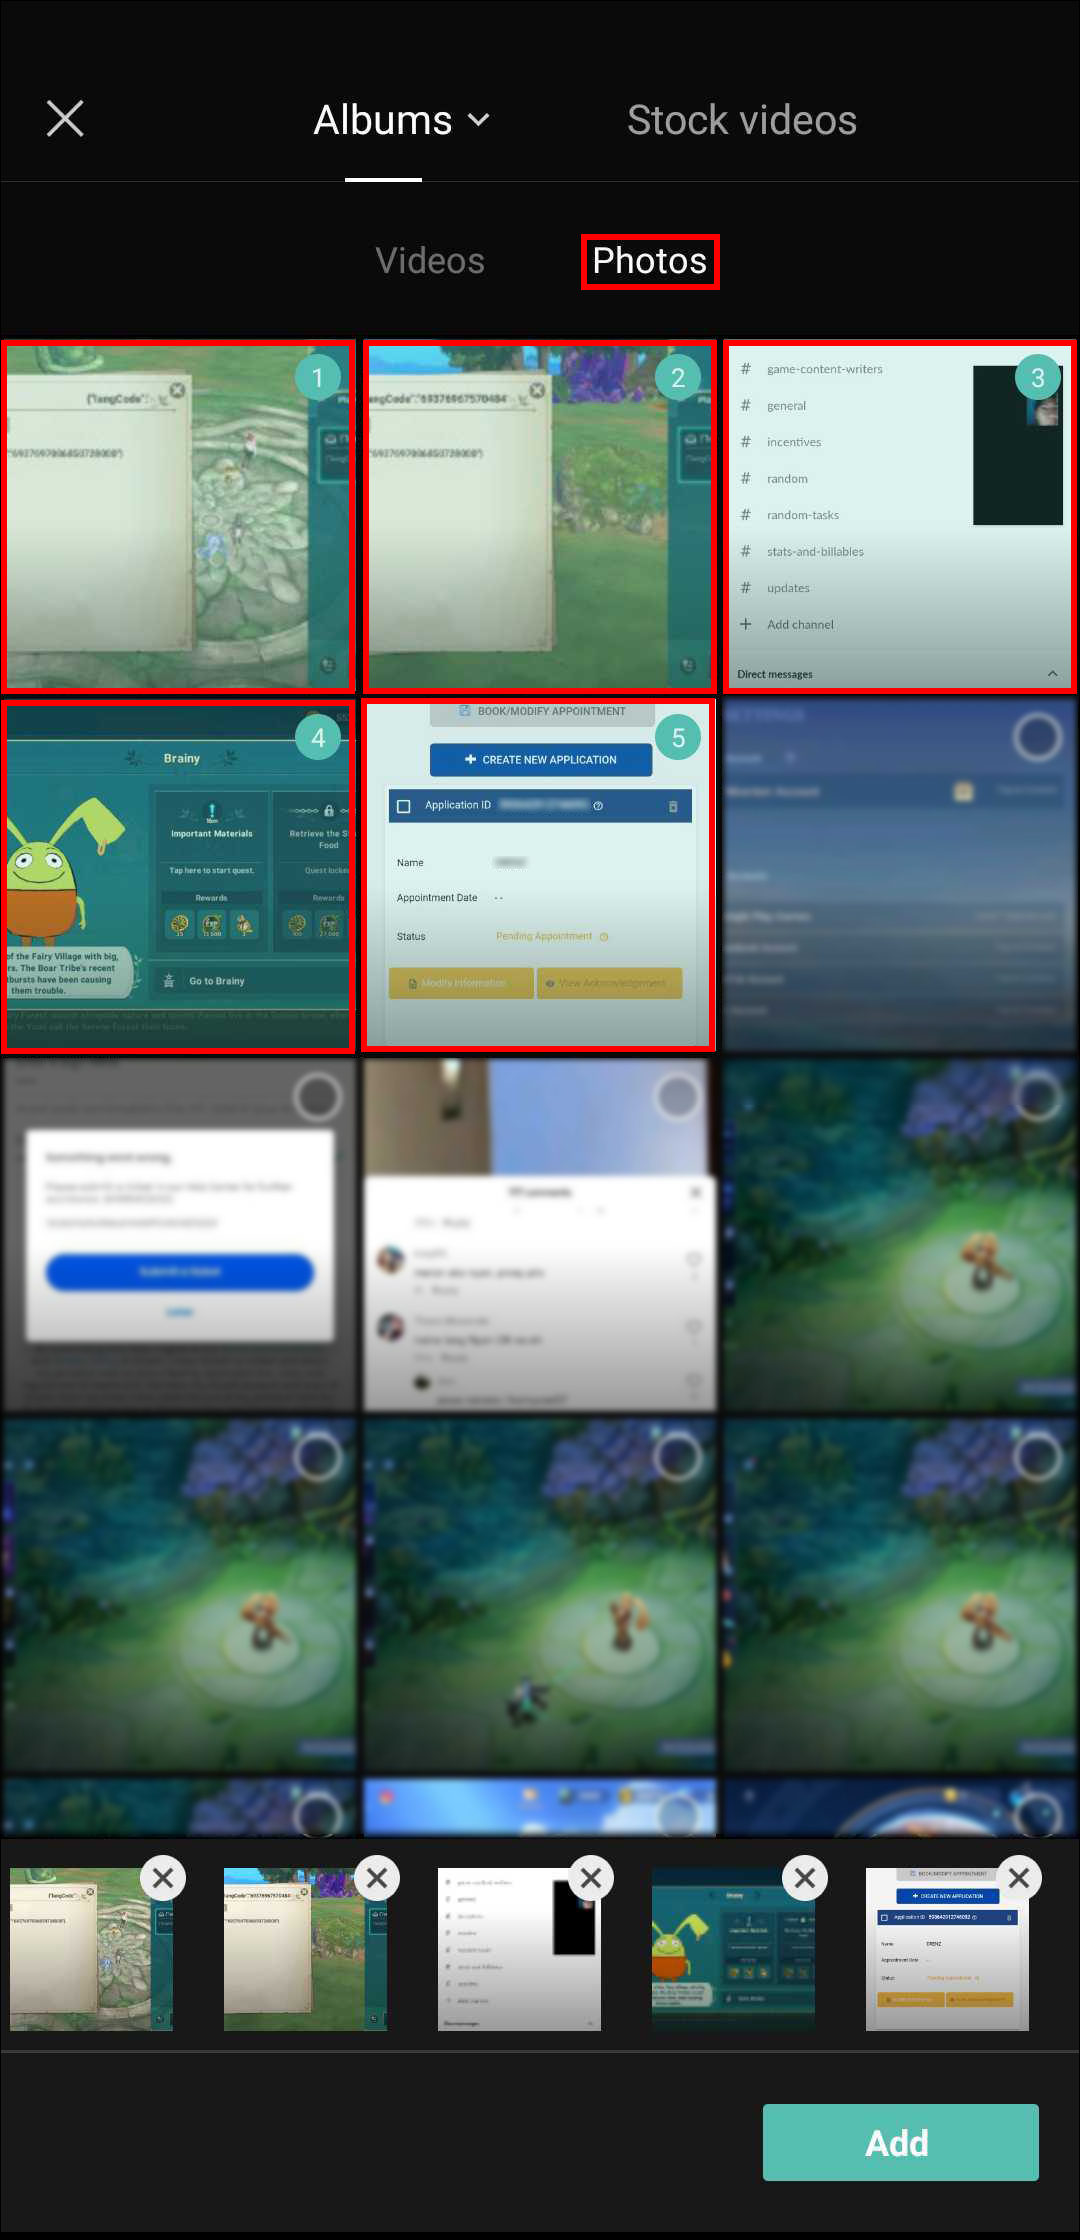
- Click Add. in the lower right corner.


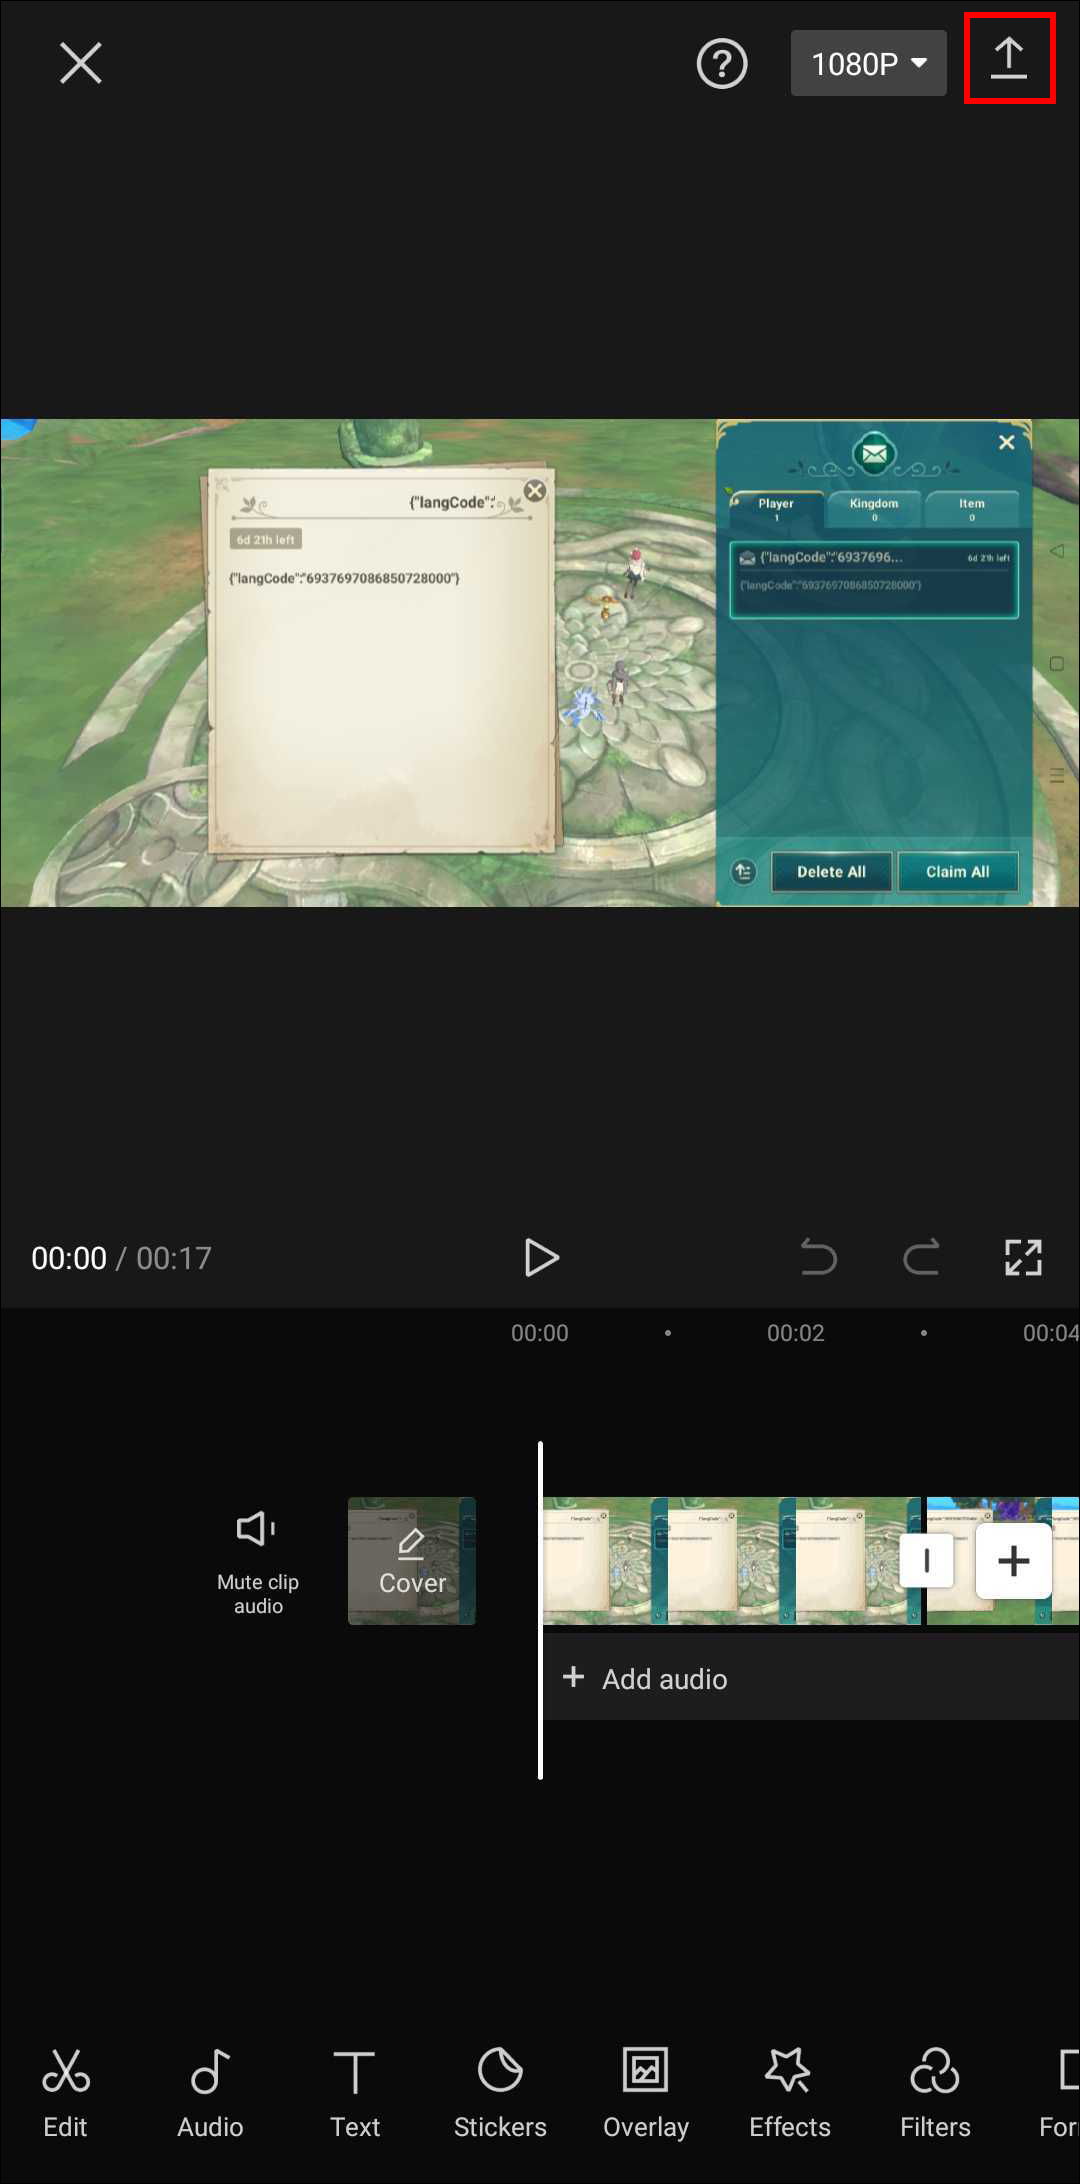
Once you’re satisfied with the order, it’s time to export the video. This is a reasonably straightforward process and requires just two taps:
- Press the Export icon in the top-right corner of your screen.
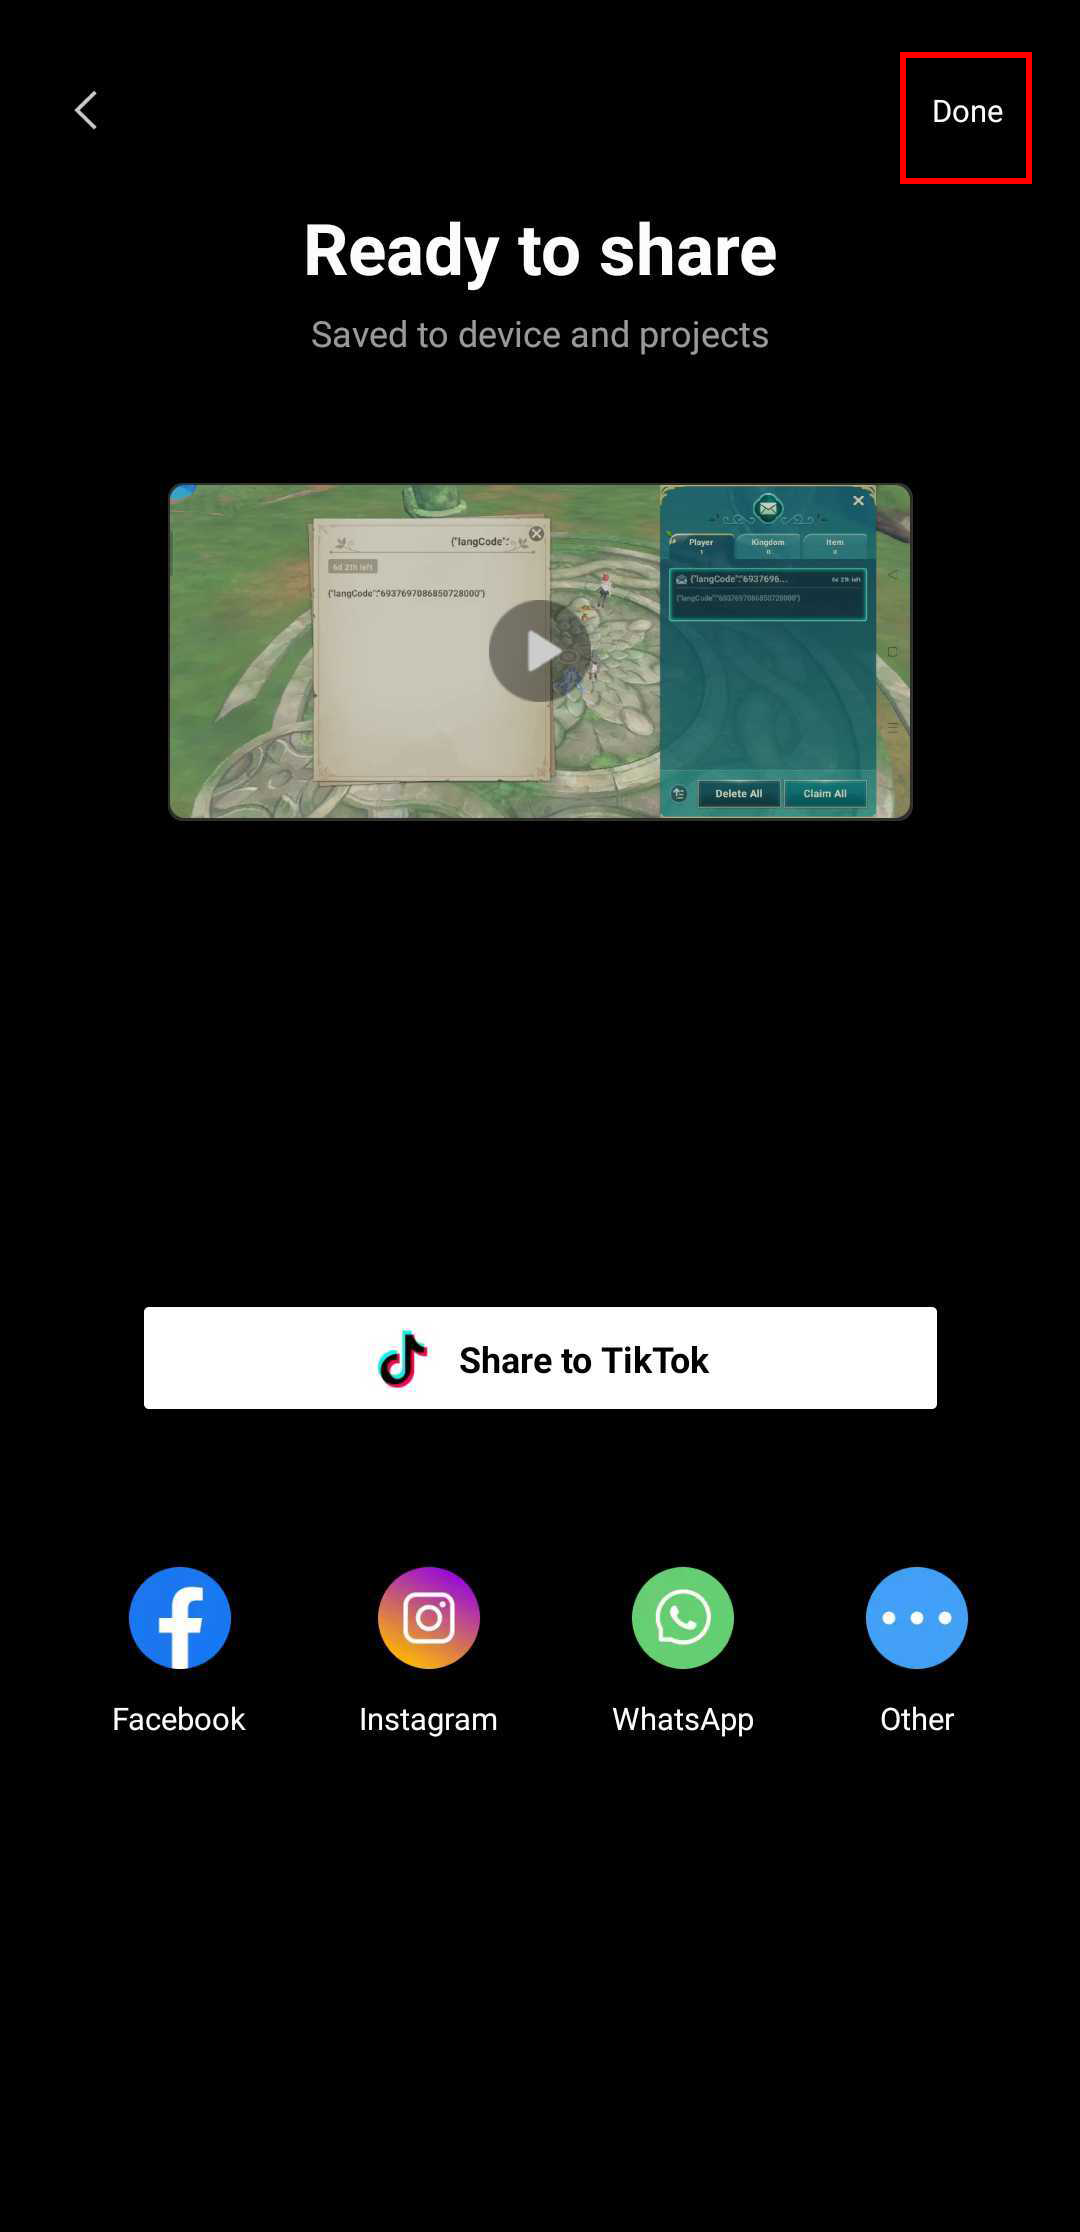
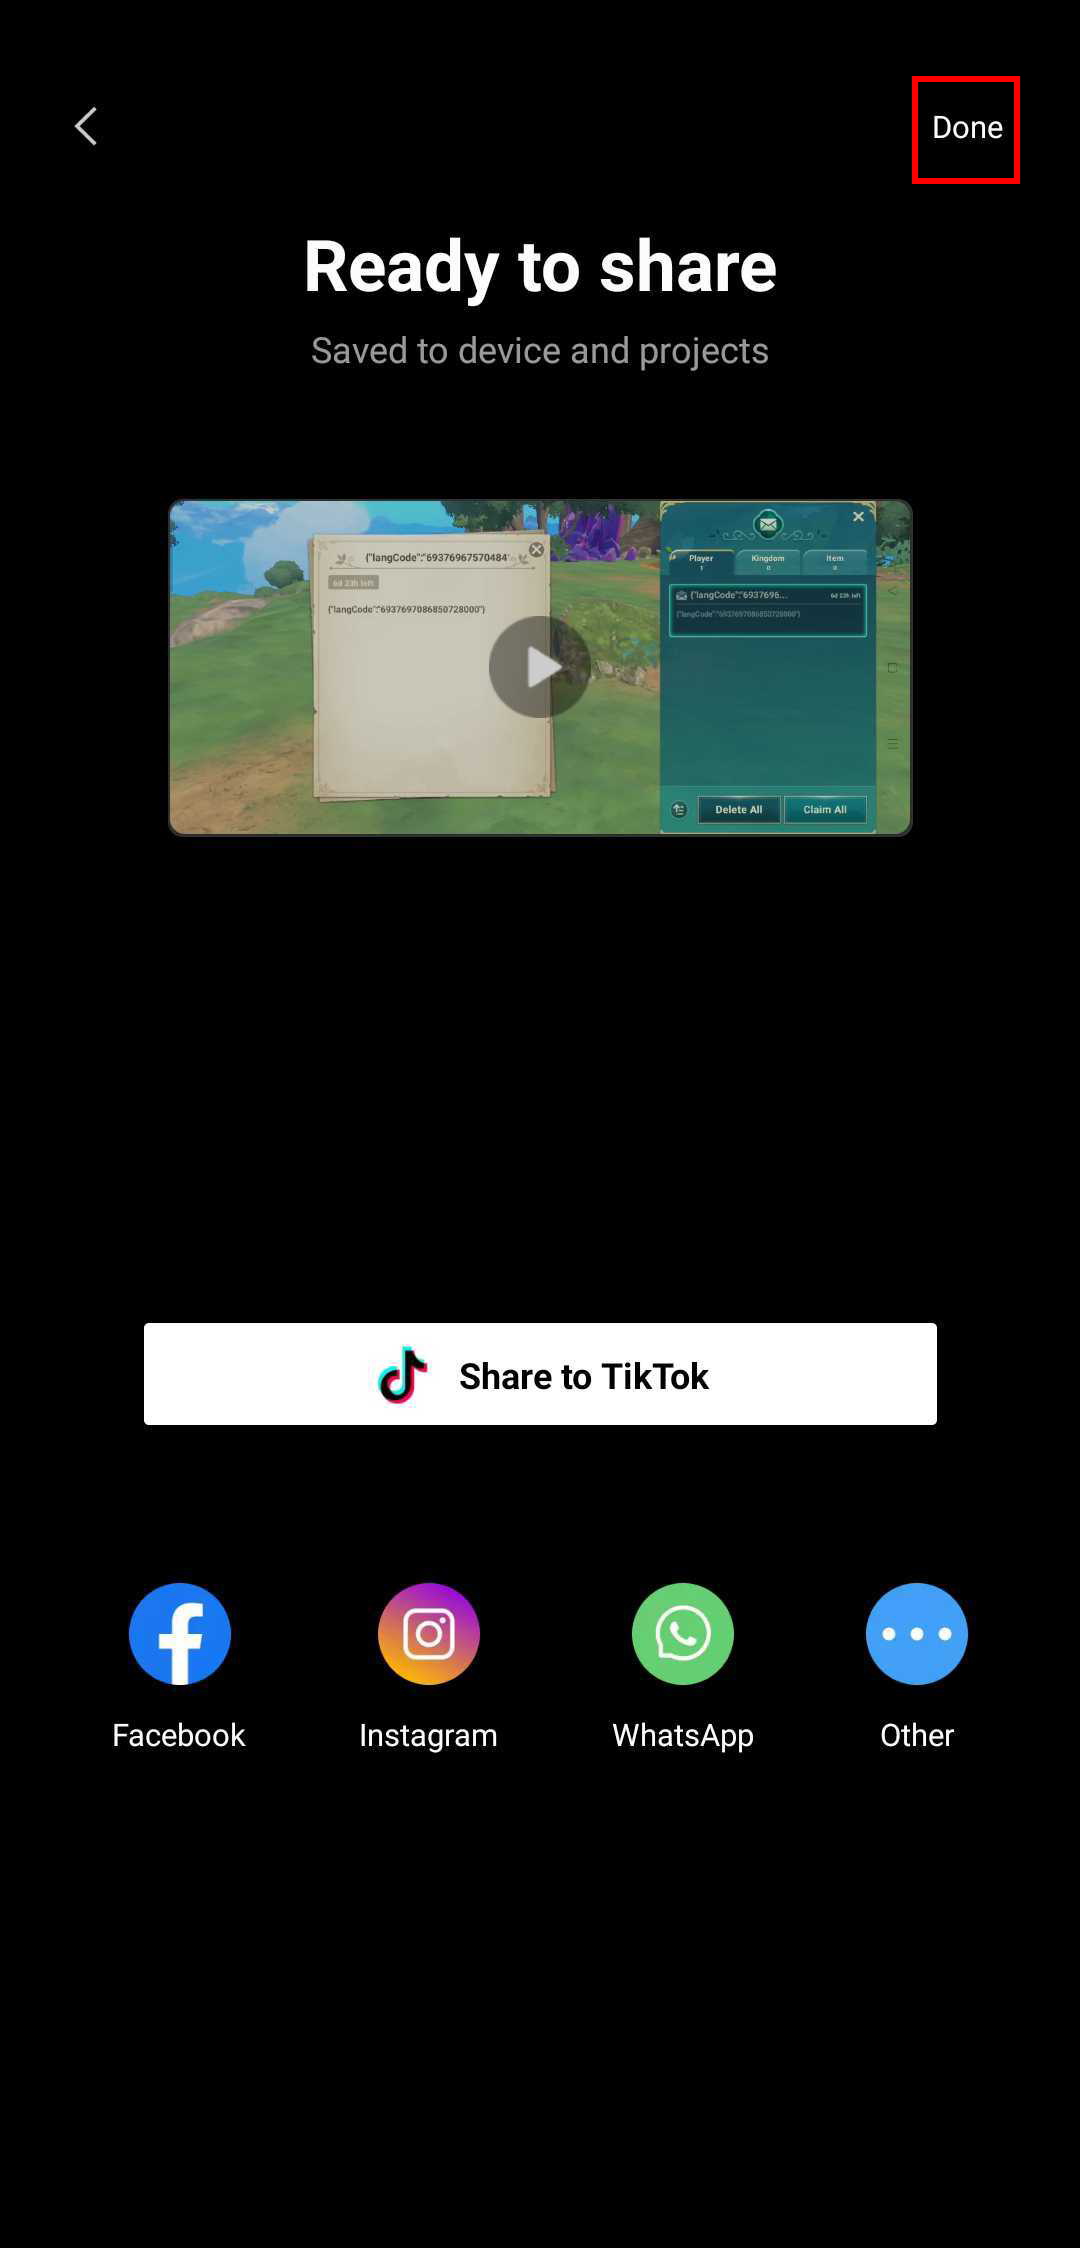
- Once the exporting process reaches 100%, tap Done at the top right.
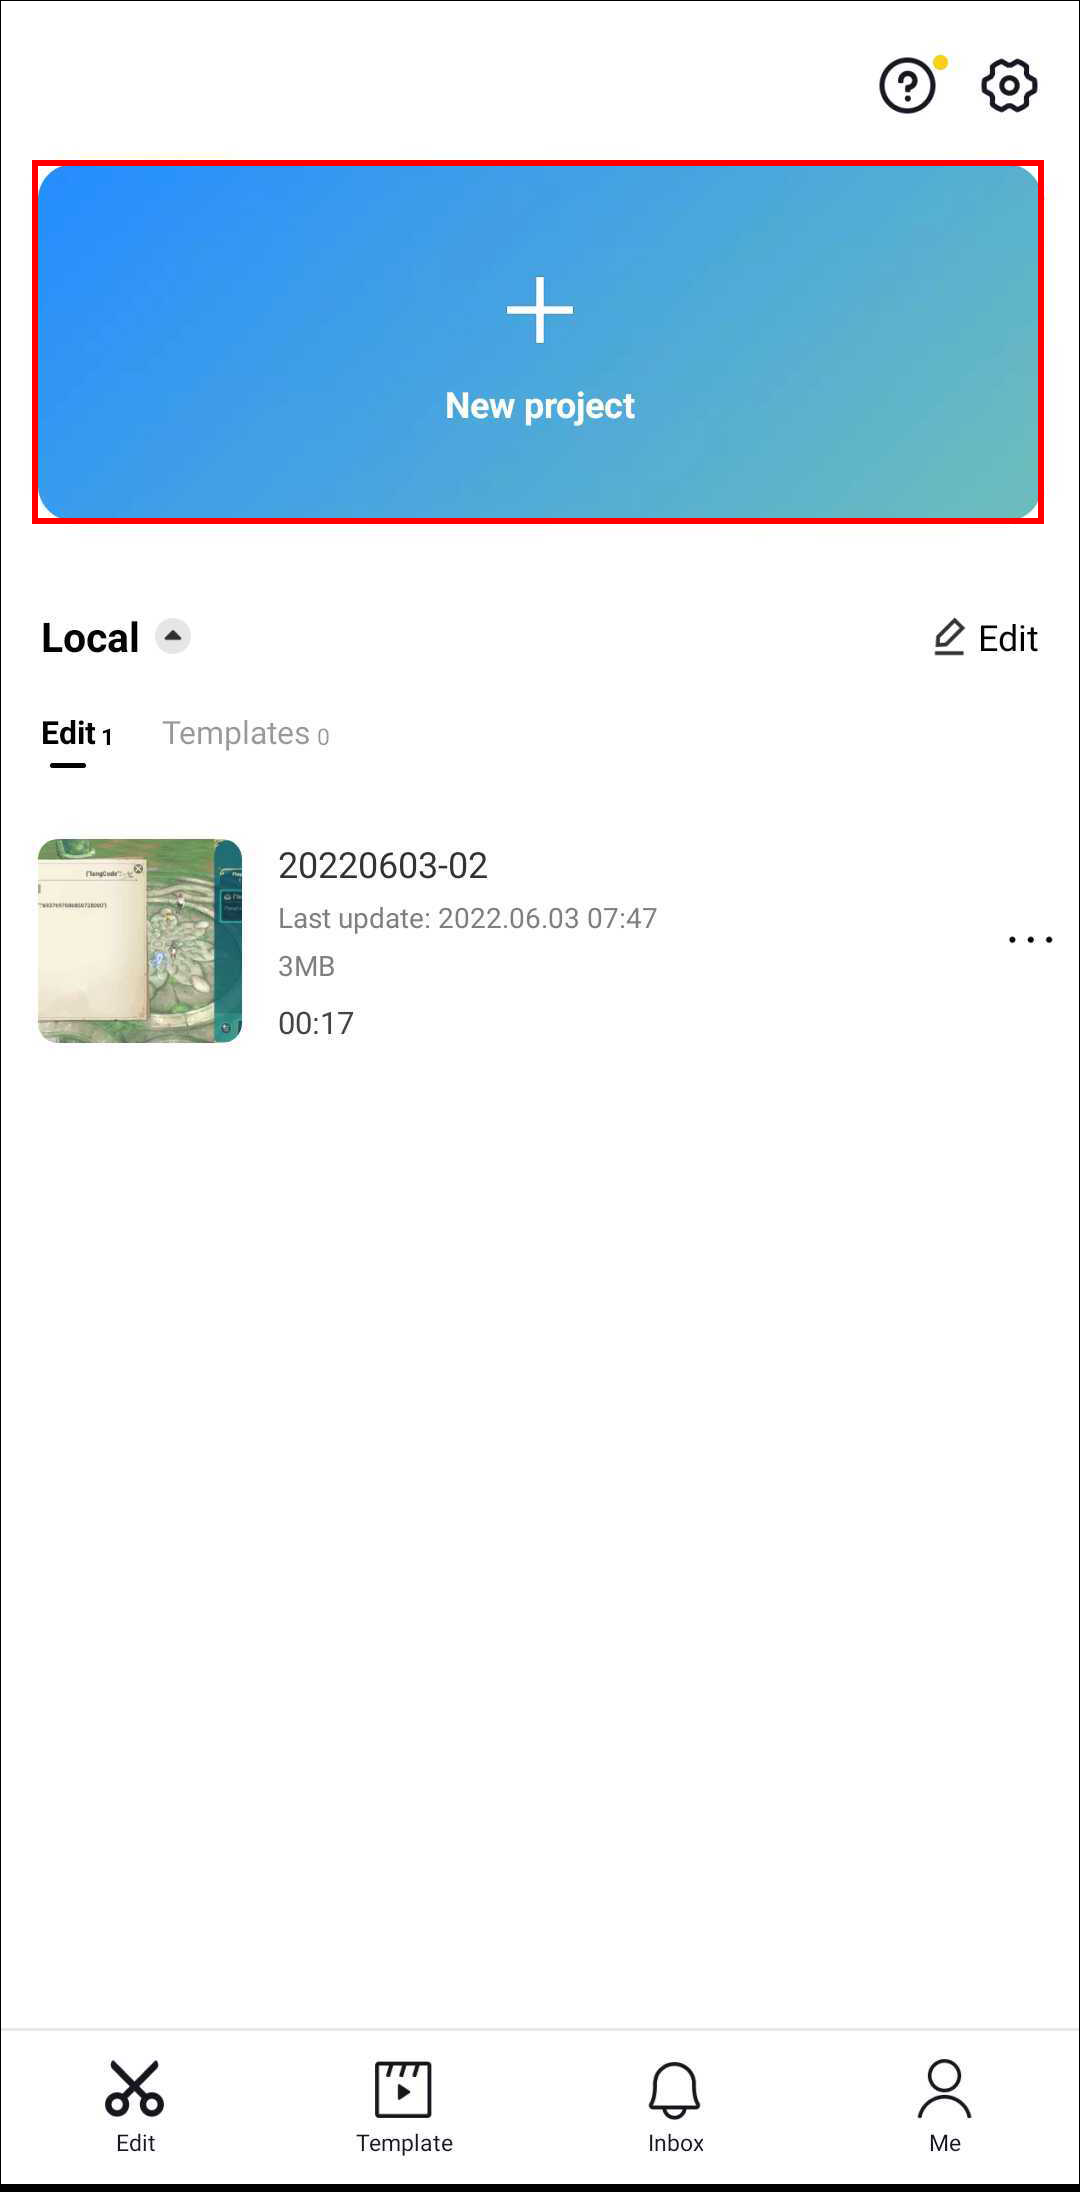
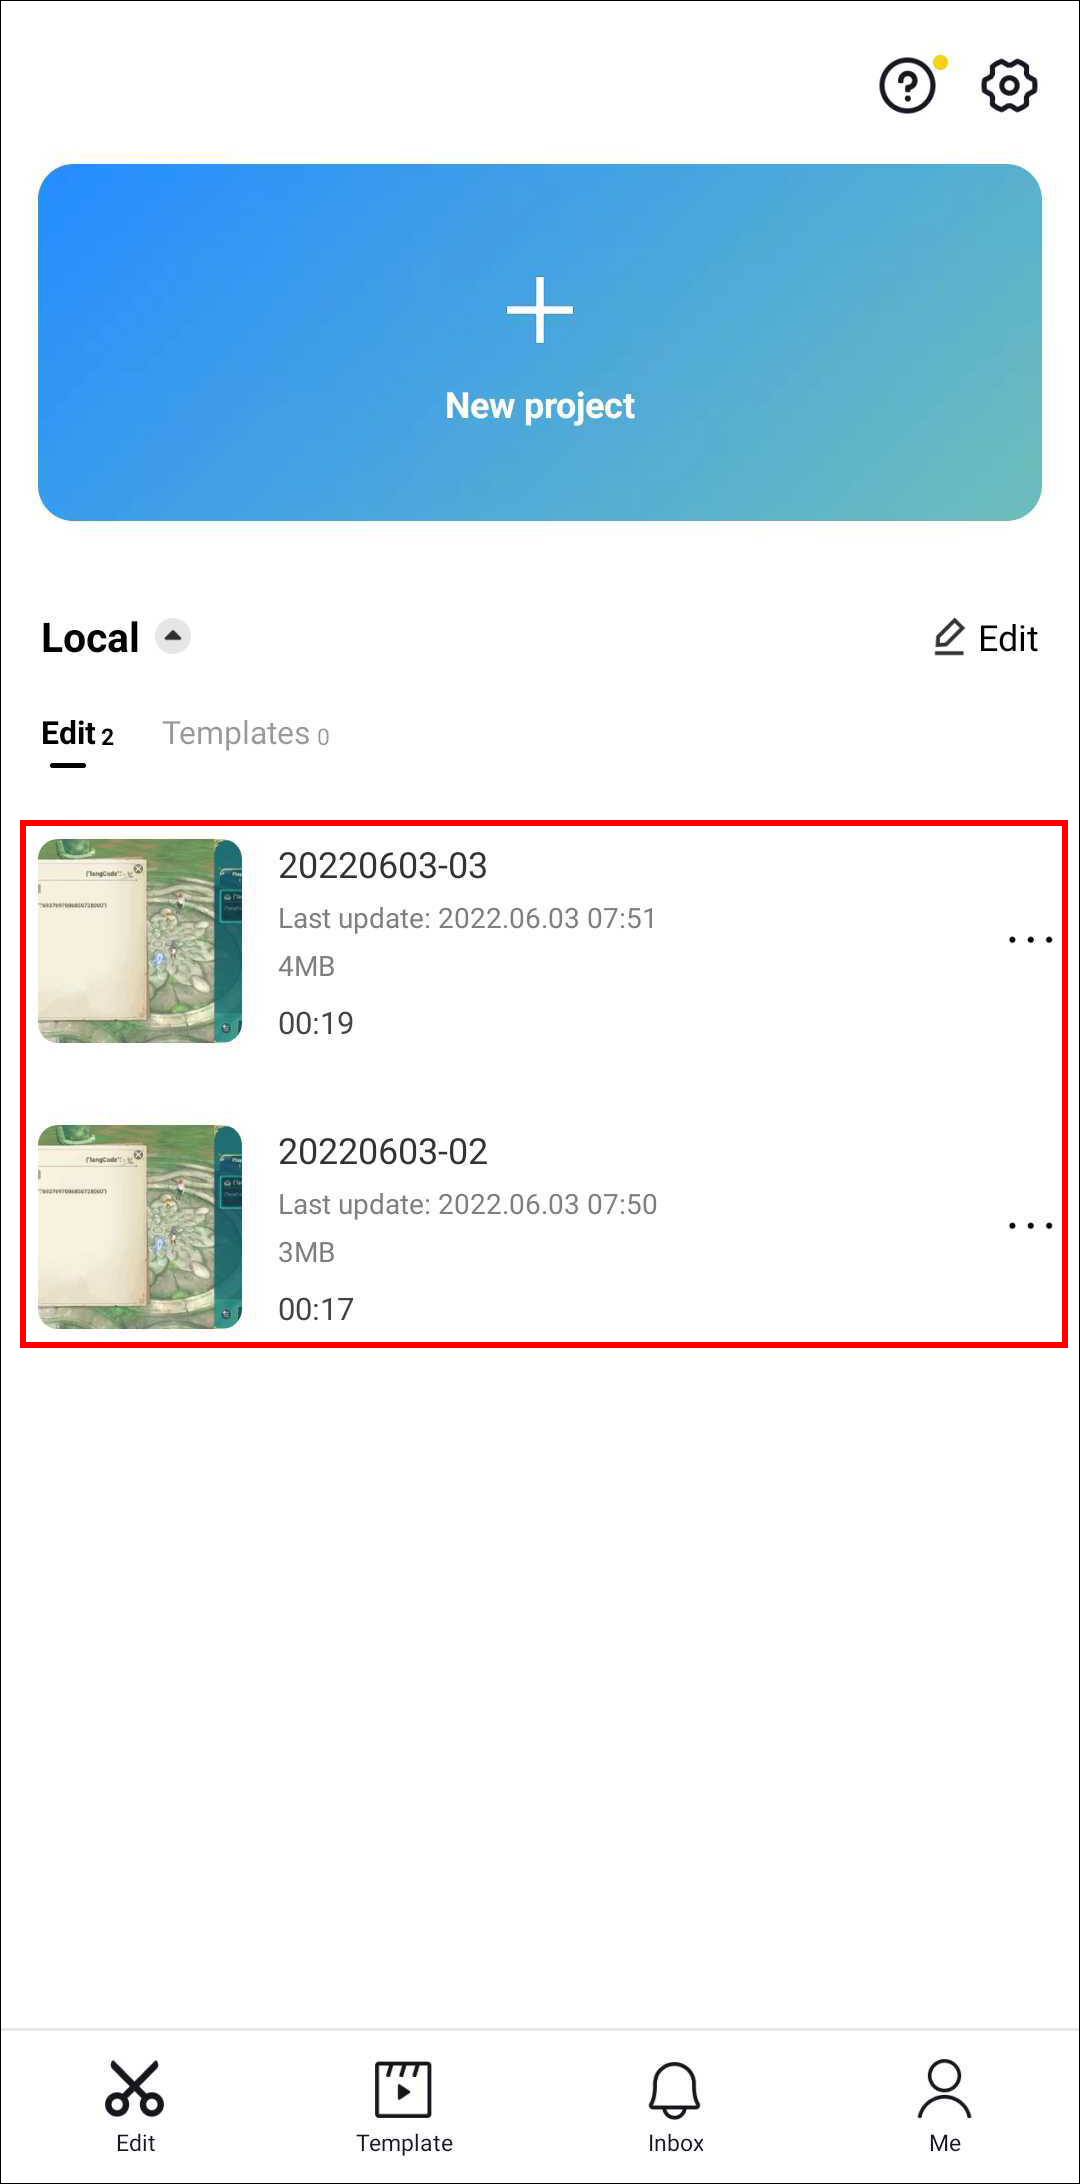
You’ll be sent to CapCut’s landing page. From here, you can add back your video and edit it as a whole.
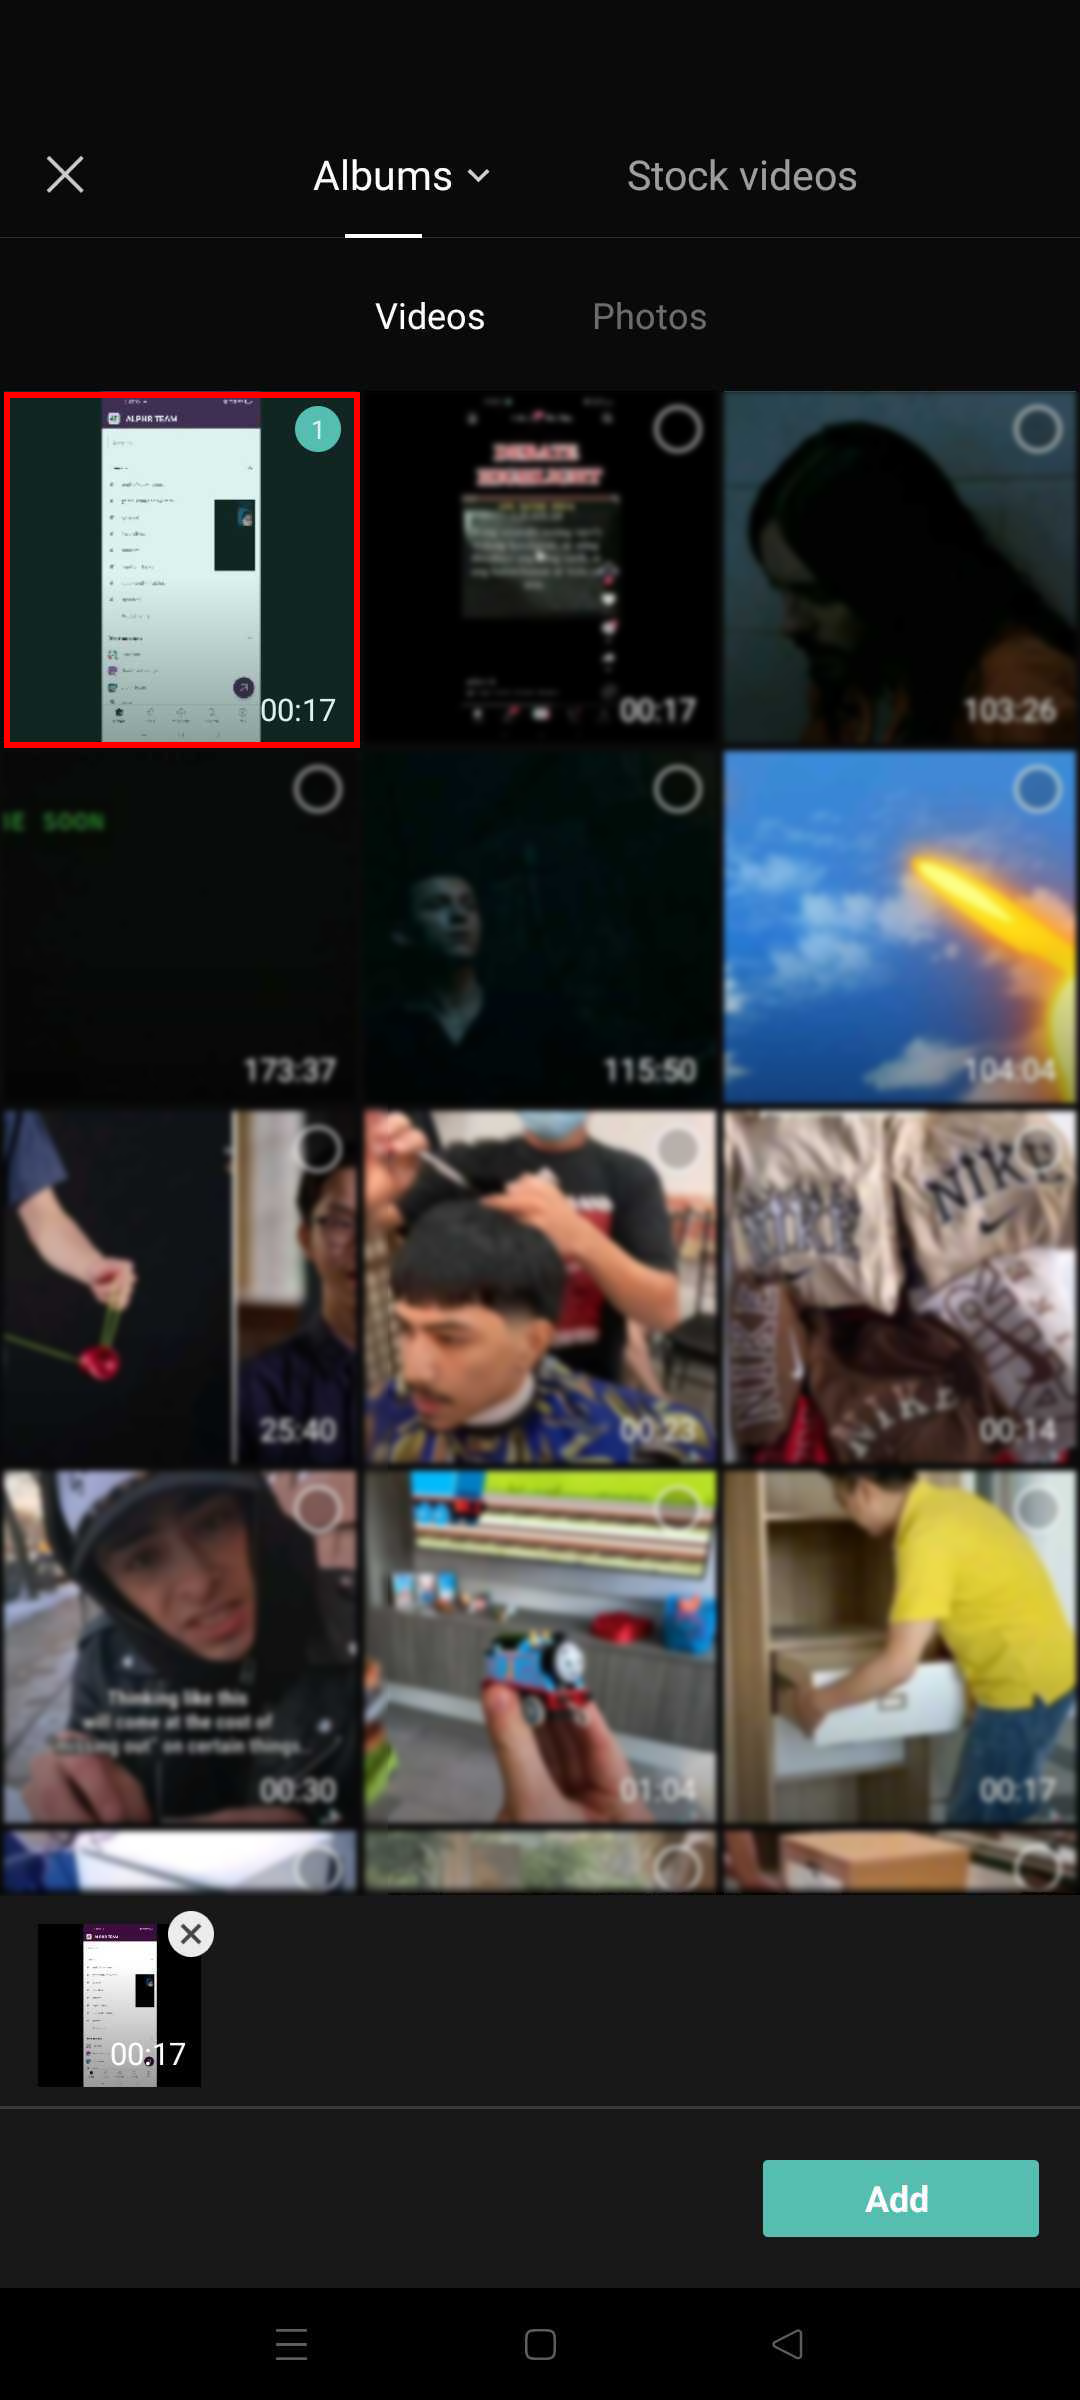
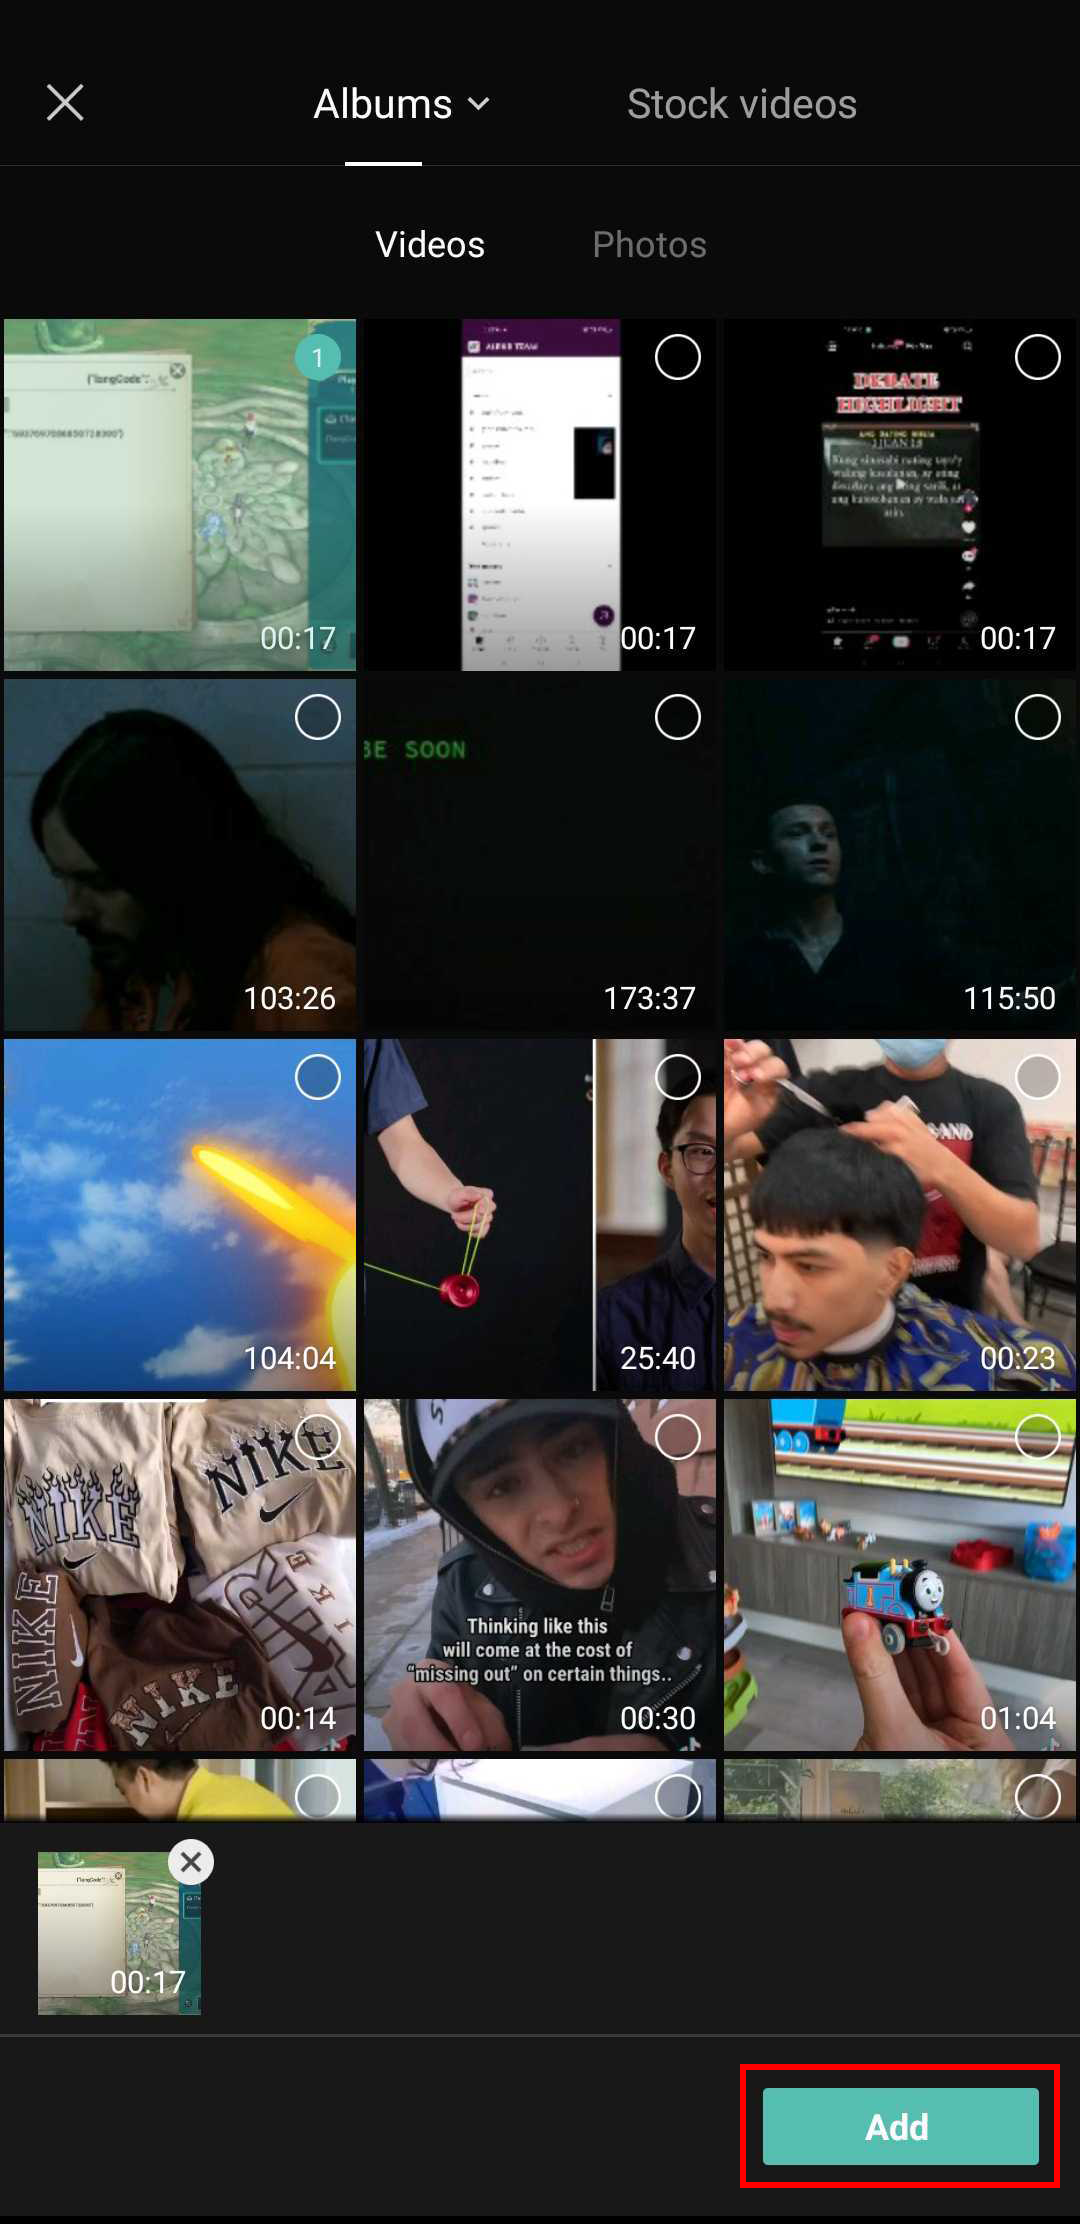
- Tap the New project button.
- Select the collage you’ve just created.
- Click on Add in the bottom-right corner.

All of your photos are now stitched together in a video. Therefore, any effects or overlays you might add will apply to all the photos at once.
How to Select All Clips
When editing a video in CapCut, you can add as many clips as you’d like, as long as the final version is no longer than 15 minutes.
Suppose you’ve found an exciting effect that you’d like to apply to all the timeline clips. In that case, you might’ve tried to speed up the process by selecting all the clips at once. If you’ve tried this, you’ve probably failed for one simple reason – this option isn’t currently available.
But this doesn’t mean you have to edit clips one by one to add a common feature. You can simply export the video and re-edit it as a whole.
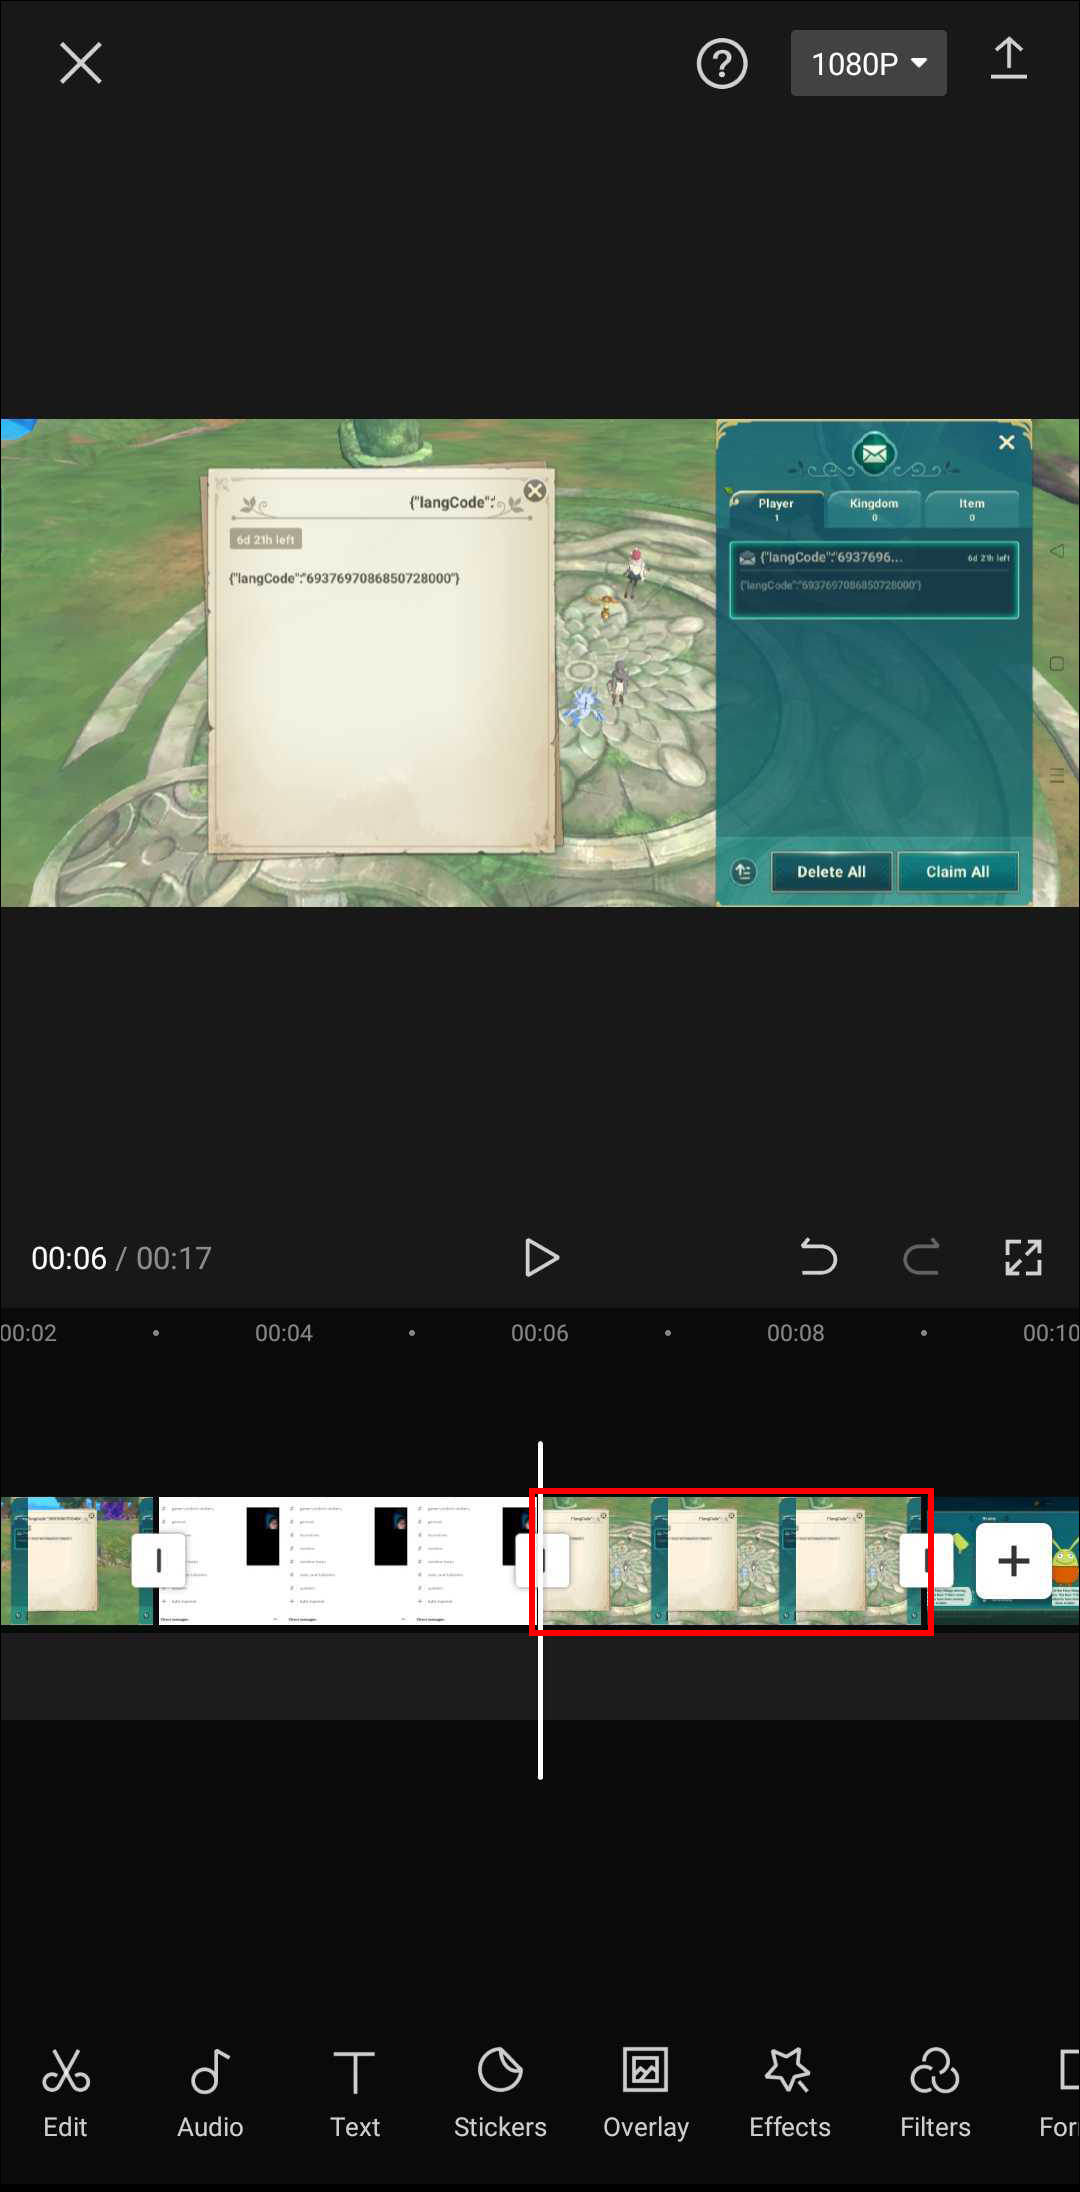
However, before exporting the video, make sure you’re satisfied with the clips’ order and length. To trim individual clips, do the following:
- Tap the clip you want to edit.
- Drag the edges towards the center to trim the unnecessary portions.
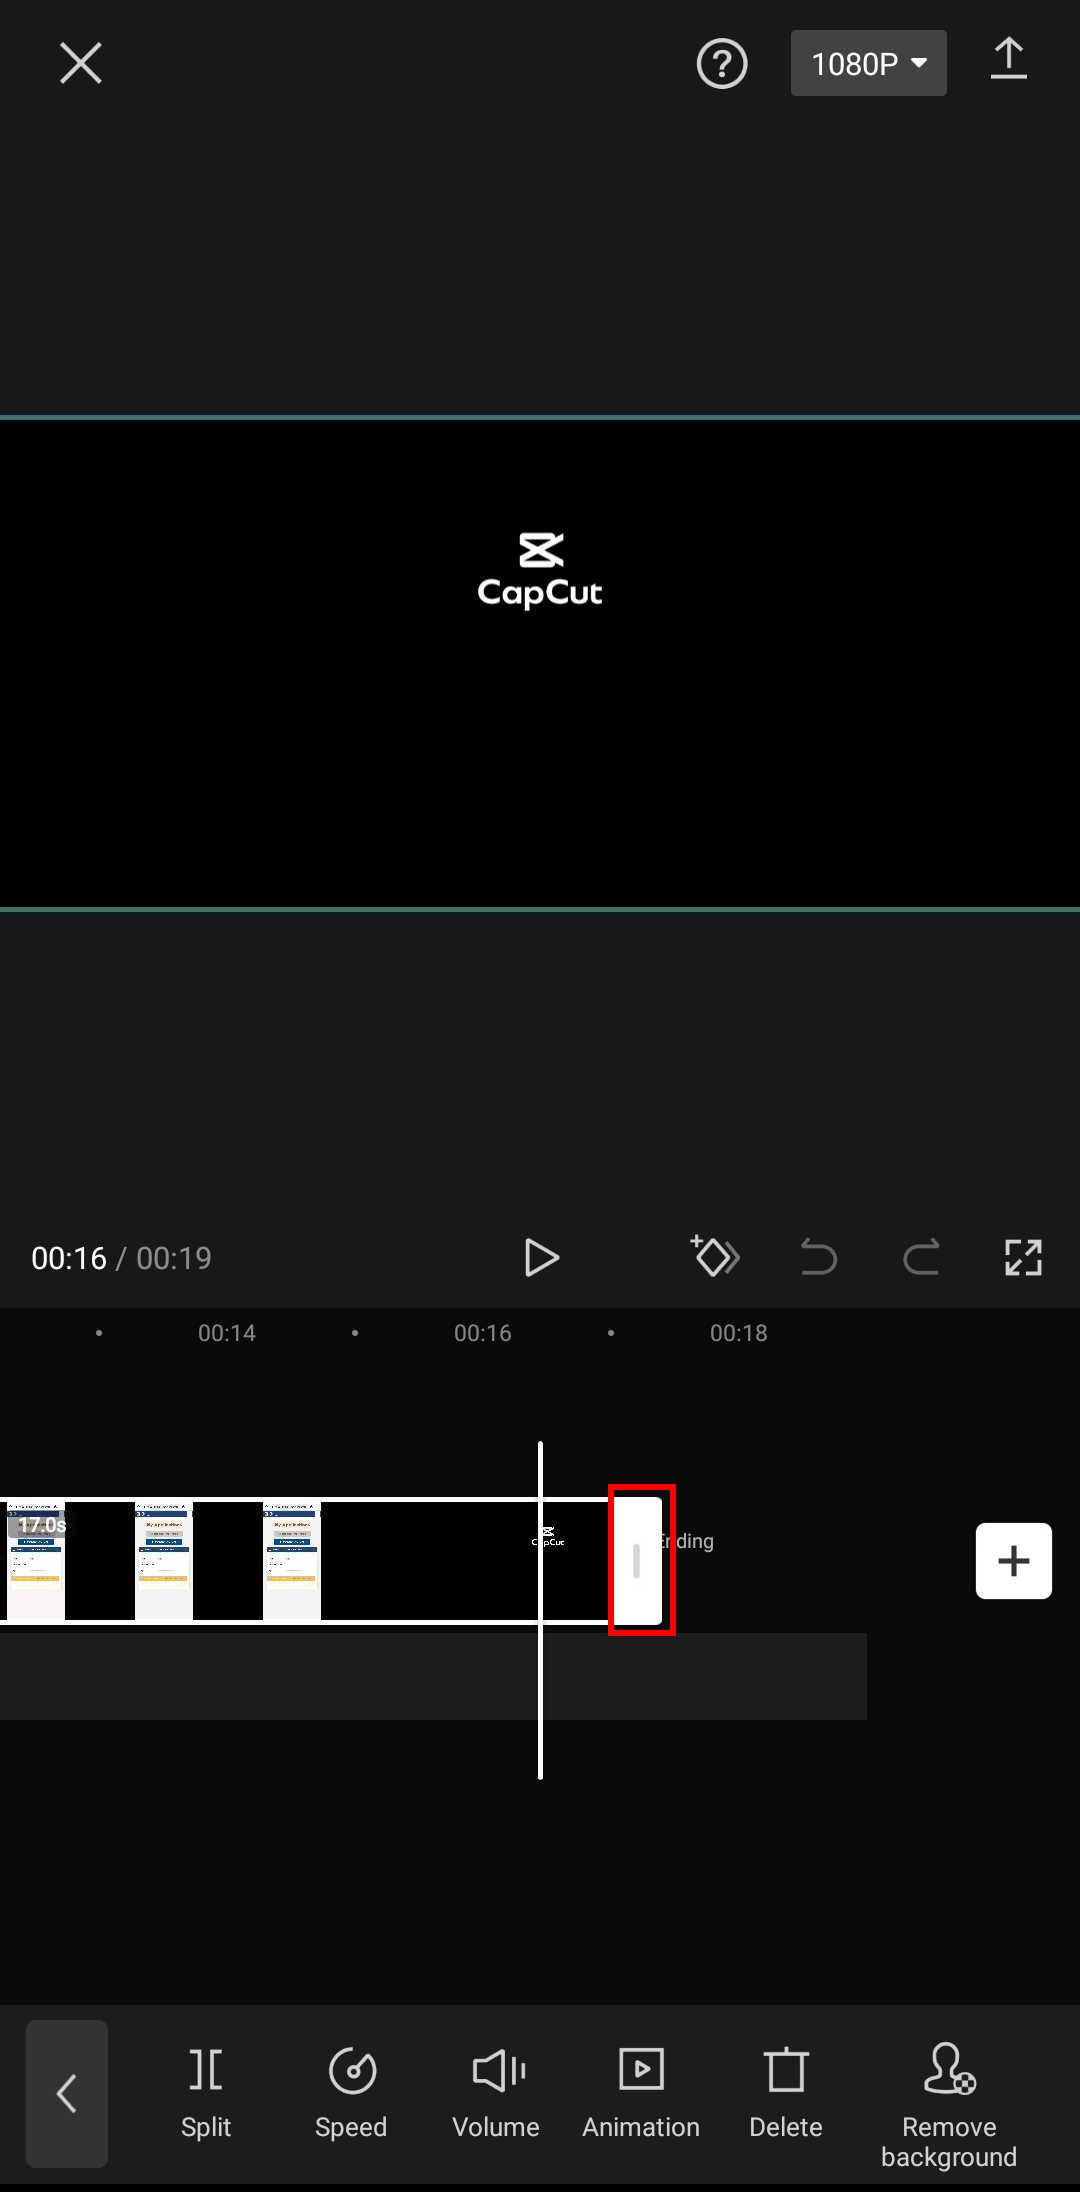
Once all your clips are a perfect size, you can rearrange them in two steps:
- Long-hold the clip you want to move.
- Drag it to the preferred location in the timeline.

After editing individual clips as you see fit, you can export your video following these steps:
- Press the Export button in the upper-right corner of your video.
- Once exporting is completed, tap Done.

Now you’ll be back to the landing page. Add the video you’ve just exported back to your timeline following these steps:
- Click on New project.
- Select the video.
- Tap Add in the bottom-right corner.


The video will appear on your editing timeline as a whole, having the same effect as selecting all individual clips. After that, you can change the speed or enhance the video however you’d like. All the changes will apply to all the clips.
All-in-One Editing
Selecting multiple videos or photos at once can be a handy editing feature. This way, you don’t have to go through the painstaking process of individually adding the same changes to clips or photos.
Unfortunately, CapCut hasn’t added this option to its otherwise impressive list of features. While we wait for them to pick up the slack, you can use the workaround from our guide to achieve the same effect.
Have you tried editing in CapCut? How did you like the app? Let us know in the comments section below.
Disclaimer: Some pages on this site may include an affiliate link. This does not effect our editorial in any way.