There are many benefits of setting up a static IP address in Windows 10. For example, this allows you to share data like documents, files, and printers locally or using port forwarding.
Services and port forwarding configurations will ultimately stop functioning if you don’t set a static IP address. One of the reasons for this is that most devices utilize a dynamic IP address, which the router’s Dynamic Host Configuration Protocol (DHCP) server usually determines. These addresses can be changed at any moment, including when you restart your computer or when the dynamic settings that were used end.
Luckily, there are a couple of ways you can set a static IP address. In this article, we’ll go through and discuss the necessary steps for configuring a static IP address on both Windows 10 and 11.
How to Set a Static IP Address in Windows 10
There are a few different methods to set a static IP address on a Windows 10 PC. Every method works is equally effective.
Command Prompt
On a Windows 10 PC, it’s possible to configure a static IP address using the command prompt. Although some users may find it difficult, this is the fastest method.
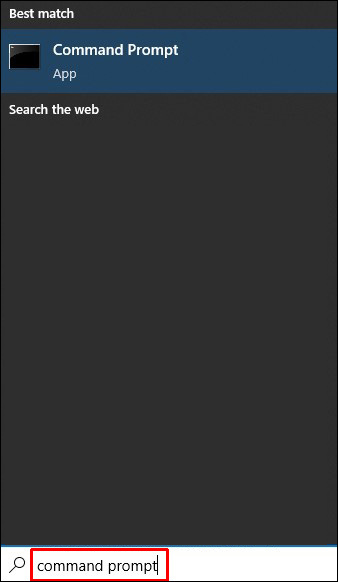
- Open the Start menu.

- Type in “Command Prompt” In the search bar.

- Right-click on the Command Prompt and select “Run as administrator.”
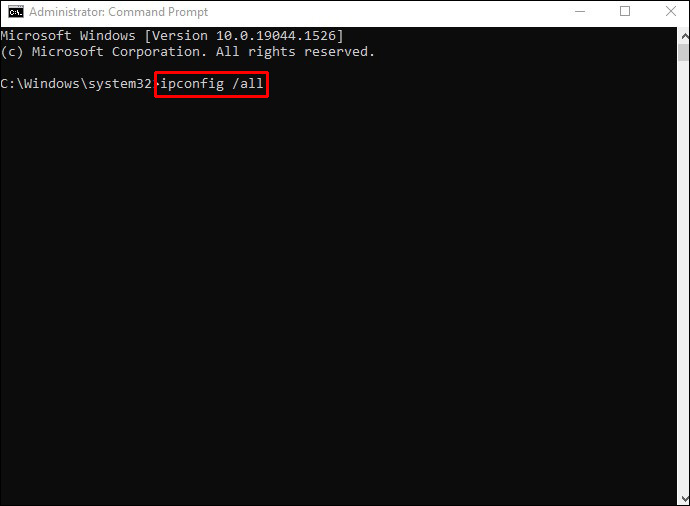
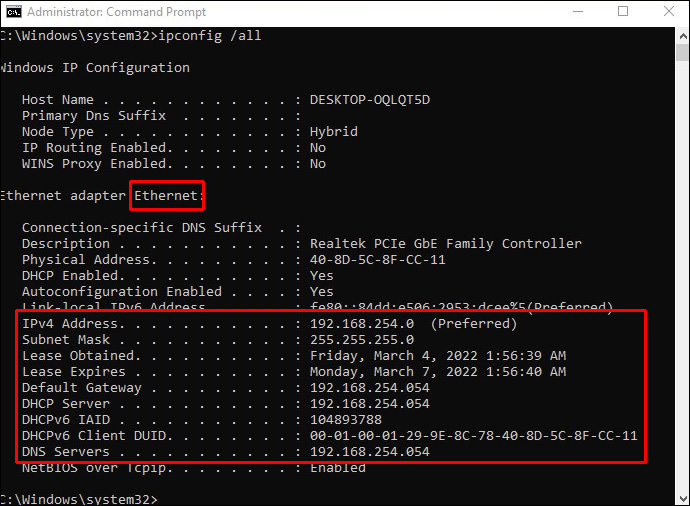
- To view your current network setup, copy and paste the following command, then press Enter:
ipconfig /all - Navigate to the network adapter section, note down the adapter’s name and the IPv4, subnet mask, default gateway, and DNS server information.
- To set a static IP address, use the following command and then hit Enter:
netsh interface ip set address name=“Ethernet0” static 10.1.2.220 255.255.255.0 10.1.2.1 - Replace Ethernet0 with the already mentioned name of the network device in the above command. Your network’s IP address, subnet mask, and default gateway should all be changed to match your network’s settings.
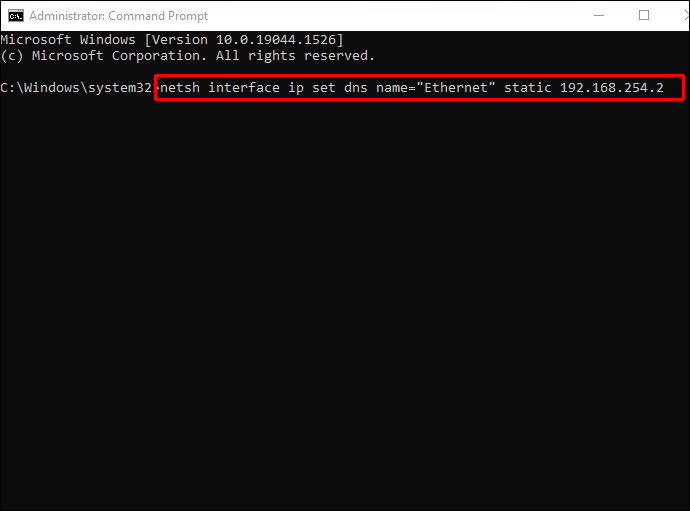
- Enter the command below to adding a DNS server address:
netsh interface ip set dns name=“Ethernet0” static 10.1.2.1 - Be sure to change Ethernet0 to the name of the network adapter and 10.1.2.1 with the DNS server IP of your local network.
- Set an alternative DNS server address by typing in the following command and pressing Enter:
netsh interface ip add dns name="Ethernet0" 8.8.8.8 index=2


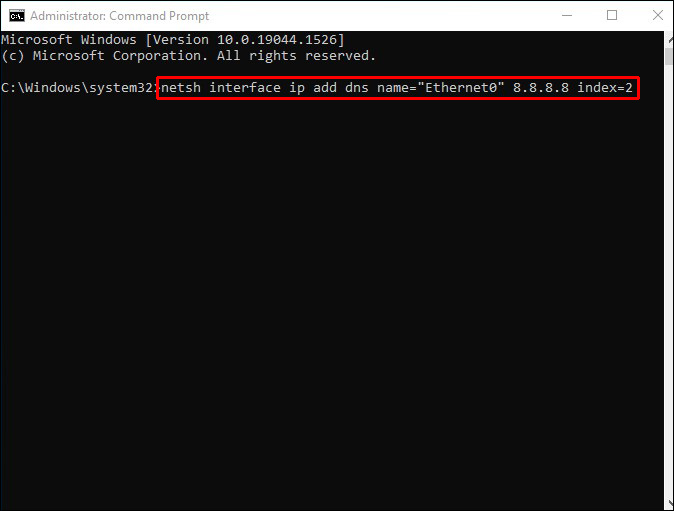
Again, replace Ethernet0 with the name of your adapter and 8.8.8.8 with your DNS server address in the command.
As soon as you’ve finished the process, you may test your new setup using a command line tool (for instance, ping google.com). Check out a web page to test whether the settings work.
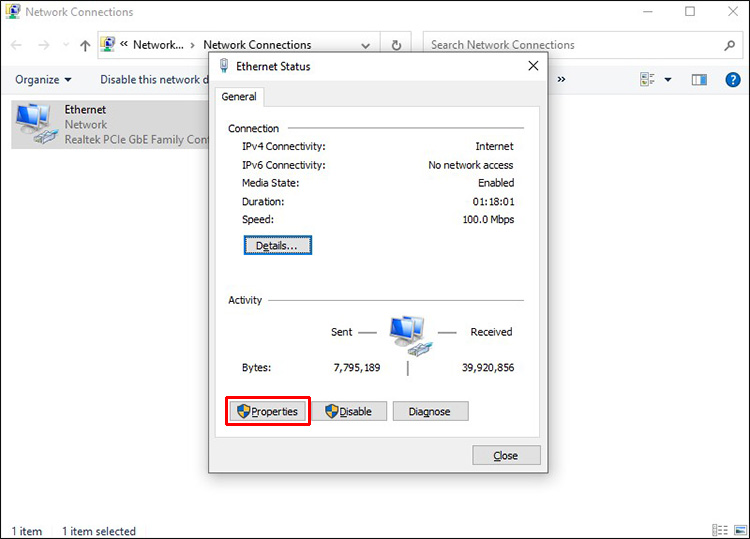
Control Panel
For some users, the previous method using the Command Prompt might not be for them. Luckily, there is a way to modify the IP configuration on a Windows 10 PC via the Control Panel. To set a static IP address using the Control Panel, follow these steps:
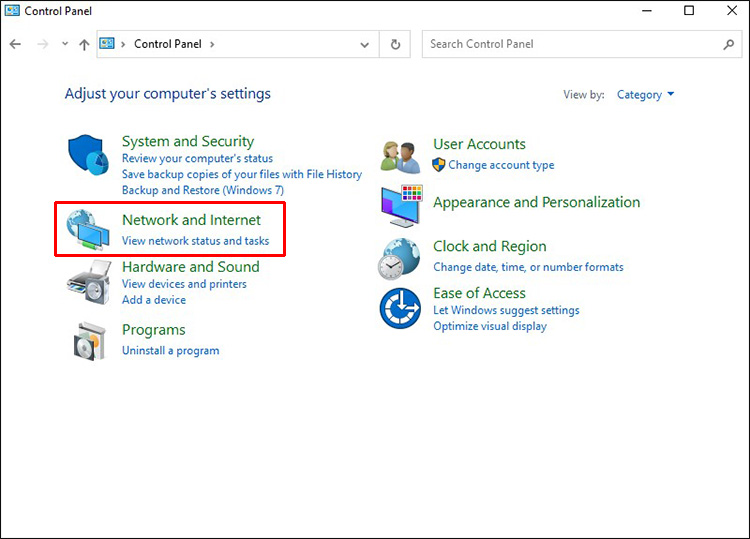
- Navigate to the Control Panel.
- Select “Network and Internet” from the menu.
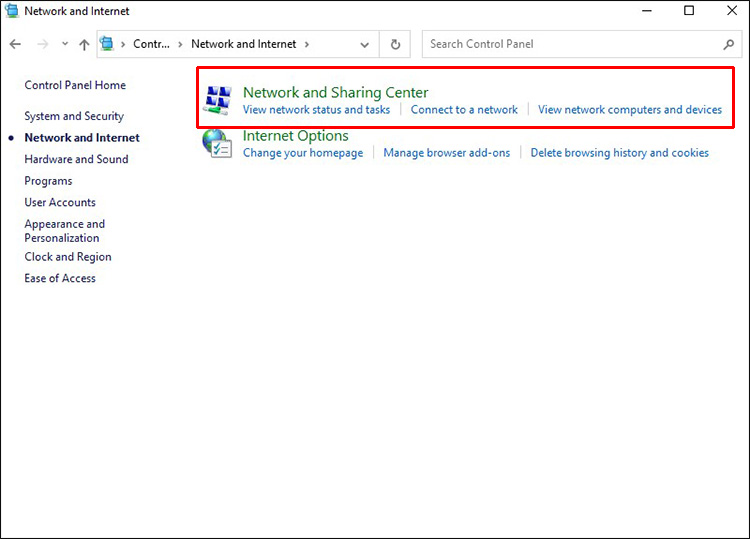
- Choose the “Network and Sharing Center” option.
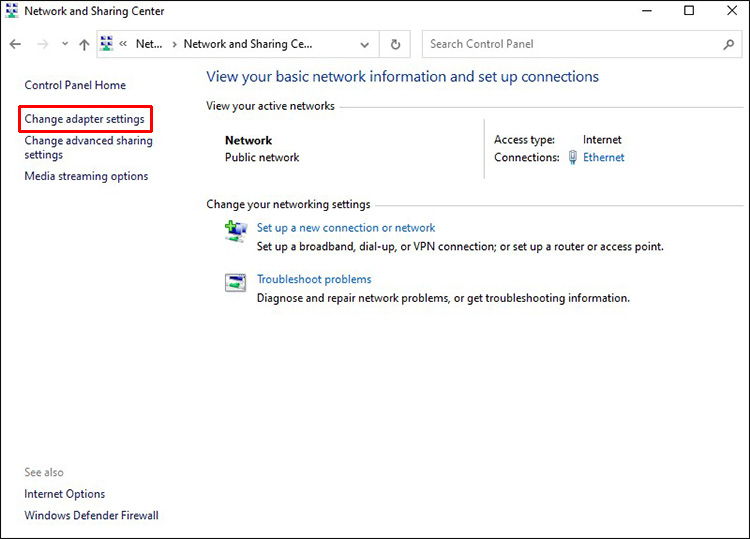
- On navigation pane on the left, choose “Change adapter settings.”
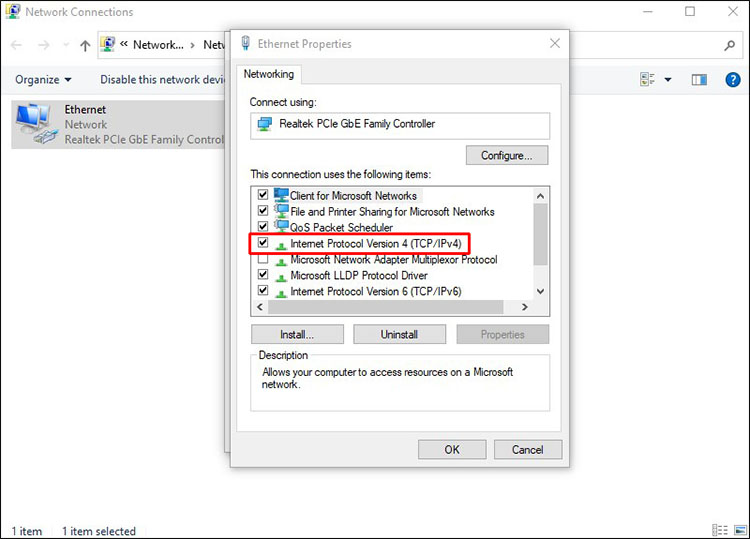
- Click on the name of the network adapter and choose “Properties.”
- Select “Internet Protocol Version 4 (TCP/IPv4)” as the protocol type.
- Hit “Properties.”

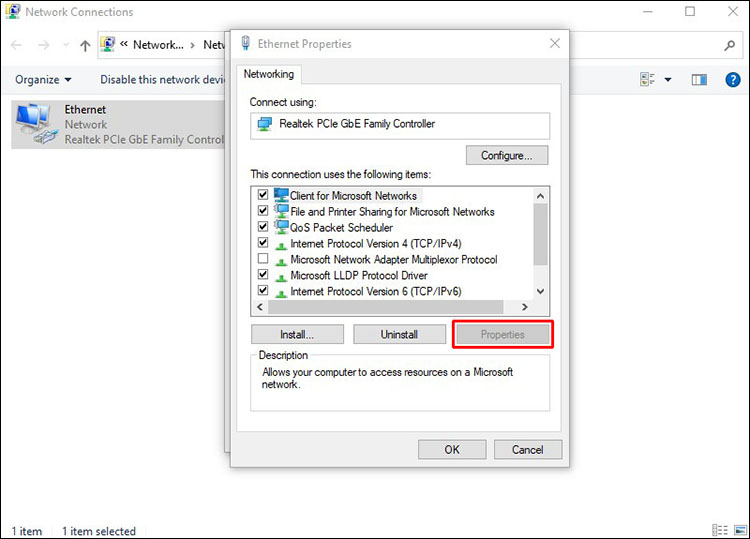
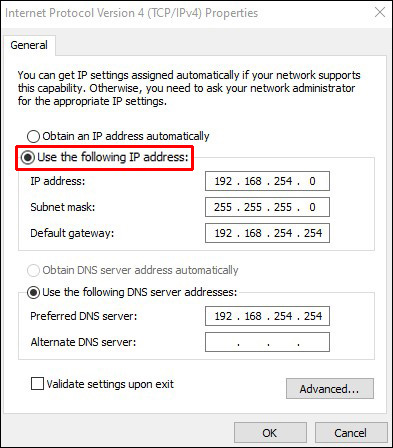
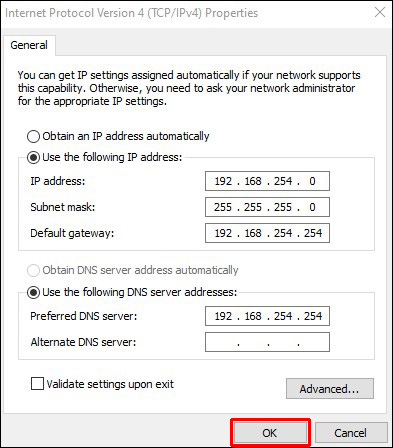
Now you can assign all the needed information.
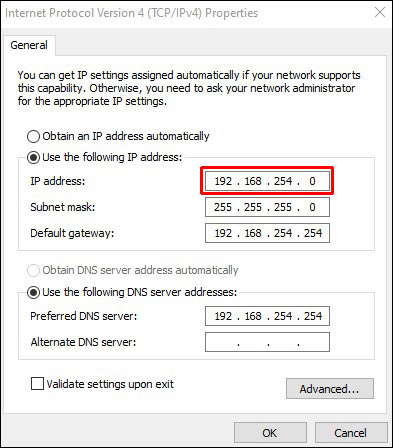
- Select the option “Use the following IP address.”
- Set the static IP address.
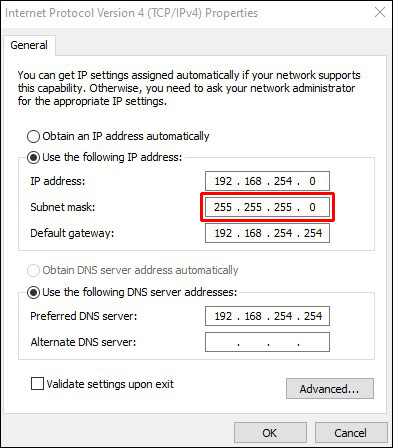
- Indicate a subnet mask. Most of the time, the subnet mask for a home network is 255.255.255.0.
- Indicate the default gateway (typically, the IP address of the router).
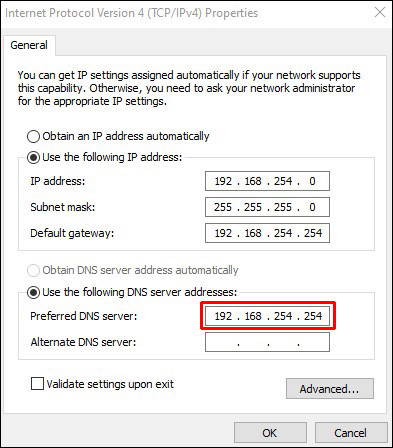
- Set the preferred DNS server address in the “Use the following DNS server addresses” column, which is either the router’s IP address or the IP address of the server delivering DNS resolves.
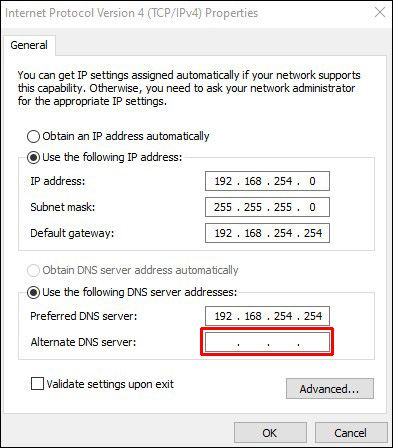
- Set an Alternative DNS server that your PC may use if the default DNS server is unavailable. This is optional.
- To proceed, hit “OK.”

When you’re finished with the instructions, you may open a web browser to test the setup by loading a webpage.
Settings
There is an option on Windows 10 to alter the IP address settings for connected devices via the Settings app. Here’s how:
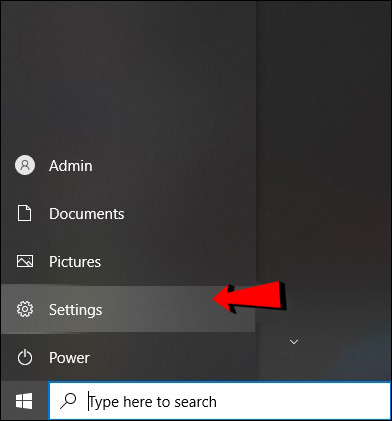
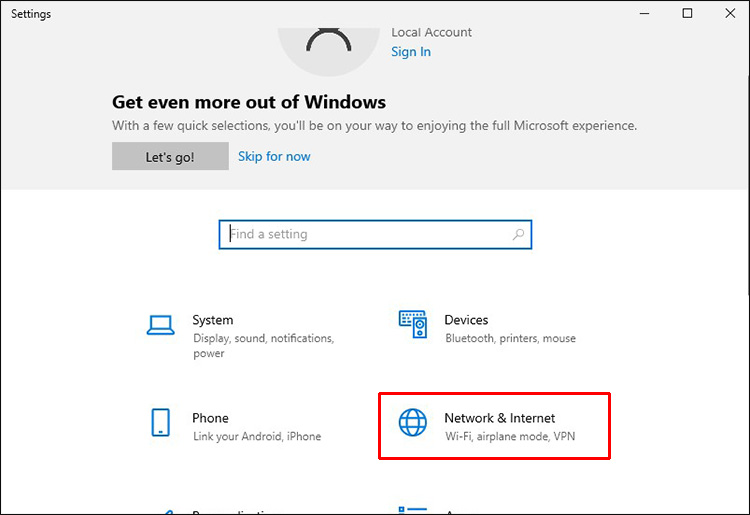
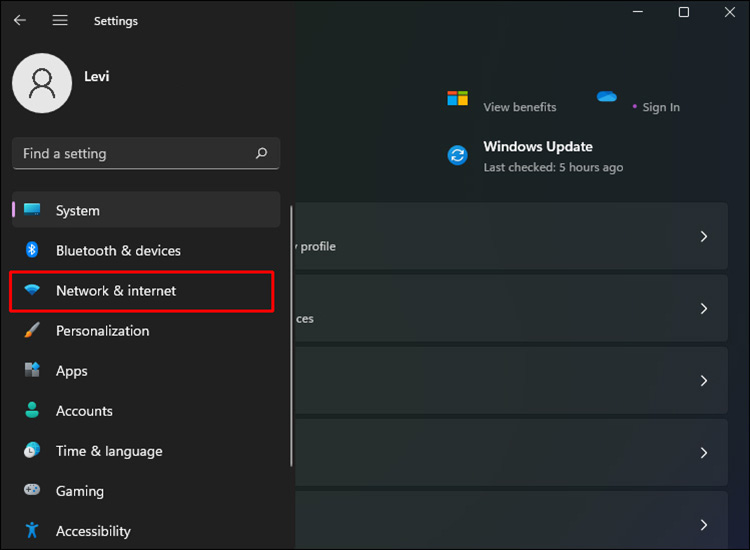
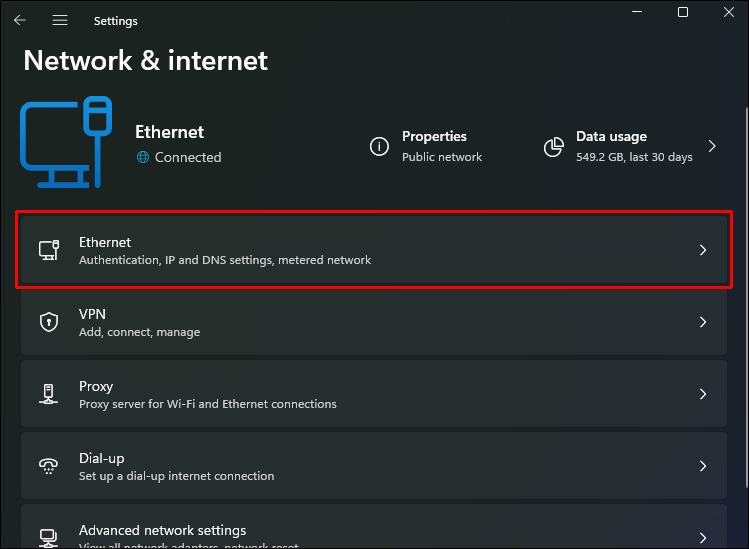
- Navigate to “Settings.”
- Select “Network & Internet” from the menu.
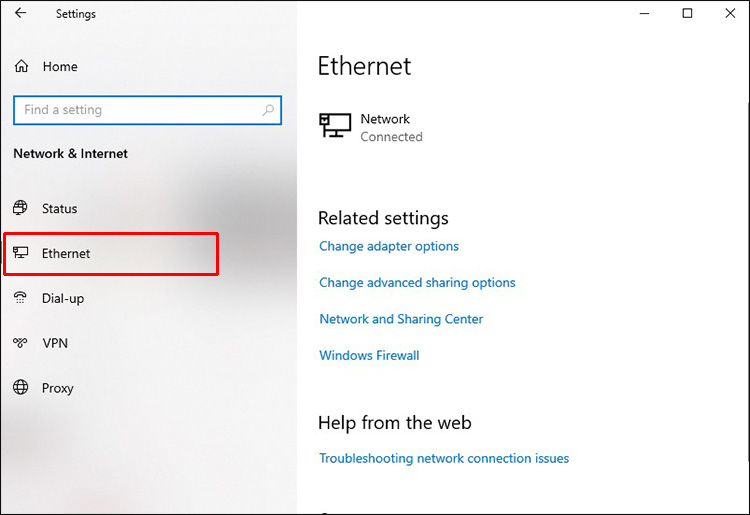
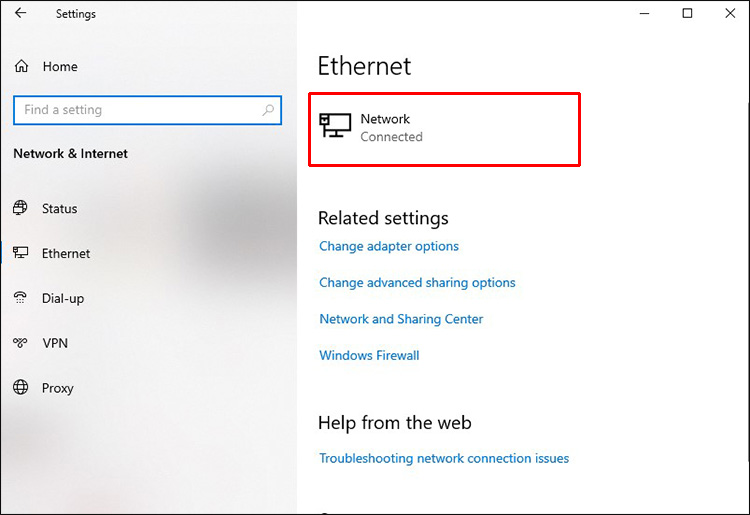
- Pick “Wi-Fi” or “Ethernet”.
- Select the active network connection.
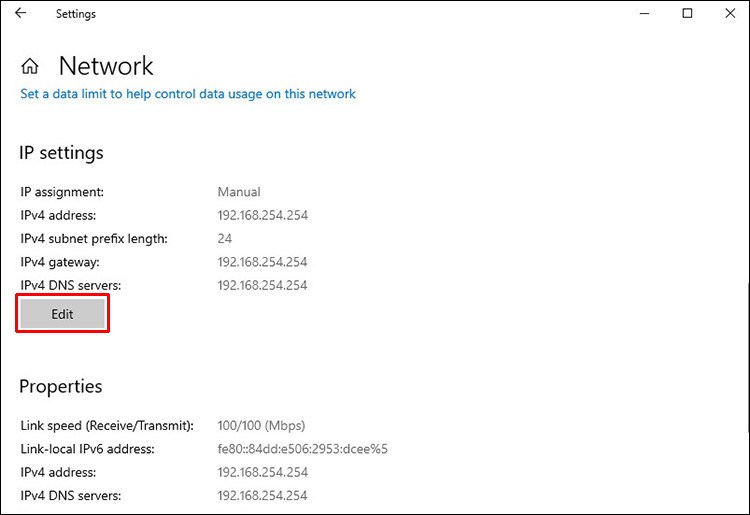
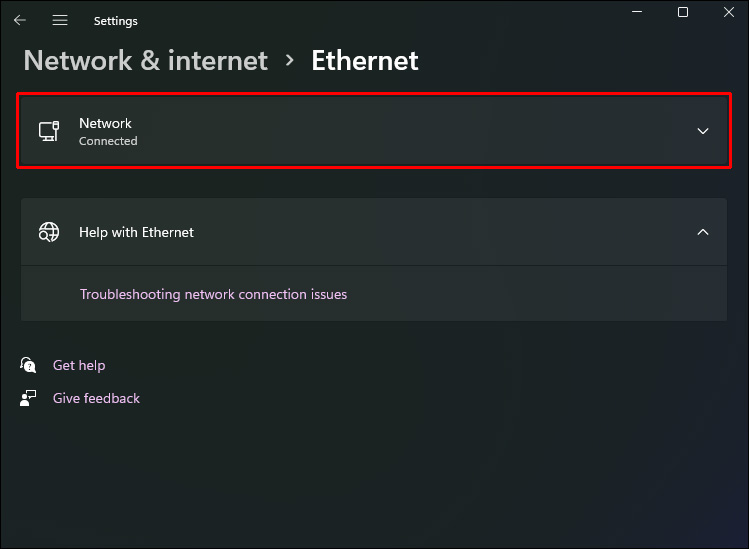
- Go to “Edit” in the “IP settings” section.
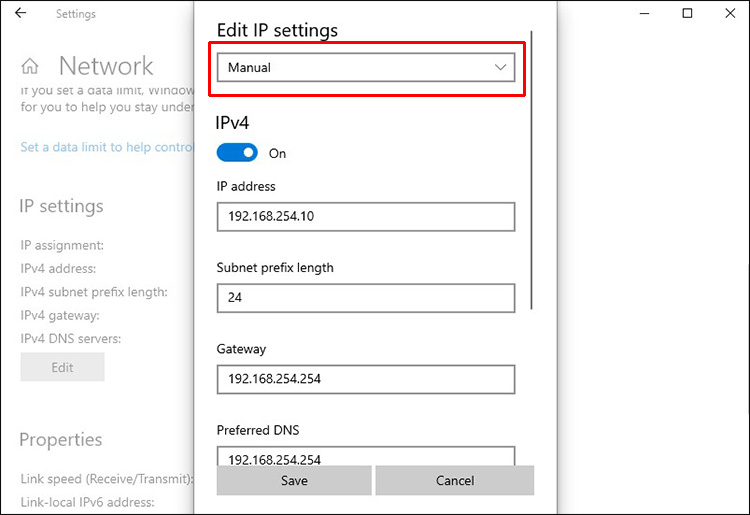
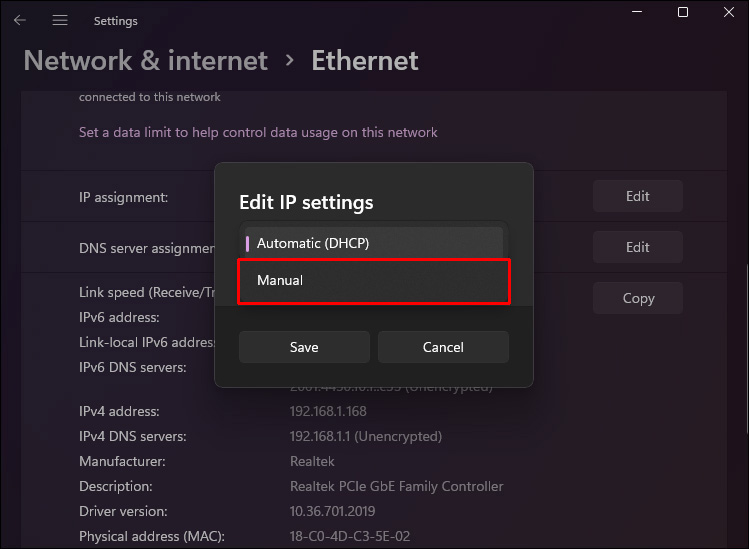
- Select “Manual” from the menu.
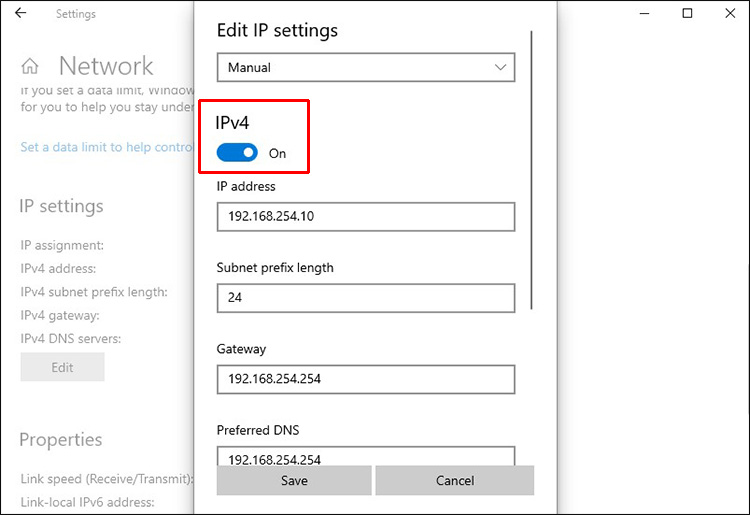
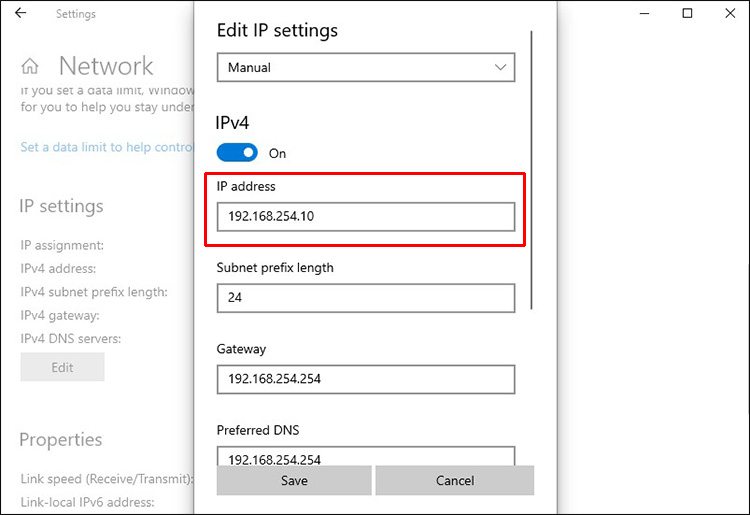
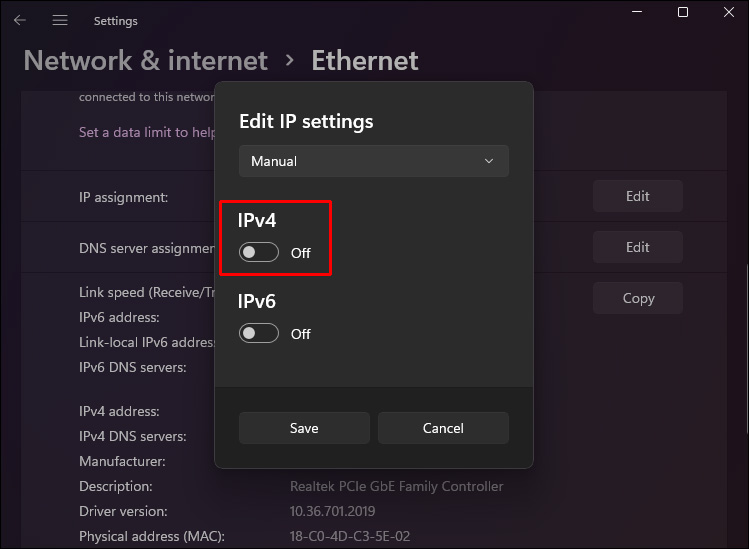
- Turn the IPv4 toggle switch on.
- Configure the Windows 10 PC to utilize a static IP address.
- Specify the length of the subnet prefix (subnet mask). If your subnet mask is 255.255.255.0, the bit length of the subnet prefix is 24.
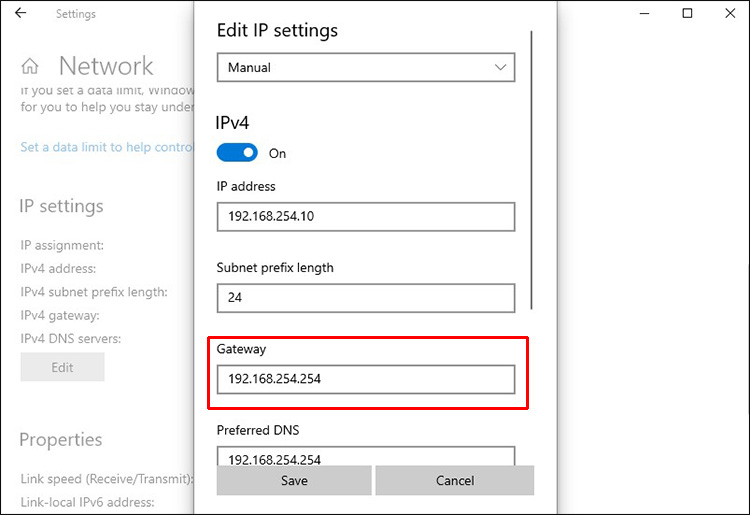
- Indicate the address of the default gateway, a preferred DNS server address, and a secondary DNS server address.
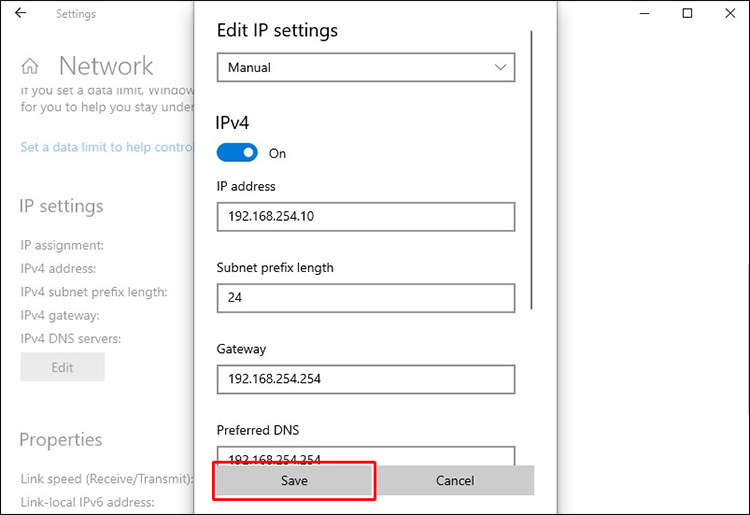
- Save the changes by clicking on “Save.”

Once you’ve finished following the instructions, you may verify your settings by opening a webpage in a web browser.
How to Set a Static IP Address in Windows 11
Settings
You can use the Settings app to set up a static IP address in Windows 11. Here’s how:
- To access the Settings page, press Win + I.
- Navigate to the appropriate section by selecting “Network & Internet.”
- If you are connected to a wired network, choose “Ethernet.” Otherwise, choose “Wi-Fi.”
- Choose the device on which you are establishing a network connection.
- Select “Edit” to the right of “IP Assignment.”
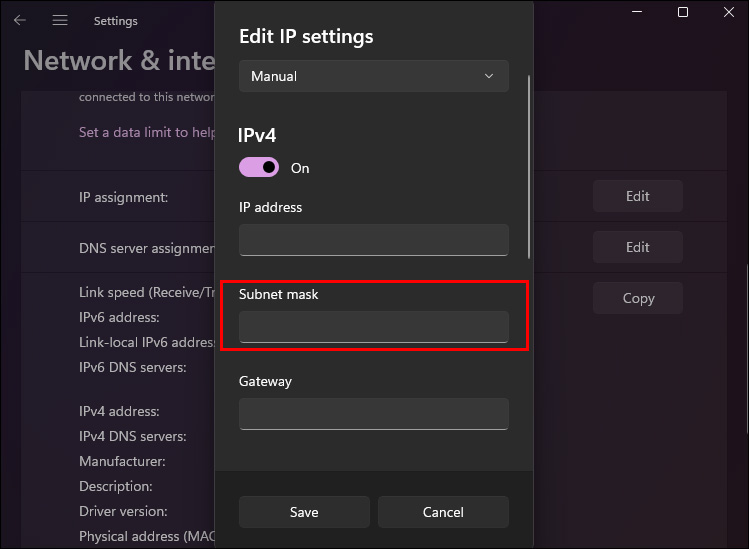
- A pop-up window will appear. Select “Manual” from the appearing menu.
- Enable IPv4 and assign a static IP address.
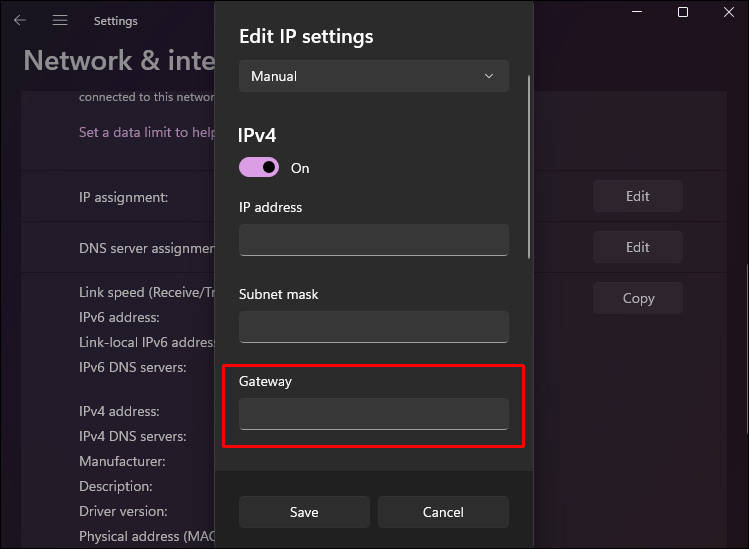
- Complete the remaining fields, such as setting the Subnet prefix length to “24” and the Gateway address to “10.1.2.1”.
- If you have a DNS address that you prefer, substitute it in the appropriate blanks. Alternatively, leave it blank. Similarly, if you have one, provide the secondary DNS address.
- Click “Save” and relaunch File Explorer.


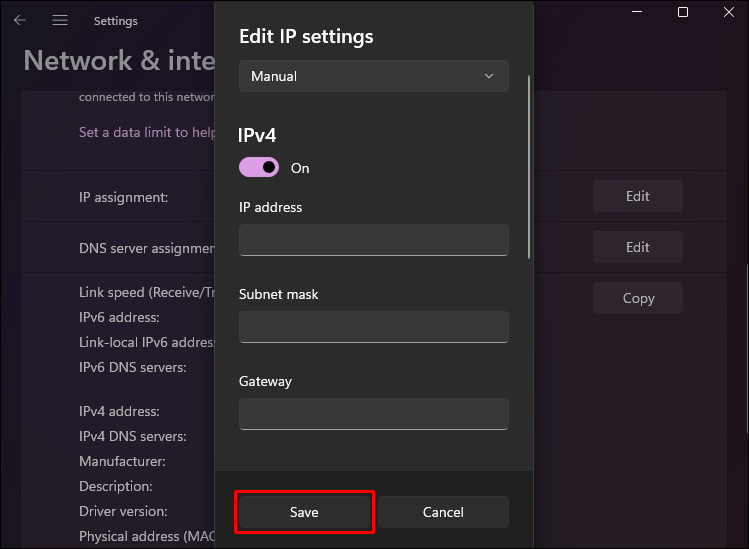
Open your default web browser and determine whether you are able to surf the internet.
PowerShell
As well as Windows 11, the PowerShell method works on older Windows versions too. Follow these steps to set up a static IP address using PowerShell:
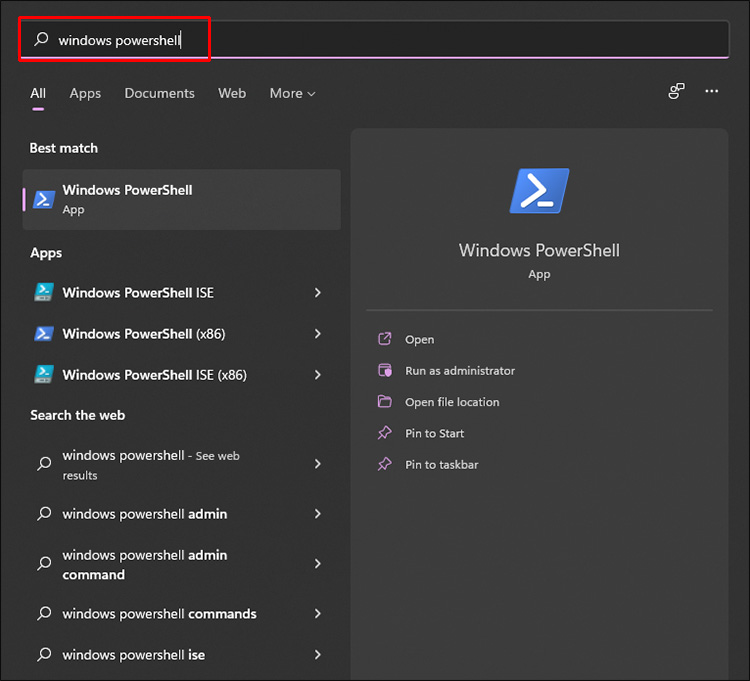
- Right click on the Windows icon in the lower left of your screen. Select “Windows PowerShell”.
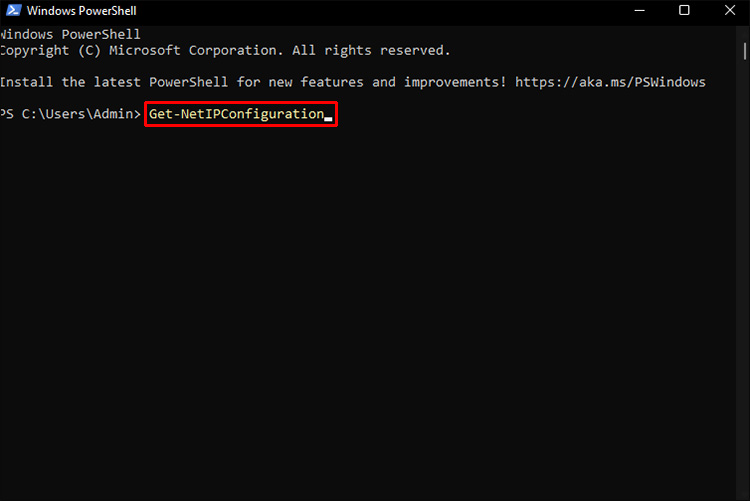
- To view your current network setup, copy and paste the following code and press Enter:
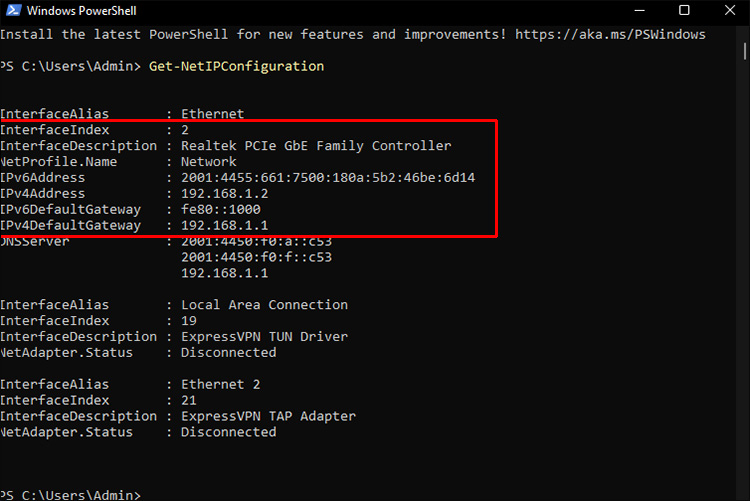
Get-NetIPConfiguration - Take note of the following information from the list of accessible data:
InterfaceIndex
IPv4Address \sIPv4DefaultGateway
DNSServer - After noting down the values for the preceding elements, execute the following code:
New-NetIPAddress -InterfaceIndex 5 -IPAddress 192.168.202.149 -PrefixLength 24 -DefaultGateway 192.168.202.15 - Replace the values for InterfaceIndex, IPAddress, and DefaultGateway in the preceding code. PrefixLength (subnet mask) is set to 24 by default for a home network. Therefore, replace it only when the same value changes on your device.
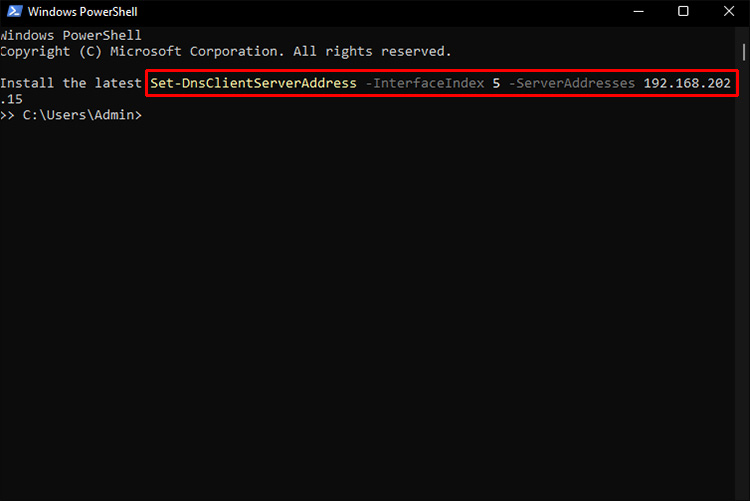
- To add a static DNS server to your network, run the following code:
Set-DnsClientServerAddress -InterfaceIndex 5 -ServerAddresses 192.168.202.15 - To add a secondary DNS server address, use the above command with an additional address separated by a comma. For example:
Set-DnsClientServerAddress -InterfaceIndex 5 -ServerAddresses 192.168.202.15, 8.8.8.8


Have All the Benefits of a Static IP Address
Setting up a static IP address in Windows 10 and 11 can come in handy in a number of situations. A Windows 11 PC or Laptop with a fixed IP address and DNS address will improve the speed of your internet connection, making it more responsive. You may also reduce ping and latency time by boosting the IP address, which will result in less lag.
Do you have a static IP address on your Windows? Have you tried setting up a static IP address? Let us know in the comment section below!
Disclaimer: Some pages on this site may include an affiliate link. This does not effect our editorial in any way.


