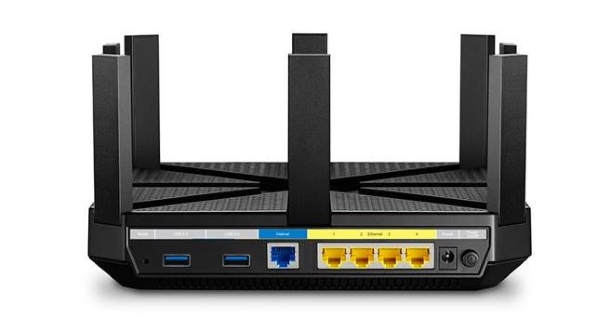
TP-Link routers are a popular choice for home users as they balance features with price and include decent security in the mix. Known more for their WiFi performance than anything else, they make a great addition to a home network. If you own one and want to set up your TP-Link router as a wireless access point, this tutorial is for you.
This is a popular question we see in the TechJunkie mailbox, and it is widely discussed online. I’ll walk you through the entire process from beginning to end, and the result will be a fully functioning access point in your home.
The Differences Between a Router and an Access Point
Before we get to set up, let me clarify the difference between a router and an access point. I think it important to know this so that you can make an informed decision about whether an access point is the right tool for the job.
A router is a piece of hardware or software that forwards packets according to their destination IP address. Basically, it connects devices to other devices, the internet, or other network appliance like a hardware firewall.
What most people are familiar with nowadays are SOHO (Small Office Home Office) routers that usually contain a modem, switch, internet gateway, and wireless access point built into one device. They’re devices that use their own firmware to provide a firewall, port forwarding, NAT (Network Address Translation), DHCP, DNS, and other features. It also may have WiFi capability too.
It uses routing tables (IP tables) to help decide where to send traffic. A router will detect what devices are on your home network and identify them using MAC addresses. It will also find out whether you use a modem or connect straight to your broadband connection and will be able to route internet traffic accordingly.
A wireless access point (WAP) is slightly different. A router can include a WAP within it, but there are also standalone WAP devices, often seen in schools and businesses along the top of the ceiling. These act as a wireless gateway onto your network that can be used to extend the wireless network or provide wireless access if your router doesn’t have WiFi.
Where a router can intelligently route traffic using IP tables and perform switching, DHCP, DNS, and other intelligent features, a WAP cannot. It acts merely as an access point for wireless devices to access the network. It cannot route traffic; it just sends everything to the router.
Think of a router as an interchange and the wireless access point as an on-ramp. The on-ramp sends all traffic in one direction towards the interchange. It’s the interchange’s job to send all traffic to the destinations they want to go.
Setting up a TP-Link Router as a Wireless Access Point
Most wireless routers can be configured as a full router or as just a wireless access point. In this tutorial, we’re doing the latter. We will configure a TP-Link router as a wireless access point to act as a range extender as well as a WAP.
You will first need to connect your TP-Link router to your main router via Ethernet. You can use WiFi if you prefer, but the configuration is slightly more difficult. Plus, if your main router has WiFi, using another router purely as a range extender is like hitting a peanut with a sledgehammer. Slightly over the top.
- Connect your TP-Link router to your main router using Ethernet.

- Power your TP-Link router on and let it communicate with your main router.
- Once the link light goes green, you have a connection and are ready to configure.
- Connect a computer directly to the TP-Link router using Ethernet.
- Open a browser and type the IP address on the label of the router. This is usually 192.168.1.1 or 192.168.0.1. You should see the TP-Link screen appear.
- Log in using the credentials also on the router, usually admin and admin. The credentials are often printed on the bottom of the device.
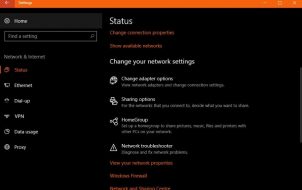
- Now, select Network > LAN.
- Configure your TP-Link router manually to an address within your home network.
- Save your change. You will be kicked out of the admin screen; that’s normal.
The IP address is important. If your main router uses a DHCP range of 192.168.1.10 to 192.168.1.100, you will want to configure the TP-Link router outside this range but within the same subnet. For example, assign it 192.168.1.210. This ensures the two routers can communicate, but there won’t be any IP address conflicts.
- Log back into your TP-Link router using the new IP address.
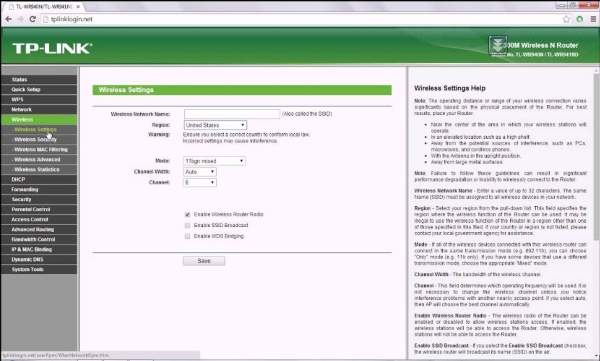
- Select Wireless and Wireless Settings from the menu.
- Set your SSID to something different from any WiFi network you may already have configured, and select Save.
- Select Wireless Security and make sure WPA2 Personal is enabled.
- Set a wireless password and make it a good one. Save the password.
- Select DHCP > DHCP Settings and select Disable. You only need one DHCP server per network, and your main router should do that job.
- Select Save.
- Next, select System Tools and then Reboot.
- Allow the TP-Link router to reboot and give it a minute to reload its config.
- Disconnect your computer from Ethernet and try to connect to the internet using WiFi.
Use the SSID and password you just set up on the TP-Link router, and you should have internet access!
Wireless Networks
Although it can seem like a daunting task, setting up a second router as a wireless access point isn’t that complicated. Once you know what the alphabet soup of acronyms stands for, computer networks aren’t anything to be intimidated by. If you’re having issues, ensure that you’ve plugged the two routers together with a LAN port on both, and then check that DHCP is off for your router that’s acting as the wireless access point.
Disclaimer: Some pages on this site may include an affiliate link. This does not effect our editorial in any way.