If you’ve ever tried to transfer a large file between two devices using Bluetooth, you know how slow and painful the process can be. It doesn’t get any easier with email, either, as many email providers limit the size of the files you can transfer from one address to another. Sometimes, the physical (and direct) solution is the best way forward.
That’s where Ethernet cables come in, offering a direct and high-speed connection between two devices that’s perfect for transferring large files. Let’s look at how to transfer files via Ethernet between two PCs, two Macs, and a PC and a Mac.
How to Transfer Files Over Ethernet from PC to PC
You don’t need a lot of equipment to transfer files for Ethernet between two PCs that run Microsoft Windows. A pair of PCs and a decent Ethernet cable (ideally Category 5 or Category 6 for high-speed transfers) does the job.
Once you have what you need, these steps allow you to connect your devices to the same network:
- Connect the PCs using the Ethernet cable by plugging one end of the cable into the Ethernet port of the first device, with the second end going into the second device.
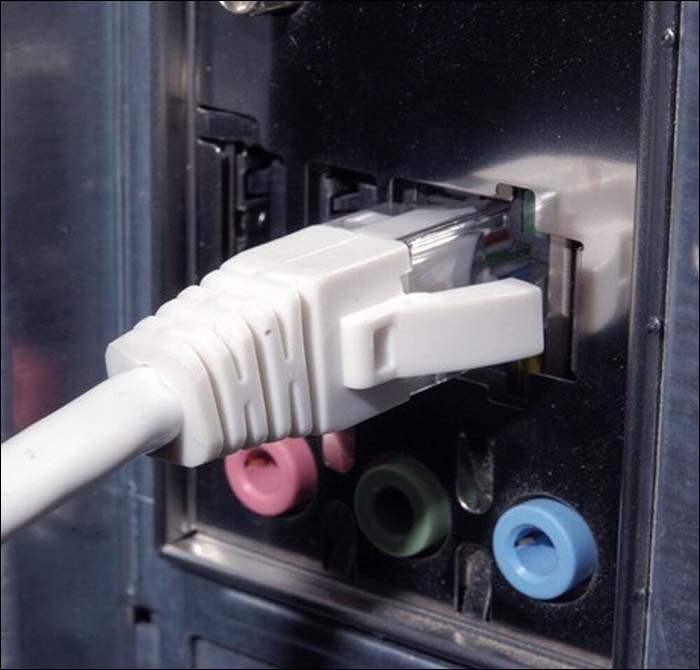
- Ethernet ports are the same across all devices so you don’t have to worry about which way round to use the cable.
- Using the device from which you want to make the transfer, click the “Start” menu button and type “Control Panel” into the search bar.

- Select the “Control Panel” icon and navigate to “Network and Sharing Center.”
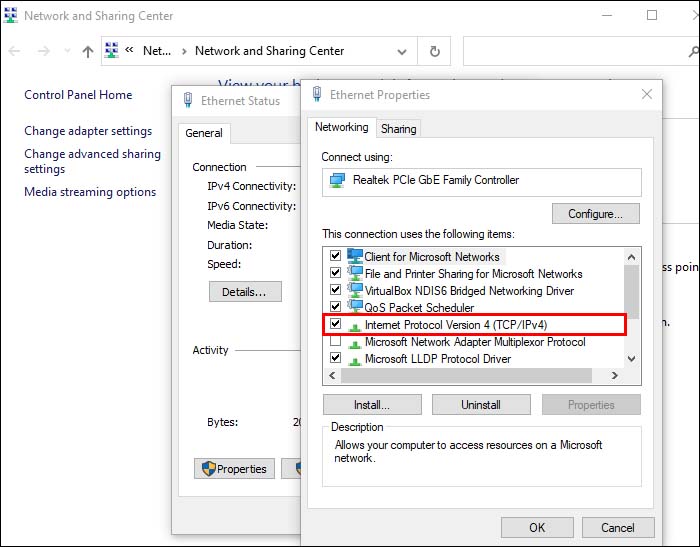
- Click on “Ethernet,” followed by “Properties” and “Internet Protocol Version 4 (TCP/IPv4).”
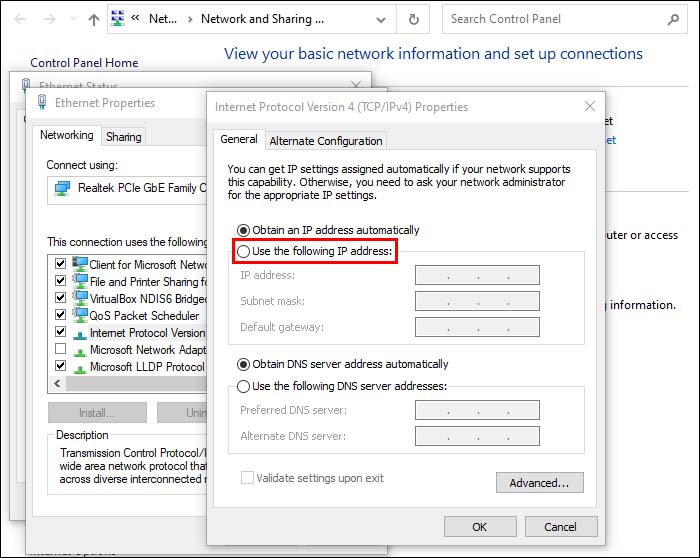
- Choose “Properties” and click “Use the Following IP Address.”
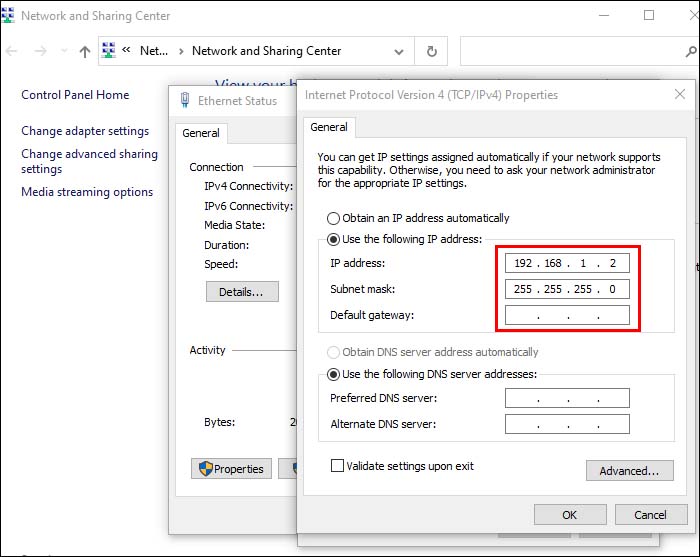
- Enter the below values for your IP address and Subnet mask:
- IP Address – 192.168.1.2
- Subnet Mask – 225.225.225.0
Repeat these steps on your second PC and you form the connection between them. Next, you need to enable file sharing via the PC you’ll use to transfer the files:
- Navigate back to “Control Panel” and select “Network and Internet.”
- Click “Network and Sharing Center,” followed by “Change Advanced Sharing Settings.”
- Turn “Network Discovery” on, along with “File and Printer Sharing” and “Sharing So Anyone with Network Access Can Read and Write Files in the Public Folders.”
- If you don’t want to enter your password every time you share a file, click “Turn Off Password Protected Sharing.”
Finally, you’re ready to share your file from one PC to another via your Ethernet cable:
- Navigate to the file you wish to share, right-click, and highlight “Share With.”
- Click “Specific People” to open the file sharing window.
- Choose “Everyone” from the drop-down menu and click the “Add” button.
- Select “Share” to make files transferrable.
- Hold the “Windows” button and press “E” to open “File Explorer.”
- Select “Network” and double-click on the PC that hosts the file you want to share.
- Copy and paste the desired file to the destination PC.
After a lot of steps, high-speed file sharing between PCs is activated and you’re ready to make as many transfers as you like.
How to Transfer Files Over Ethernet from Mac to Mac
You can use the Ethernet ports built into your Mac to transfer files to another Mac. If your Mac doesn’t have an Ethernet port, you can try using a USB adaptor, which allows you to plug an Ethernet port into your Mac via a USB port.
Assuming both Macs have the required ports, use these steps to set up file sharing via Ethernet:
- Connect the Macs using a standard Ethernet cable.
- On the first Mac, navigate to the “Apple” menu and click “System Settings.”
- Select “General” from the sidebar and click “Sharing” from the options on the right-hand side.
- Make a note of the Mac’s name, which you should find on the “Sharing” screen.
- Repeat Steps 2-4 on the second Mac.
- Using either Mac, navigate to “Finder” and select “Go.”
- Choose “Connect to Server.”
- Click “Browse” and double-click the other Mac’s name. You may have to enter your password to form the connection.

Your Macs are now connected and capable of sharing files via your Ethernet cable. You should see the shared folders from each Mac appear on the other Mac’s monitor. You can then copy and paste files from one of these shared folders to a local folder.
The only thing that may stand in your way is a manually configured TCP/IP setting on the Mac to which you connect. If you have manually configured this setting, you may have to enter the other Mac’s TCP/IP address in the dialog box that appears after you click “Connect to Server” in Step 7 of the above process.
How to Transfer Files Over Ethernet from Mac to PC
Connecting a Mac to a PC is surprisingly straightforward, despite the differences in the operating systems at play. However, you’ll need to set each device up for transferring files separately before you can copy and paste between them.
After connecting the Mac and PC via an Ethernet cable (and turning both devices on), follow these steps on your PC:
- Click the “Start” menu button and enter “Settings” into the search bar.
- Open the “Settings” menu and select “Network.”
- Locate your Ethernet connection and select “Turn Sharing On.”
- Click “Yes, Turn On Sharing and Connect to Devices.”
- Right-click on the “Start” screen’s background to open the Windows taskbar.
- Select “All Apps” and right-click “Computer.”
- Click “Properties” and jot down the Workgroup name and Computer name, both of which you’ll need when creating the connection on the Mac’s end.
Your Windows PC should now be ready to connect to the Mac, though some users may have to complete a couple of extra steps. Check that TCP port 445 is open on your PC and turn off the “Internet Connection Firewall,” assuming it’s currently active.
When you’re ready, move on to your Mac and follow these steps:
- Navigate to the “Finder” icon on your Mac and click “Go.”
- Choose “Connect to Server” and select “Browse.”
- Located and click on the Computer name you noted earlier from the list of options.
- Select “Connect As” and enter the Workgroup name. You may also have to enter your username and password if prompted.
- Click “Remember This Password in My Keychain” so you can connect the two devices easier in the future.
With the connection established, you need to set up file sharing on your Mac:
- Click the “Apple” icon and select “System Preferences.”
- Choose “Sharing” and put a check in the box next to “File Sharing.”
- Press the “Options” button and check “Share files and folders using SMB” in the resulting window.
- Navigate to the “Windows File Sharing” section and check the box next to each user whose files you wish to share.
- Click “Done.”
- Once back in the “Sharing” window, click the “+” icon next to the folders you wish to share with your PC.
- Check the “File Sharing: On” message and make a note of your Mac’s IP address.
Finally, you’re ready to access your Mac’s files on your PC, though you’ll need to map a network drive to your PC to enable transferring over Ethernet:
- Open “File Explorer” and click on the address bar located at the top of the window.
- Enter “\\” followed by your Mac’s IP address. There’s no space between the “\\” and the first number of the IP address.
- Type in the relevant username and password for your Mac when prompted.
- You should see all of the folders you chose to share when setting up file sharing on your Mac. Right-click the folder you wish to access and choose “Map Network Drive.”
- Select a drive letter from the list, making sure to pick one that isn’t already in use.
- Check “Reconnect at Sign-In” if you want to connect to this folder every time you log into your PC.
With that connection established, you can drag and drop folders and files from the new network drive into your PC’s local storage.
Get Connected with Ethernet
Unfortunately, transferring files using an Ethernet cable isn’t as simple as plugging the cable in and getting an automatic connection. No matter what devices you use, you have to go through several steps to both set up the connection and enable file transfer.
Are the higher speeds worth it for the steps you have to take? How often do you think you’ll need to transfer files between your devices? Tell us what you think in the comments section below.
Disclaimer: Some pages on this site may include an affiliate link. This does not effect our editorial in any way.


