Using your iPad as a webcam for video calls is a great idea. If your webcam has stopped working, your iPad can serve as an excellent backup; or if you’re looking for better picture quality. Not only is an iPad or iPhone camera better than a webcam, but you’ll also have the option to move around, as opposed to being confined to your PC or laptop desk.
Luckily, setting this up is pretty straightforward. There are plenty of apps available to turn your iPad into a webcam. Then once you use a Wi-Fi network to connect to your iOS as a webcam, away you go! Read on to find out how to use your iPad as a webcam.
How to Use an iPad as a Webcam for PC
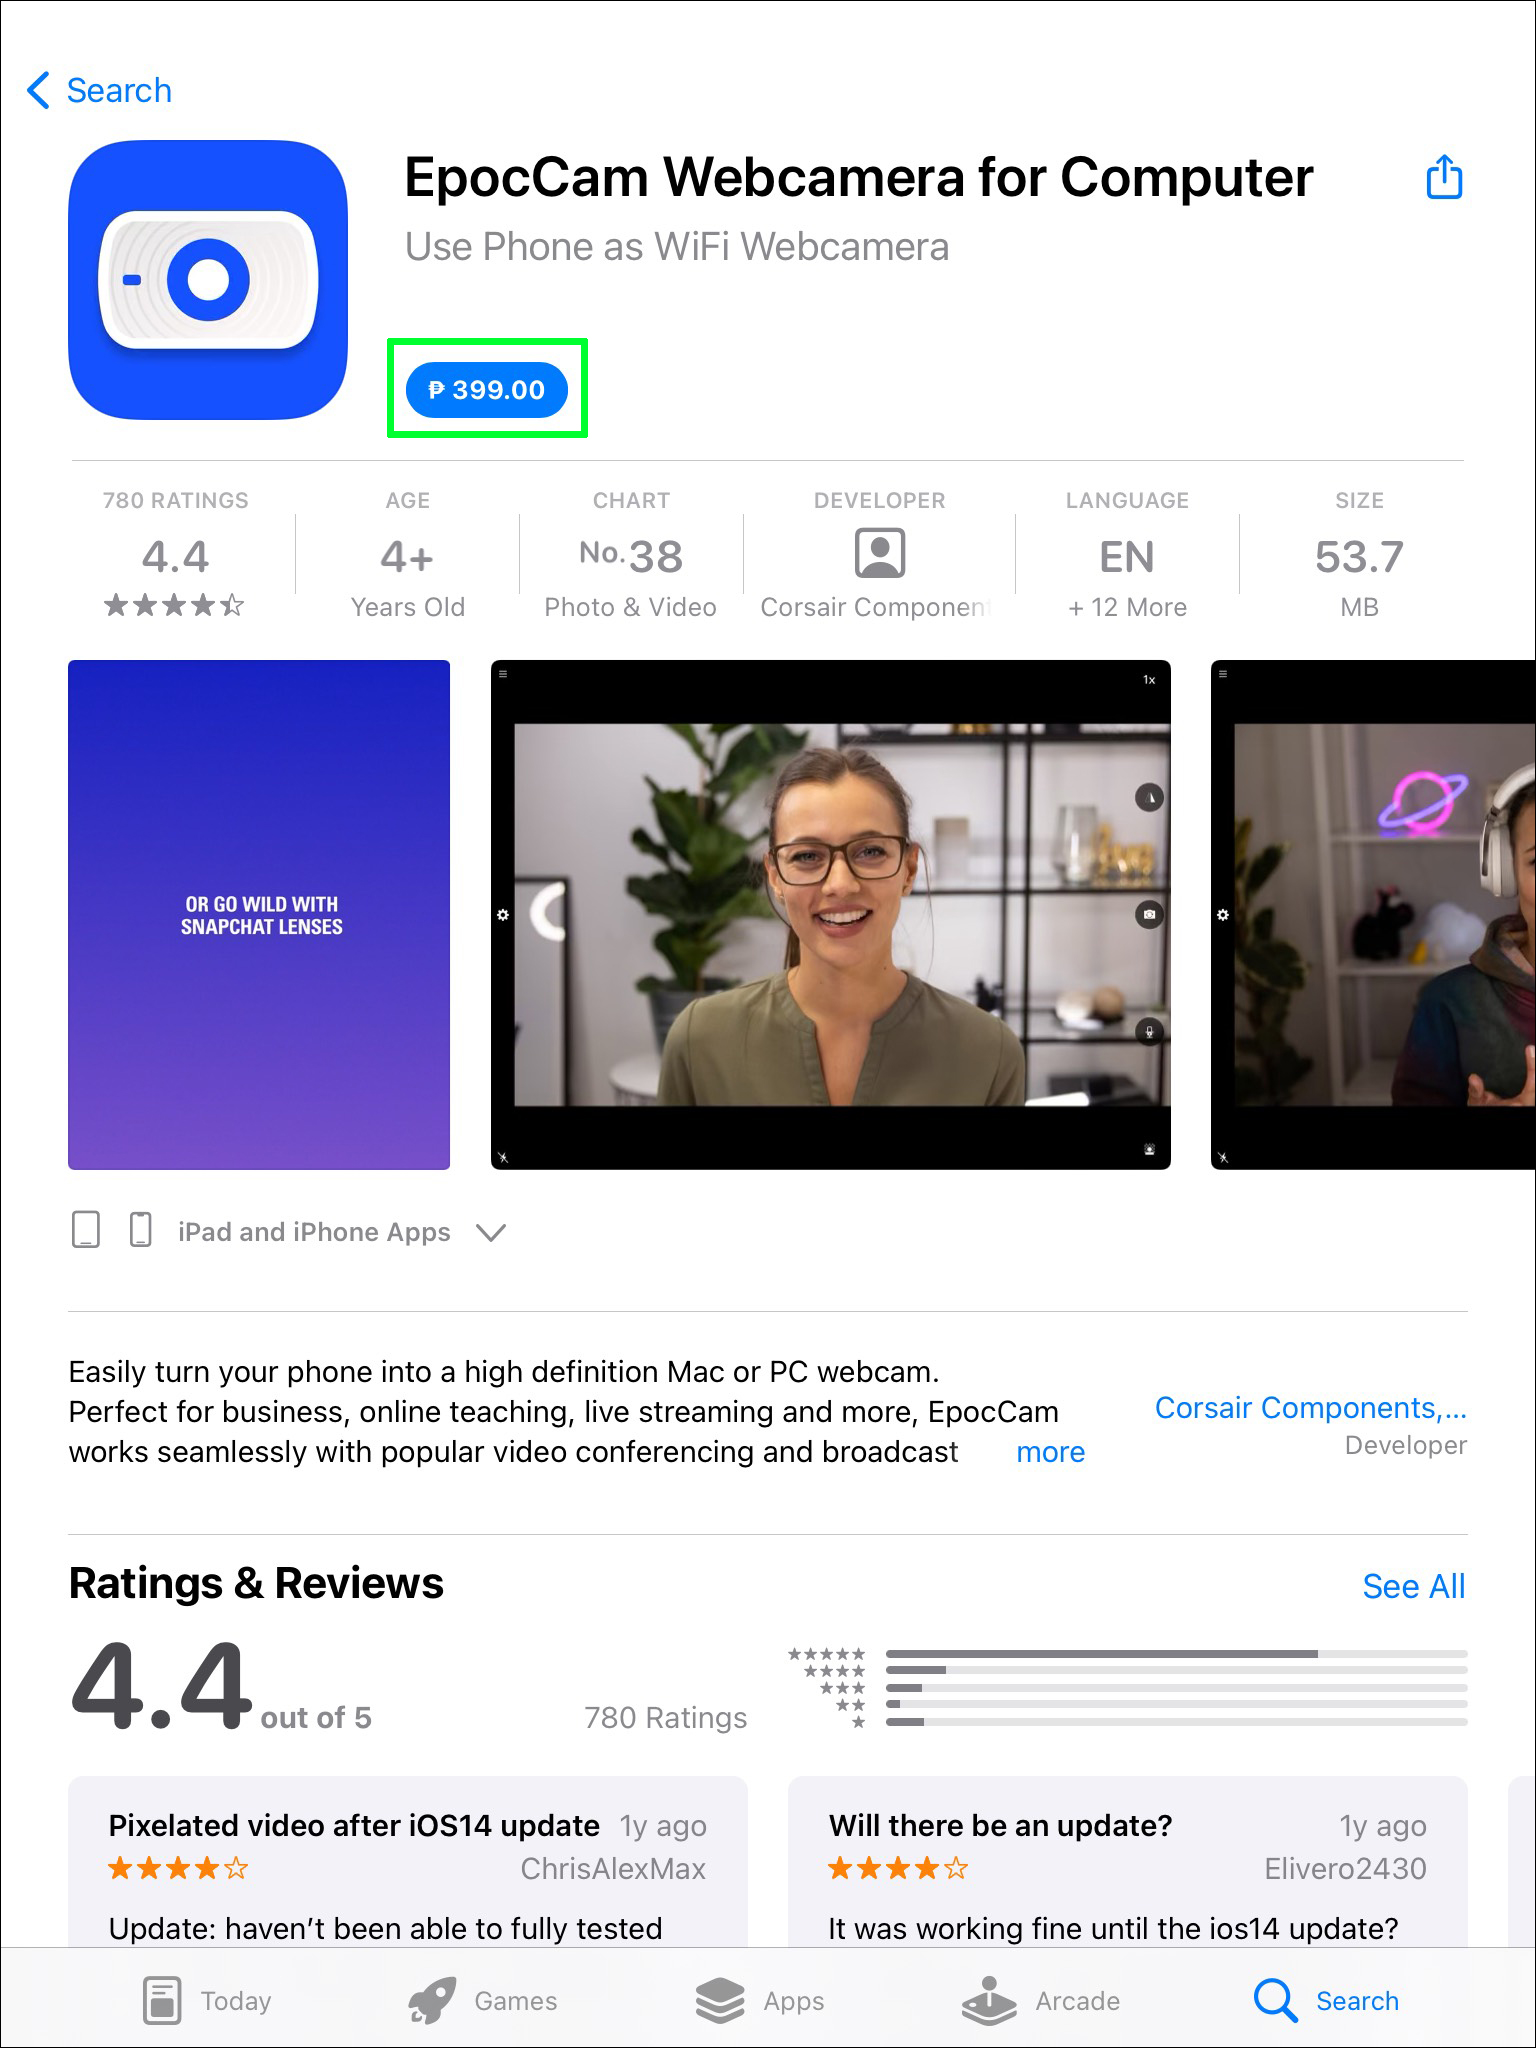
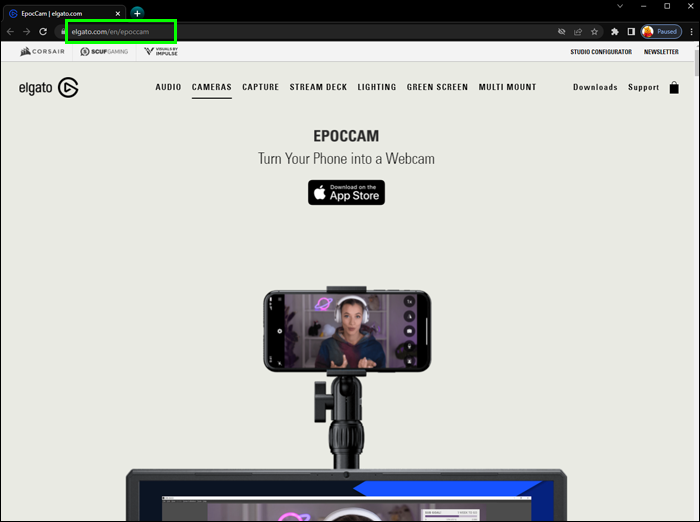
With EpocCam installed on your iPad, iPadOS 13 or later installed, and the necessary drivers, you can “Turn your iPhone into a webcam.” EpocCam supports video and audio and comes in a free and paid version. The free version offers 640×480 video resolution with a watermark on the video. Follow these steps to start using your iPad as a webcam with EpocCam:
- Visit the App Store to download and install the “EpocCam” app on your iPad.
- Next, visit Elgato.com to install the necessary drivers for your PC.

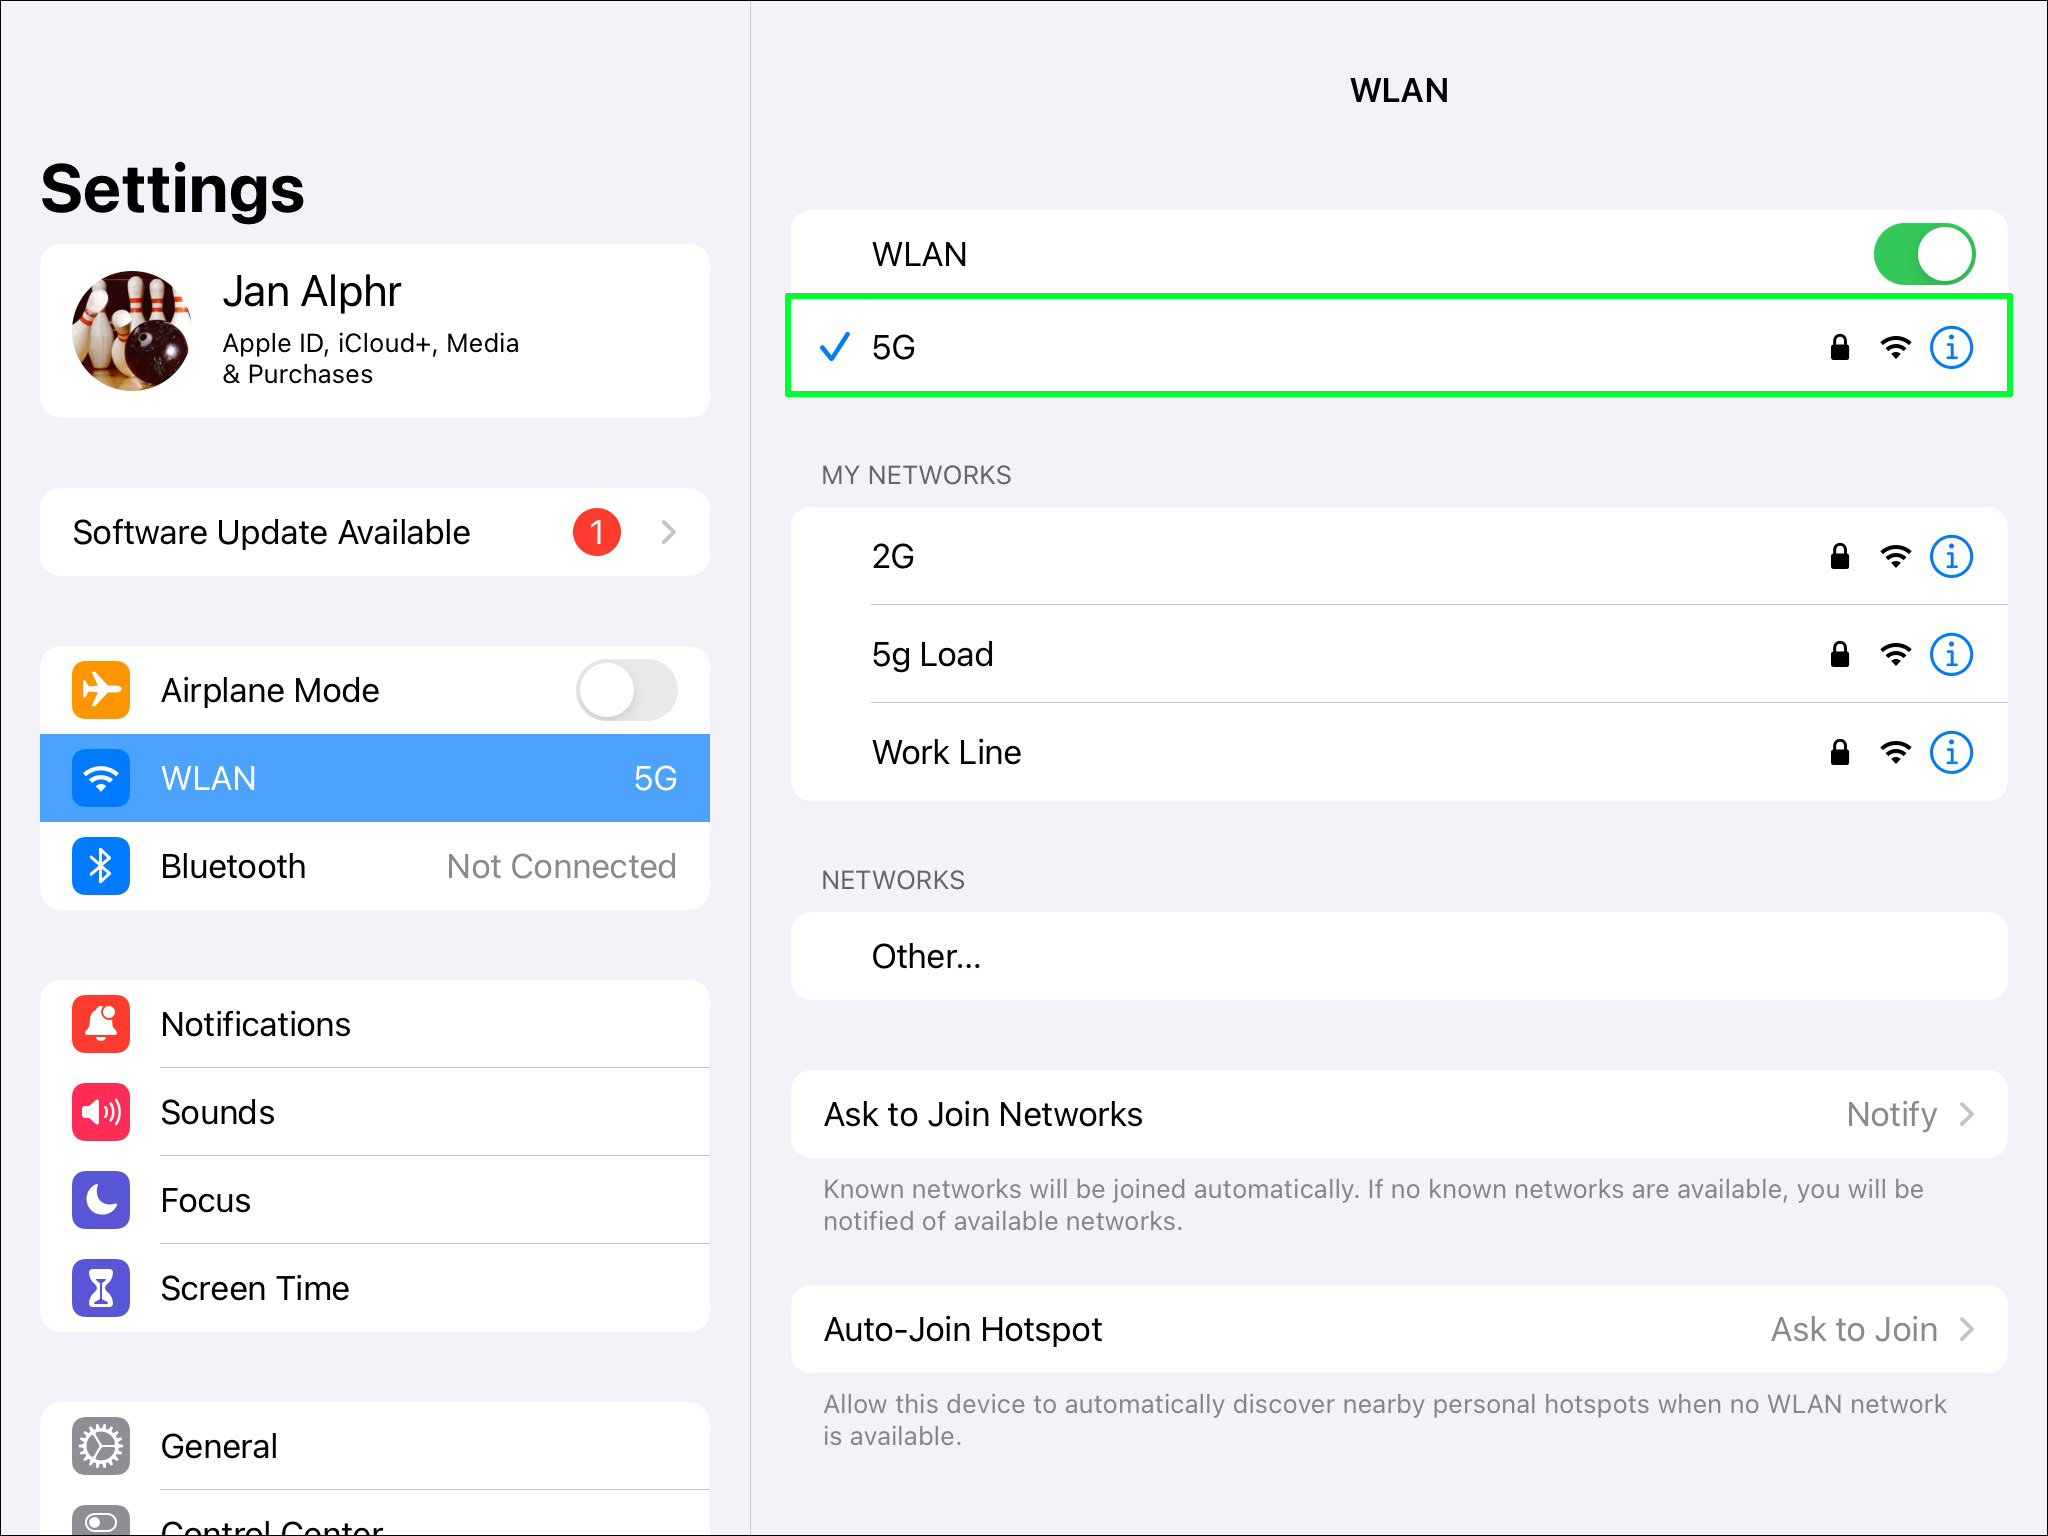
- Now ensure your iPad and PC are connected to the same Wi-Fi or LAN network.
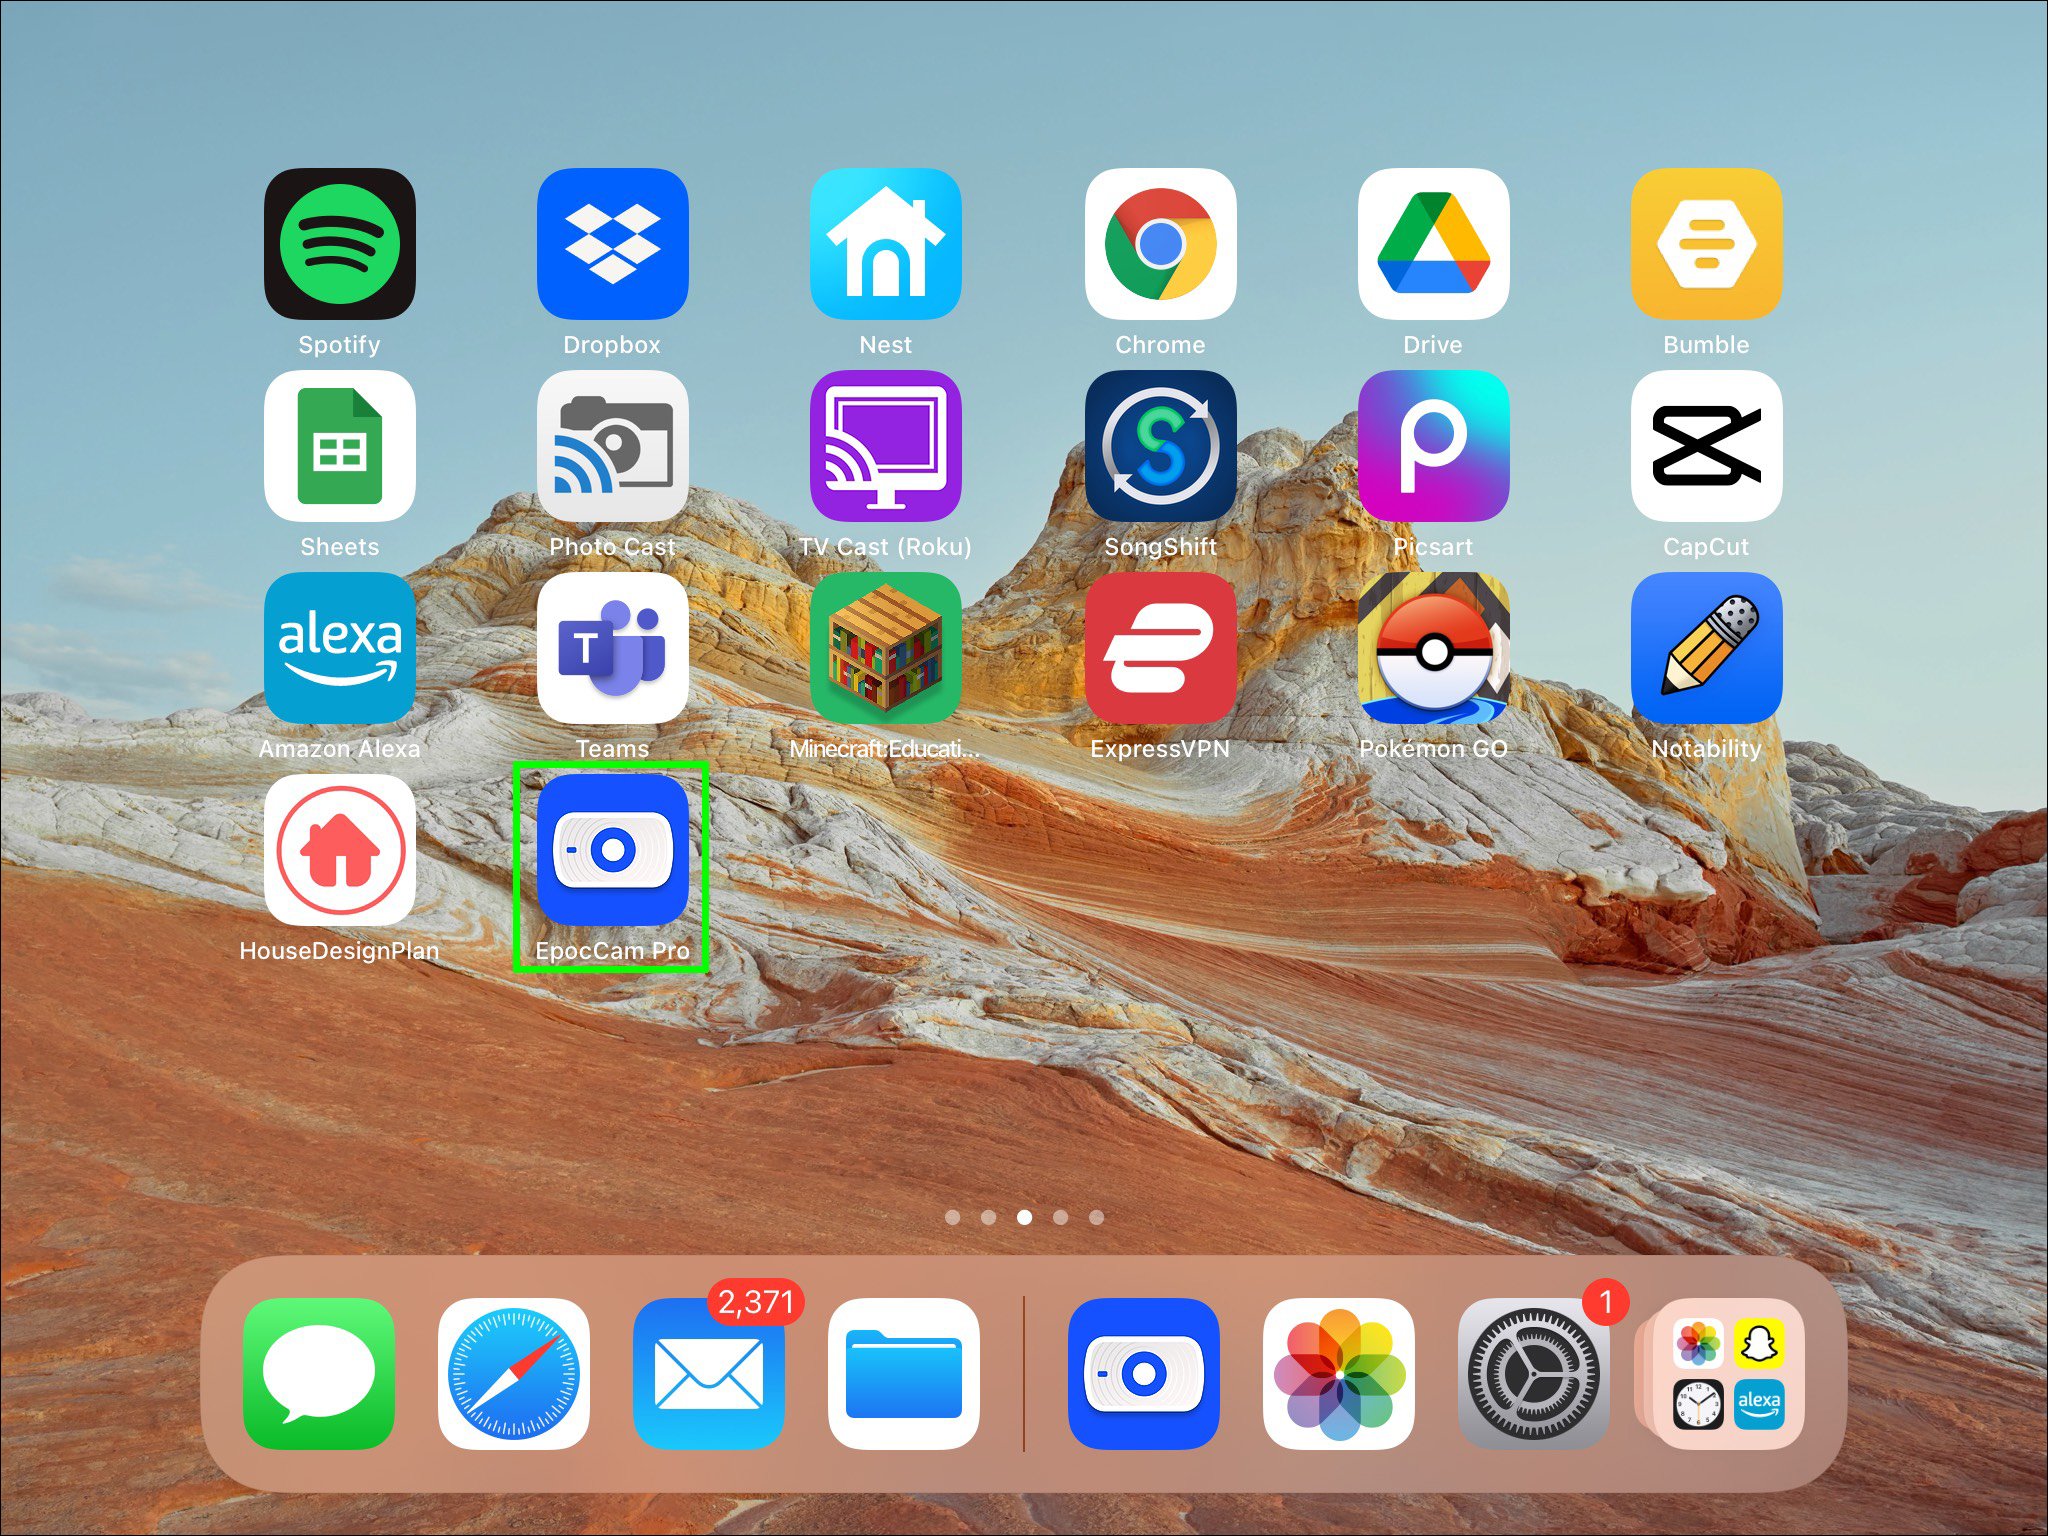
- Open “EpocCam” on your iPad, then launch the video conferencing app you’ll use on your PC.
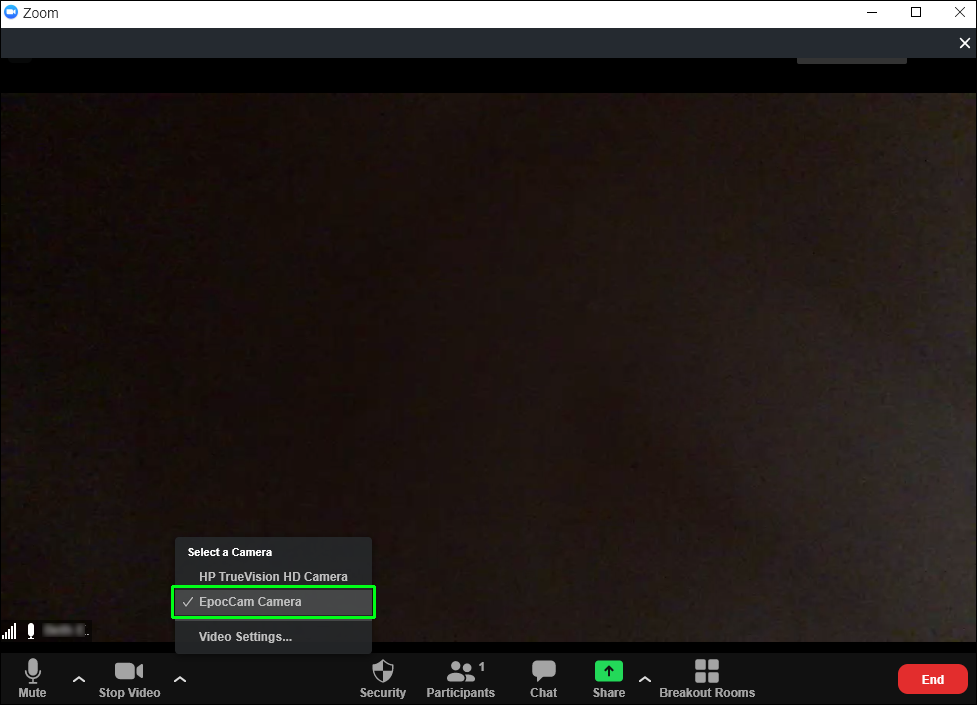
- Be sure to select “EpocCam” in your camera settings. You should see a notification on your computer confirming “EpocCam” is connected using Wi-Fi.


How to Use an iPad as a Webcam for a Windows PC
You can turn your iPad into a webcam to use on Windows 10 by installing the “EpocCam” app. “EpocCam” supports both video and audio and is available in free and paid versions. However, the free version will include a watermark on the video and have a video resolution of 640×480. Follow these steps to set this up:
- Ensure iPadOS 13 or later is installed on your iPad.
- Visit the App Store to install “EpocCam.”
- Navigate to Elgato.com to install the drivers required for Windows 10.
- Ensure that your iPad and PC are connected to the same LAN or Wi-Fi network.
- On your iPad, launch “EpocCam,” then on your PC, open the video conferencing app.
- Ensure “EpocCam” is selected in your camera settings. You’ll see a notification on your PC confirming “EpocCam” is connected.
How to Use an iPad as a Webcam for a Mac
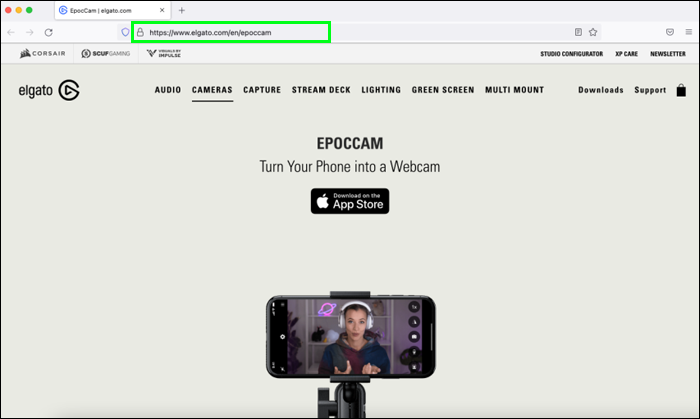
By installing “EpocCam” on your iPad with iPadOS 13 or above installed, you can turn it into a webcam for your Mac. “EpocCam” supports video and audio and comes as a free and paid version. The free version will include a watermark on the video and a resolution of 640×480. Here are the steps to get started:
- Using your iPad, visit the App Store to install “EpocCam.”
- Visit Elgato.com to install the drivers required for your Mac.
- Ensure your iPad and Mac are connected to the same Wi-Fi network.
- Launch “EpocCam” on your iPad, then open the video conferencing app you’ll use on your Mac.
- Ensure “EpocCam” is selected in your camera settings. You’ll receive a notification on your computer confirming “EpocCam” is connected using Wi-Fi.
How to Use iPad as a Webcam for a Mac Without an App
Here’s how to use your iPad as a webcam for Mac without installing “EpocCam” or a similar app:
- First, on your Mac, go to obsproject.com for your free version of OBS Studio.
- Once OBS is downloaded and installed, a dialog box will pop up, which you can ignore.
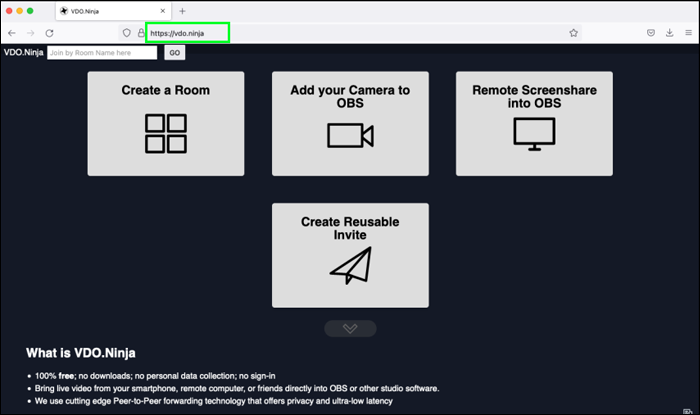
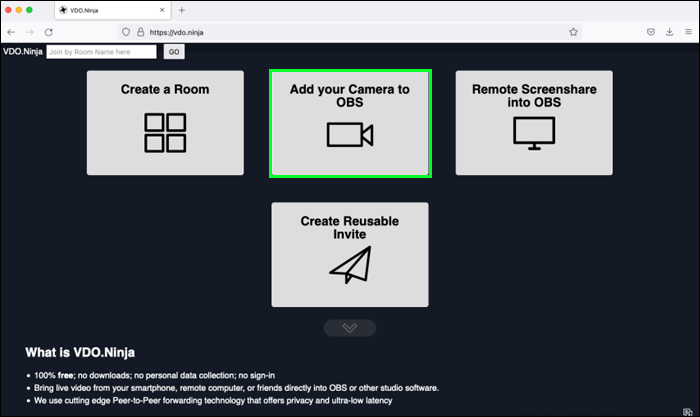
- Next, you’ll need to tell OBS that you’ll use your device as a webcam. To do that on your device, go to vdo.ninja.
- Once it opens, click on the “Add your Camera to OBS” option. Give permission if requested.
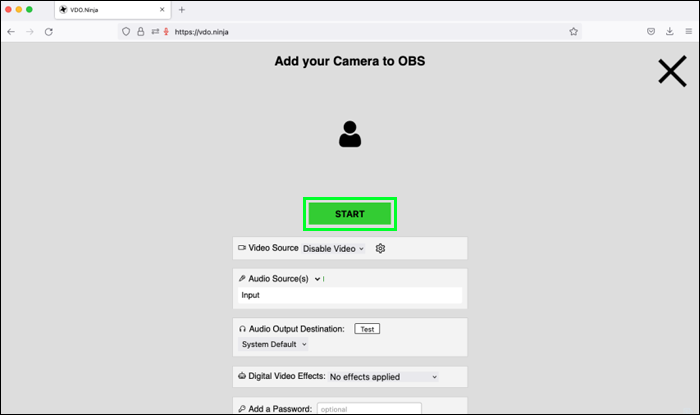
- Beneath the screen that appears hit “Start.”
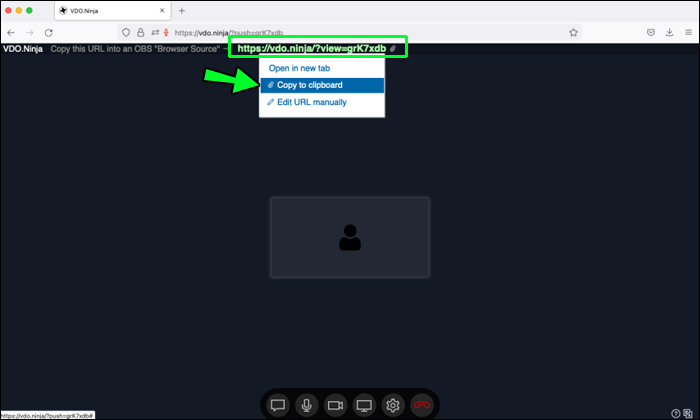
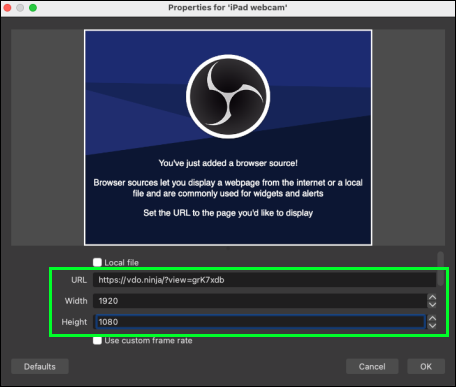
- Then towards the top right corner of the screen, you’ll see a URL. You’ll need this later to enter in OBS, so either copy it to your clipboard or write it down.
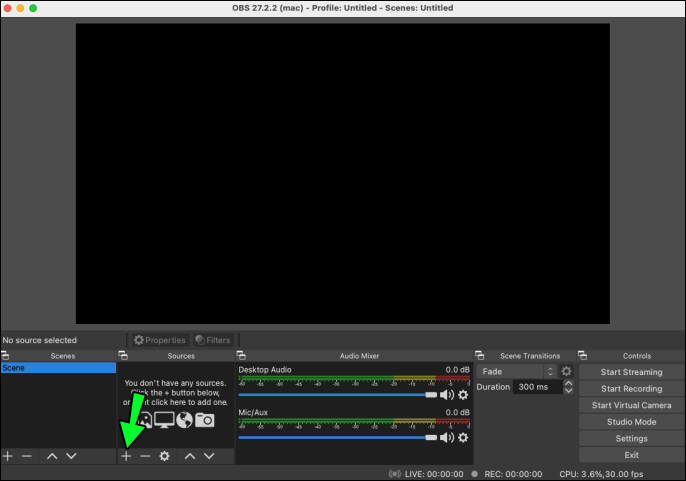
- Back in the OBS program on your Mac, select “Sources” towards the bottom of the screen, then click on the little “+” sign.
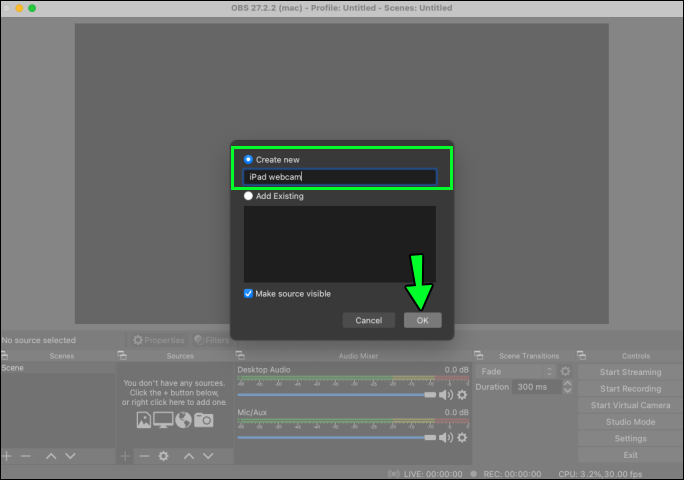
- From the list of options, select the “Browser” option, then enter something like “iPad webcam” in the “Create new” text field, then “OK.”
- Enter or paste the URL from step 6 into the “URL” text field on the next screen. In the “Width” text field, enter 1920 and 1080 as the “Height.”
- Next, enable the checkbox that says “Control audio via OBS.”
- Use the scroll bar on the right to scroll towards the bottom of that section, then enable “Refresh browser when the scene becomes active check box and click “OK.”

iPad to the Rescue
iPad to the rescue, if your webcam doesn’t work or the picture quality on the one you’re using isn’t great. Luckily, you can turn your iPad into a mobile webcam by installing an app like EpocCam on it. “EpocCam” supports video and audio and has a free and paid version. Even though the free version will include a watermark on the video, the overall picture quality will likely be better than your webcam. Another free program to consider is OBS Studio for use across all major devices and operating systems. Plus, it will be watermark-free!
What version of iPad are you using, and what is the picture quality like? How do you think using your iPad as a webcam will benefit you? Share your thoughts in the comments section below.
Disclaimer: Some pages on this site may include an affiliate link. This does not effect our editorial in any way.