VLC is a popular, free, portable quality multimedia app that recognizes and plays most multimedia formats. It converts uncommon audio and video files into universal options like MP4, making devices that support specific file types only more accessible.
If you’re sitting on files that need to be converted to MP4, you’re in the right place.
This article will cover some of the best ways to convert files to MP4 for high output quality via Windows and macOS. Some of the files we’ll cover include multimedia container formats MKV, VOB, and DVD.
How to Convert MKV to MP4 in VLC
To convert your MKV file to MP4 using VLC via Windows and macOS:
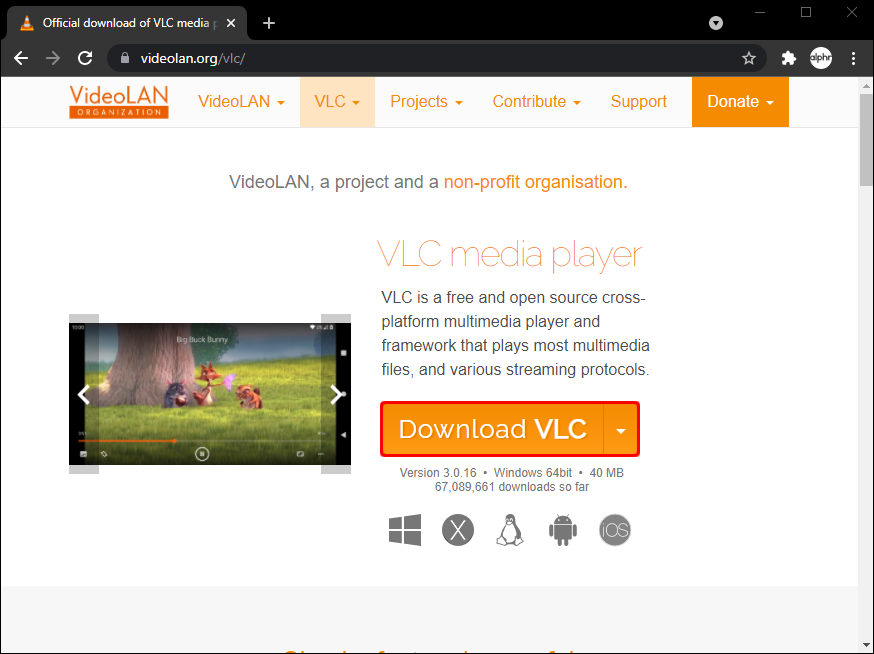
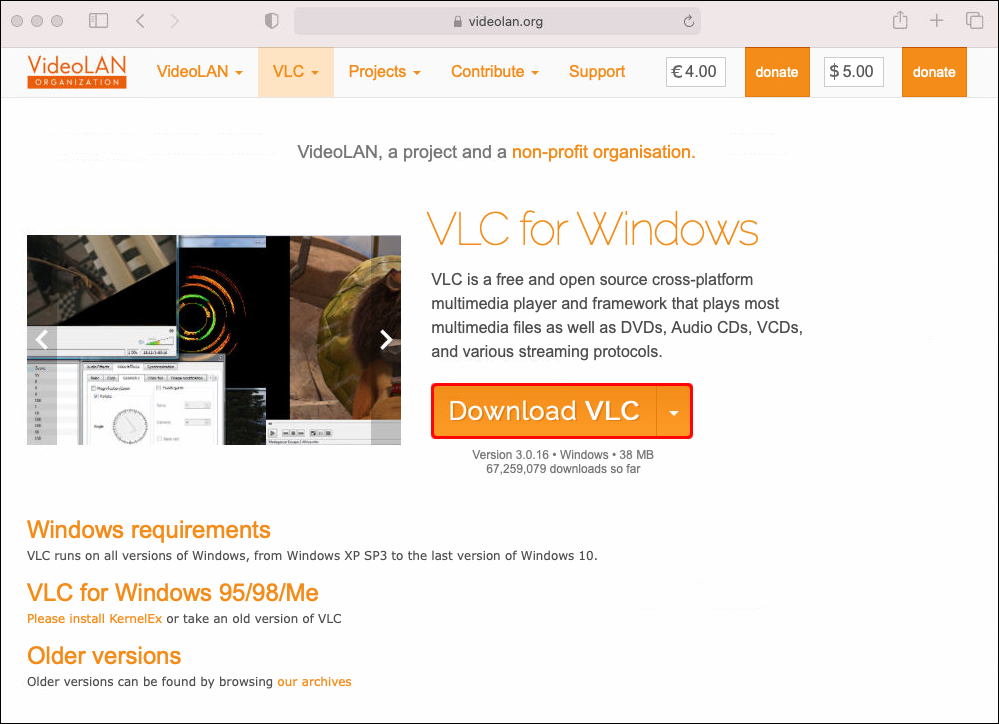
- Go to the VideoLAN official website to download a copy of VLC if you haven’t already.
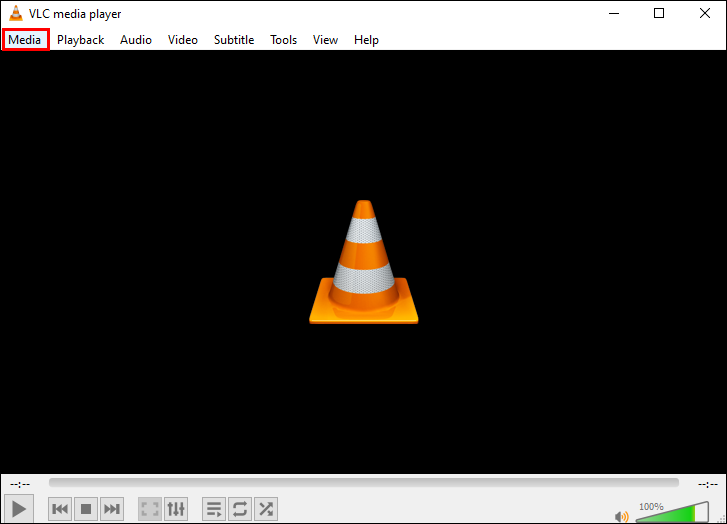
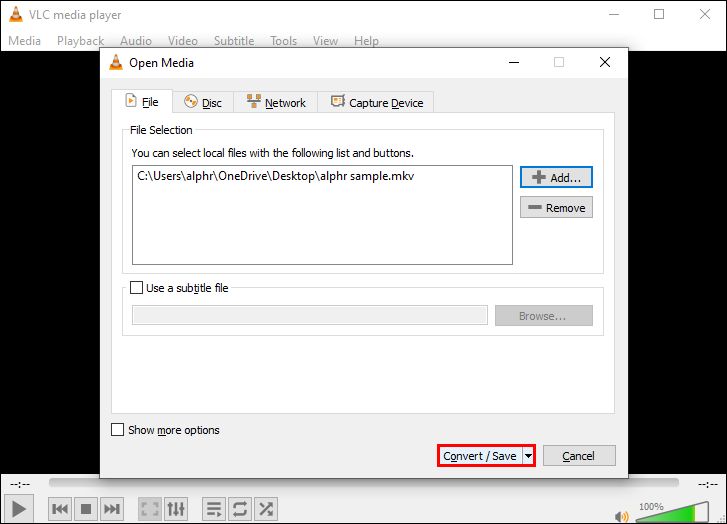
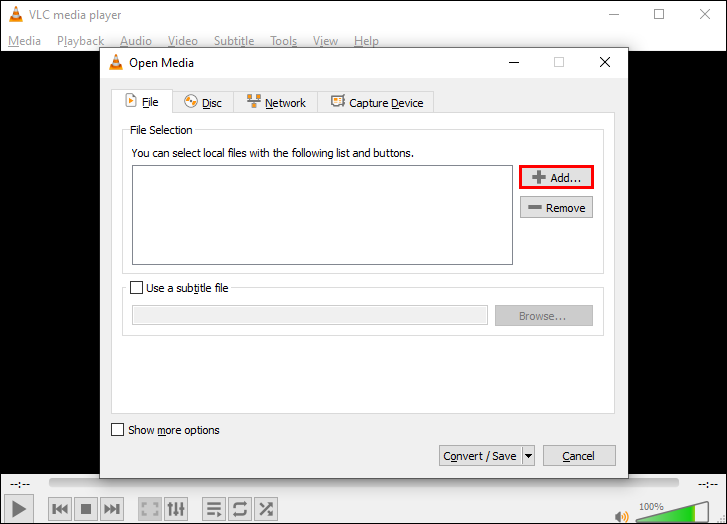
- Open the app and select the “Media” tab from the top left.

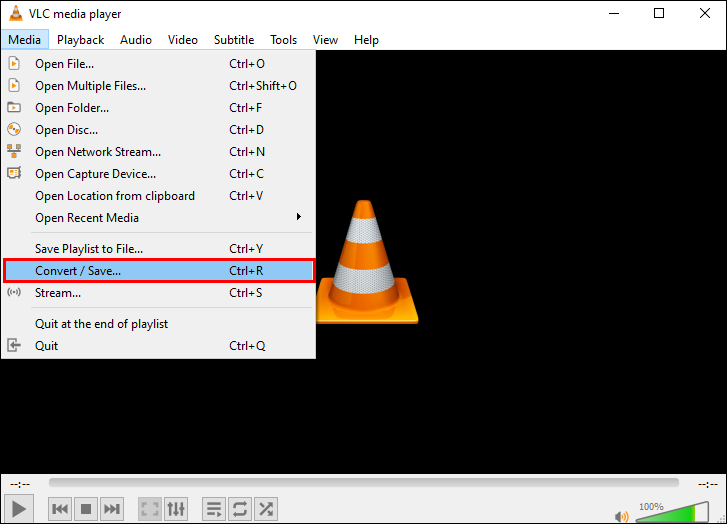
- Choose “Convert/Save” from the options.
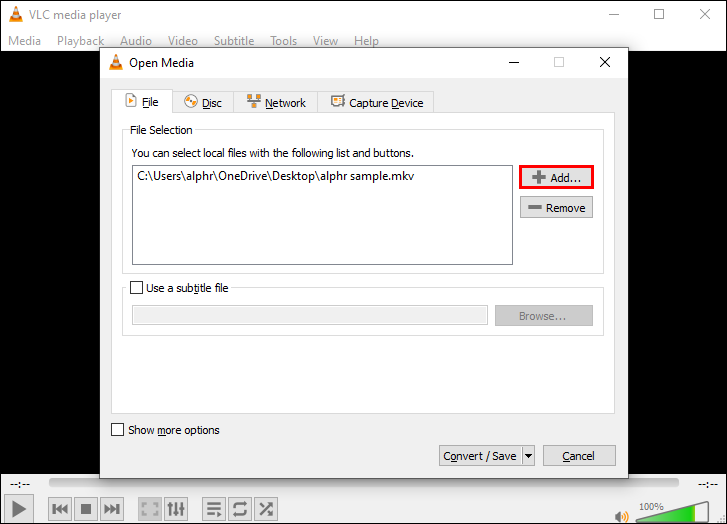
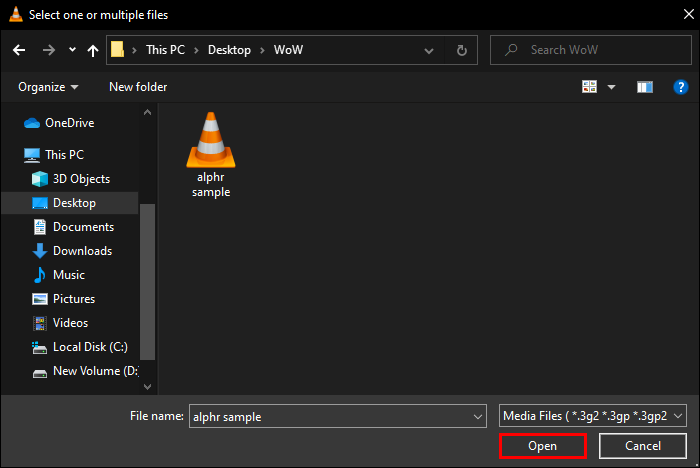
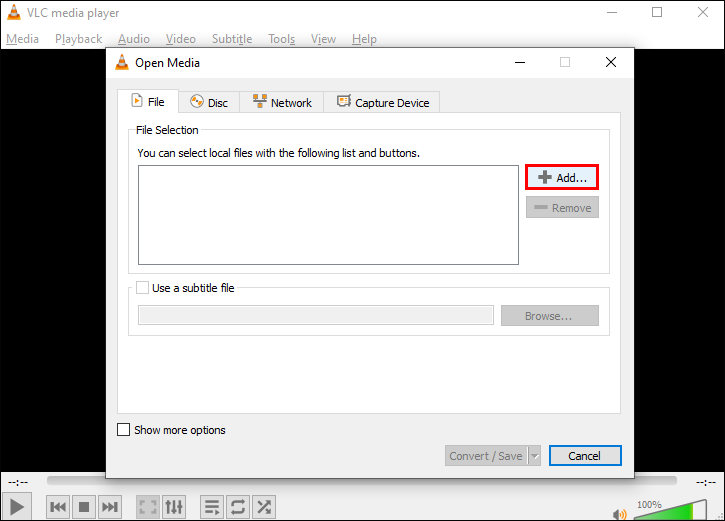
- Click the “Add” button, then find the MKV file you wish to convert.
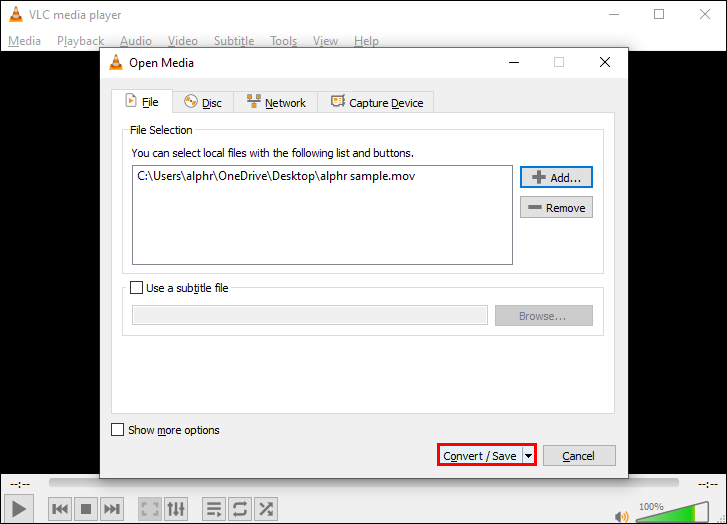
- Once you’ve selected the file, click the “Convert/Save” button at the bottom of the window.
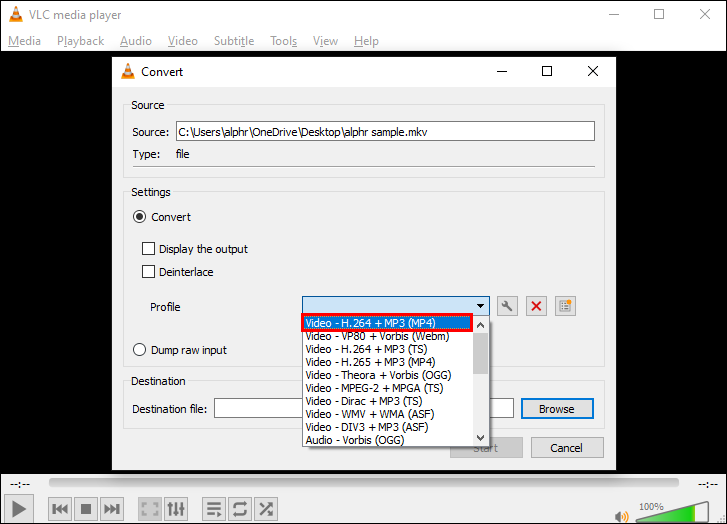
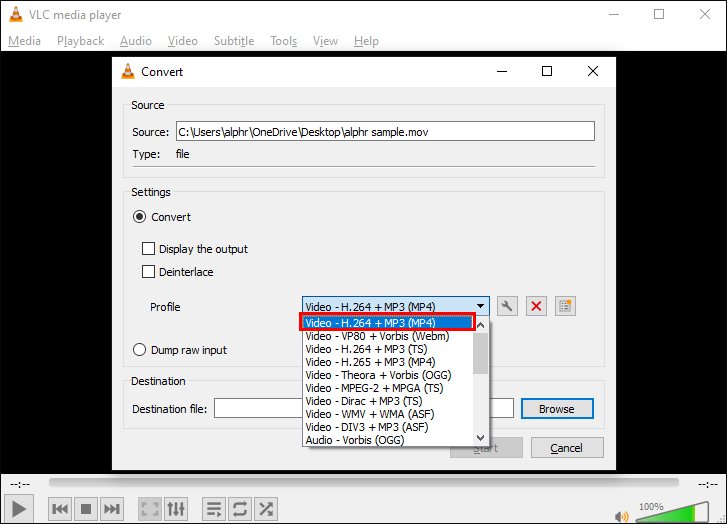
- Use the pull-down menu next to “Profile” to specify the video format – “H.264 + MP3 (MP4) is recommended for an MP4 file.
- (optional) Fine-tune your settings by clicking on the tool icon next to the pull-down menu.
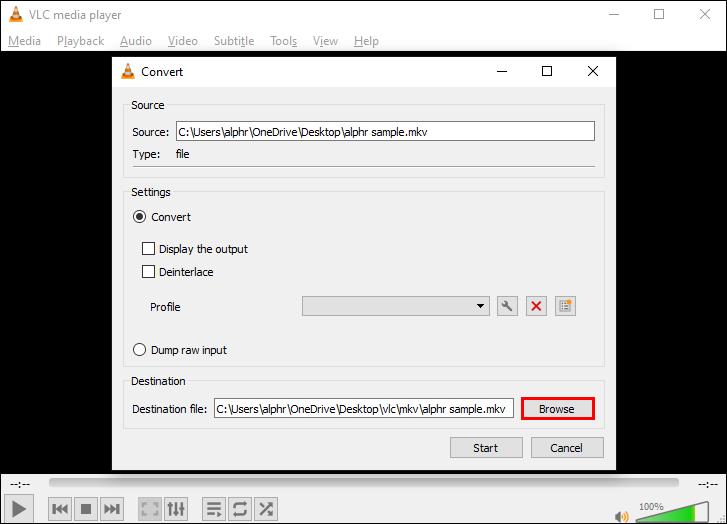
- Beneath “Destination,” choose where you’d like to export your file.
- Select “Start” to begin the conversion.

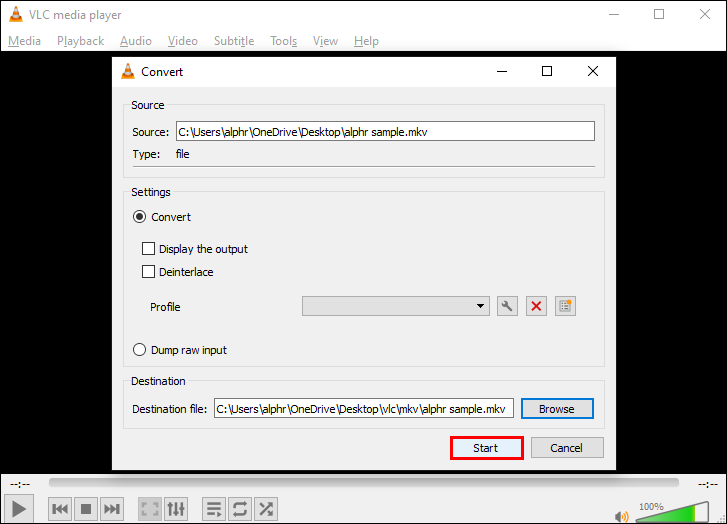
Your MP4 file will go to the specified location once the conversion is complete.
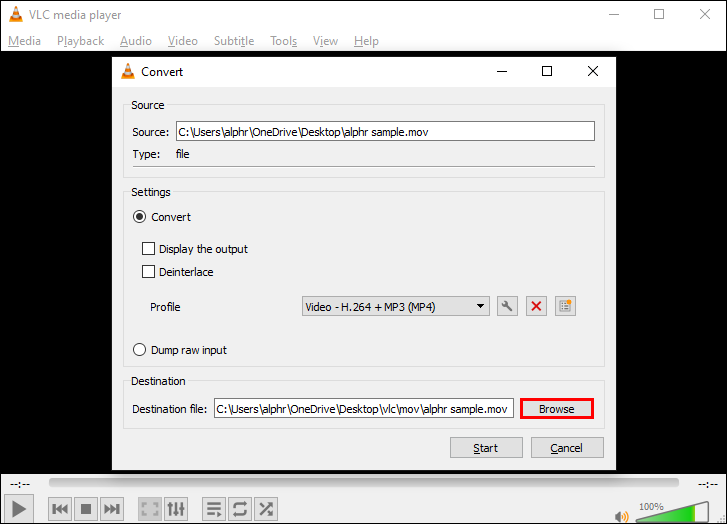
How to Convert MOV to MP4 in VLC
Follow the steps below to convert your MOV file to MP4 format via Windows and macOS:
- Download the VLC software from their official website if you don’t already have the app.
- Launch VLC, then click on the “Media” menu.
- Choose “Convert/Save.”
- In the new window, click on the “Add” button.
- Find the MOV file to import to VLC.
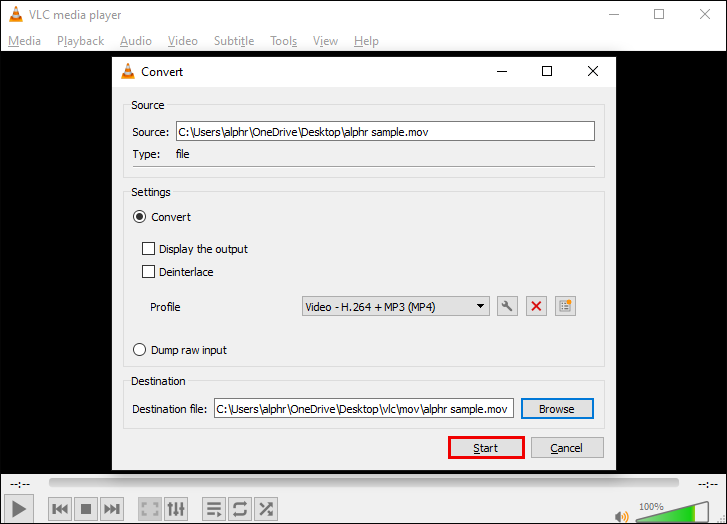
- To start the MP4 conversion, select the “Convert/Save” button.
- From the “Profile” pull-down menu, choose “Video – H.264 + MP3 (MP4).”
- Choose a save location for the converted file.
- Click “Save,” then “Start.”
Once the conversion is complete, your MP4 file can be found in the specified folder.
How to Convert a DVD to MP4 in VLC
Use the steps below to convert your DVD to an MP4 file from Windows and macOS.
From Windows, insert the DVD you wish to convert into your disc drive then:
- Go to VLC’s official website to download the software if you don’t already have it.
- Launch the VLC app.
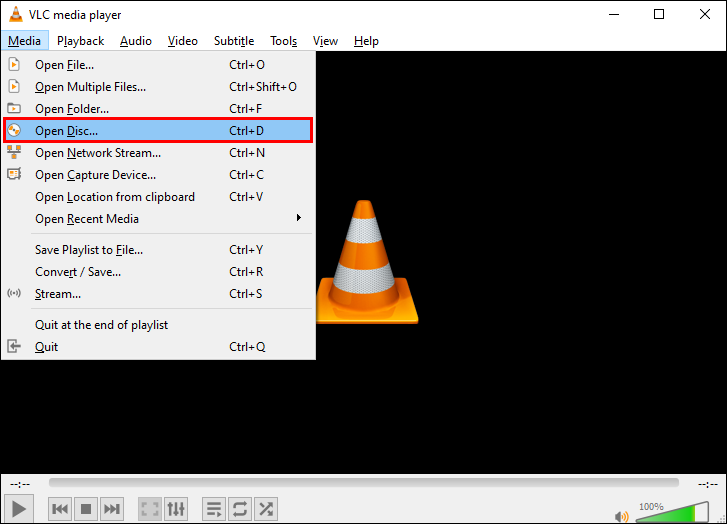
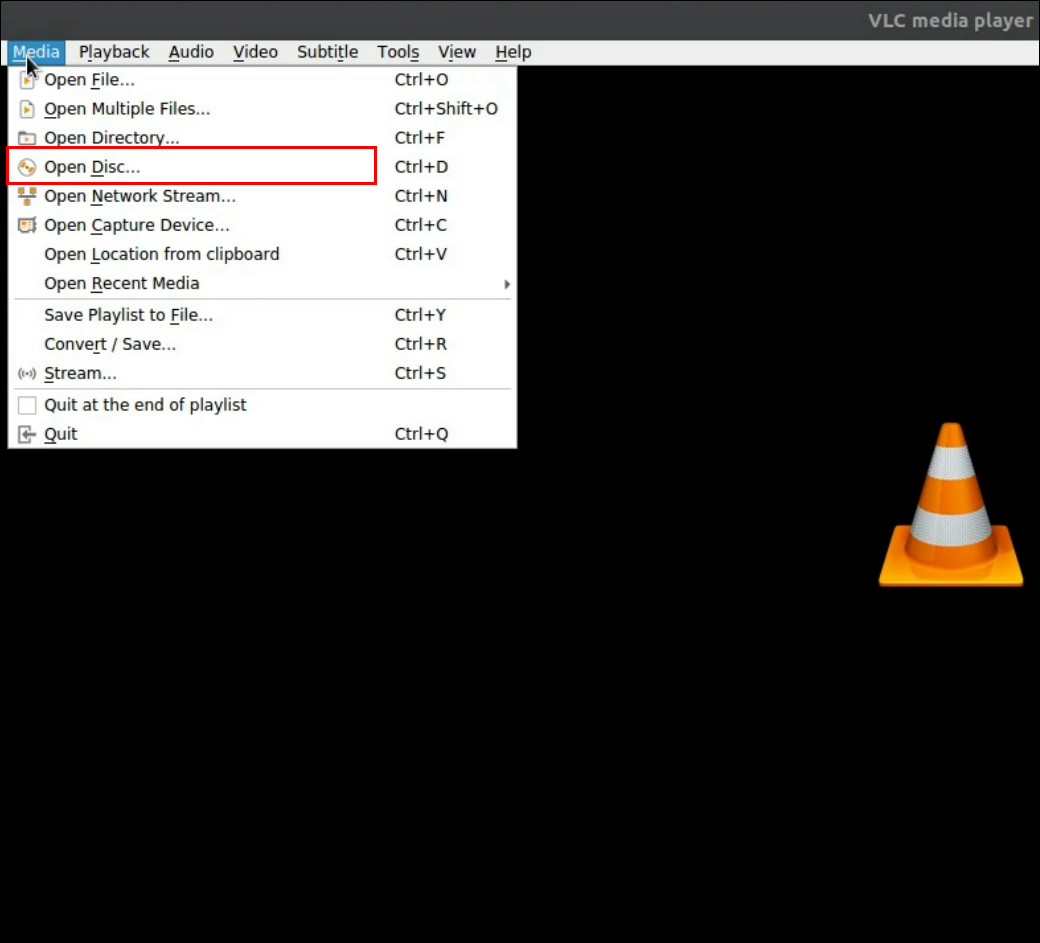
- Click the “Media” tab from the top left corner of the main menu.
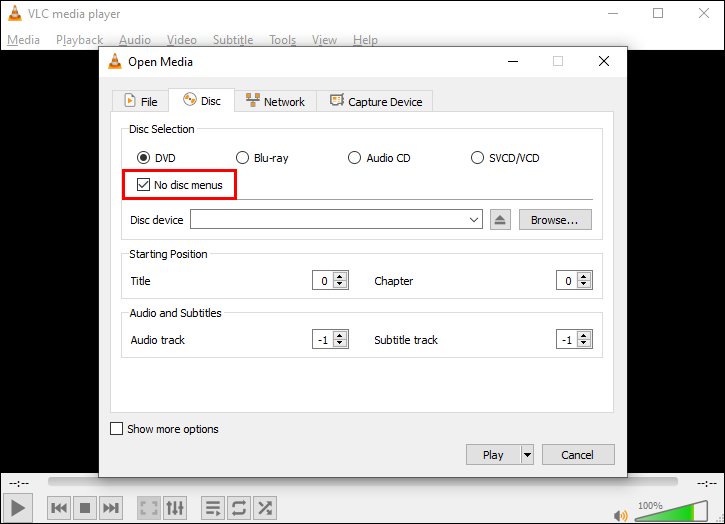
- Select “Open Disc” from the drop-down menu.
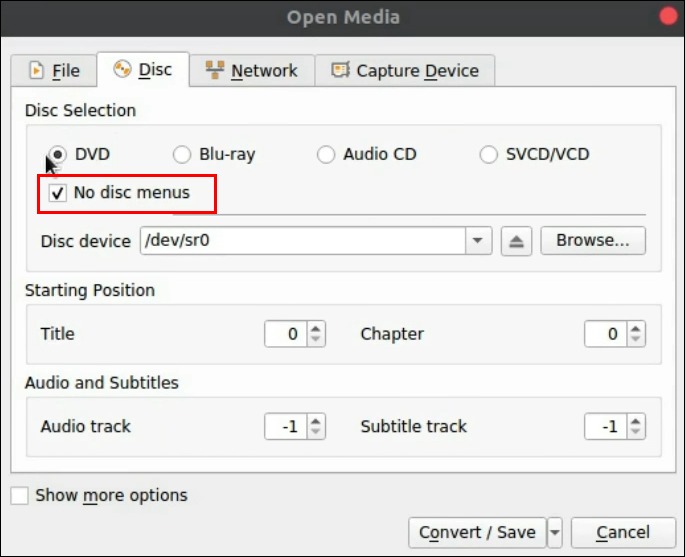
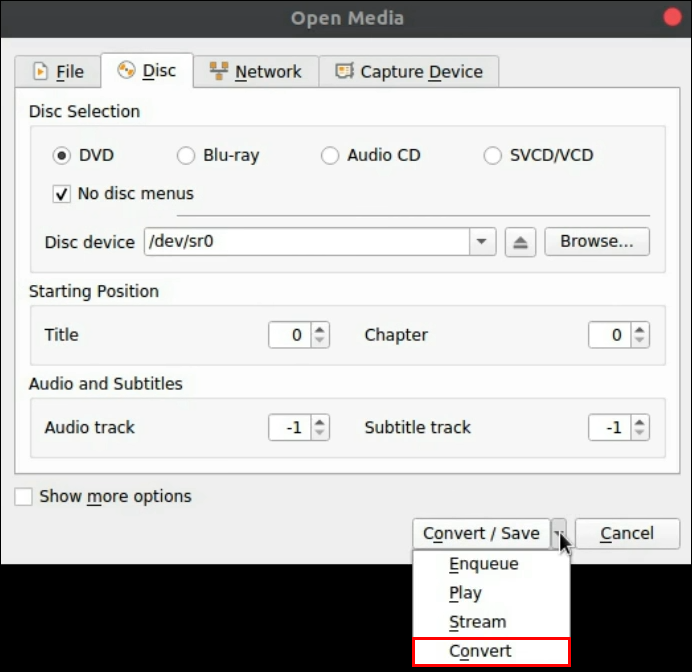
- Beneath “Disc Selection,” select the checkbox for “No disc menus.”
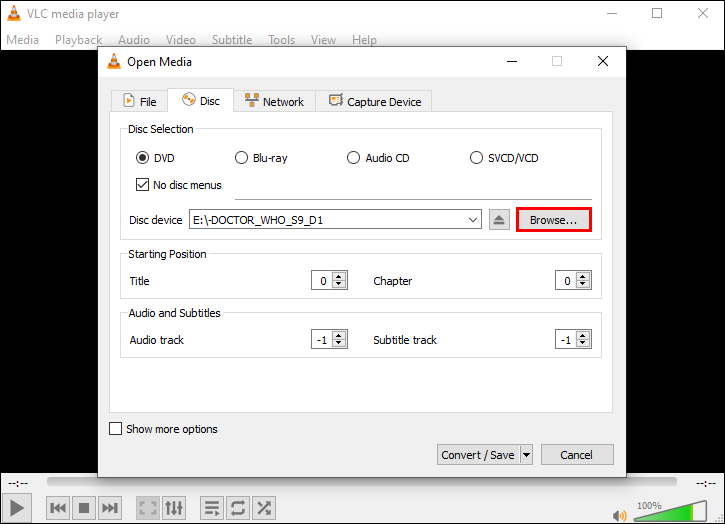
- At “Disc Device,” choose the DVD location.
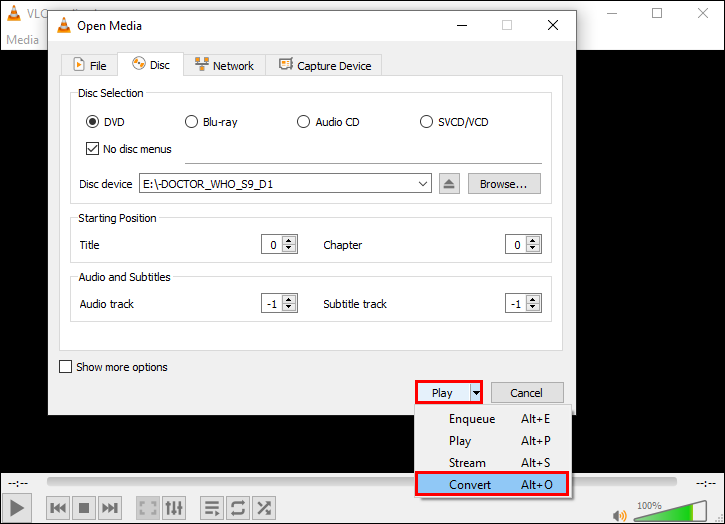
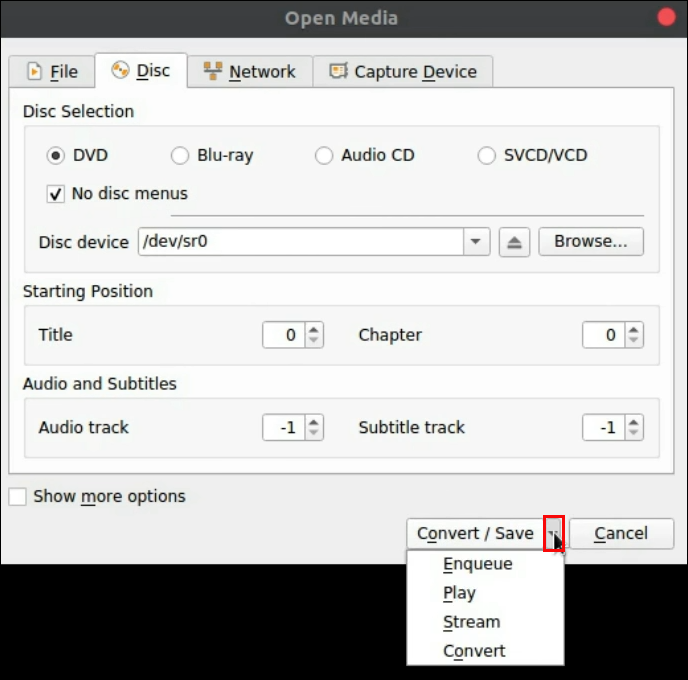
- On the bottom right next to the “Play” button, access the pull-down menu, and choose “Convert.”
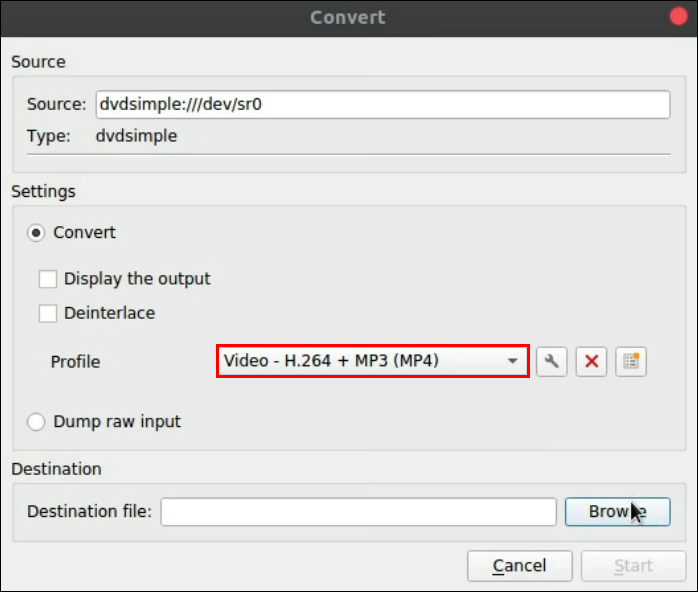
- From the “Convert” window beneath “Settings,” select “Video – H.264 + MP3 (MP4)” as the “Profile” format.
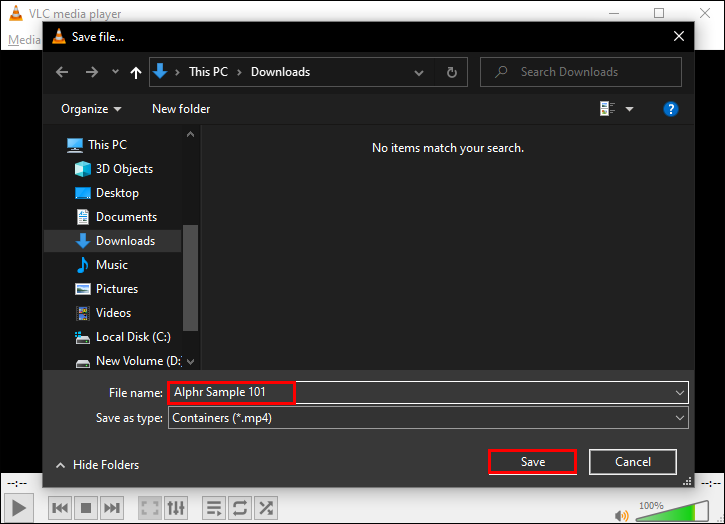
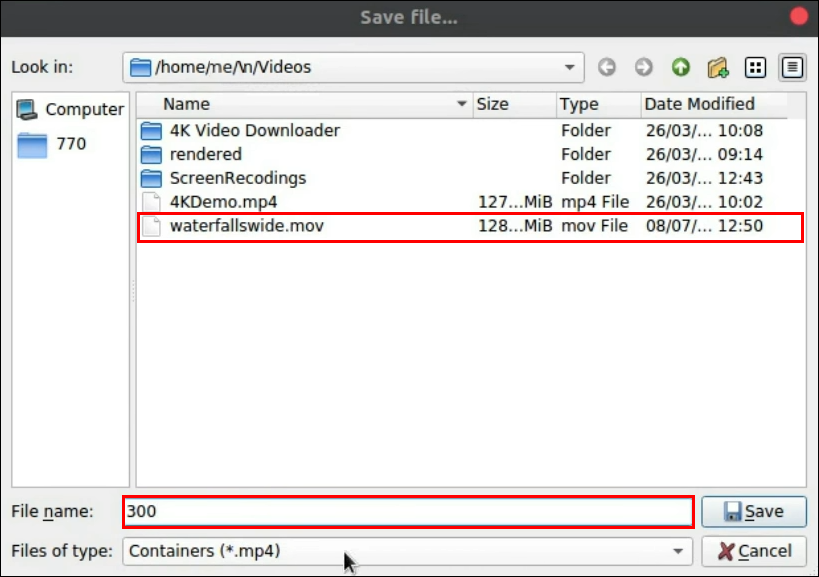
- At “Destination File,” click “Browse” to choose the location to save the converted file and give it a name.
- Click “Start” to kick off the conversion.


Once the DVD has been converted to MP4 format, the file is saved to the location selected in Step 9.
Using a macOS, insert the DVD you want to convert into your disc drive then:
- Visit VLC’s official website to download the software if you don’t already have it.
- Open the VLC app.
- Click on the “File” tab, then select “Open Disc.” A new window displaying your DVD info will open.
- Check the box for “Disable DVD menus.”
- Check the box for “Stream output” at the bottom left.
- Click the “Settings” button.
- Check the “File” option to save the converted file to your Mac.
- Click “Browse.”
- In the pop-up window, name your converted file and select a save location.
- Press “Save” to confirm.
- Open the pull-down menu via the “Encapsulation Method.”
- Select “MPEG 4.”
- Beneath “Transcoding options,” set the “Video” and “Audio” to “MPEG 4” or “H.264 + MP3 (MP4).”
- Select “OK” to confirm the settings.
- Click “Open” to begin the conversion.


Once the DVD has converted, a copy of the file will be saved in the location set in Step 9.
How to Convert WebM to MP4 Using VLC
To convert your WebM file to MP4 using VLC via Windows and macOS:
- Open the VLC app.
- From the top left, select the “Media” tab.
- Choose “Convert/Save” from the options.
- From the “Open Media” window, click the “Add” button on the right.
- Look for the WebM file you want to convert to MP4, then click “Open.”
- Click on the “Convert/Save.”
- In the “Convert” window, click “Browse” to name your converted file and choose the location to save it to, then “Save.”
- Click “Start” to start the conversion.


Once the WebM file has been converted to MP4, it will be saved to your chosen location.
How to Convert VOB to MP4 with VLC
Follow the steps below to convert your VOB file to MP4 format via Windows and macOS:
- Launch the VLC app.
- From the main menu, click on “Media.”
- Leave the other setting as they are and click “Convert/Save.”
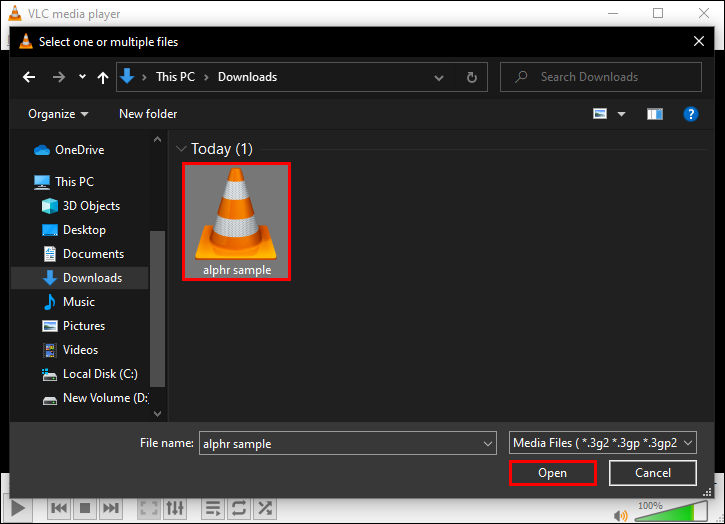
- In the “Open Media” window, click the “Add” button on the right.
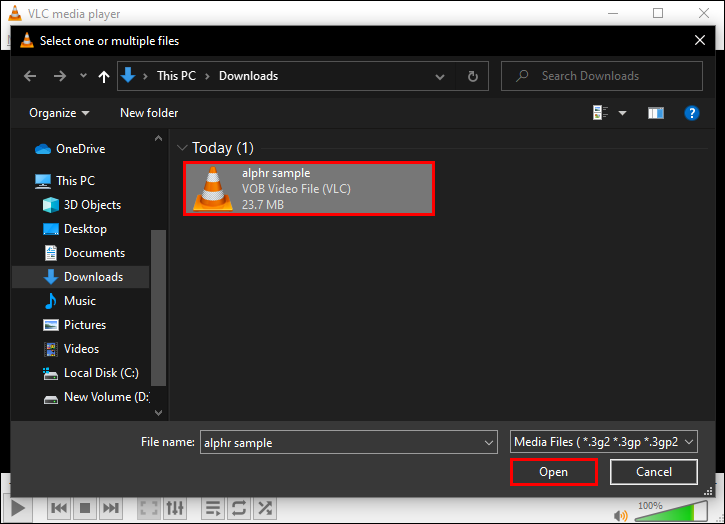
- Find and select the VOB file you want to convert, then “Open.”
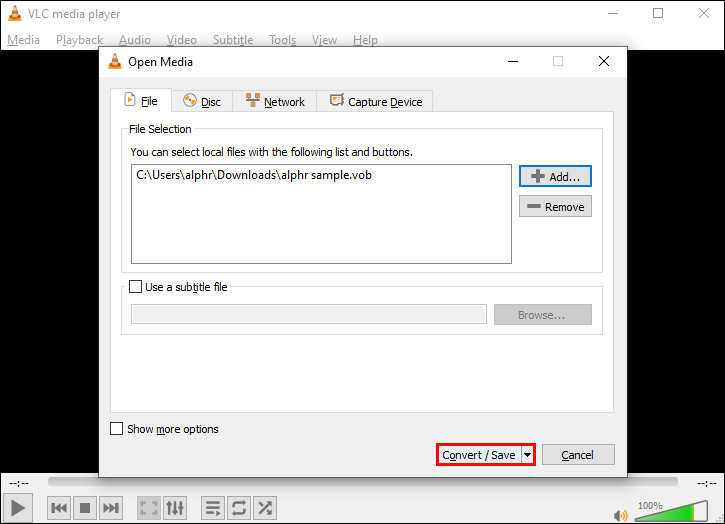
- Click on the “Convert/Save” button again.
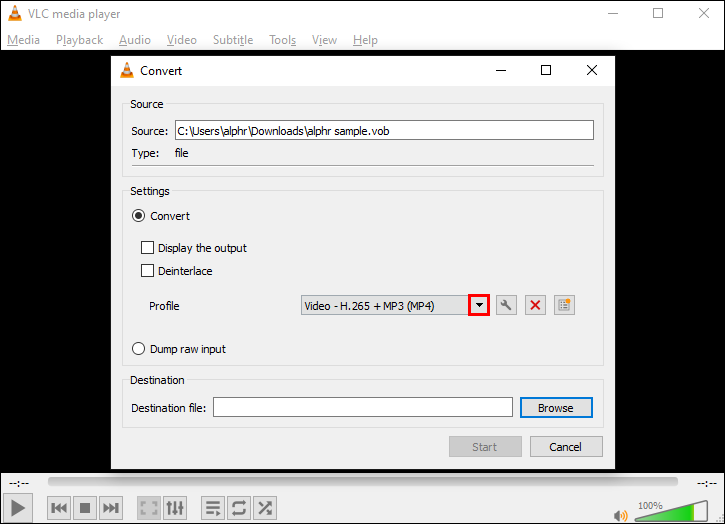
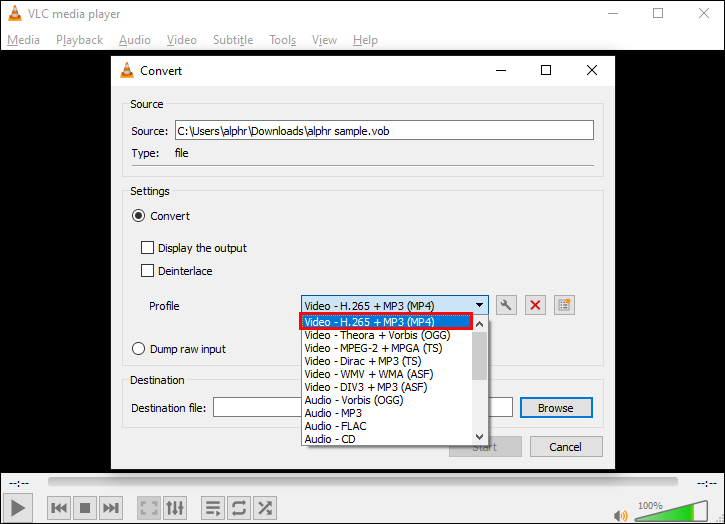
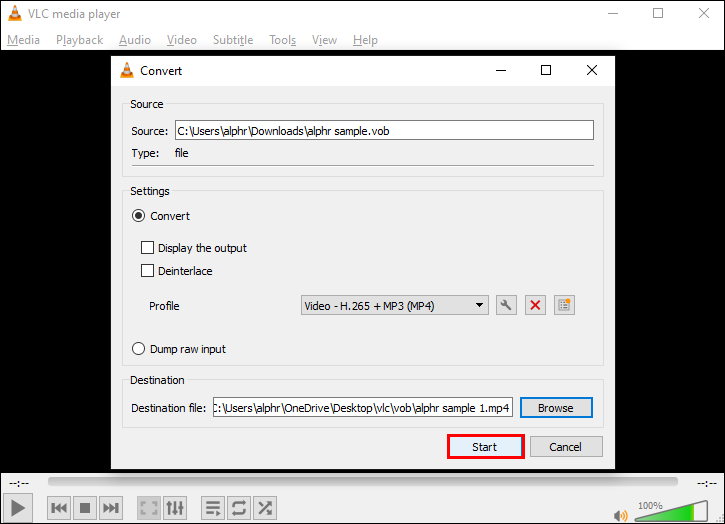
- In the “Convert” window under “settings,” Select on the pull-down menu next to “Profile.”
- Choose “Video – H.264 + MP3 (MP4)” as the output format.
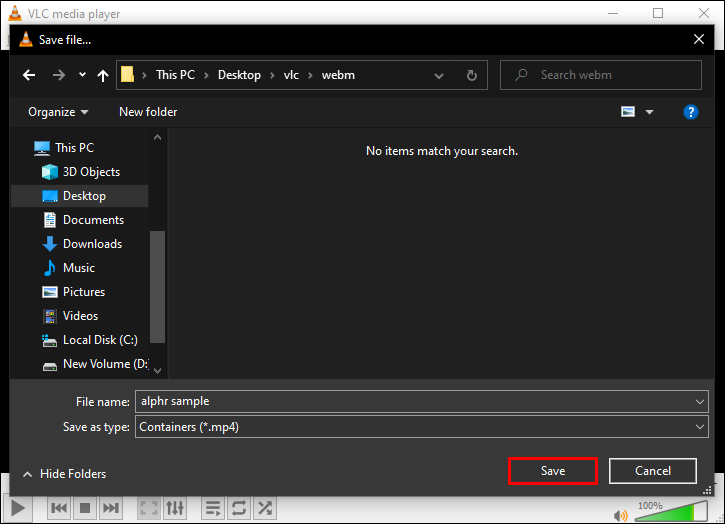
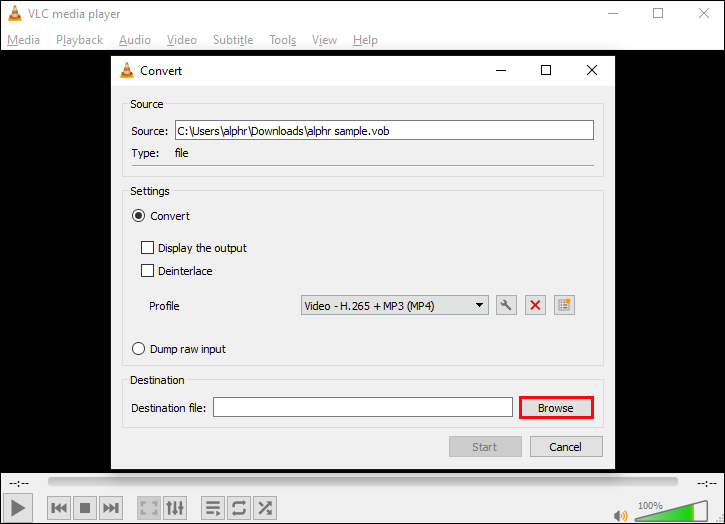
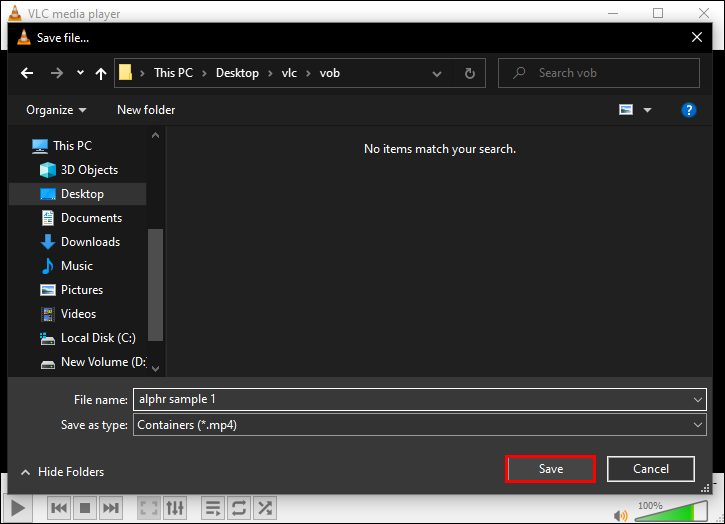
- At the bottom next to “Destination file,” click the “Browse” button.
- Choose where you’d like your converted MP4 file to be saved to and give it a filename.
- Press the “Start” at the bottom to start the conversion.
Once the conversion is complete, the file will be saved to your chosen location.
How to Convert AVI to MP4 Using VLC
Use the steps below to convert your AVI file to an MP4 file using Windows and macOS.
- First, visit VLC’s official website for a copy of the software if you haven’t already.
- Open the VLC application.
- From the main menu at the top, click on “Media.”
- Leave the setting as-is and select “Convert/Save.”
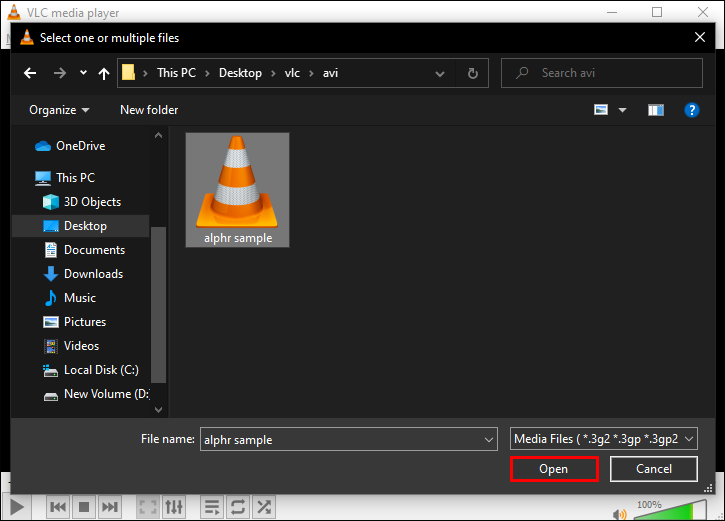
- In the “Open Media” dialog window, click the “Add” button on the right to find the file you wish to convert.
- Select the AVI file and then “Open.”
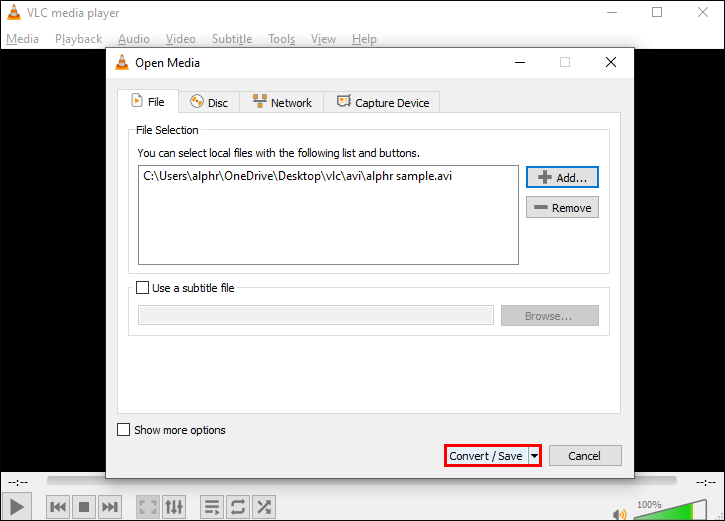
- Click on the “Convert/Save” button again.
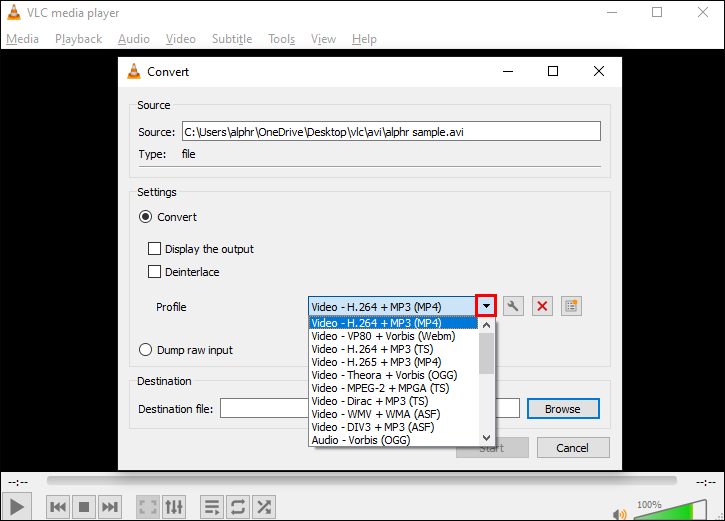
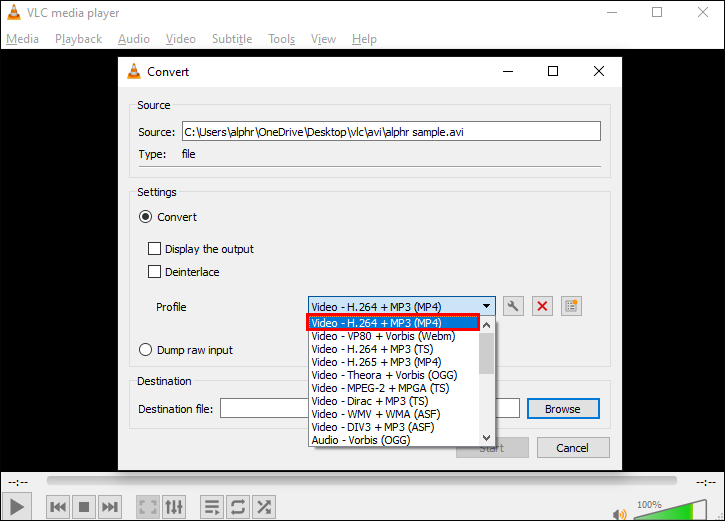
- In the “Convert” window under “settings,” click on the pull-down menu next to “Profile.”
- Choose “Video – H.264 + MP3 (MP4)” as the output format.
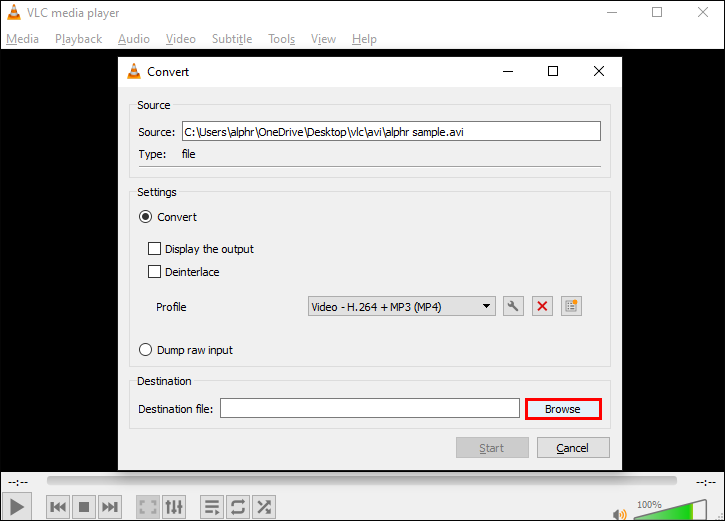
- Click on the “Browse” button next to “Destination file.”
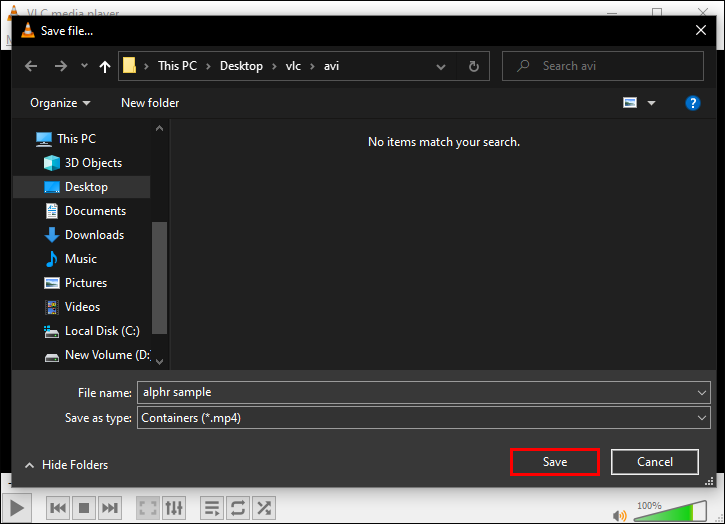
- Choose where you’d like your converted MP4 file to be saved and name the file.
- Click on “Start” to kick off the conversion.
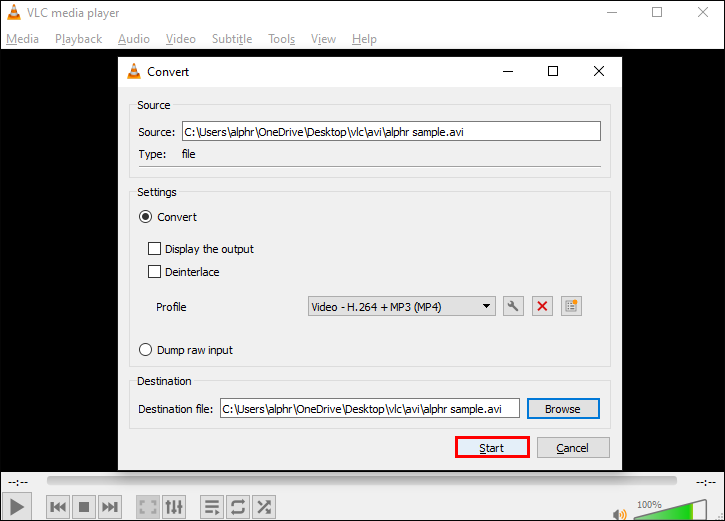
Your MP4 file will be saved to your chosen location once converted.
Access to Quality Audio and Video Files Galore
The VLC multimedia player plays a wide variety of audio and video file types and converts uncommon formats into common ones like MP4. With this tool, you have more options to access your media from devices that only support specific file types.
VLC is widely used since not only is file quality maintained once converted, but it is also open source and free to use.
What do you think about the VLC player? Have you tried a file type you thought it wouldn’t support and did? Let us know in the comments section below.
Disclaimer: Some pages on this site may include an affiliate link. This does not effect our editorial in any way.