Most people use VLC for audio and video playbacks. However, VLC can also act as a video editor. If you want to cut a portion of a long video, you can do it in VLC.
This article explains how to use VLC to cut a video on Mac and suggests alternative tools you can use for the same task.
How to Trim Videos in VLC on MacOS
You can trim your videos in VLC on Mac for various reasons. Perhaps you’ve a long video, but only a fraction of it sounds interesting. Maybe your video clip would sound great without a specific portion. It could also be that you plan to add a small section of a video to your personal or office presentation. No matter your reasons, you can slice a video in VLC on your Mac. Here’s how to do it:
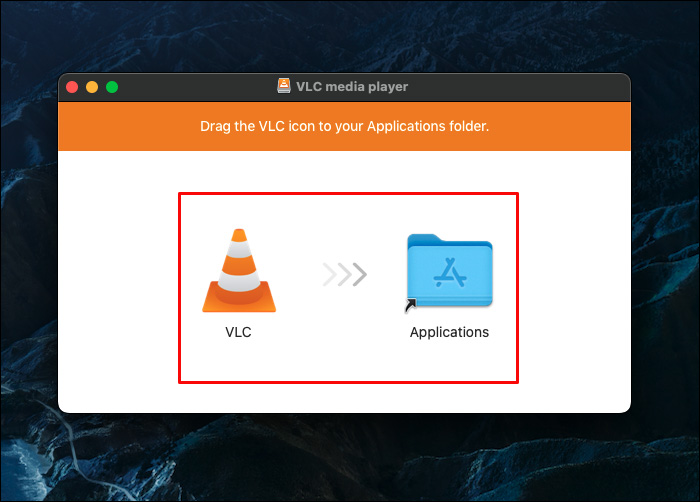
- Download the latest VLC version from the VideoLAN website. Ensure you select VLC for MacOS.

- Install the downloaded file on your Mac and launch VLC.

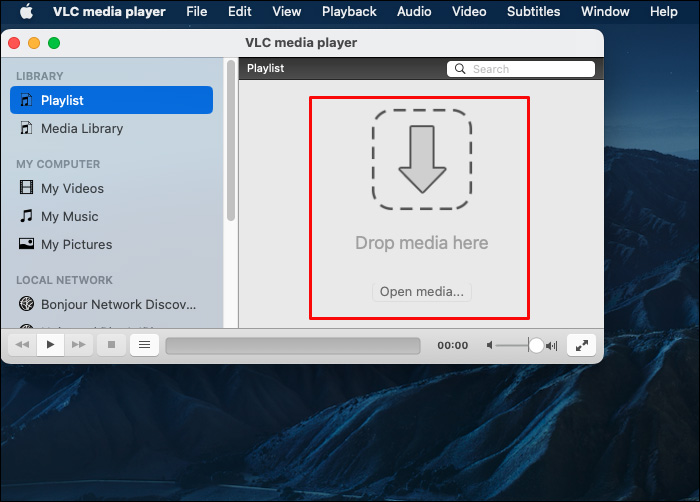
- Import the video you want to trim. You can drag and drop the video clip onto the VLC playlist, as it will play automatically. If this fails, move to the top menu of VLC and hit “Media.” From the drop-down menu, choose ‘Open File,” select a video clip to import, and hit “Open.” Alternatively, press the “Control + O” keys to open the file browser window. Locate the video clip you want to edit and double-click it.
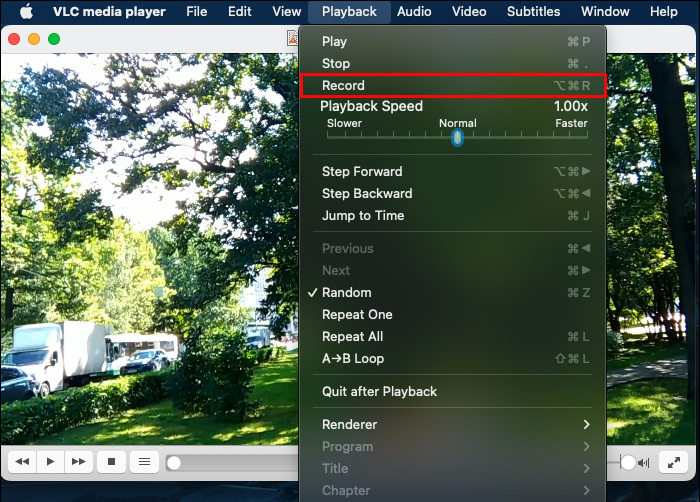
- Locate where to start trimming your clip. You can use your mouse to move the scroll bar to where you want to begin cutting. If not, click “Play” or press the “Spacebar” key to play your video up to where you plan to start trimming it.
- Move to the top menu and click “Playback.” Then, select the “Record” icon from a drop-down list. If not, press Shift + Command + R on your keyboard.
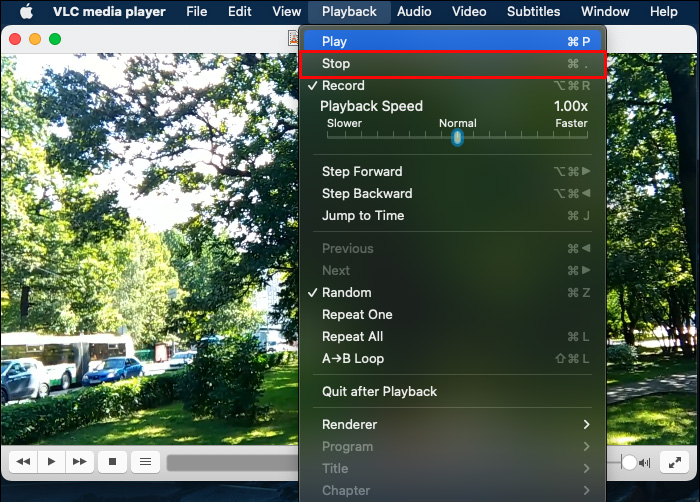
- Click “Play” or press “Spacebar” to start recording up to where you want to stop cutting. Then, click “Pause” and open “Playback,” again. Click “Stop” to finish recording.
- Find the trimmed video clip in the “Movies” folder. Check a file saved in the format vlc-record. VLC saves trimmed files this way by default unless you alter settings via the “Preferences” menu.

Alternative Ways to Trim Video Clips on Mac
VLC Media Player is not a complete video editing software. You can rely on it only if you plan to do simple video cuts. If you want to edit a video in multiple ways often, you require a more specific software tool. Here’s the gist of what you’ll encounter with VLC for video editing:
- VLC can only chop off the head and tail from a video clip.
- You can’t split a video into multiple sections simultaneously.
- VLC doesn’t allow you to trim multiple videos at the same time.
- This media player has an old interface. Hence, you can’t find the video trimming feature on the menu.
- If you need to cut a 30-minute clip from a long video, VLC won’t work.
- Sometimes the “Record” button doesn’t work. So, you might produce a trimmed video without any content inside.
To avoid these issues, consider using a flexible video editing application. Most applications come with a premium subscription plan. So, choose dedicated video editing software if you will continue to edit many other clips in it. Here are some options you can try.
VideoProc Converter
VideoProc Converter is among the top video editing tools online. You can use it to edit videos, including cutting off portions from them. VideoProc Converter has a simple user interface that any novice can understand. You can trim, split, crop, add filters, alter colors, edit subtitles, etc. Here’s how to trim your videos in VideoProc Converter on Mac:
- Download and install VideoProc Converter on Mac.
- Load your application and hit the “+Video” button. This will let you add one or more videos to the application.
- Move to the “Edit’ toolbar and click “Cut.”
- Slide the green button to mark the beginning and the end of the part you need to cut.
- Click the orange scissor icon to trim the video clip.
- Click “Done” to finish editing the clip.


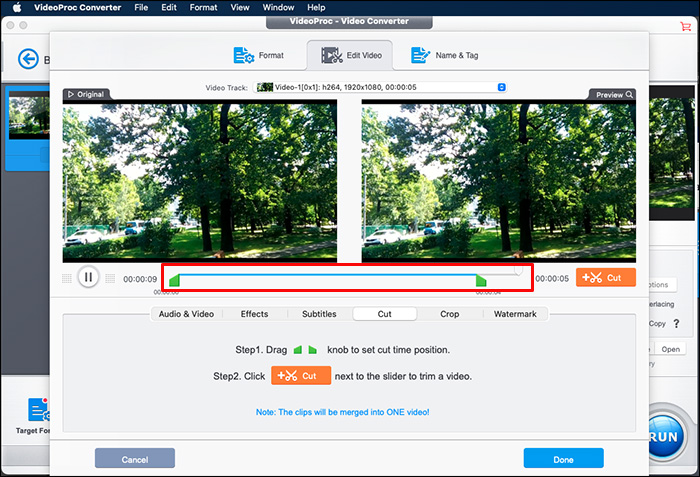


VideoProc Converter allows you to trim many sections from a video. To do so, drag the green button to identify various cutting points. Then, repeat steps 3 to 6. After finishing, the software will combine all the portions you’ve cut.
Filmora
Filmora by Wondershare is among the most capable video editing tools online. If you can’t edit your video in VLC properly, use Filmora instead. Unlike VLC, this software allows you to trim many videos together. Additionally, you can remove many portions from one video clip at once. Since it offers advanced effects, you can use it to customize your videos. When trimming a video in Filmora on Mac, follow these steps:
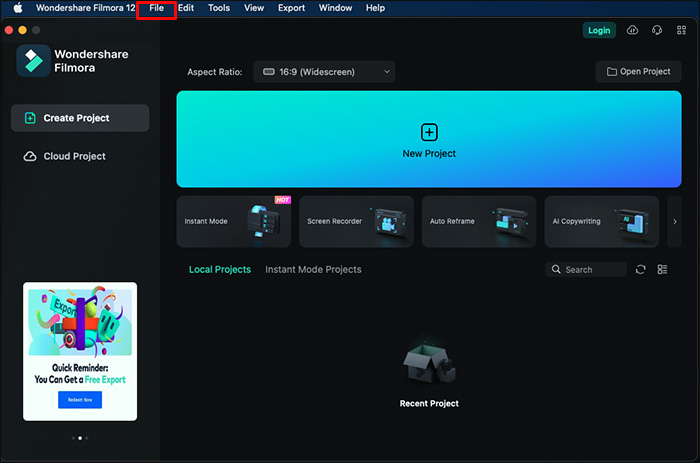
- Download Filmora for Mac 10.14 or later on the Wondershare website and install it on your computer.
- Launch the Wondershare Filmora application and navigate to “File” on the menu.
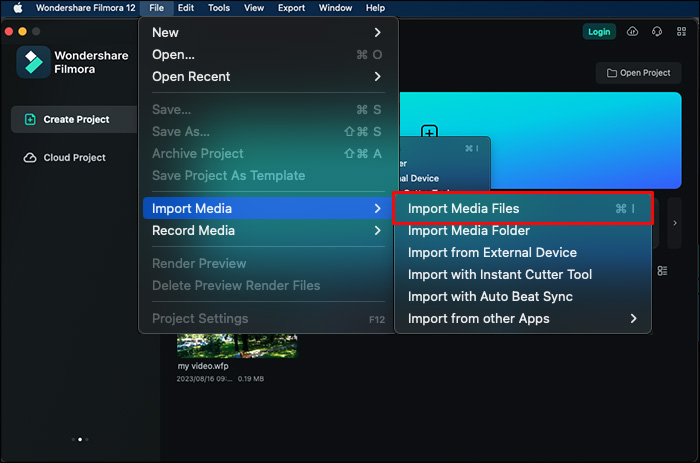
- Click “Import Media” and choose “Import Media Files” to add files to the “Media Library.”
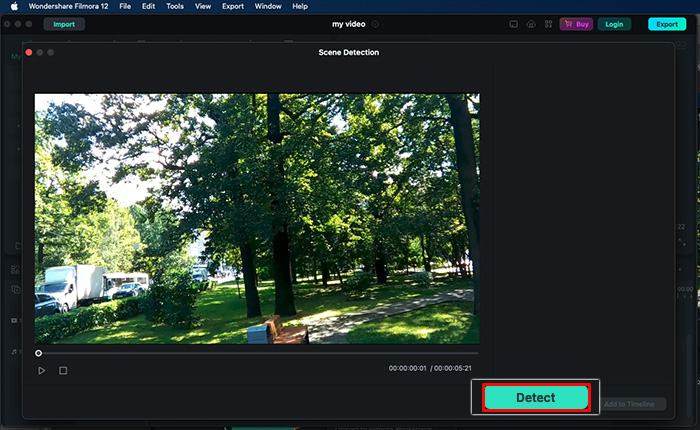
- Highlight a video clip in the “Media Library” and right-click on it. Choose “Scene Detection.”
- Click “Detect.”
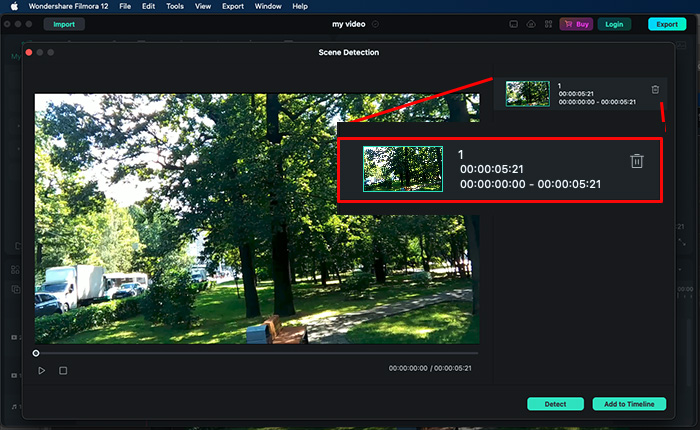
- Under “Show Properties,” if you want to remove unwanted scenes, click “Delete” in the same area.
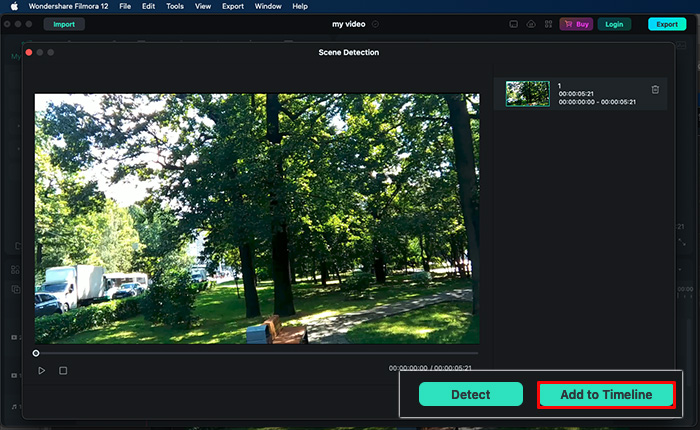
- Choose “Add to Timeline” to import various video sections to your timeline.


FlexClip
Another reliable tool for trimming your videos instantly is called FlexClip. You can record the start and end of your video on a Mac without issues. FlexClip can also trim multiple videos at the same time, unlike VLC. There is no need to download this software on Mac. You can upload the files to trim directly online. Here’s how to use it:
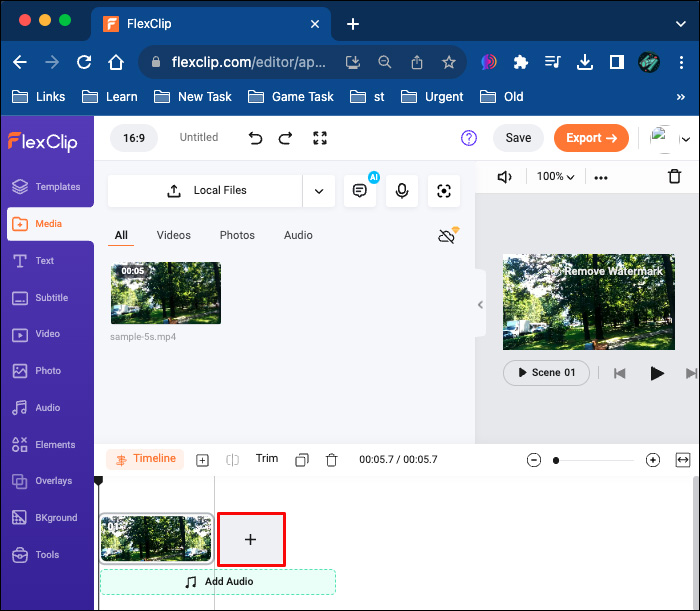
- Open FlexClip and follow easy prompts to upload your video clips from your Mac.
- Locate and click the “+” sign. This will let you add video footage to the timeline.
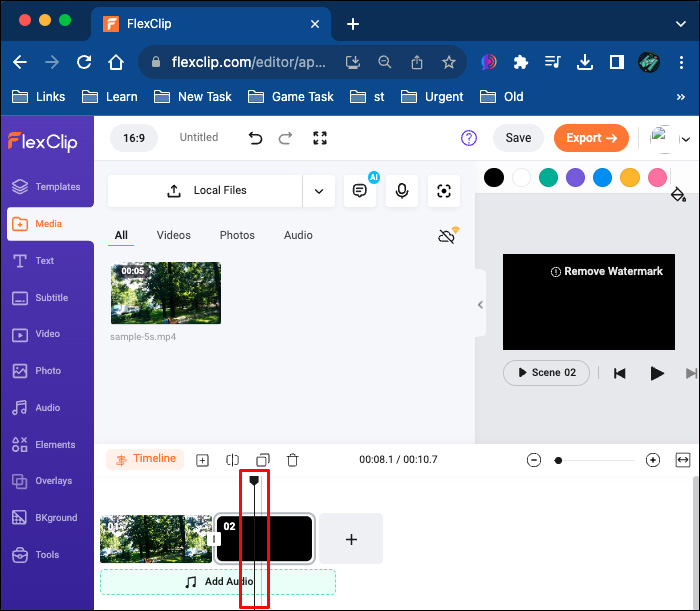
- Select one video clip and move its slider inward from each end.
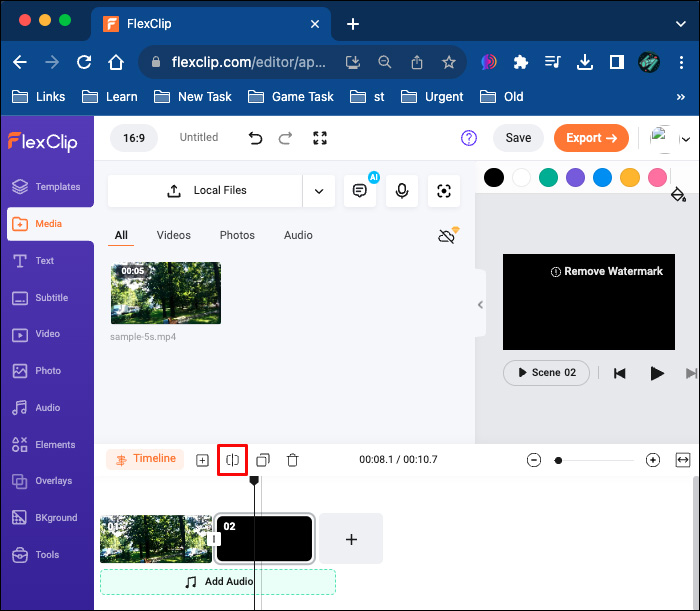
- Cut the clip into two halves by moving the playhead to the cutting point. Then, click “Split.”
- Create an overlay by placing clips over a video. Drag and hold to change the sequence of your clips on the timeline. Alternatively, choose from two hundred transitions to connect various clips.

MiniTool MovieMaker
If you notice a problem with your VLC when cutting a video, try using the MiniTool MovieMaker. It has a simple user interface and advanced video editing features. MiniTool MovieMaker can help you create high-quality videos for YouTube, TikTok, Facebook, and related sites. You can trim, split, merge, reverse, and speed up videos with this software. To cut a video clip with it on Mac, do the following:
- Download the MiniTool MovieMaker and install it on your Mac.
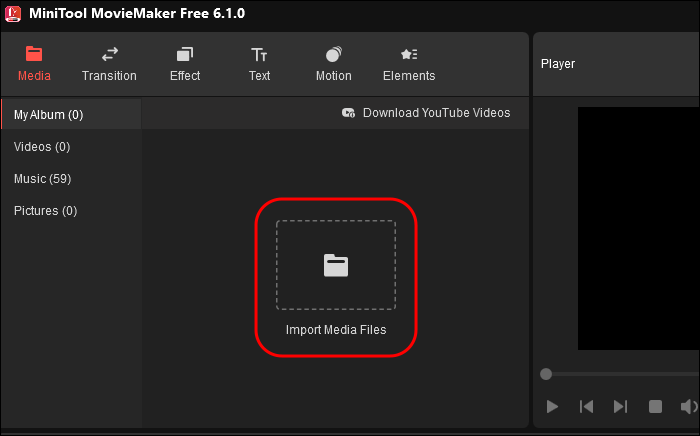
- Hit “Import Media Files” to add the video clip you need to trim. Alternatively, drag and drop a file onto the timeline.
- Slide the playhead to the preferred cutting point and hit “Split.”
- Select the unwanted clip and press “Delete” on your keyboard.
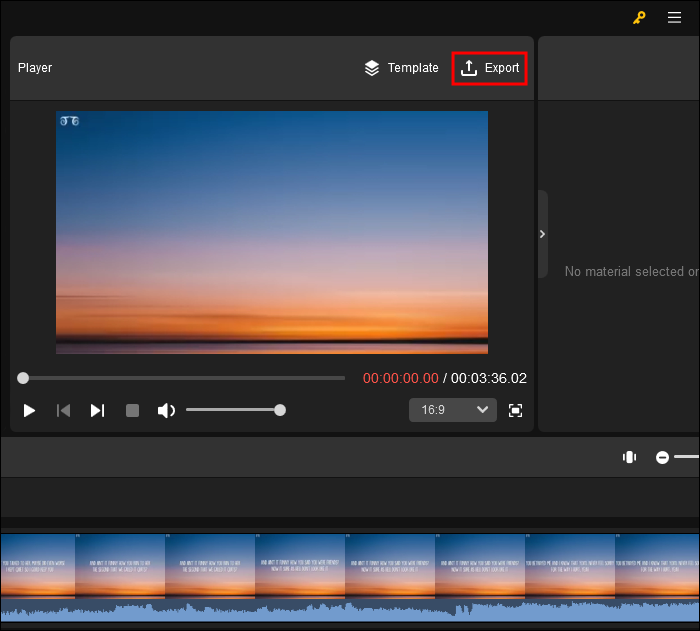
- Click “Export” to share the trimmed video clip.


FAQ
Can I trim videos in VLC for free?
VLC Media Player is an open-source tool. You can trim a video in it without paying. Just download the latest version for your MacOS and follow the steps above.
How can I save a video clip after cutting it in VLC?
You have two ways to save a trimmed video. First, trim your video and check it in the default “Movie” folder. To store your trimmed videos elsewhere, open the VLC’s top menu bar and choose “Preferences.” Change settings to save your files in a different location on your Mac.
Trim Your First Video in VLC
VLC has relatively reliable but limited video editing features. Although it has no one-click dedicated trimming button, VLC can trim your video in seconds. However, it’s not the best at video editing, so you might need dedicated video editing software for that.
Did you recently try to cut a portion of your video in VLC on your Mac? Were you able to use it, or did you use a dedicated video editing tool instead? Let us know in the comments section below.
Disclaimer: Some pages on this site may include an affiliate link. This does not effect our editorial in any way.