When it comes to freeware media players, VLC is the undisputed king. It plays everything—files, discs, webcams, streams, and even works with that odd codec-encrypted file you downloaded from some website in Eastern Europe (but please, don’t download weird files from websites in Eastern Europe). It runs on every platform: Windows, Linux, Mac OS X, Unix, iOS, and Android. Therefore, if you haven’t already added it to Windows 10 or whatever platform you’re using, Download VLC now.
One handy feature that VLC offers is called “Frame by frame,” which enables you to play through a video, one step at a time. This feature is handy if you need to capture snapshots from specific videos or if you want to carefully examine every frame of that sick skateboard jump you captured on your smartphone.
Here’s how to use frame by frame on VLC Media Player.
Going Through a Video Frame by Frame in VLC
To play through a video, frame by frame, you can press a hotkey.
- To start, open a video within VLC by selecting “Media > Open File,” then play the clip.
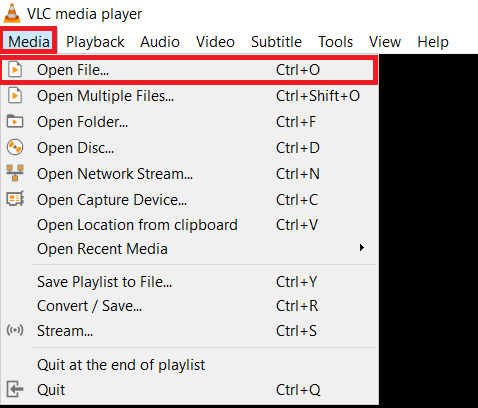
- Now, press the “E” key. The video will pause. Now, every additional press of the “E” key will advance the video one frame. To start the video again, just hit the “Spacebar.”


“E” is the default hotkey for the Frame by frame option, but you can customize that keyboard shortcut along with others.
How to Change the Hotkey for Frame by Frame in VLC
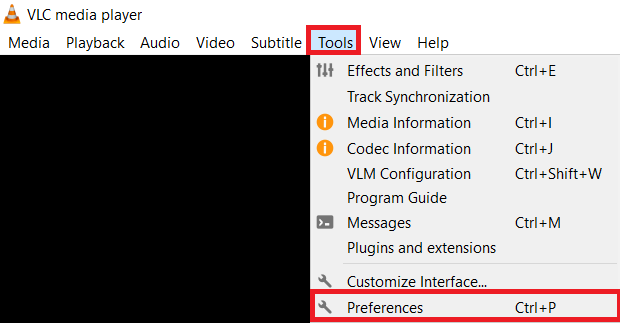
- Click on “Tools > Preferences” at the top.
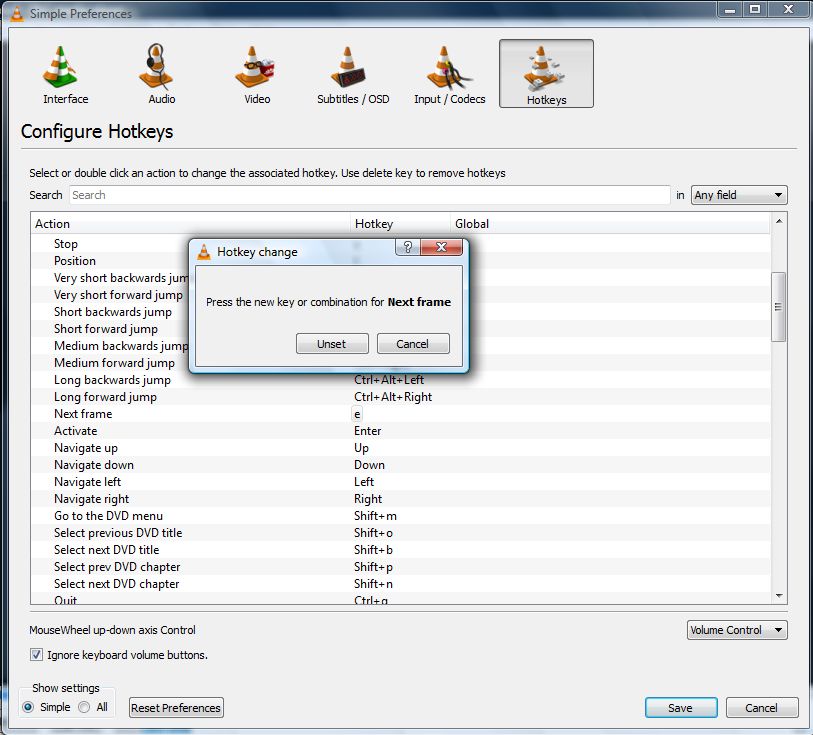
- Select “Hotkeys” and scroll down and double-click “Next frame” to open the window shown below.
- Just type the “new hotkey” for “Next frame” to configure it.
- Click the “Save” button on the “Simple Preferences” window. Then, you can press the new “Frame by frame” keyboard shortcut.


Viewing the Video, Frame by Frame, with the Toolbar Button
You can also activate “Next frame” with a toolbar button.
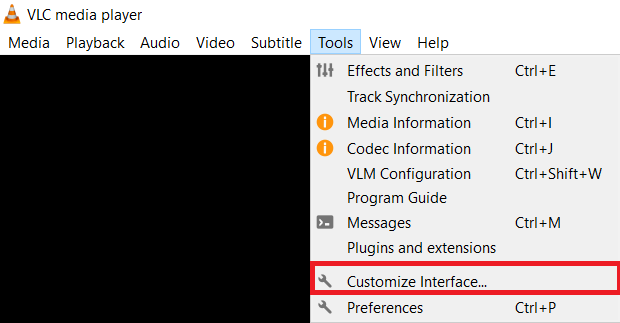
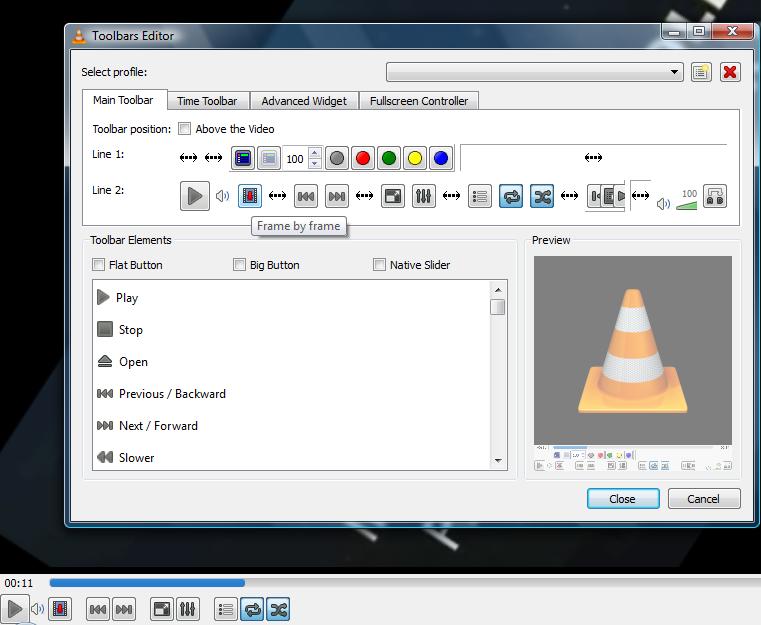
- If it’s not already on your playback toolbar, click “Tools > Customize Interface.”
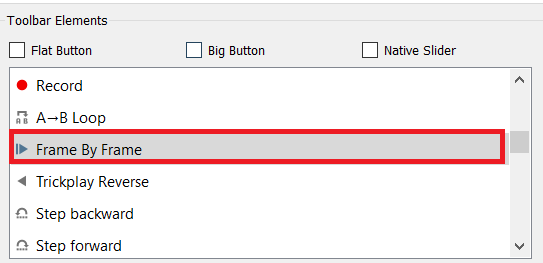
- Now, scroll down the “Toolbar Elements” list until you find the “Frame by Frame” option.
- Drag the “Frame by Frame” button somewhere onto “Line 2” so that you can select the option on the playback toolbar.
Reversing a Video, Frame by Frame, in VLC
For those interested in reversing a video, frame by frame, here’s how to do it.
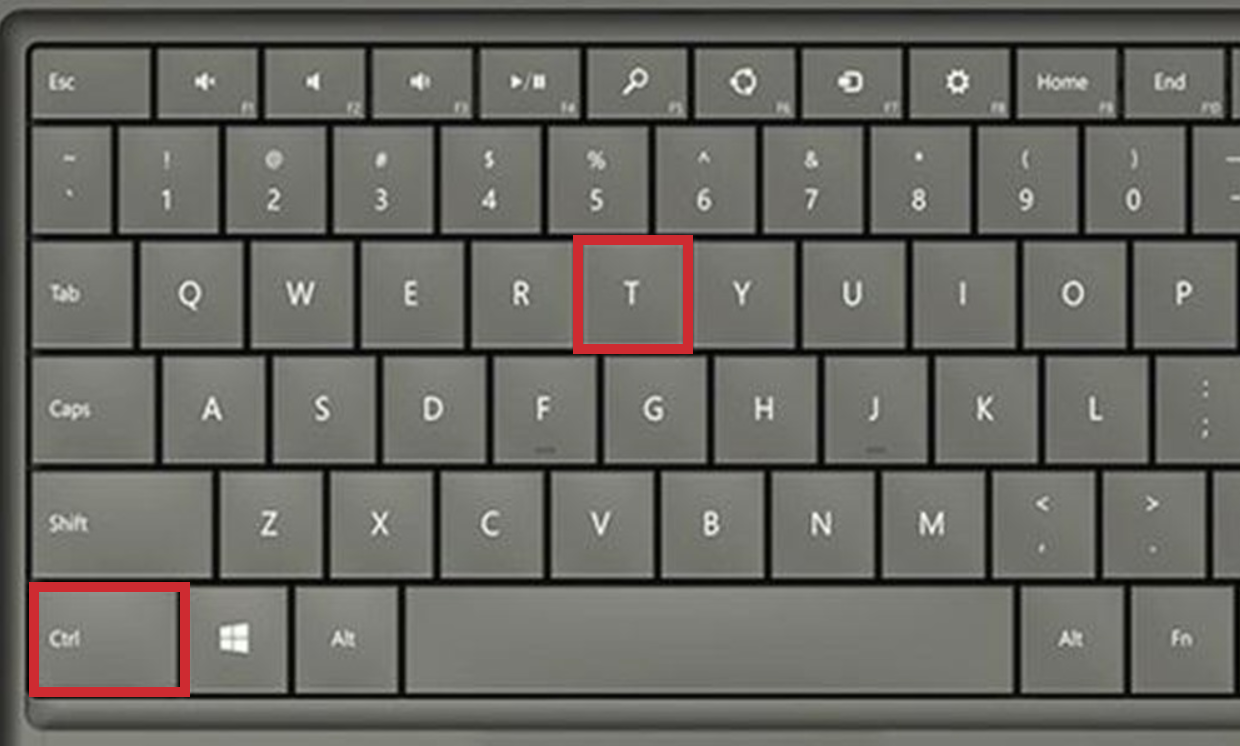
Short of using this extension, your only option is to use “Ctrl + T” to back up a second or two and then use “Frame by frame” again to go forward.
Using the VLC Add-On “Jump to time Previous frame v3”
- Download the “Jump to time Previous frame v3” VLC extension. It is a zip file.
- Unzip the extension, then extract the “.lua” file and copy/paste it into the VLC subdirectory “/lua/extensions.”
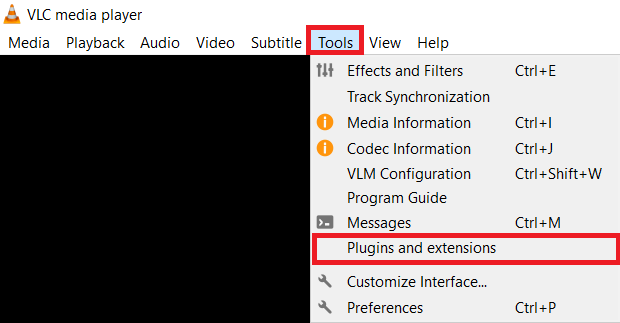
- Restart VLC to load the extension into the app or just reload extensions by going to “Tools -> Plugins and extensions.”
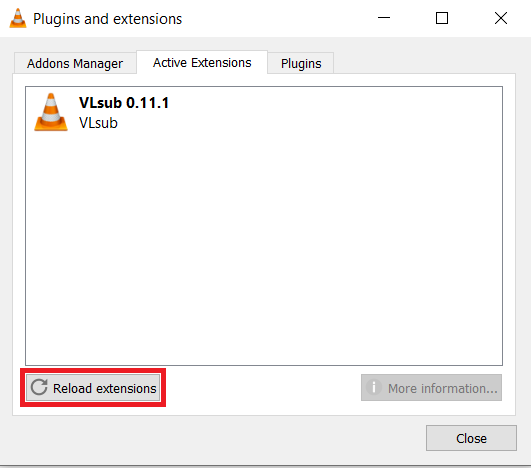
- Click on the “Active Extensions tab” and select the “Reload extensions” button.


Using a Hotkey to Reverse Videos Frame by Frame
- Load your desired video of choice by going to “Media -> Open File…”
- Find the area of the video you want to view step by step, then press “Ctrl + T” to back up a second or two.
- If you need to go forward, use “Frame by frame” again.

Now that you know how to go through a video on a frame-by-frame basis (using a hotkey, the toolbar button, or an extension), you can capture any clips you need and get the shot you genuinely want. No matter which option you choose, it lets you capture specific snapshots from any video with the “Snipping Tool” or VLC’s “Take Snapshot” option.
Disclaimer: Some pages on this site may include an affiliate link. This does not effect our editorial in any way.