Visual Studio Code is a sophisticated piece of software that most people use to start their programming journey. Its robust features, cross-compatibility, the range of programming languages make it one of the most used programming tools in the world.
While VS Code has a vast array of features to begin with, its functionality can be further improved through the use of extensions, which can add additional languages, compilers, and other tools that improve a programmer’s workflow.
In this article, we’ll be showing you how to install extensions in VS Code, as well as discuss some of the most useful and popular extensions.
How to Install Extensions in VS Code
VS Code has an integrated extension marketplace that is used to find, install, and/or manage your extensions. Here’s how to install an extension via the VS Code Marketplace:
- Click on the “Extensions” button in the Activity Bar. It’s located on the side of VS Code’s client. Alternatively, you can use the keyboard shortcut “Ctrl+Shift+X” to open the “Extensions” screen.

- This will bring you to the “Extensions” list. VS Code automatically sorts Extensions by popularity. You can also use the search box on the top of the page to filter your results.

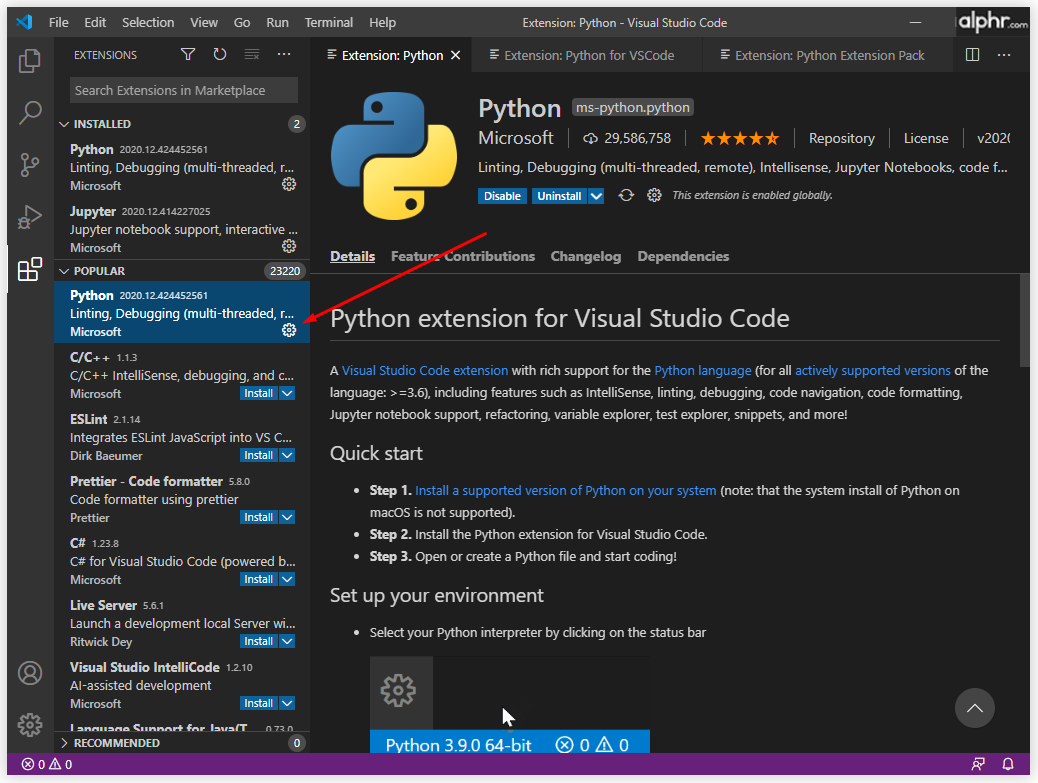
- Each extension in the list will have a brief description, the download count (the number of times it has been downloaded), the publisher’s name, and a rating from zero to five stars.
- You can click each extension on the list to see more details before committing to a download. Details include a changelog, frequently asked questions, and a list of contributions and dependencies the extension gives to and requires from VS Code, respectively.
- If you’re using a proxy to access the internet, you’ll need to set up VS Code to use a proxy server as well to connect to the internet and download extensions.
- Once you’ve found an extension you like to install, click on its details.
- You’ll see an “Install” button under the extension’s name.
- Click the “Install” button, and the extension will automatically download and install on your device.
- The “Install” button will now change to a “Manage” button that looks like a gear.


Extensions are a great way to customize and enhance the capabilities of VS Code to suit your personal or professional needs. A computer that is connected to the internet without a proxy server will usually have no problems downloading and installing extensions automatically through the integrated marketplace.
Do note that some extensions might require other extensions to be installed beforehand to function. A complete list of an extension’s dependencies can be found on its details page.
Other methods exist that can help users get VS Code extensions and don’t require an internet connection.
How to Download Extensions for VS Code
If you need a VS Code extension for a device that isn’t connected to the internet, there is a workaround to accessing the extensions, however, you will need a second device with internet access. Here’s what you need to do:
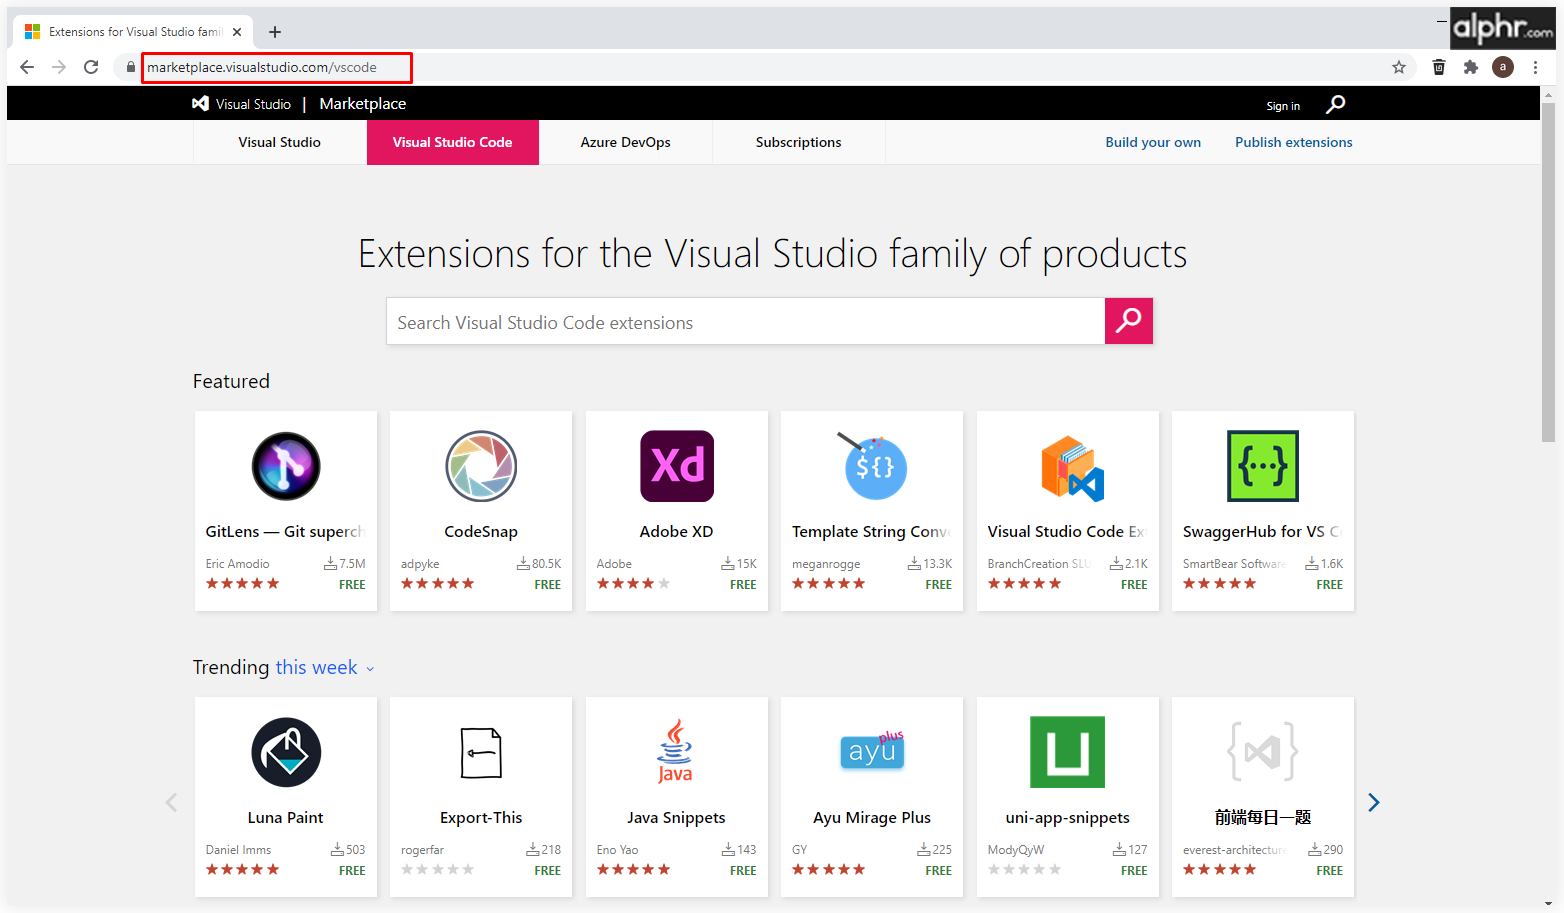
- On the device with an active internet connection, open a browser of your choice and go to VS Code Marketplace’s URL.
- Use the search function to specify your preferences. Alternatively, the marketplace lists most popular and useful items directly.
- Click on the extension in which you’re interested. This will open a page that shows more details about the extension, including a brief description, the publisher’s name, tabs that show some FAQs, and a complete version changelog.
- Click on the “Download Extension” button on the right side of the page. Don’t click on the “Install” button on the top, as it will begin to install the extension on the current device.
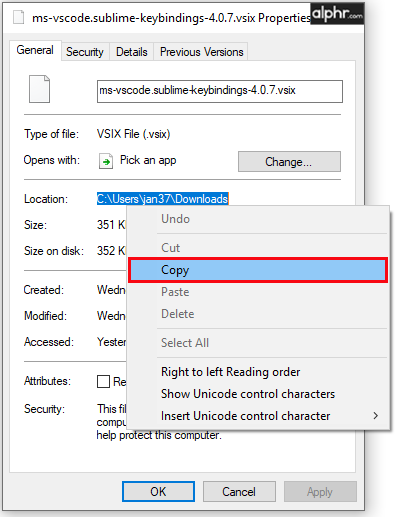
- The download will produce a .VSIX file that can be transferred to the machine that needs it.


Downloading an extension in this manner does not install it. The .VSIX file is not readable by any program other than the one being used to install the VS Code extension. If you open the .VSIX file manually, you might receive errors.
How to Install Extensions Offline for VS Code
While most computers these days are connected to the internet, some devices don’t have that connection for safety and security reasons or specific professional needs. Thankfully, the machine doesn’t have to be connected to the internet to install an extension. However, you still need a way to download the extension.
Use the steps outlined in the previous section of this article to download the extension on a different, connected device and then copy the generated .VSIX file. For obvious reasons, use a transfer medium that doesn’t depend on an internet connection, such as a USB drive or an external HDD or SSD.
Do note that if the extension has dependencies, you’ll need to download them as well and install them first.
Once the extension is transferred to the machine you want to install it on, follow these steps:
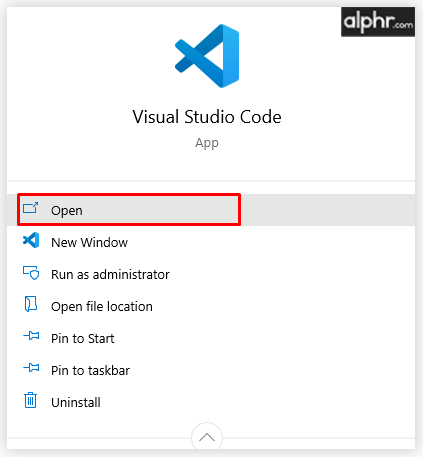
- The first option to installing the new extension should be to open the extension’s .VSIX file. If VS Code is installed on the device, older versions of the software will be able to install the extension manually from here. Follow the installation prompts to integrate the extension into VS Code successfully. If the extension is installed, you can ignore the other steps.
- If the above method doesn’t work, there is a workaround. Follow these steps.
- Open VS Code.
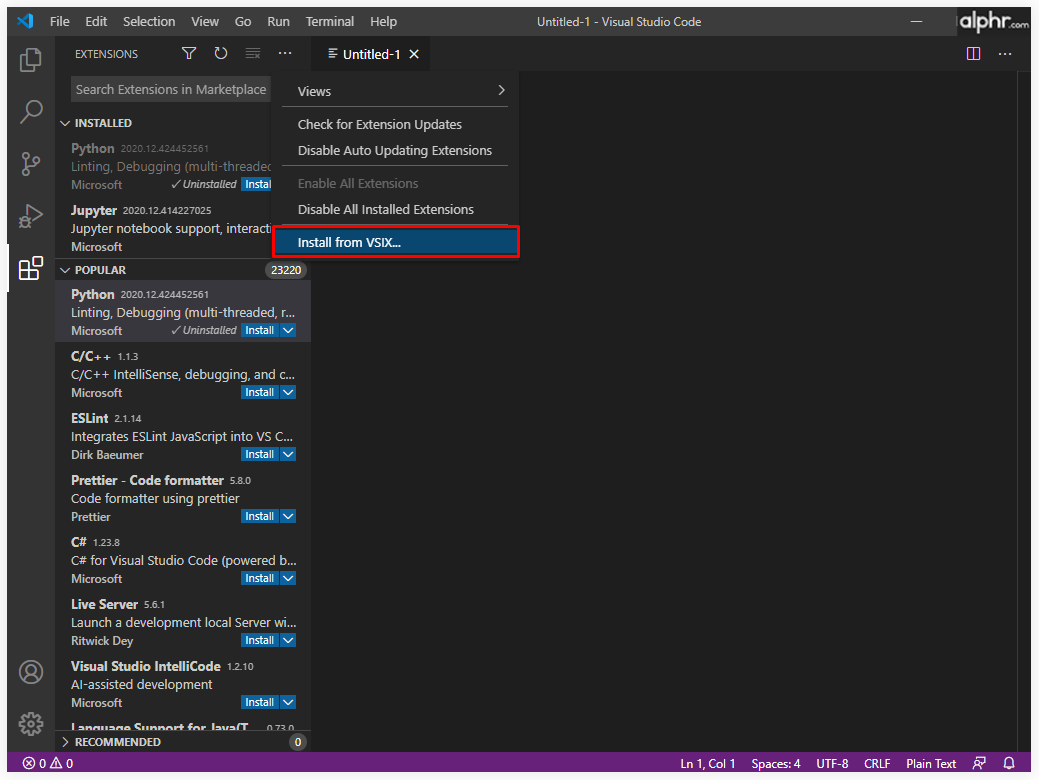
- Open the “Extensions” sidebar (you can use “Ctrl+Shift+X”).
- Click on the ellipsis icon in the top right corner of the menu.
- Select “Install from VSIX…”
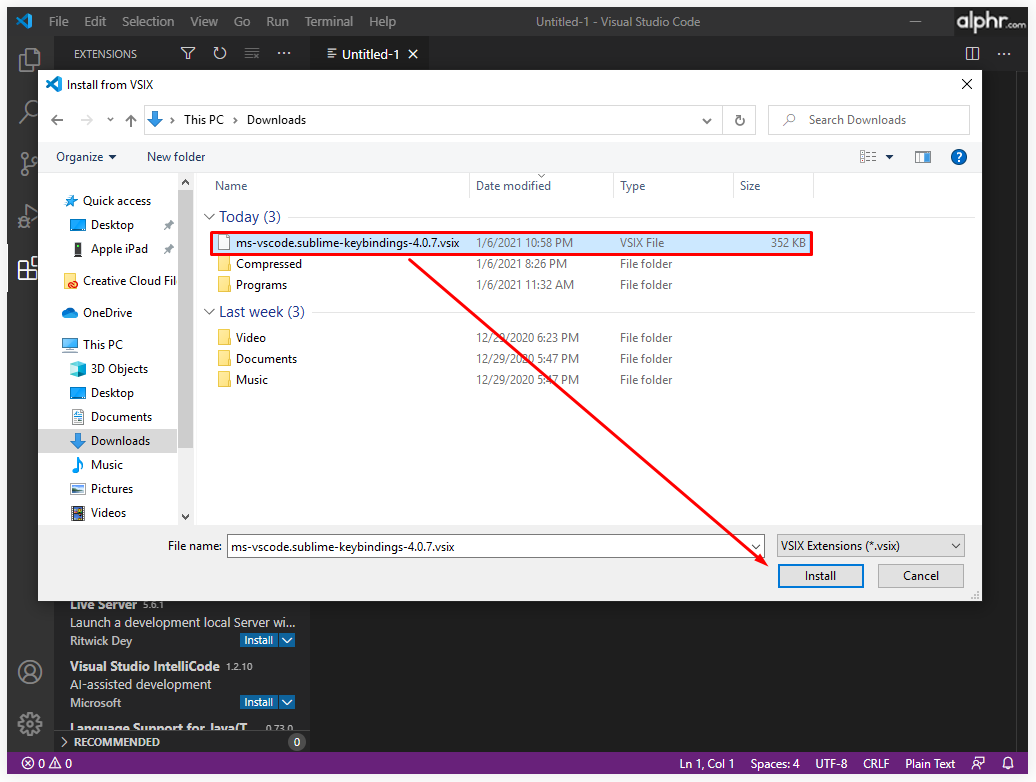
- VS Code will open a document browser. Locate the .VSIX file you transferred and select it.
- VS Code will now begin the installation process of the extension.
- After the extension has been installed, you’ll be able to see it in the “Extensions “menu and manage it accordingly.
- Open VS Code.


How to Install an Extension in VS Code with Command Prompt
For the more tech-savvy among you, VS Code has a command prompt integration that allows most of its functions to be replicated with command lines.
Here’s how to open the command prompt in VS Code:
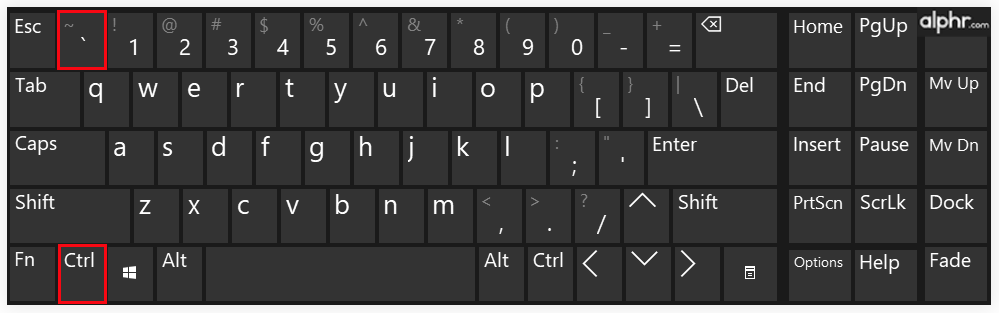
- Use the “Ctrl+`” (backtick) keyboard shortcut.
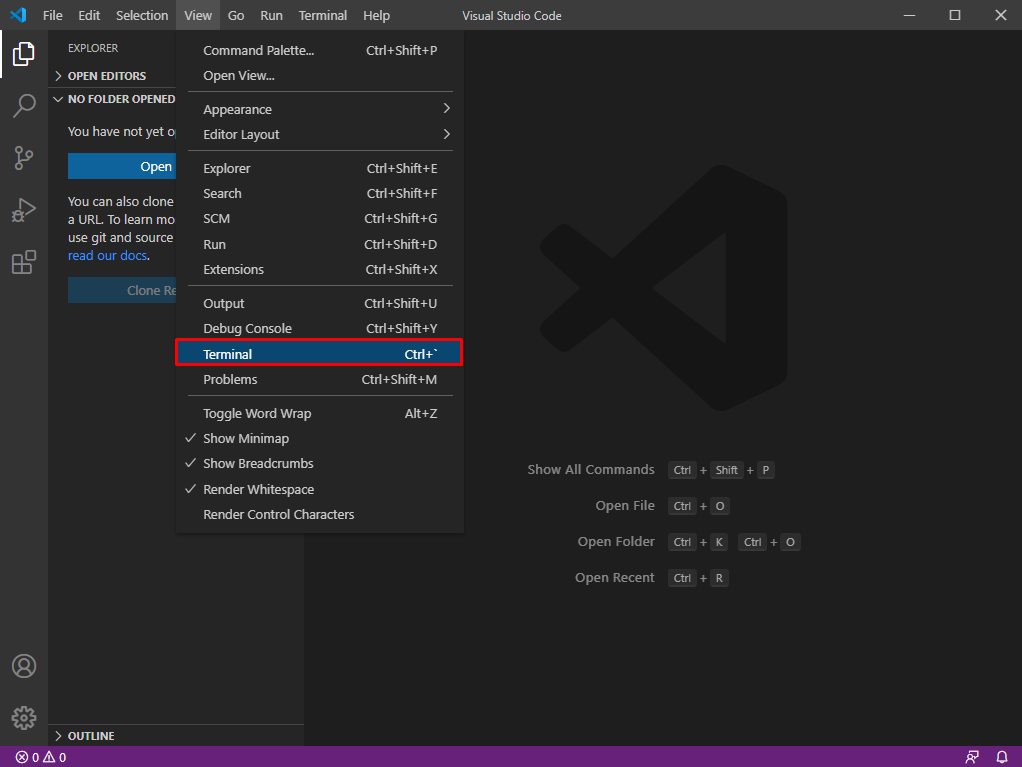
- Go to “View,” and then select “Terminal” in the menu.
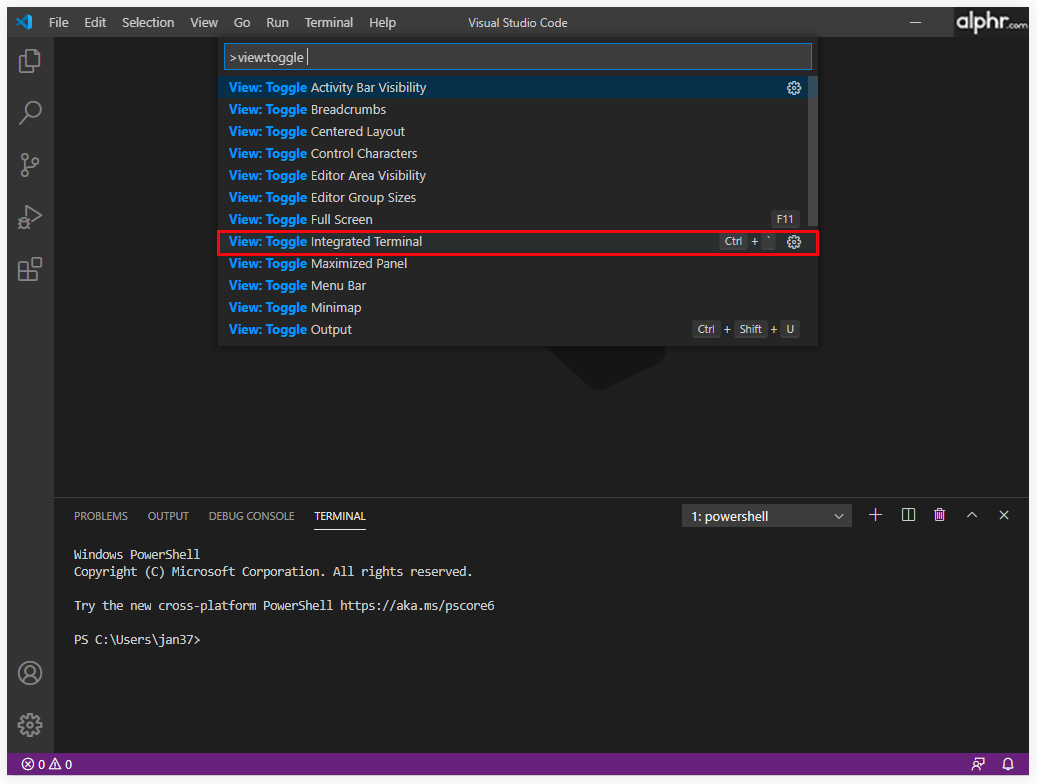
- Use the command palette (“Ctrl+Shift+P”) and then use “View: Toggle Integrated Terminal.”
When the command prompt is opened, use the following command to install new extensions:
“–install-extension <ext> “
You need to provide the full name of the extension, replacing the “<ext>” argument, which is usually in the format of “publisher.extension”. The extension’s full name can also be found in the URL of the extension on the VS Code Marketplace, after the “itemName=” argument.
How to Install Extensions in VS Code for All Users
Suppose the machine that is running VS Code is used by different people using separate profiles to access it. In that case, not all of them will get the extension installed when the process is performed automatically. VS Code’s integrated marketplace will only install the extension on the current user’s instance of the program. The installation would then need to be repeated for each user that needs the extension.
However, there is a workaround that will install the extension for all users on the machine. Here’s what you need to do:
- Use the online VS Code marketplace to download the extension’s .VSIX file, as described in the “How to Download Extensions for VS Code” section above.
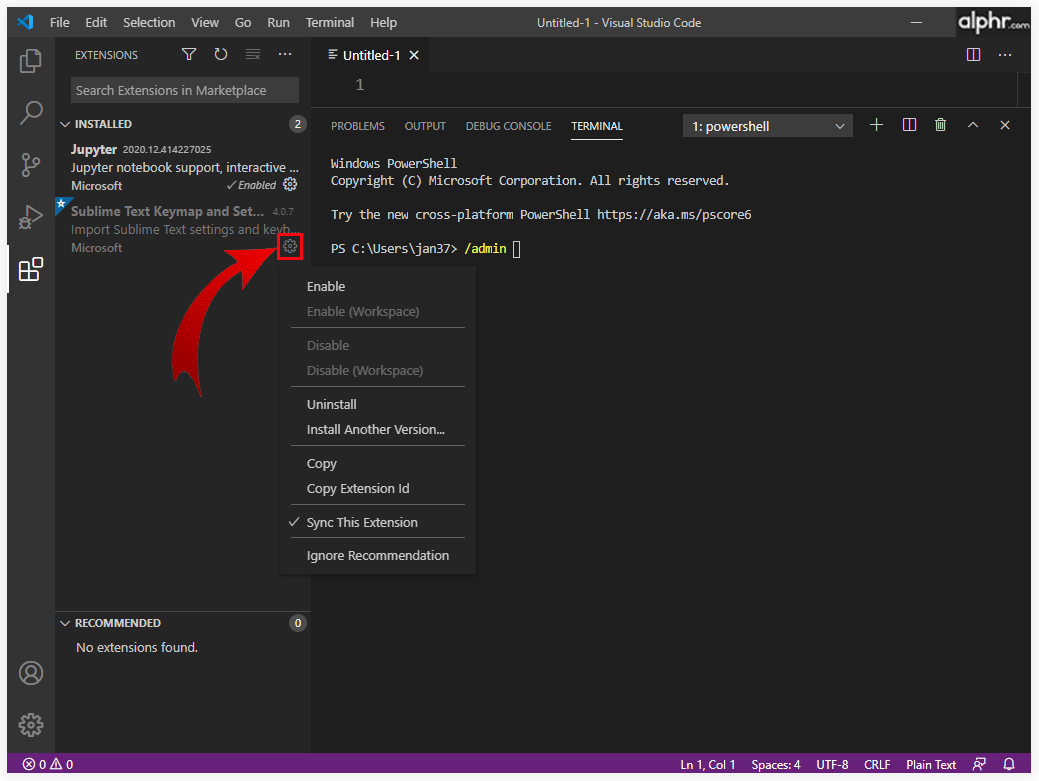
- Locate the application named “VSIXInstaller.exe”.
- Use the “/admin” parameter when calling the installer to install the extension for all users. For example: “VSIXInstaller.exe /admin file_path.vsix”. You can use VS Code’s command prompt to try and expedite this process.

Some extensions come with their installers attached, which will allow you to install them for all users if correct checks are marked during installation.
If the above methods don’t work, the only solution is to manually use the .VSIX installation method outlined in “Offline” or “Command Prompt” segments.
How to Manage Extensions in VS Code
Managing extensions allows you to get the most out of your VS Code platform. Each extension can be enabled, disabled, or uninstalled directly from the “Extensions” menu:
- Open the “Extensions” menu.
- The listed extensions are usually in the enabled > disabled > recommended order.
- If you want to manage an extension, press the gear icon on the right side of its entry in the list, then select the desired management options from the dropdown list.

Alternatively, you can see and manage extensions from the command prompt. If you prefer to use the command prompt to manage your extensions, here are some of its additional functionalities:
- “–uninstall-extension <ext>” uninstalls the extension. Use the full extension name in the “<ext>” argument, similar to when you installed it.
- “–list-extensions” will list all installed extensions on the device.
- “–show-versions” can be used in conjunction with the list command to show the versions of the extensions that are installed. This can be useful to determine if some extensions need to be updated.
- “–disable-extensions” will disable all extensions. VS Code will still list them as “Disabled” in the “Extensions” menu, but the extension won’t be active.
- “–enable-proposed-api <ext>” enables the extension’s proposed API features. You need to provide the full name of the extension for the “<ext> “argument.
The Command Prompt has many uses outside of managing extensions, which might be covered on a different occasion.
How to Uninstall an Extension from VS Code
Over the course of your programming life, there may be additional extensions you don’t need, or you’ll come across ones that have more capabilities and make others redundant. Here’s how to uninstall extensions:
- Open VS Code.
- Open the “Extensions” menu.
- Select the gear icon next to the extension you wish to remove.
- Select the “Uninstall” option to remove the extension from your device. This will prompt you to reload VS Code.
- Alternatively, use the “–uninstall-extension <ext>” command in VS Code’s terminal. Provide the full name of the extension (publisher.extension) for the “<ext>” argument.

As an alternative to uninstalling an extension, you can use the “Disable” option to keep the extension installed but prevent it from making a change in your VS Code projects. Extensions can be re-enabled at a later date using the “Enable” button.
How to Update an Extension Manually in VS Code
By default, VS Code automatically updates all installed extensions whenever a new version becomes available on the marketplace. However, for machines without internet access or with auto-updates disabled, there is a way to update an extension manually. Here’s what you need to do:
- If the machine has internet access, use the “@outdated” filter in the “Extensions” search bar. This will list the extensions that require an update. Click the “Update” button on the extension details to update it and force VS Code to reload. Alternatively, use the “Update All Extensions” command to update all outdated extensions. If you have automatic checking disabled, you need to use the “Check for Extension Updates” command in the menu.
- If the machine doesn’t have internet access, you’ll need to download the proper extension version elsewhere, then uninstall the outdated version from the machine and install the up-to-date one afterwards.
What to Do If VS Code Fails to Install an Extension
If VS Code fails during the installation process, there are a few things you can try out to fix it:
- Check for dependencies. Some extensions require other extensions to work properly, or in some cases, even install.
- Check for your proxy server. You’ll need to configure VS Code to use the same proxy server.
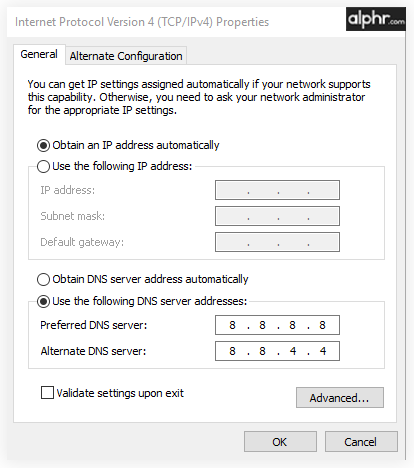
- Change your DNS settings to 8.8.8.8 and 8.8.4.4. These settings can be found on your “Internet Settings > Change” adapter options.
Get Coding with VS Code
VS Code is a sophisticated piece of software that allows you to program in all sorts of languages and use its extensive features. The extensions are a great way to customize and improve VS Code’s functions and performance. Good extensions will boost your workflow tremendously, so be on the lookout for new extensions to install.
What extensions do you use on your VS Code? Let us know in the comment section below.
Disclaimer: Some pages on this site may include an affiliate link. This does not effect our editorial in any way.


