Windows OS is positioned as an enterprise-friendly operating system with various features to support workgroups and the sharing of files and physical resources. Despite this focus, however, this flagship operating system seems to go out of its way to generate cryptic and user-hostile error messages for common problems.
These error messages always make solving issues more complicated than it needs to be. Additionally, Microsoft tends to add a layer of confusion and frustration for intelligent but not computer-immersed users—people who could probably fix the problem if they knew something about its cause.
One of the more egregious offenders is Windows error code 0x80004005. This error generally happens during a failed attempt to use a shared resource over the network, such as a shared network hard drive. The usual syntax for this error is something along the lines of “Windows cannot access \Computer1, Check the spelling… Error code 0x80004005 Unspecified error.”
Of course, this super-helpful message on someone’s screen tells them nothing. As a result, it can be challenging to troubleshoot this error.
Don’t worry, though. Several methods get used to resolve this issue. This article discusses diagnosing and troubleshooting the underlying problems that error code 0x80004005 might represent.
What Causes Error code 0x80004005?
Unfortunately, diagnosing the cause isn’t as simple as we’d like. There are a few behaviors that can trigger the 0x80004005 error code. However, we’ve come up with this list to help narrow it down:
- You are not signed in to the account with ownership of the file.
- The program you’re using doesn’t support the file type.
- A third-party program is blocking access to the files.
- There is an error with the current version or latest update of Windows.
Other malfunctions can result in the error code. But fortunately, we’ve provided several fixes below.
Quick Fixes for the ‘Windows Cannot Access Computer’ Error 0x80004005
There are several “quick fixes” worth trying to resolve this error. These particular solutions often resolve the error code 0x80004005 issue.
While this isn’t a comprehensive list of all the possible solutions, there’s a good chance that one of these fixes will work for you.
Quick Fix 1: Update Windows
Microsoft releases updates to fix bugs and implement security patches. If you missed an update, let’s start there. Here’s what to do:
- Click on the Windows icon in the lower left corner. Then, click Settings.

- Click on Update & Security.

- Click Check for updates.
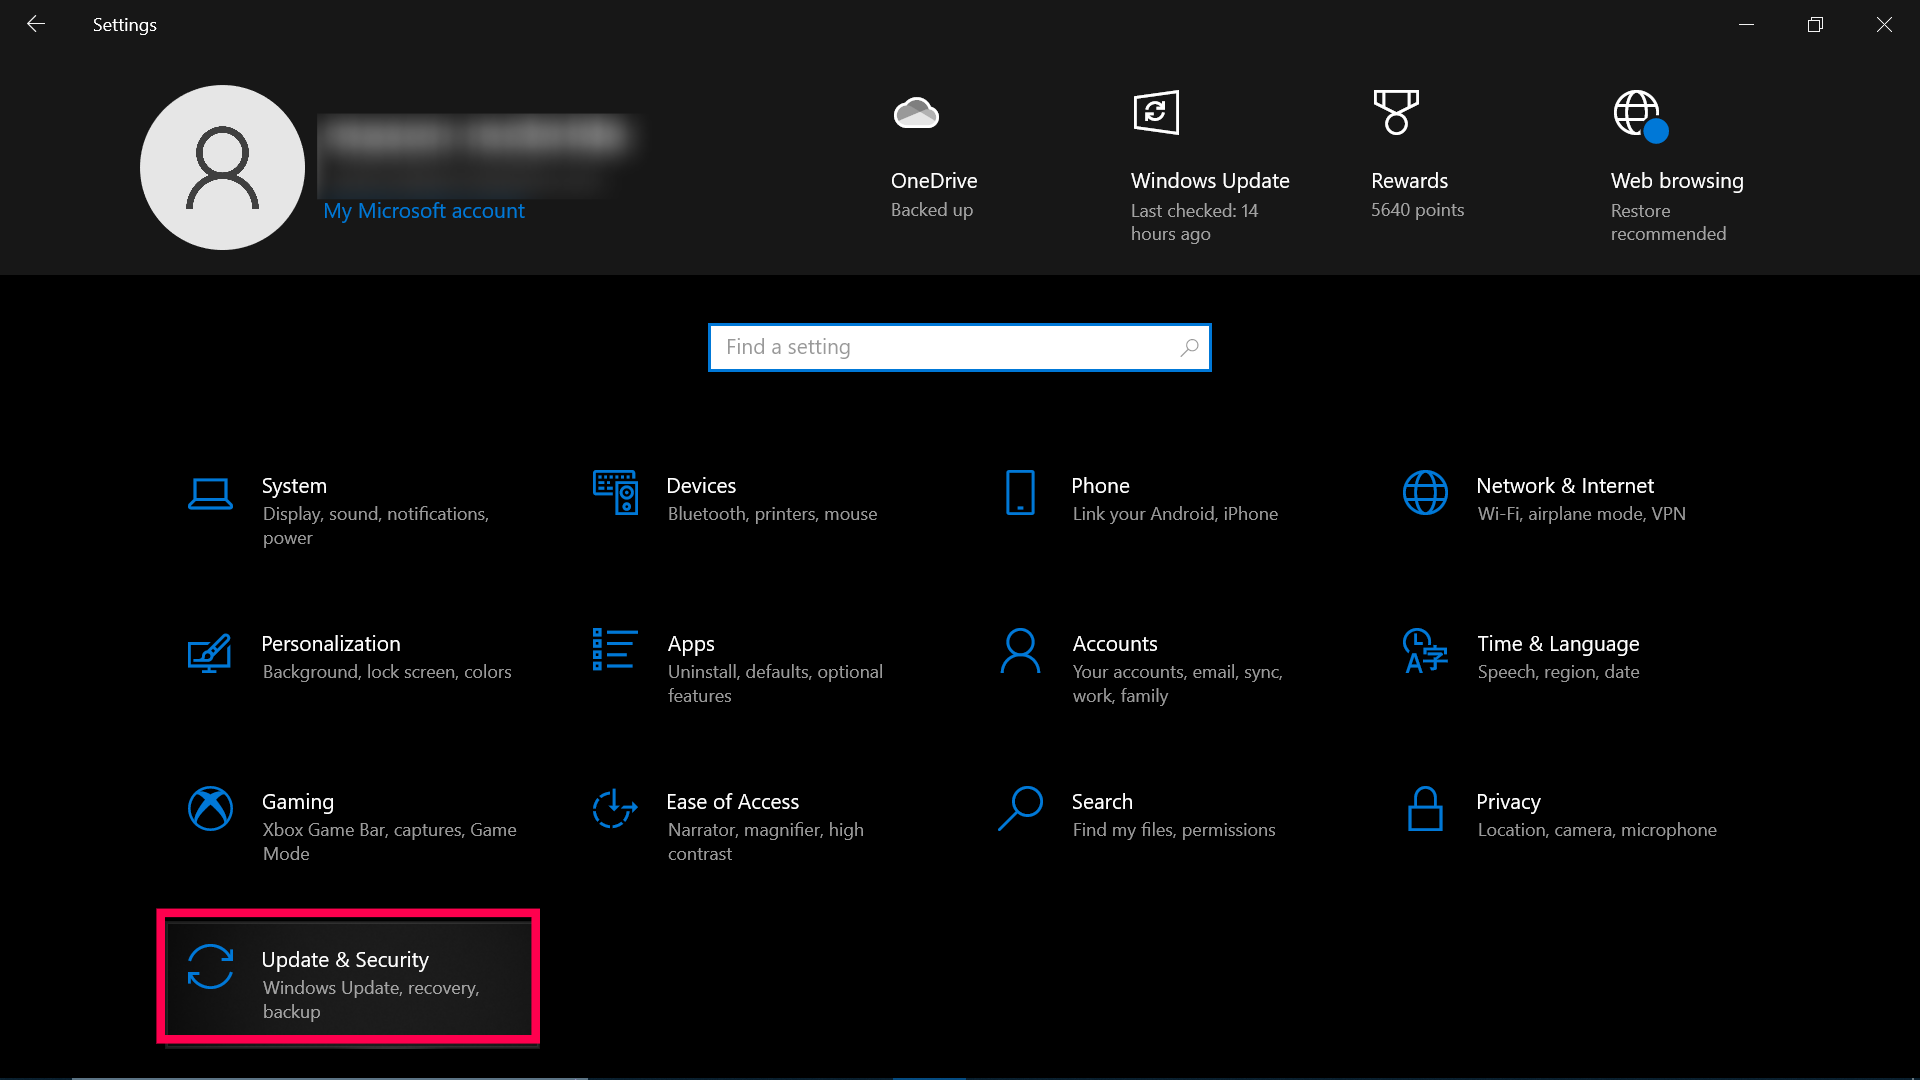

Perform any available updates. Then, check to see if the error disappears. If you continue having problems, keep reading.
Quick Fix 2: Disable IPv6
One fix to the 0x80004005 error code is to disable your computer’s IPv6 protocol. You don’t need IPv6 right now, anyway, unless you’re running an IPv6 network.
Just follow these four steps to try this fix:
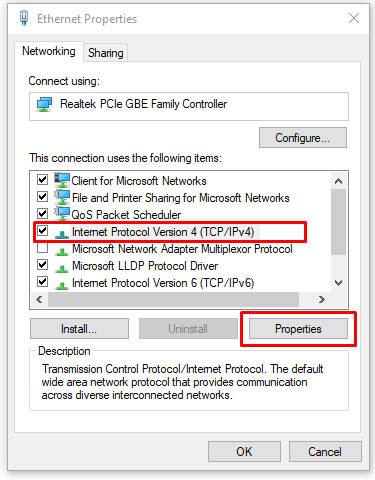
- Right-click the Windows Start button and select “Network Connections.”
- Click “Change adapter options.”
- Right-click your network adapter and select “Properties.”
- Find “Internet Protocol Version 6 (TCP/IPv6)” in the center pane and uncheck the box.


Most network configurations still use IPv4 and will for the foreseeable future, so you won’t need IPv6 for a while unless you’re in an enterprise network already utilizing IPv6.
If this doesn’t resolve the error, then move on to the following suggested solution.
Quick Fix 3: Check NetBIOS
The next step to resolve error code 0x80004005 is ensuring the NetBIOS service is working. NetBIOS allows networked computers to share resources. If this isn’t working or isn’t enabled, it could cause the error to occur.
Follow these steps to check that the NetBIOS service is enabled:
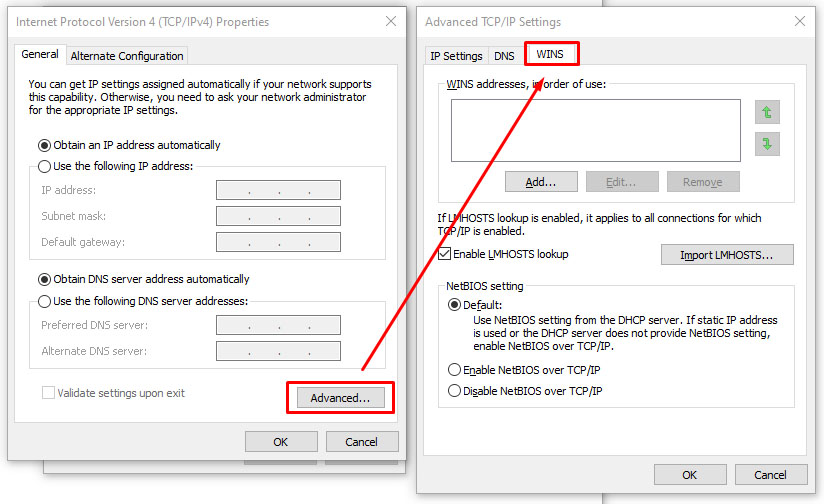
- In the same window as above, highlight “IPv4” and click the “Properties” button underneath.
- Click “Advanced,” then select the “WINS” tab.
- Ensure the NetBIOS setting is at “Default.”

If NetBIOS is working as it should be, move on to the next possible solution.
Quick Fix 4: Check the Sharing Settings
If the NetBIOS settings weren’t the problem, look at the advanced sharing settings.
- Navigate to “Control Panel -> Network and Internet -> Network and Sharing Center -> Advanced sharing settings.”
- Click the “Private” network and ensure that “Turn on network discovery” is enabled and that the “Turn on automatic setup…” checkbox is enabled. Make sure “Turn on file and printer sharing” is also activated.
- Click “All Networks” and ensure the “Turn off password-protected network sharing” option is enabled.


If you changed the sharing settings, retest your share to see if it fixed the 0x80004005 error. If the changes did not fix the error code, move on to checking permissions.
Quick Fix 5: Check Permissions
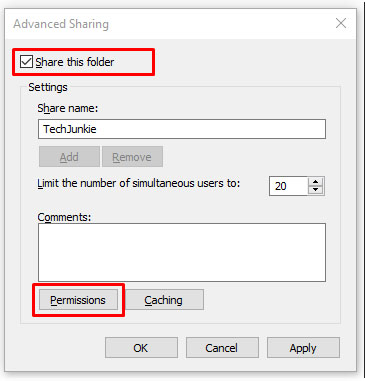
- Right-click on the folder or drive you want to share, then select “Properties.”
- Click on the “Sharing” tab, then select “Advanced sharing.”
- Ensure the box found next to “Share this folder” appears checked, then click “Permissions.”
- Highlight the “Everyone” group, which should be in the top panel, and allow “Full Control.” If there isn’t an “Everyone” group, click “Add” and type “Everyone” in the bottom panel, then select it.


If permissions didn’t work for you, move on to re-downloading Windows 10 updates.
Quick Fix 6: Re-download Windows 10 Update
If you receive the error message with error code 0x80004005 while attempting to update Windows 10, the problem could get caused by a corrupt installation file.
To fix this, try re-downloading the Windows 10 installer and starting over. Frustrating as it may be, it’s worth a shot if this is the source of the problem.
Quick Fix 7: Enable SMB 1.0/CIFS File Sharing Support
As suggested by TechJunkie reader TFI, several users have reported that enabling SMB 1.0/CIFS File Sharing Support does the trick.

- In the search box, type “control panel,” then select “Programs and Features.”
- In the left-hand task pane, click on “Turn Windows features on or off.”
- In the dialog that comes up, scroll down and find “SMB 1.0/CIFS File Sharing Support.”
- Ensure the checkbox next to “SMB 1.0/CIFS File Sharing Support“ displays as checked.
- Click “OK.”


In closing, it can be frustrating and difficult to troubleshoot Windows 10 errors, and the error messages rarely provide any useful information.
Hopefully, one of the above processes helped you get your Windows 10 machine working correctly again. Have any other suggestions on dealing with this issue? Please share them with us in the comment section below!
For other Windows error codes, check out fixing the 0x80042405 error, fixes for the 0x80044004 error, how to deal with 0xc000007b errors, and view our take on error code 0x80240034.
Disclaimer: Some pages on this site may include an affiliate link. This does not effect our editorial in any way.


