Adding columns in any spreadsheet program is a fundamental skill that enables you to work more effectively with the application. Google Sheets is no exception; if you’re going to do any significant work in Google Sheets you need to understand how to perform this task. Along with splitting columns and adding rows and cells, learning to add columns in Google Sheets is a core skill that makes creating useful spreadsheets much easier.
Everything is of a uniform size in an empty sheet but as soon as you begin entering data, all that changes. Being able to move, add, split and delete columns, rows and cells will make your life with Google Sheets a whole lot easier. Here’s how.
Add columns in Google Sheets
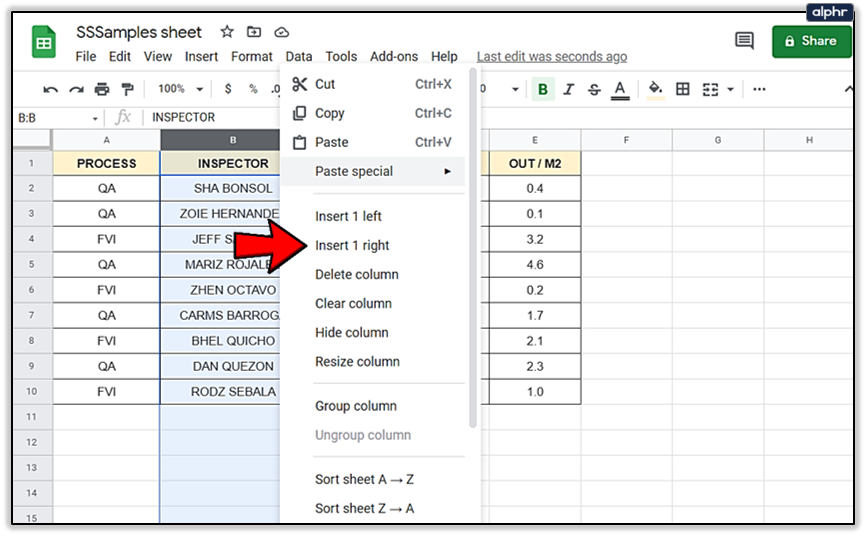
There are quite a few things that Google Sheets does better than Excel and one is giving you the choice as to where to add your column. Google Sheets let you choose whether to add to the left or to the right of the insertion point. It’s genius, yet so simple.
- Open your Google Sheet.

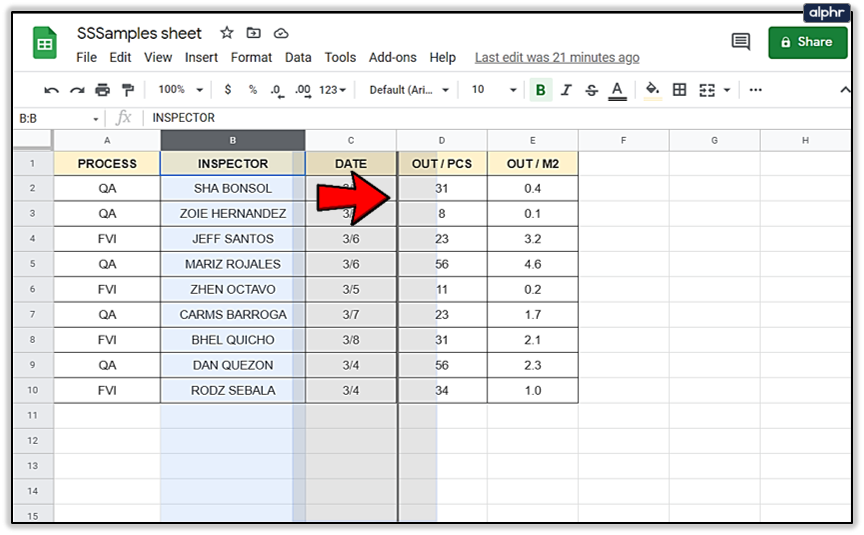
- Highlight an existing column heading and right click.

- Select Insert 1 left or Insert 1 right.
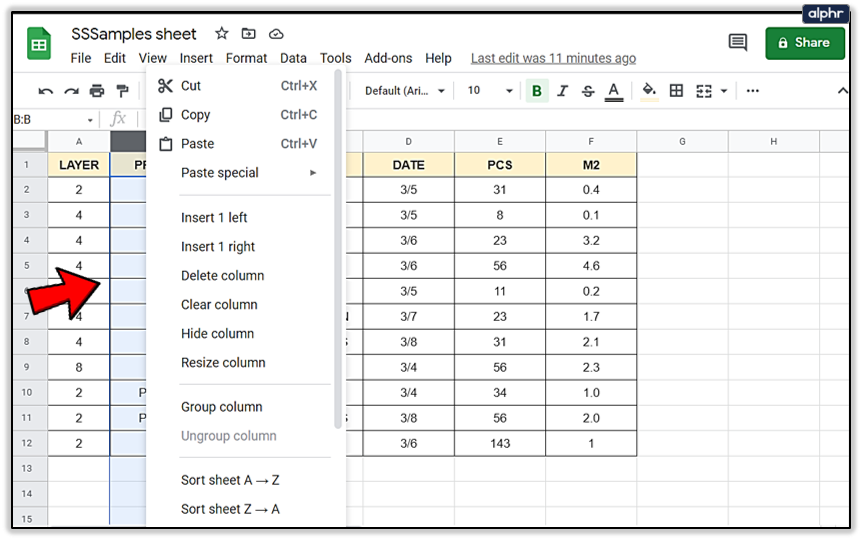

The new column will then be added on the side you selected. You can also use the Insert menu at the top to add columns but as you need to highlight the column you want to insert next to, it’s usually easier to just right click.

Split columns in Google Sheets
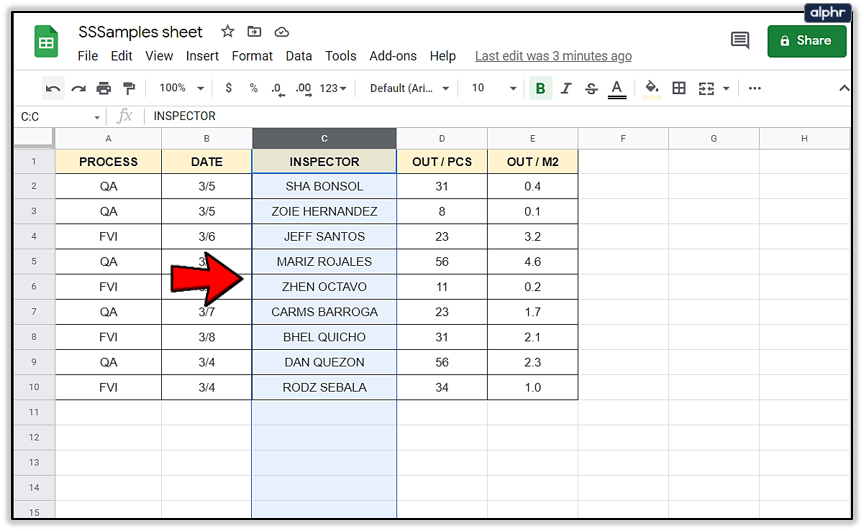
Splitting a column is useful for a variety of different purposes, but one of the most common is when you’re reformatting imported data. For example, say you imported an employee database with first and last names in the same column and need to split the two names into two columns. Here’s how you do it.
- Open your Google Sheet.
- Right click the header of the column you want to split.
- Select Insert 1 left or Insert 1 right to give the split somewhere to deposit data.
- Highlight the column you want to split.
- Select Data from the top menu and Split text to columns.
- Select Space in the box that appears near the bottom of the screen.


This splits the data in that column that is separated by a space. You can also select comma, semicolon, period or a custom character depending on how the data has been formatted. For example, if you had a column of combined category and part numbers where the format was ‘123-299193’, you could specify the dash character as the separator and divide the column into category and part number.

Add rows in Google Sheets
Adding rows is as straightforward as adding columns in Google Sheets. It uses exactly the same commands, but works horizontally instead of vertically.
- Open your Google Sheet.
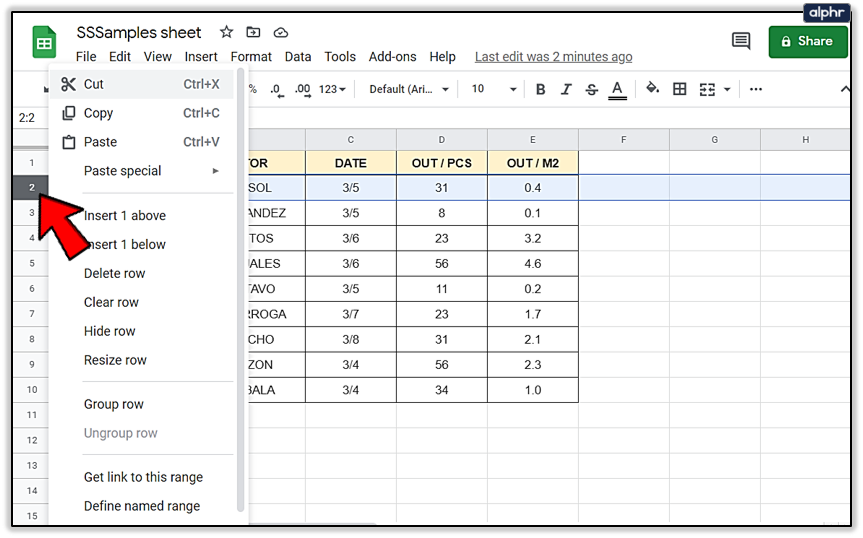
- Right click an existing row heading on the left.
- Select Insert 1 above or Insert 1 below.
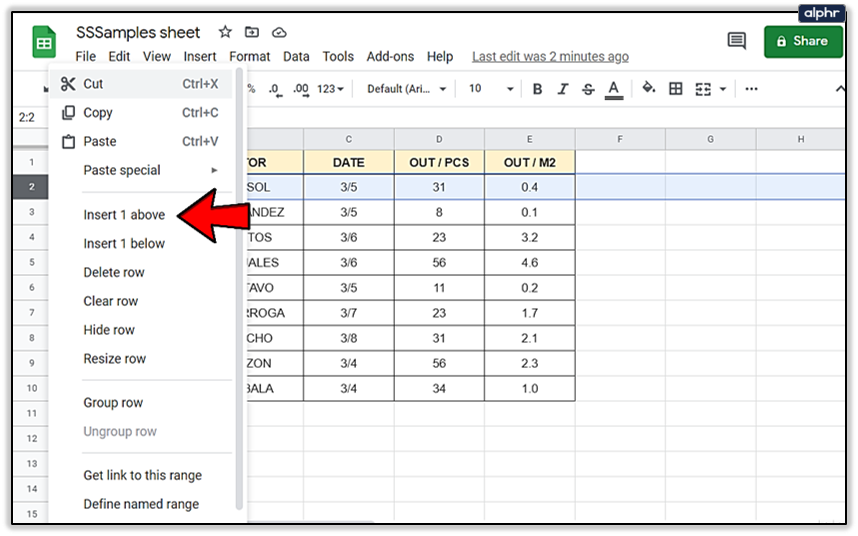
The new row will then appear in the position you specified. You can also use the Insert menu at the top to add rows but as you need to highlight the row you want to insert next to, it’s usually easier to just right click.

Move a row or column in Google Sheets
If you need to move a row or column into a new place on the spreadsheet, that’s easily accomplished.
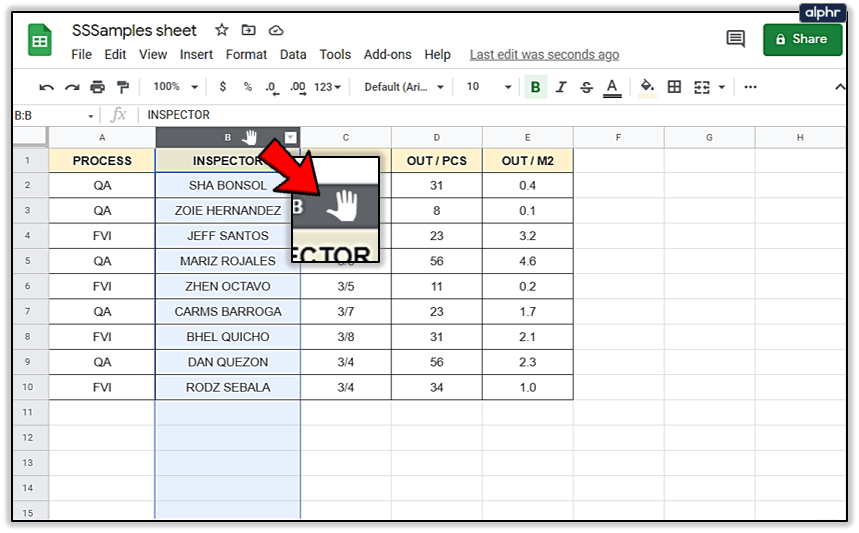
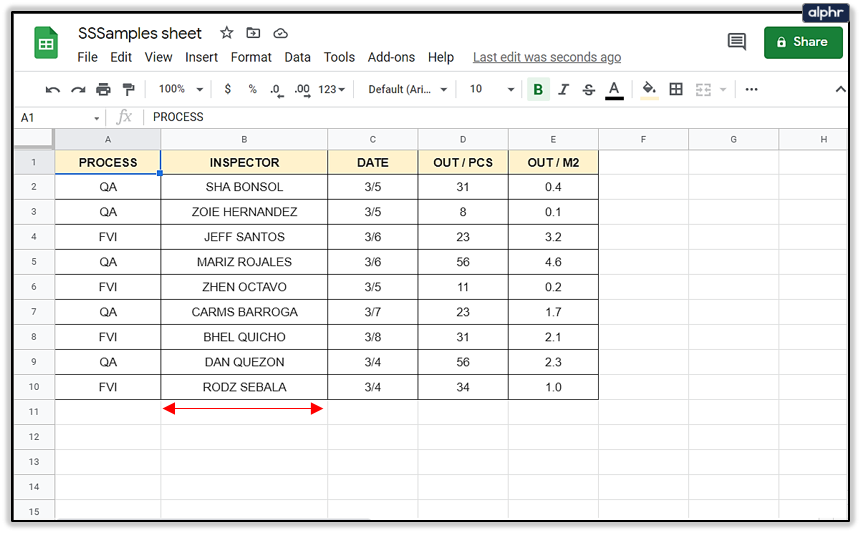
- Select the column or row you want to move and hover over the header. The cursor should change to a hand.
- Drag the row or column to your desired position and let go.
- Sheets will move the data in its present form to the new position.
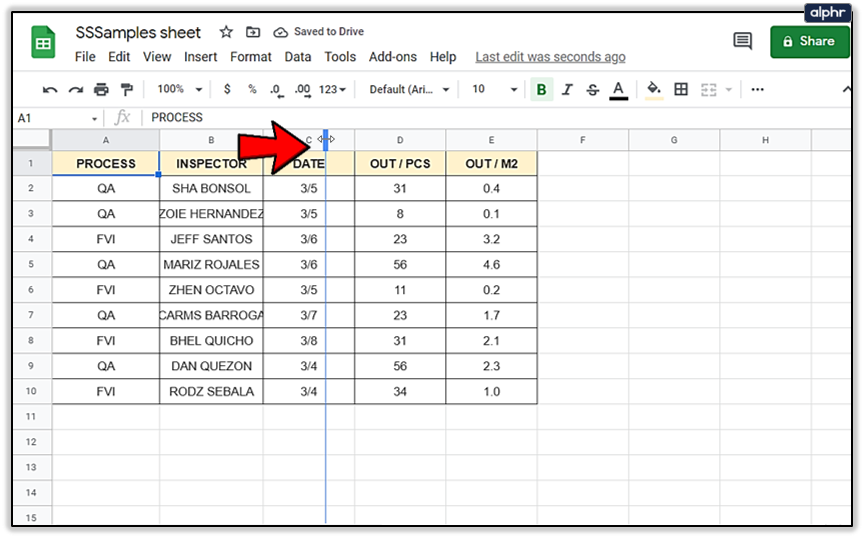
Resize a row or column in Google Sheets
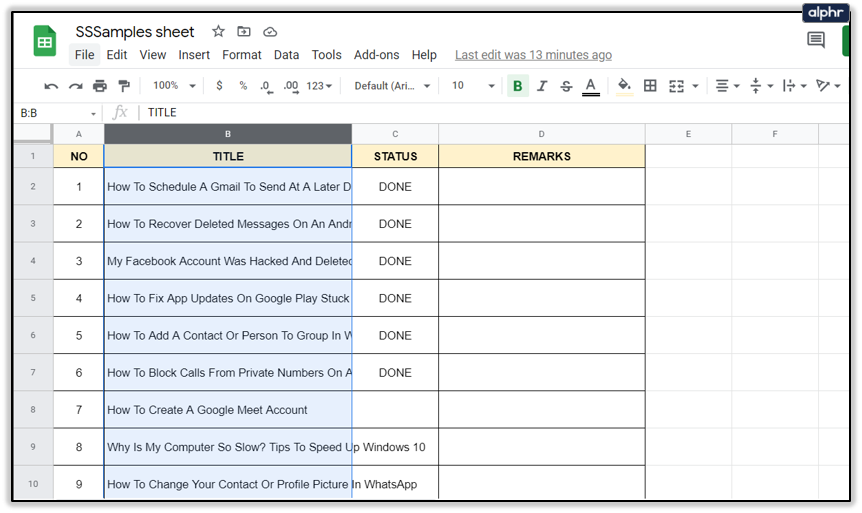
Sometimes, the data contained within a cell is too large to be seen completely. You can either resize it or use wrap to display all text within those cells. Here’s how.
To resize a row or column:
- Hover the cursor over the line dividing a row or column. It should change to a double arrow.
- Drag the cursor until the row or column is of the desired size or displays the data clearly.
- Let go the cursor and the row or column will retain its size.

Sometimes resizing isn’t suitable or doesn’t work within a sheet design. In that case, you can use wrap text to squeeze a little more visibility into the cell.
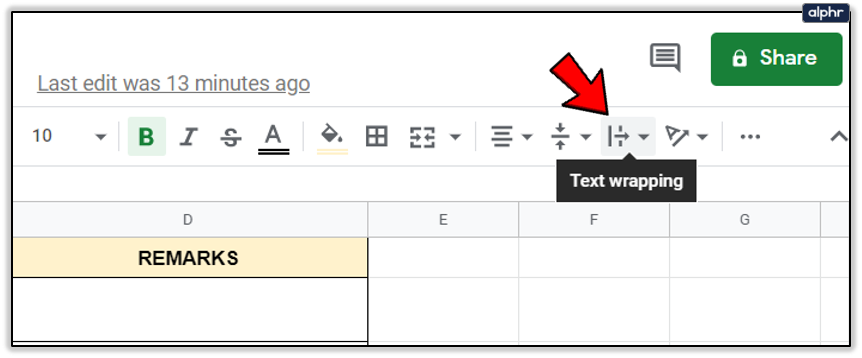
- Highlight the row, column or cell you want to wrap.
- Select the text wrapping icon from the menu.
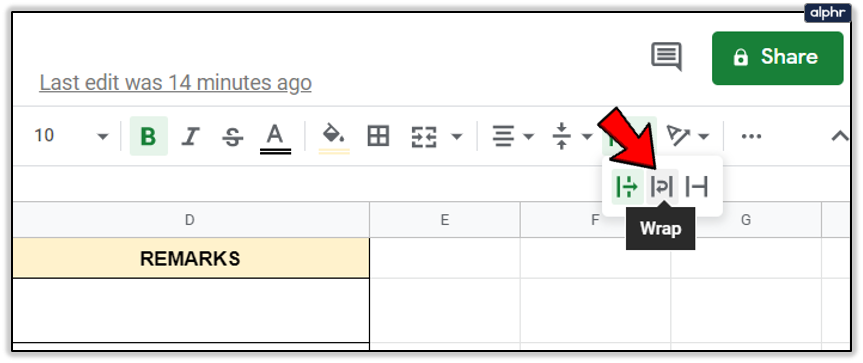
- Select Wrap. The text should now be formatted to fit better into the cell size and be clearer to read.
You can also use the Format menu and select Text wrapping to achieve the same goal, or right click on the row or column header and select “Resize”.

Delete a row or column in Google Sheets
Finally, one of the most common tasks in Google Sheets or any spreadsheet is deleting a column or row. Here’s how to do it.
- Select the column or row header you want to delete.
- Right click and select Delete Row or Delete Column.
- Sheets will shift the spreadsheet data up or down depending on formatting.

Rather than deleting, you can also hide rows and columns if that would work better. This can be done by selecting the row or column header and selecting “Hide”. This can be useful for hiding formula or other data from view while still displaying data derived from it.
Disclaimer: Some pages on this site may include an affiliate link. This does not effect our editorial in any way.