Nothing is as mundane and uninspiring as filling in Excel cells one by one. Fortunately, you don’t have to spend the rest of your life copying data from one spreadsheet to another. You can leverage Excel autofill to save some time and complete your task more efficiently.
How does this feature work in Excel? Read on to find out.
How to Autofill Cells in Excel
Using the Excel autofill feature can be as easy as dragging your cursor. All you need to do is fill in the first cell or two, and the program will identify what the rest of the cells should contain.
To autofill cells with the same information, follow these steps.
- Fill in the first cell.

- Move your cursor over the bottom right corner of the cell to see it turn into a “+” sign.

- Grab the corner of the cell and drag it out to fill in the rest of the cells.


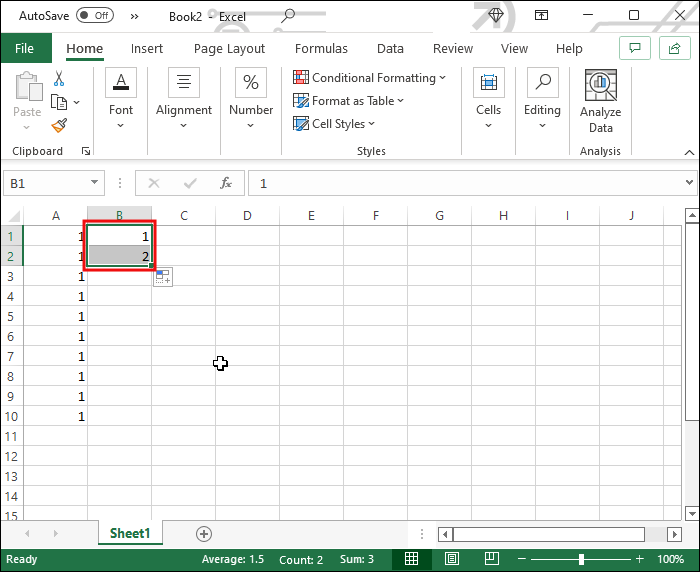
The process is similar if you want to fill cells with a sequence instead of the same value.
- Fill in the first two cells of your sequence.
- Select the cells.
- Click and hold the bottom right corner of the selection and start dragging it.
- Excel will deduce the pattern based on the cells you filled in and continue the sequence.


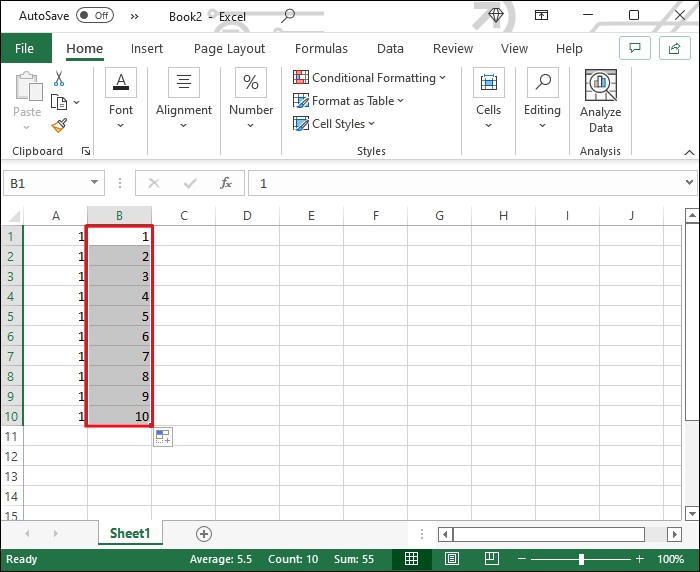
If the program didn’t identify the correct pattern, adjust the autofill by clicking the autofill menu that appears when the process is complete. Select the correct option, and Excel will adjust the sequence accordingly.
Excel Autofill Cell Based on Another Sheet
Do you want to copy data from one Excel sheet to another? Forget about copy-pasting each cell and manually updating your spreadsheet each time the original document changes. Here’s how to autofill cells based on another sheet.
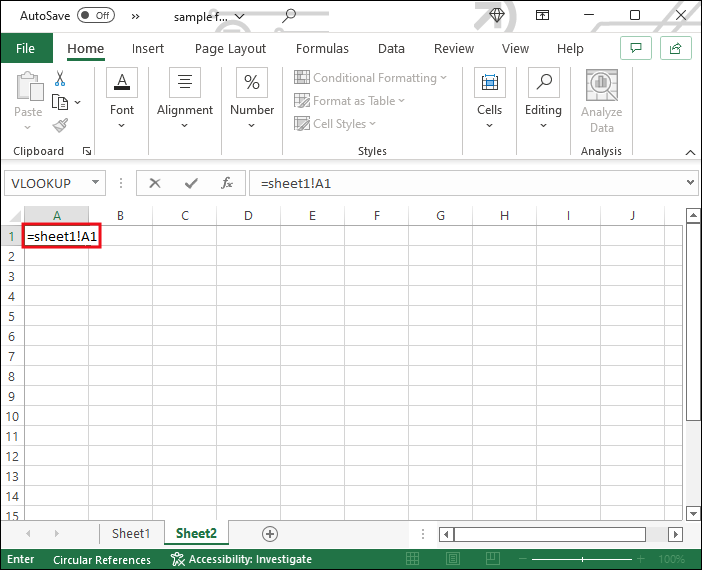
- Create a new sheet for your database.
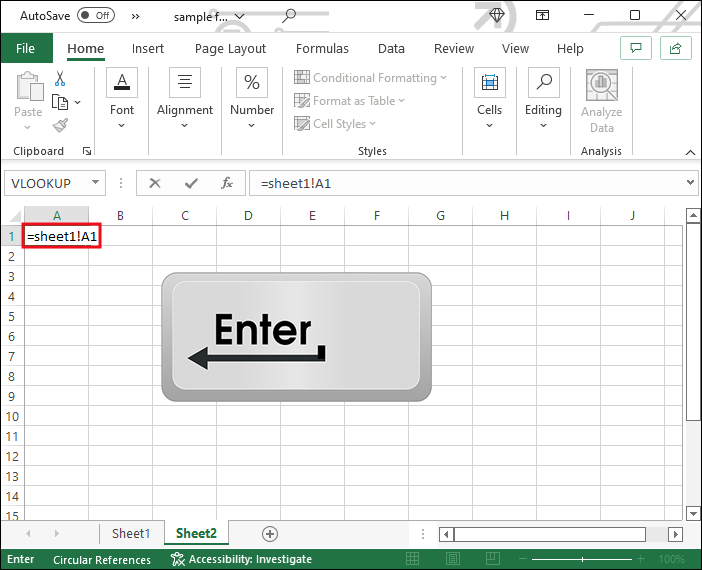
- Place your cursor in one of the cells and type “=” followed by the name of the sheet, an exclamation mark, and the cell number you want to reference. For instance, a simple formula would look as follows: “=Sheet1!A1”
- Hit “Enter,” and the cell will display the information located in the cell you just referred to.
- Grab the bottom right corner of the cell and drag the selection to import data from subsequent rows and columns.

Although this is a great way to import data from another sheet, you might sometimes need to filter or organize the data instead of simply copying it. By changing your formula a bit, you can filter data from another sheet in Office 365 and only import relevant pieces of information. Follow these steps to get started.
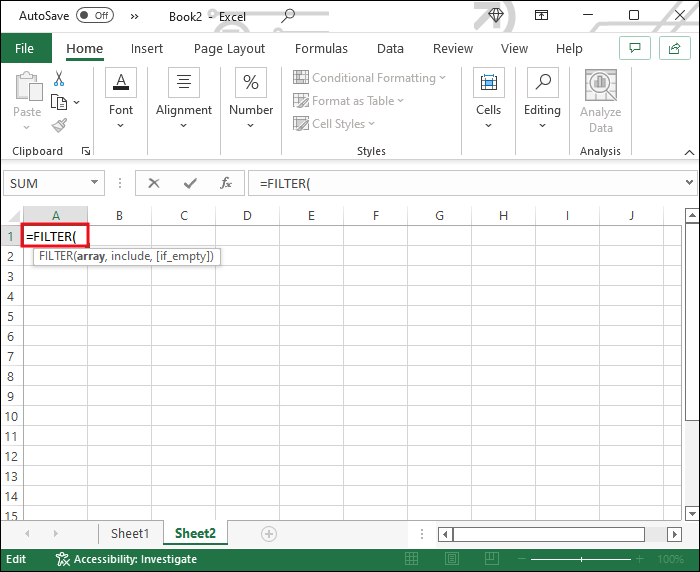
- Create a new sheet.
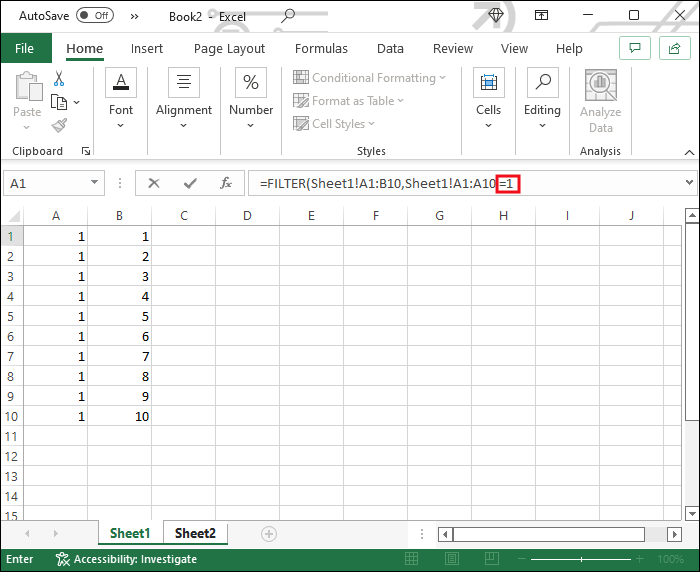
- Click in a cell and type the “=FILTER(” formula.
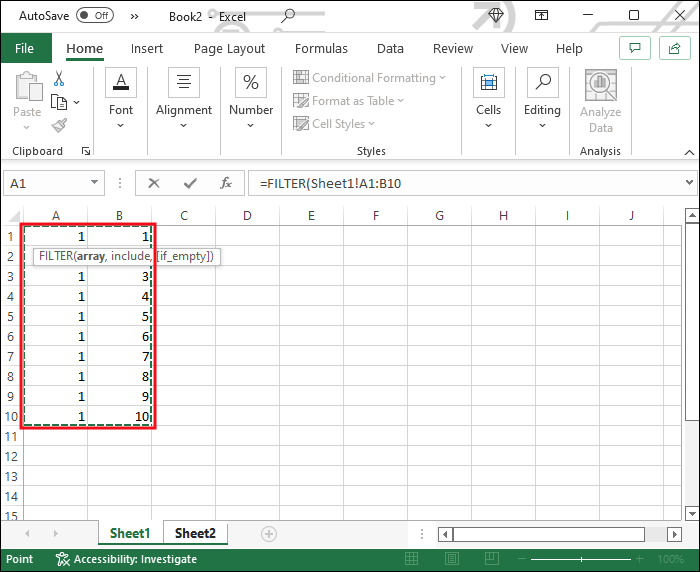
- Switch to the sheet you want to reference and select your entire table without its headings.
- Type a comma in the formula, then select the column based on which you want to filter your data. Make sure you exclude the heading again.
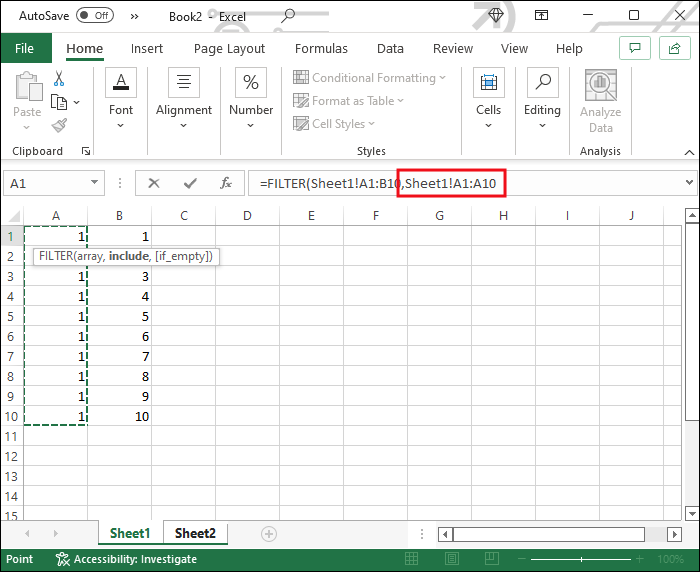
- Type “=” and define the criterion for your filter. If it’s a number, simply write the number. If the column contains text, use quotation marks in your formula. For example, “=FILTER(Sheet1!A1:C3,Sheet1!A1:A3=1)”. Every row marked with the number 1 in column “A” will get imported to the new sheet.
- Close the parenthesis and hit “Enter.”

Excel Autofill Cell Based on List
Do you have an Excel sheet with a long list of data that you need to compile in a specific format? Don’t worry. You won’t have to retype the pieces of information manually. Excel’s “Flash Fill” feature takes autofill to the next level and will make your job easier. Here’s how to autofill cells based on an already existing list.
- Fill in the first cell the way you want, using the information from your list.
- Hit “Enter” and start typing the next entry.
- Excel will fill in the rest of the cells following the same pattern. Press “Enter” to accept the suggestion, and your list is complete.

Excel Autofill Cells Based on Dropdown List Selection
Creating a dropdown list in Excel that will help you fill in cells with the information you select can save you a tremendous amount of time. Let’s see how to autofill cells based on dropdown list selection.
First, you’ll need to create a separate sheet for the information your dropdown list will cover.
- Open your Excel document and add a new sheet.
- Paste the database you want to include or create one from scratch on the blank sheet.
Next, convert your spreadsheet into a table. This is important because it’ll be easy to edit or expand this way. It also ensures that the dropdown you’re about to create will update automatically each time you modify the data. - Select any of the cells in your spreadsheet.
- Hit Ctrl and “T” and press “OK” to create a table.


With your database ready, it’s time to create the dropdown list.
- Select the cell where you want to place your dropdown list.
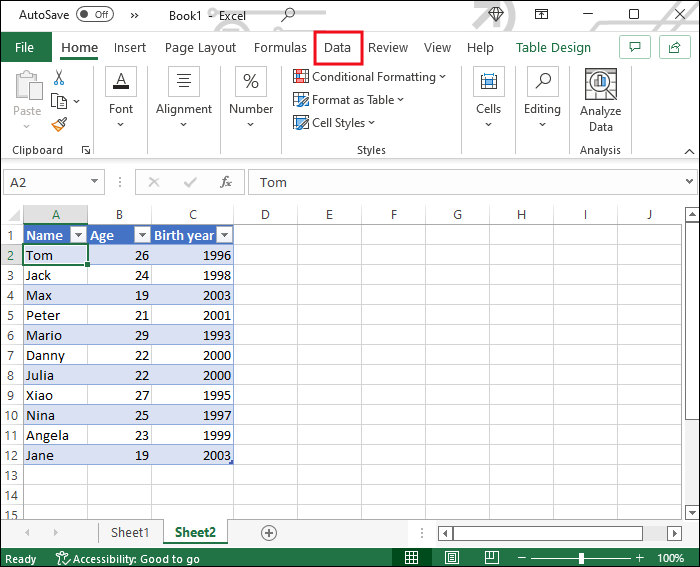
- Switch to the “Data” tab at the top.
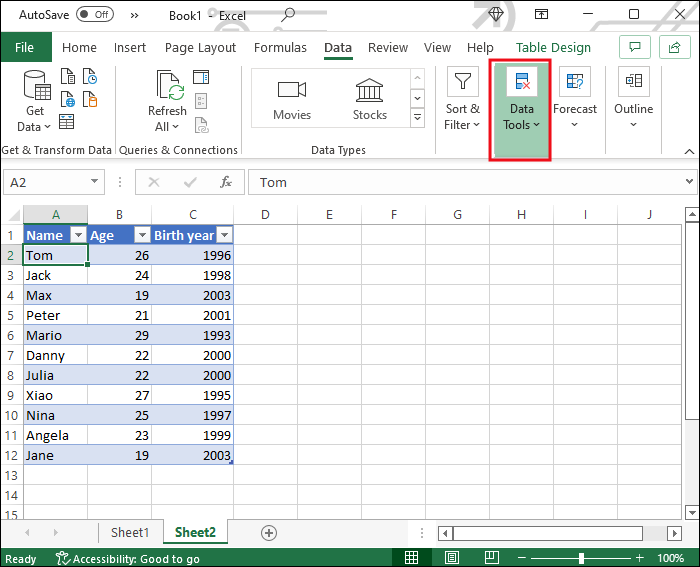
- Find the “Data Tools” section.
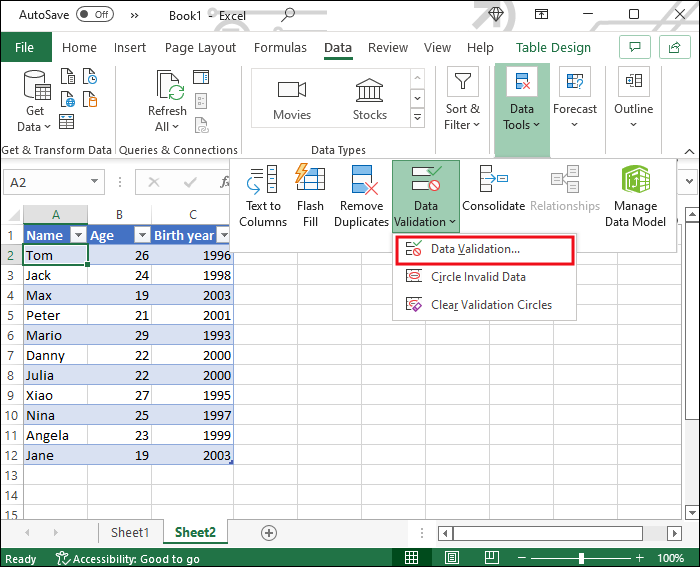
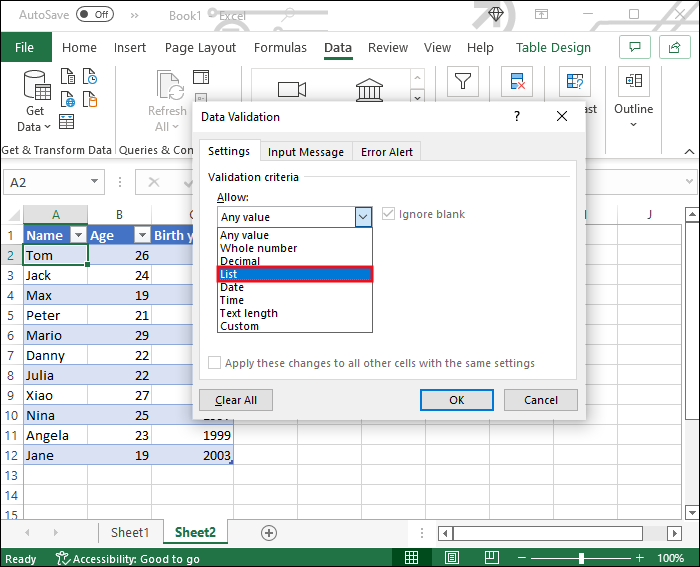
- Click the “Data Validation” icon and select this option from the dropdown menu.
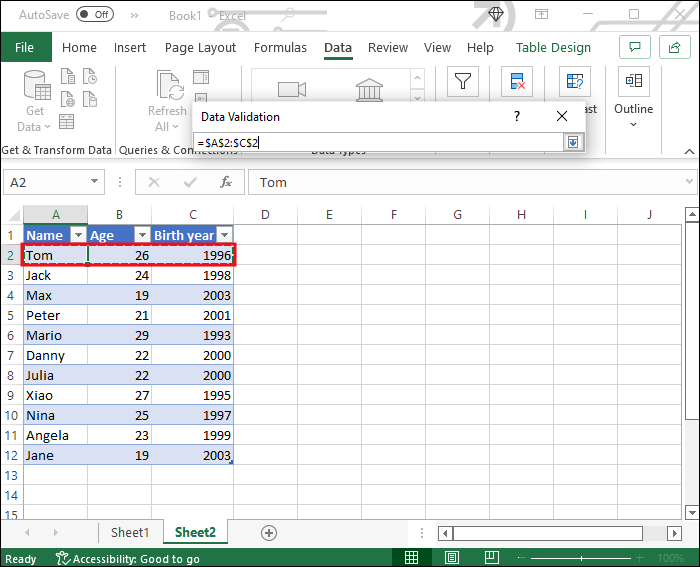
- Select the “List” option under “Allow.”
- Click the “Source” field and switch to your database’s worksheet.
- Select the column with the items you want to appear on your dropdown list.
- Click “OK” in the Data Validation window.


Now, insert the rest of the data you want to appear when selecting an item on your list.
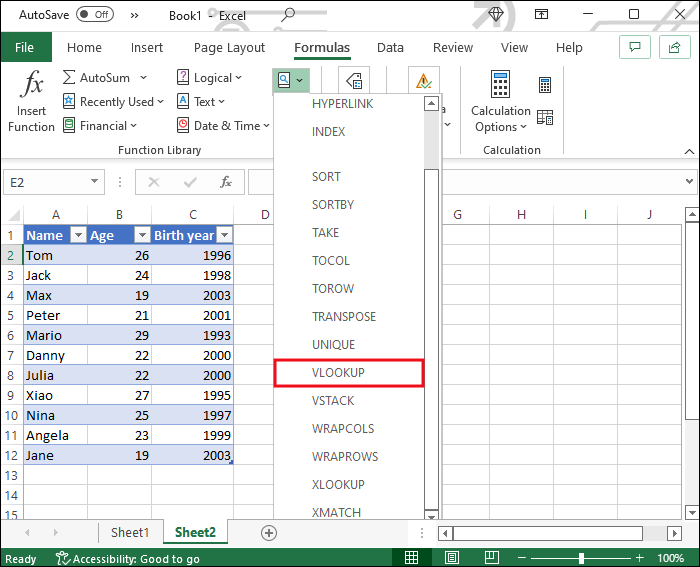
- Select an empty cell for your first piece of data.
- Click “Formula,” then “Lookup & Reference,” and select “VLOOKUP.”
- Fill in the fields the following way, then hit “OK.”
- The “Lookup_value” should be the cell of your dropdown list.
- For “Table_array,” select your entire database.
- For “Col_index_num,” type the number of the column where the information you want to appear is located.
- Make sure “Range_lookup” is “false.”


You just created a reference to one column. Copy and paste the formula to subsequent cells to display the data in the rest of the columns. In each copy, replace the index number with the number of the column you want to reference.
Every time you select an item in your dropdown list, the cells you equipped with the formula will automatically get filled in with the information about the item in question.
Get the Most Out of Excel
Learning how to autofill Excel cells can significantly cut down on the labor you’ll need to invest in your spreadsheets. Follow the instructions above to leverage these advanced Excel features and spare yourself from monotonous tasks.
Have you used Excel’s autofill option before? What are some of your favorite ways to leverage this feature? Let us know in the comments section below.
Disclaimer: Some pages on this site may include an affiliate link. This does not effect our editorial in any way.


