Instances on BlueStacks can be used for various things, such as playing several games or using different accounts simultaneously, farming faster, etc. However, if you wish to delete instances from BlueStacks, there is a way to do it. Namely, the master instance, the first BlueStack 5 instance, can be deleted in a certain way when you don’t want to use it anymore.
Read on to learn how to delete the master instance on BlueStacks, how to delete BlueStacks altogether, and more.
How to Delete Master Instance on BlueStacks
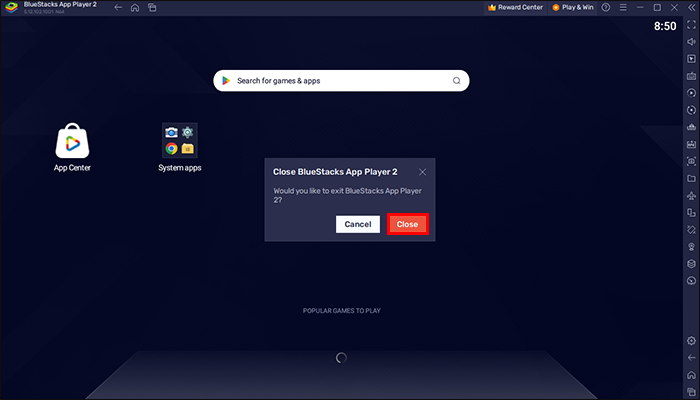
To delete the master instance, your BlueStacks 5 app has to have more than two Android versions installed. If only one Android version exists, a pop-up will appear on your screen that the master instance can’t be deleted. Additionally, before you start the process of deleting a master instance, make sure you don’t have it running in the background. Close it, and then you can delete it.
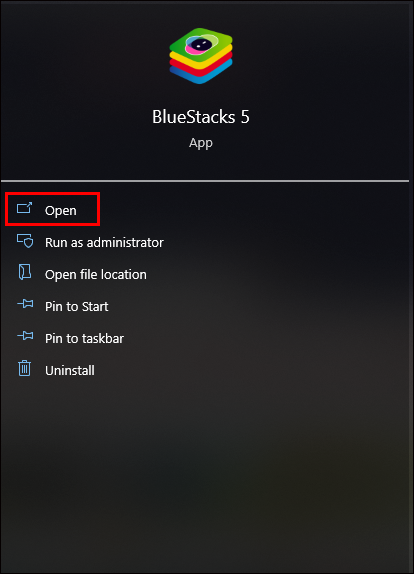
- Open the BlueStacks App Player.

- Click on the “Multi-instance Manager.” The icon for it, resembling stacked books, is in the left sidebar.

- Click the “Delete” icon (trash can) next to the master instance you want to remove.
- Confirm the deletion in the next window.


Note that deleting the master instance of one Android version on BlueStacks will also delete all instances installed there.
Deleting All Instances on BlueStacks
You can delete a specific number of instances of Bluestacks as you like or all of them at the same time by using batch operations. To perform this action, follow these steps:
- Open the BlueStacks App.
- Go to “Multi-instance Manager.”
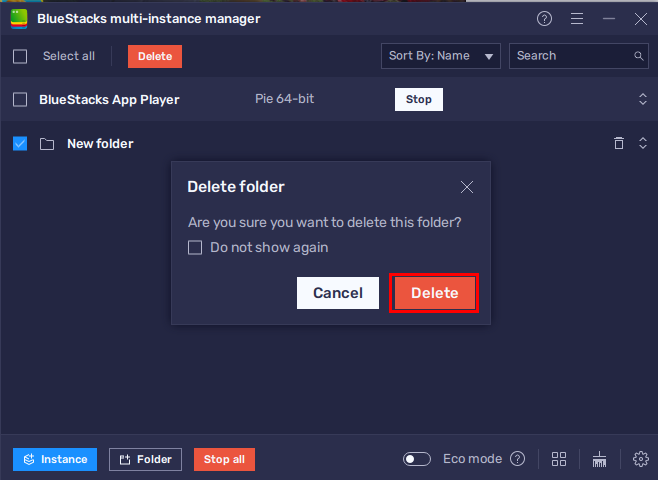
- From the instance list, click on the checkboxes of those you want to delete simultaneously.
- Click on the “Select All” option to delete all of them.
- Click on the “Delete” button.


This same action can be performed until the last step for other batch operations. The options you can choose are delete, start, and stop. The start option will begin all the instances that aren’t currently running, while stop will finish all presently running instances.
How to Assign One Instance as a Master Instance
If you’re in a situation where you don’t want to use the master instance assigned to your BlueStacks account, you can reassign it to another instance you do use. This can be done without uninstalling and reinstalling BlueStacks. The important thing is to install a new instance with any version but Android Nougat 32-bit. It’s recommended to use Android Nougat or Pie 64-bit. This way, your games won’t crash or run slowly, as can be the case with the 32-bit version.
- Go to the “Multi-instance Manager” in your BlueStacks App.
- Create a new instance.
- After installation, run the instance to see if it’s working.
- Close the “BlueStacks App.”
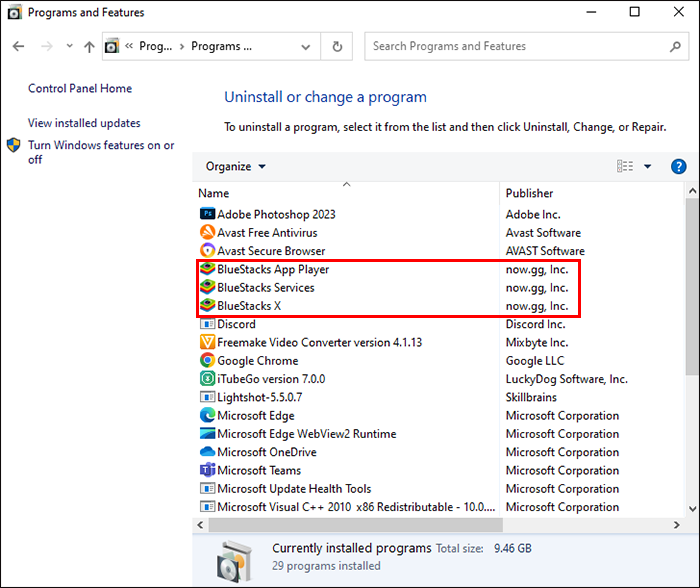
- Open the “Control Panel” on your PC.
- Click on “Programs and Features.”
- There will be two instances, the old one and the one you installed, the 64-bit one.
- Uninstall the old instance.
- If you open the “Multi-instance Manager” again, there will only be the latter instance.


After completing this process, you can delete any instances you want, even the current one, without uninstalling Multi-instance Manager.
How to Manage BlueStacks Instances
Multi-instances on BlueStacks are helpful if you want to play several games at the same time or play the same game from multiple accounts. Suppose you created too many instances; sometimes, finding the one you need is confusing. For this reason, you should know how to manage your instances in a way that suits you the best. If you’re in a hurry and need to find a specific instance, you can type its name in the search box in Multi-instance Manager.
Additionally, you can sort your instances by name or engine. If you choose the “Sort By Name” option, the BlueStacks instances will be in alphabetical order. But if it’s by the engine, the order will prioritize the Android runtime of each instance.
How to Uninstall BlueStacks
The 64-bit Android Nougat version will fix problems with slow-running games. However, the app alone can cause your PC to freeze and function incorrectly. If that’s the case, it’s better to uninstall this heavy app. It’s not enough to delete the program from the computer, you also need to delete its program data and temporary files:
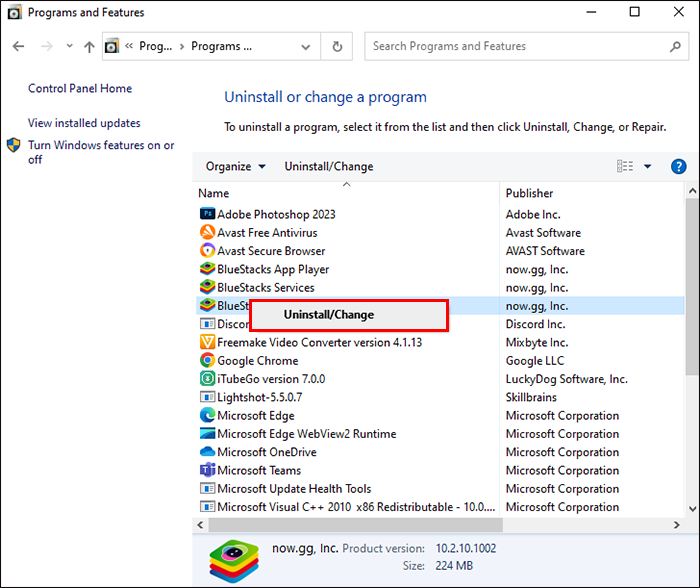
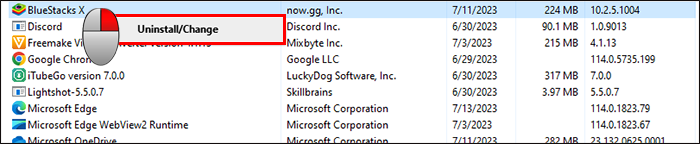
- To uninstall BlueStacks, open the “Control Panel.”
- Click on “Programs and Features.”
- After you find BlueStacks, right-click on it and click “Uninstall.”
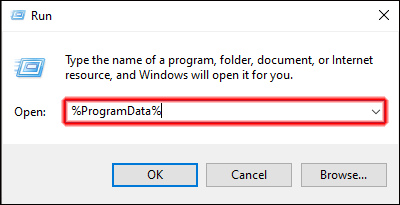
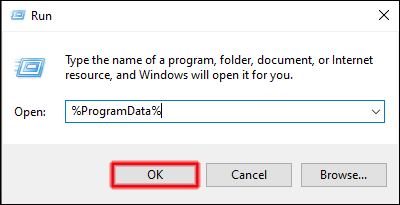
- Open the “Run dialog box.”
- Type “
%ProgramData%”. - Click on “OK.”
- Find the BlueStacks folder in the new window and delete it.

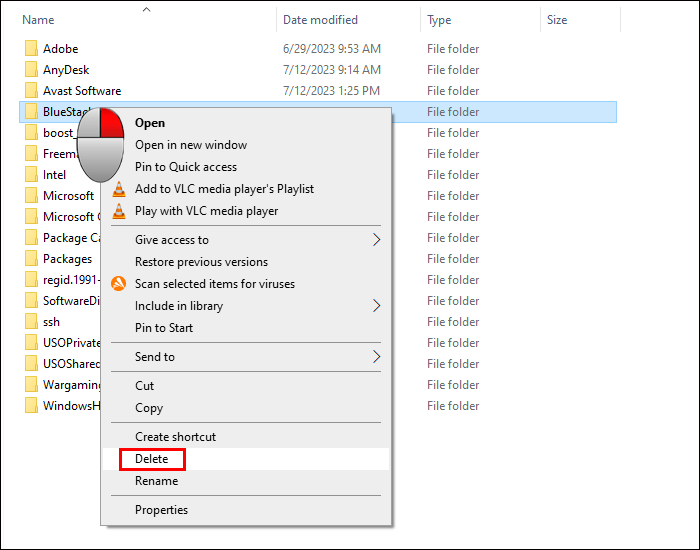
After this, you have successfully deleted the app and its program data, but BlueStacks leaves temporary files on your PC, which you must also delete.
- Open “Run” again.
- Type “
%temp%” and click “OK.” - Select every file in the new folder and delete it.


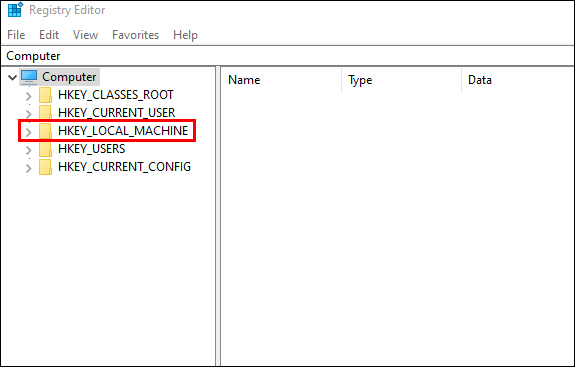
The last thing you need to do when completely removing BlueStacks from your PC is to remove the registry entry.
- Open “Run.”
- Type “
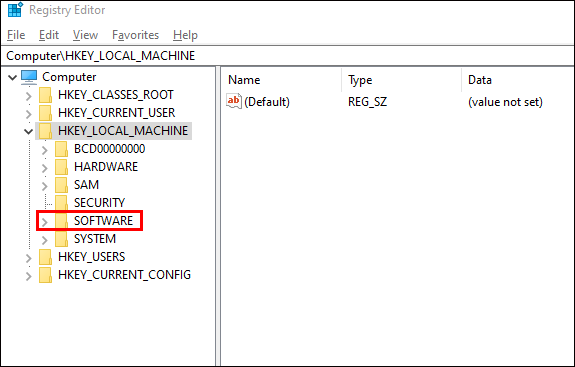
regedit” and click “OK.” - In the “Registry Editor” window, find “
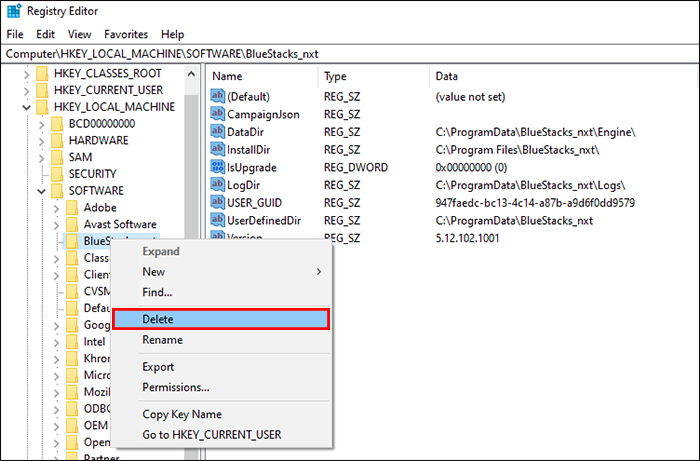
HKEY_LOCAL_MACHINE.” - Click on “Software.”
- In this folder, delete the “BlueStacks nxt” and “BlueStacksInstaller” files.

How to Free Up Disk Space on BlueStacks
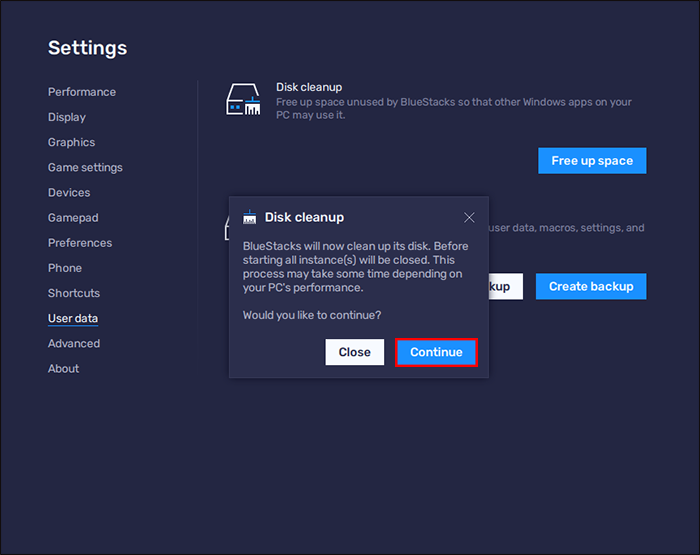
If deleting the BlueStacks entirely from your PC is a lot of work, you can free up disk space on the app and allow your PC to work better. You can free up unused space from the settings menu and the Multi-instance Manager. If you opt for clean-up, after the process is finished, all instances will be stopped and closed, and you will have to wait five minutes to open the app again.
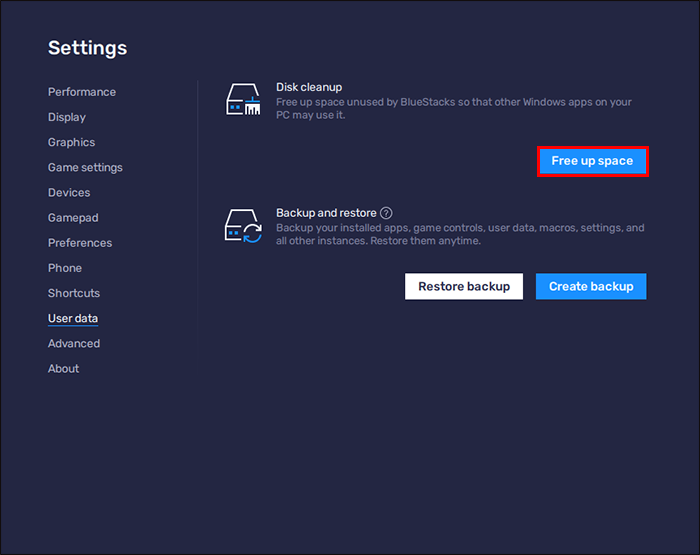
To clean the disk space on Bluestacks from settings:
- In the “Settings” menu, click on the option “User Data.”
- Click on “Free up space.”
- Confirm the action and click “Continue” for BlueStacks to close and clean the disk space.
From Multi-instance Manager, it’s even easier to clean up the space.
- Click on the “Disk Cleanup” icon in the sidebar.
- Click on “Continue” to start the cleaning process.


FAQs
How to uninstall an app from BlueStacks
This can be done from the home screen of the BlueStacks app. All you need to do is find the game you want to uninstall, left-click on it, and choose “Uninstall.”
Where Is my data from BlueStacks saved?
The BlueStacks app is automatically downloaded in the C folder of your file explorer. All the data from the BlueStacks should be saved at “C:\ProgramData\BlueStacks\Engine.”
Can I run two instances on BlueStacks?
Yes, you can create up to four instances on your BlueStacks 5 and run them simultaneously. This can be done by using the Multi-instance Manager. How well the instances will work depend on the specs of your PC.
Does uninstalling BlueStacks delete games?
This can depend on whether you have your game data from BlueStacks synced with your social media account. You can uninstall BlueStacks without losing the game data, instances, and apps if you synced the data.
Multi-Instance Manager Importance for BlueStacks
BlueStacks can be a confusing app to use. Instances on this app can be used for different things, and depending on which action you choose, you can delete, create, manage, and arrange instances. You can delete the master instance and all instances or uninstall BlueStacks completely if it affects the performance of your PC.
What was the reason for deleting the master instance on your BlueStacks? Do you prefer instances on the Android version of 32 or 64-bits? Let us know in the comments section below.
Disclaimer: Some pages on this site may include an affiliate link. This does not effect our editorial in any way.