A virtual reality platform with a massive fanbase, VRChat allows users to customize almost everything about their avatar. From different colors to heights to clothes, VRChat has an option for nearly any creative application. In a world where you can look like anything, unique and creative avatars are half the excitement of the game.
In this article, we’ll show you how to change different aspects of your avatar.
How to Change an Avatar
You can have up to 25 different avatars in VRChat. Whenever you enter the game, you can switch between them. To quickly change your avatar in VRChat, do the following:
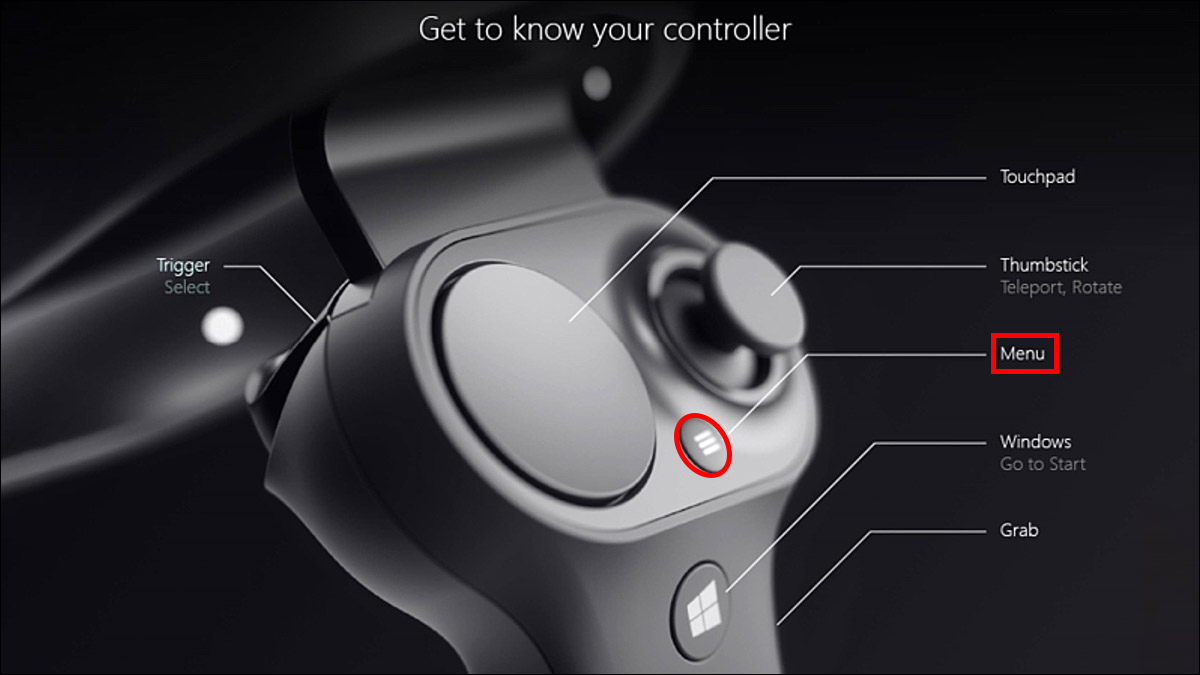
- Press “Menu” on your controller.
- The Quick menu should appear. Navigate to the “Avatar Menu.”
- Click the “Avatar” button. All of your avatars will load.
- Select the avatar you want to change.
You can switch your avatar at any time, whenever you feel like a change.
How to Change Your Avatar Clothes
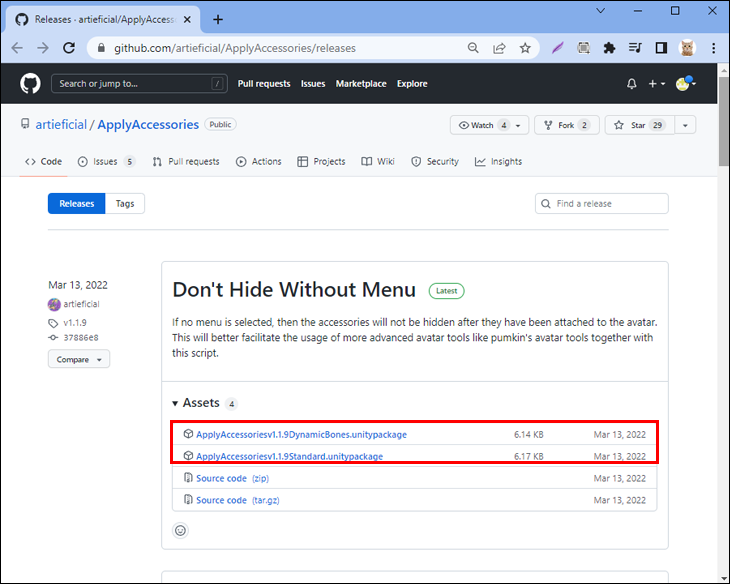
Clothes and accessories are a big part of VRChat and make your avatars unique. You can purchase accessory files from individual creators and upload them to your game. Here’s how to apply the files to your avatar:
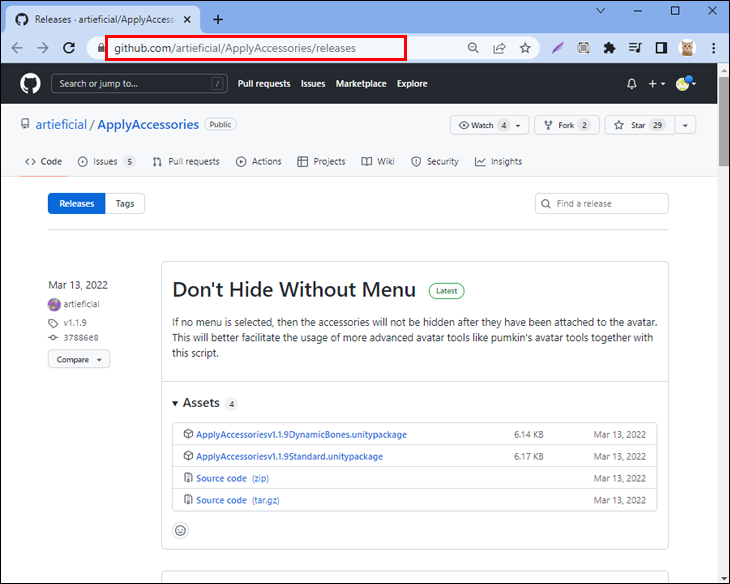
- Click here to get the script you’ll need to use clothes in Unity.

- Download the Unity package.
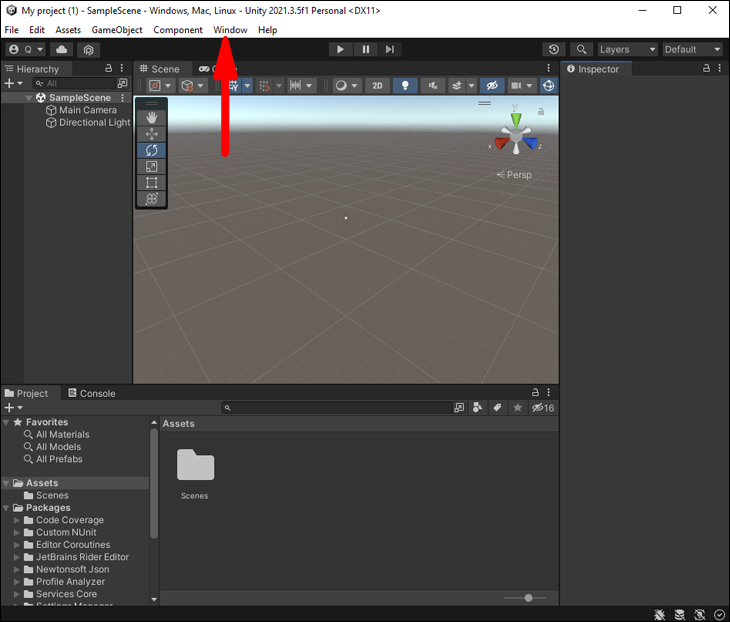
- In Unity, navigate to “Window.”
- Select “Apply Accessories.”
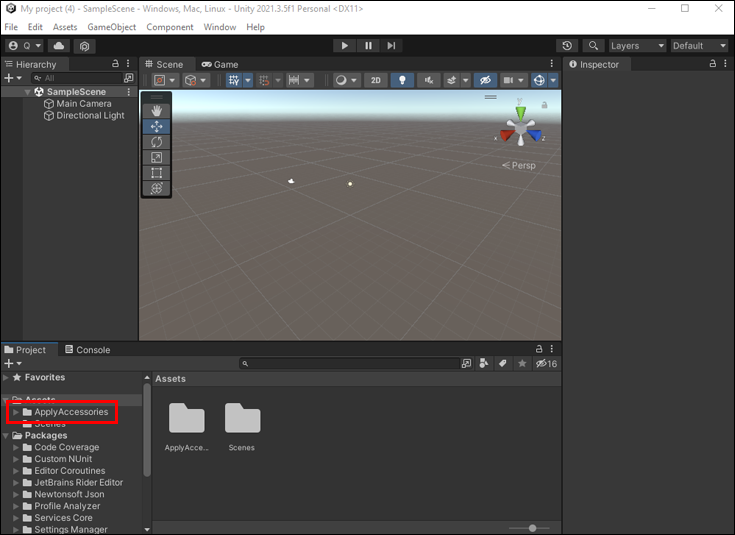
- Drag and drop the new window to the right-hand side to dock it.
- Find your avatar on the left-hand side and drag it to the “Avatar” field on the right. This selects the avatar you’re about to edit.
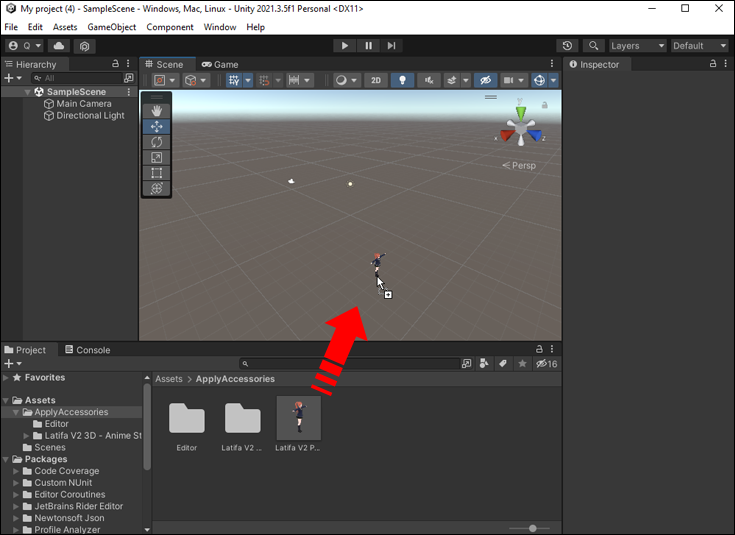
- Next, find the accessory file at the bottom of your screen and drag and drop it into the scene on the left-hand side.
- Drag and drop the accessory from the scene into the “Accessory” field on the right-hand side. You should see the accessory appear on your avatar in the preview.
Now that you have the basic accessory file loaded onto your avatar, the next series of steps involves correctly applying custom animations and interactions with other accessories.
Custom Animations
If you purchased an accessory with custom animations, follow these steps to load them onto your avatar:
- Check the anims folder to see if the accessory came with custom animations.
- If they are present, go to the right-hand window and find the “Custom animations” checkbox.
- Check this box to apply the animations.
Female Blendshape
Some accessories are designed to provide a clear female body type, and the blendshape must be applied to show on the accessories properly. To use the blendshape, do the following:
- Locate the “Female blendshape” dropdown on the right-hand side.
- Click the drop-down to see all available blendshape options with your accessories.
- Select the “Female blendshape” to activate it.
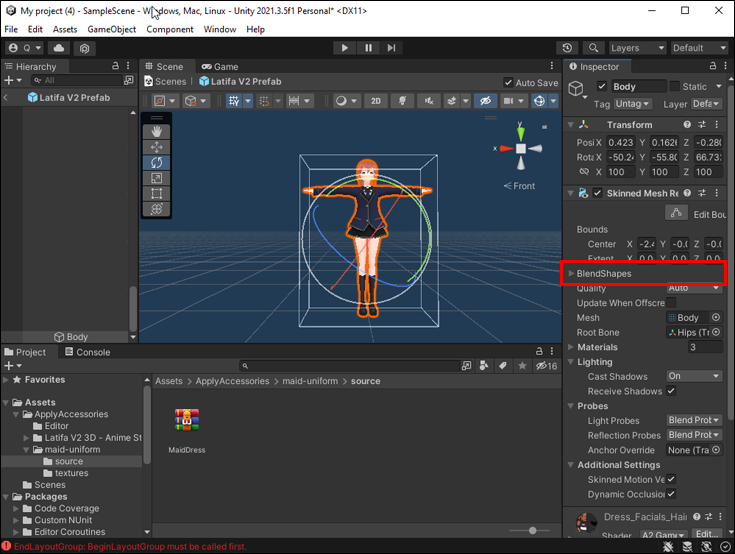
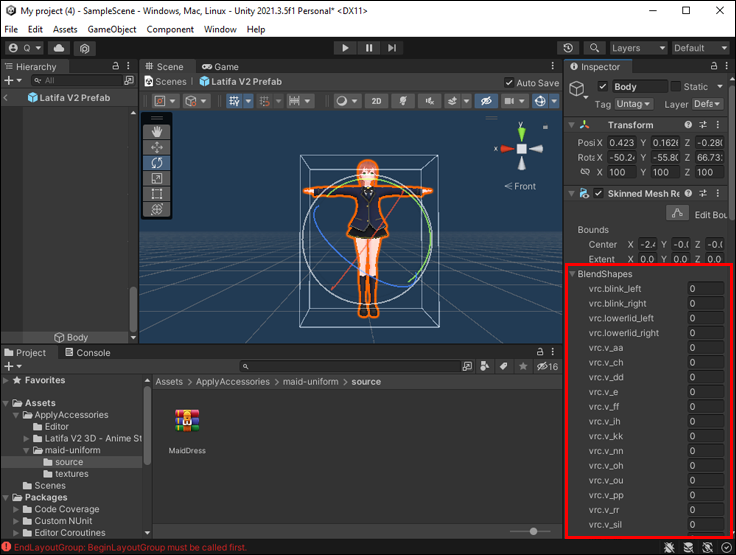
Interactions With Other Accessories
In the “Interactions with Other Accessories” section on the right-hand side, you’ll find the blend shapes for your accessories in a dropdown menu. These blendshapes provide more realistic facial features for your avatar, so it’s vital that you activate them as needed. Please note that not all accessories will need additional action from this section.
The creator of the purchased accessory will likely have included specific instructions on which properties to select. Follow the instructions to apply the accessory to your avatar correctly.
Completing Your Accessories
Once you’ve completed the above steps, click “Apply Changes” in the bottom right. You should now be able to enable the accessories in VRChat.
How to Change Your Avatar on the Website
If you ever experience a bug in your game that consistently causes a crash, one of the best ways to reset is to switch out the avatar you’re using. This will let you navigate the game enough to find where the bug was introduced and fix the file. Here’s how to change your avatar on the website:
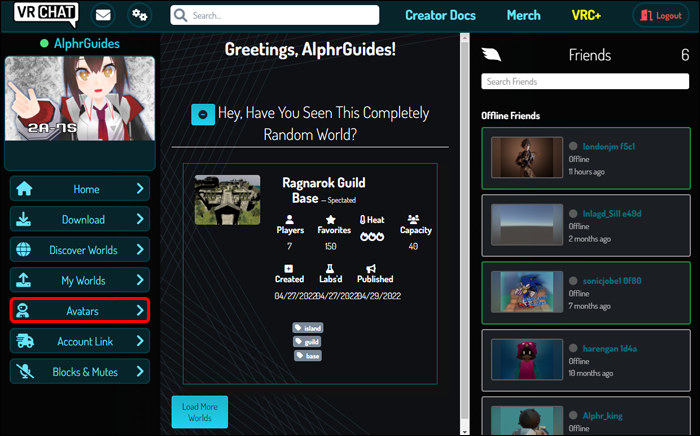
- Go to the VRChat website and log in to your account.
- Click on “Avatar.”
- Find the “Reset to Default Avatar” button to the right of the current avatar.
- Click “Reset to Default Avatar.”

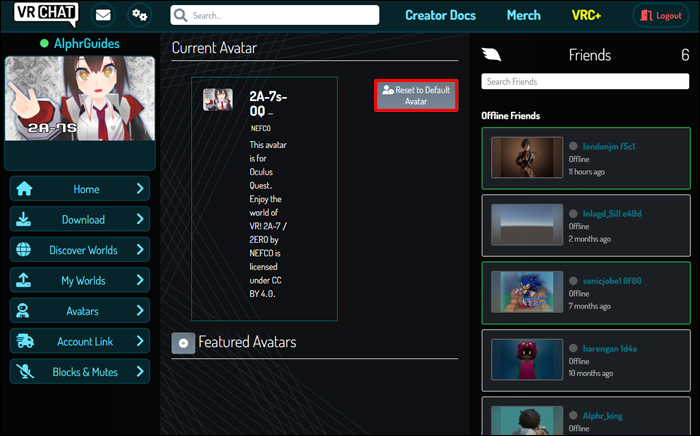
Your default avatar should be stable enough that you can investigate what went wrong without continually crashing your game.
Change Avatar Height
One way users like to change the look of their avatars is to alter the height. This is technically done by changing the viewpoint of a character in relation to their virtual environment. To change the height of your avatar, do the following:
- On the left-hand side, click on the avatar in the hierarchy system.
- The inspector will appear on the right-hand side. Go to the “Transform” tab.
- Find “Scale.”
- Enter a higher or lower number into the “x,” “y,” and “z” axes. Enter a smaller number to decrease the avatar’s height or a larger number to increase the avatar’s height.
- Go to “VRC Avatar Descriptor” on the bottom right of the screen.
- Find “View Position.”
- Increase the “Y” scale if trying to make the avatar taller. Decrease the “Y” scale if trying to make the avatar smaller.
- This will move the grey viewpoint sphere up and down. You want the viewpoint’s height to be just between the avatar’s eyes.
- Increase or decrease the “Z” scale of the view position until the viewpoint is just in front of the avatar, between their eyes.
If you made your scales smaller or larger, your avatar should appear shorter or taller in VRChat. You can keep adjusting the scales for a more dramatic effect.
Change Avatar Color
You can change nearly every aspect of your avatar, including its color. However, it’s not as simple as clicking on the item you want to change and then sliding a cursor around until the color is where you like it.
As everything in VRChat is uploaded, if you decide to change the color of something, you must first change the image file’s baseline texture. To do so, you’ll need photo editing software. Many people use Photoshop for this process, but we recommend using GIMP, which is free.
To change the texture of an image file using GIMP:
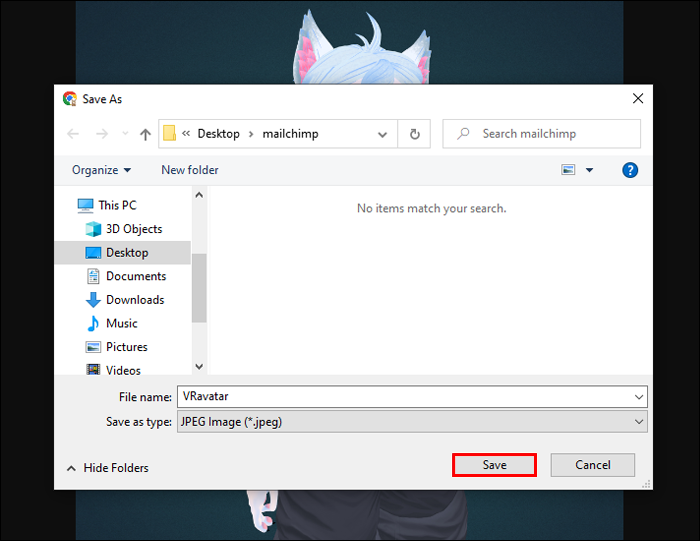
- Find the image you want to change and save it to your computer.
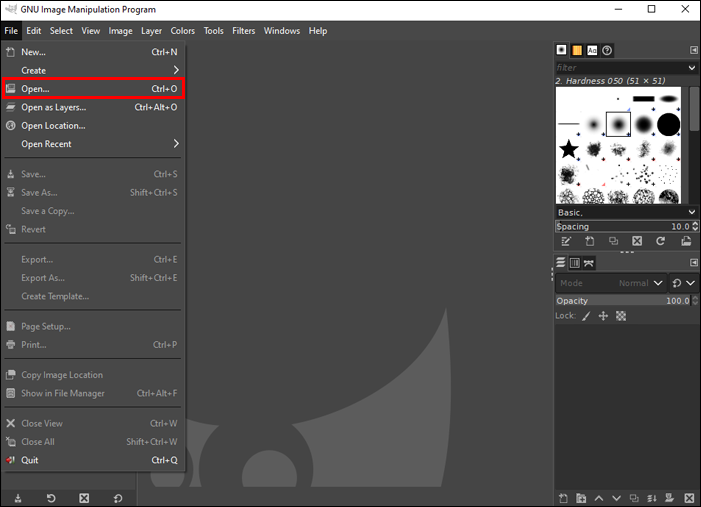
- Open GIMP and go to “File” and then “Open.”
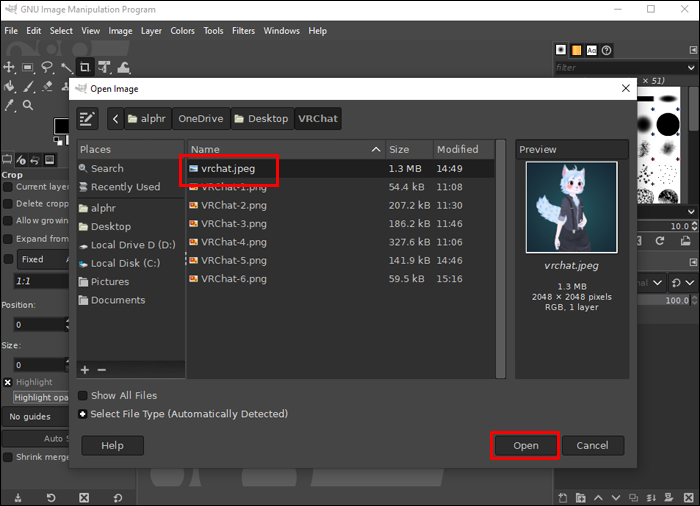
- Select the photo you saved to your computer and import it into GIMP.
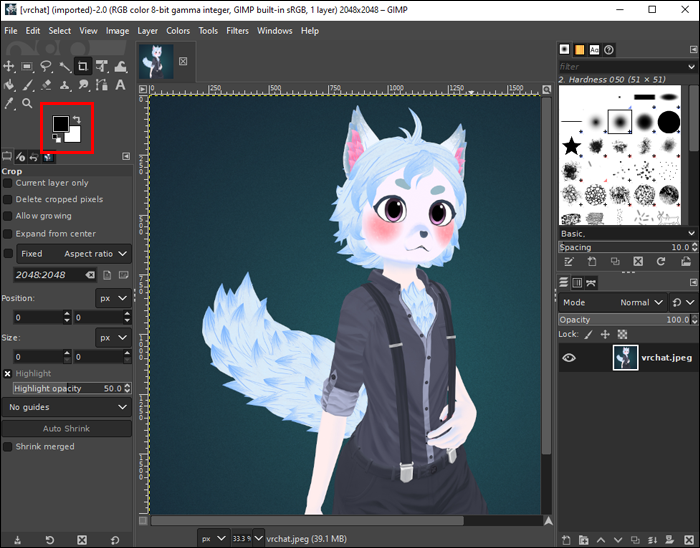
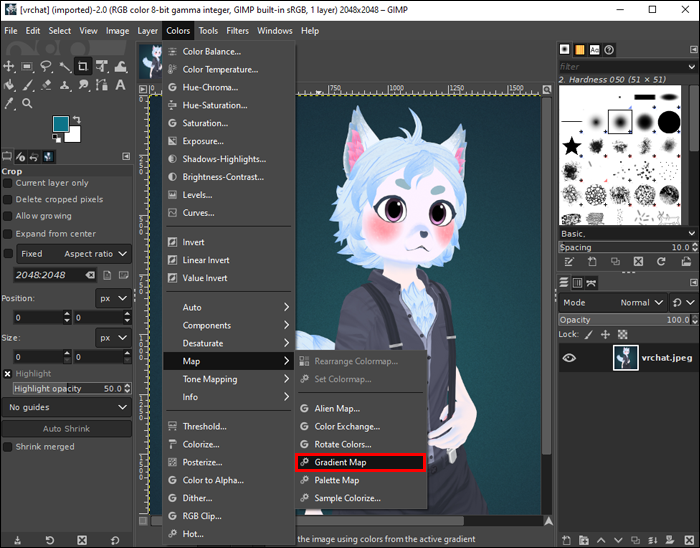
- Click on the two squares in the top left-hand corner. A color window will open up.
- Slide the cursor around until you find the color you like. From the “Colors” menu, go to “Map” and then select “Gradient Map.” This will change the color of the image.
- Select “File” and then “Export As.” Export as PNG.
- Go back to your Unity Project and open up your files. Drag and drop the file into your Project. Then, click in the item you want to change.
- On the right-hand side of the screen, drag and drop the file into the “Main Texture” block.

There are other settings within VRChat that you can play around with, such as rim lighting and metcap settings, to get the specific change you want. Different textures will appear different on various items and avatars.
Massive Customization for Every World
Thanks to VRChat’s massive customization, you’re guaranteed to create an avatar as unique as you. From stylized clothes, hair, and unique body shapes, there’s an avatar style for everyone.
Are you a player in VRChat? What is your favorite avatar customization? Let us know in the comments section below.
Disclaimer: Some pages on this site may include an affiliate link. This does not effect our editorial in any way.