OneDrive comes in handy when you’re not interested in creating additional accounts in similar Cloud apps, but want to use what you already have in your Windows 10 system. This storage allows you to keep your files in a safe place, easily share them with others, and work on them with your colleagues in real time.
But what if one account on OneDrive isn’t enough for you? Can you have more, and how do you switch between them? Read on to find out.
How to Switch Between OneDrive Accounts
When you use your OneDrive account, you actually create folders where you’ll keep your files. You can also create multiple OneDrive accounts and use them for different purposes. That said, you can’t access the files from one folder from different accounts at the same time.
Here’s how to switch from one OneDrive account to another:
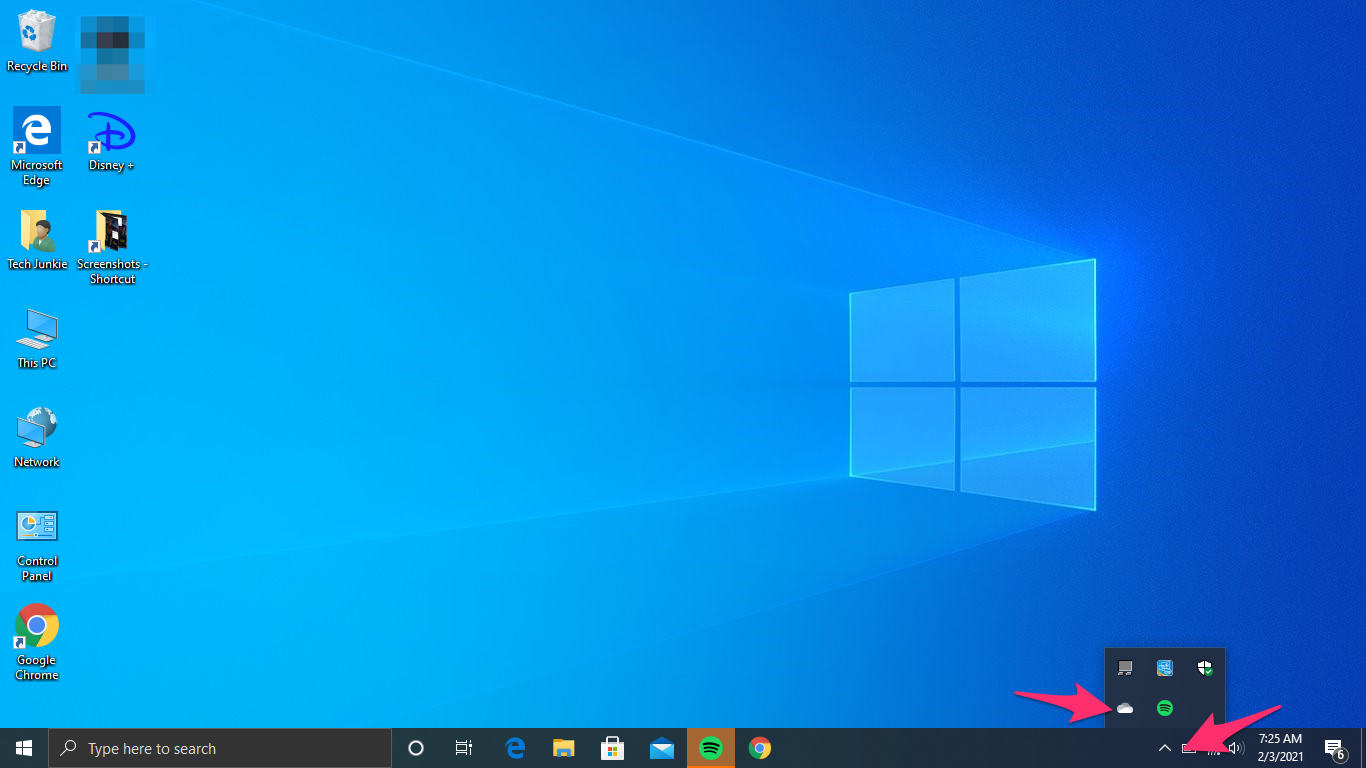
- Go to the notification area and right-click on the OneDrive icon. In case you don’t see the icon, open the Hidden icons menu to find it. It’s in the right corner of the taskbar.

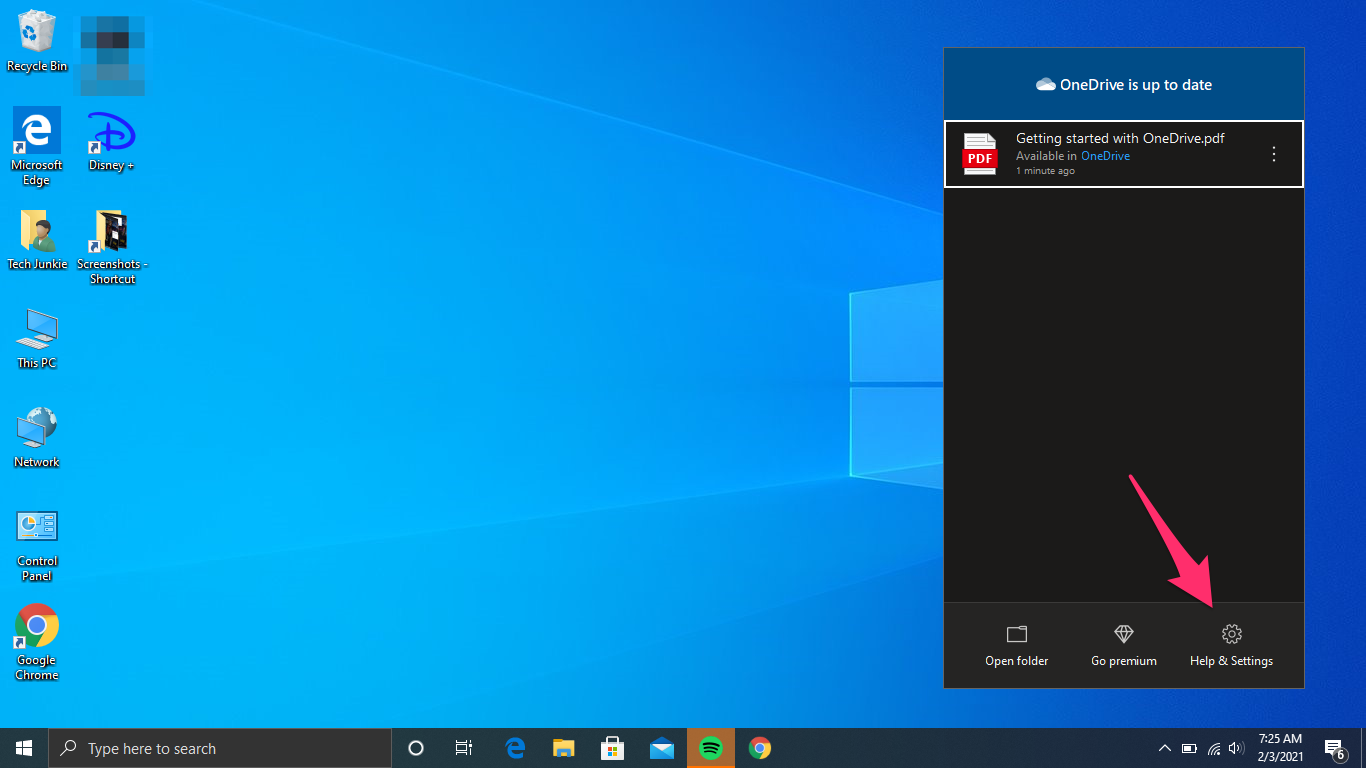
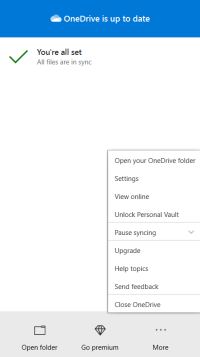
- When the OneDrive window opens, click on Help & Settings in the bottom right corner.
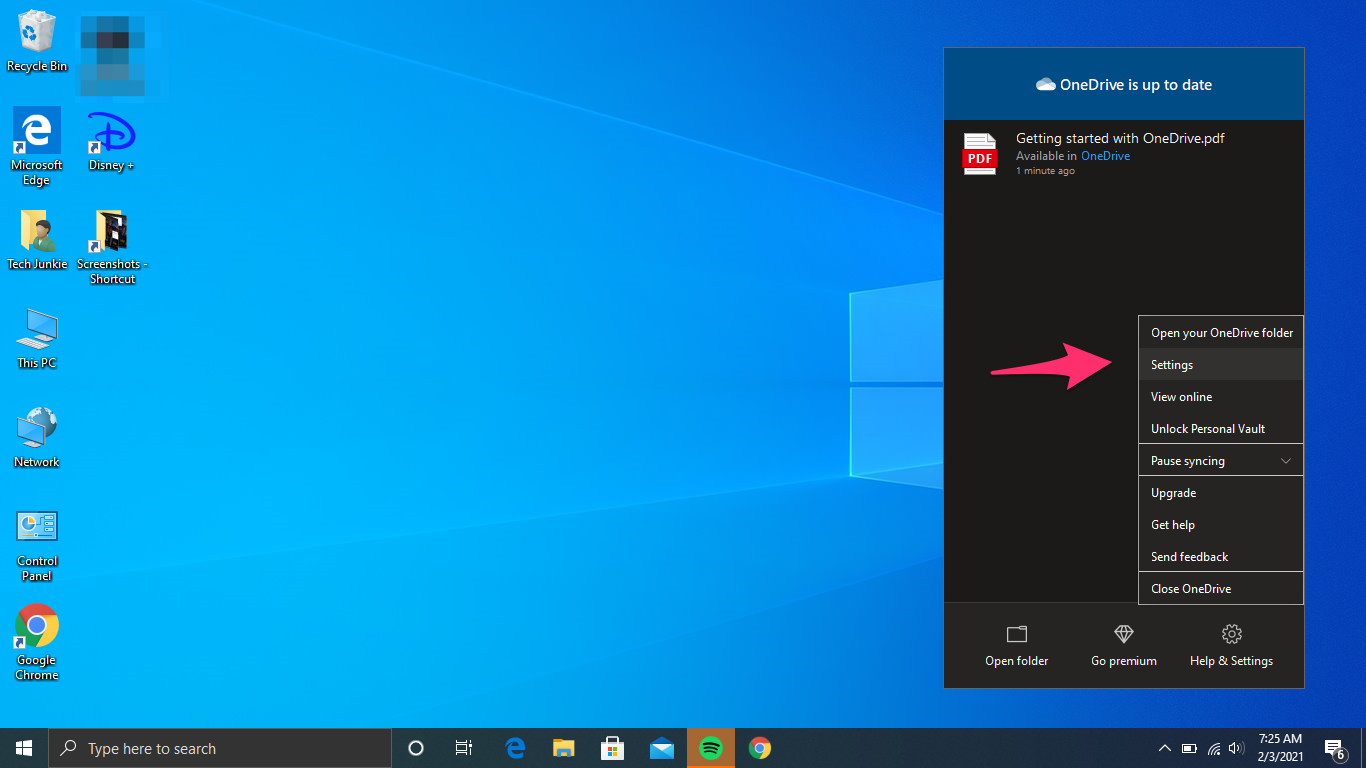
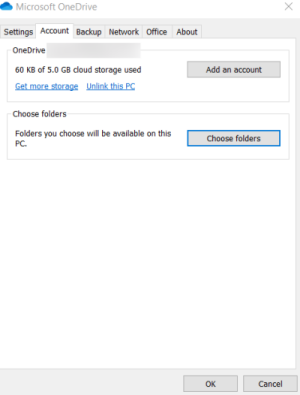
- Select Settings from this list.
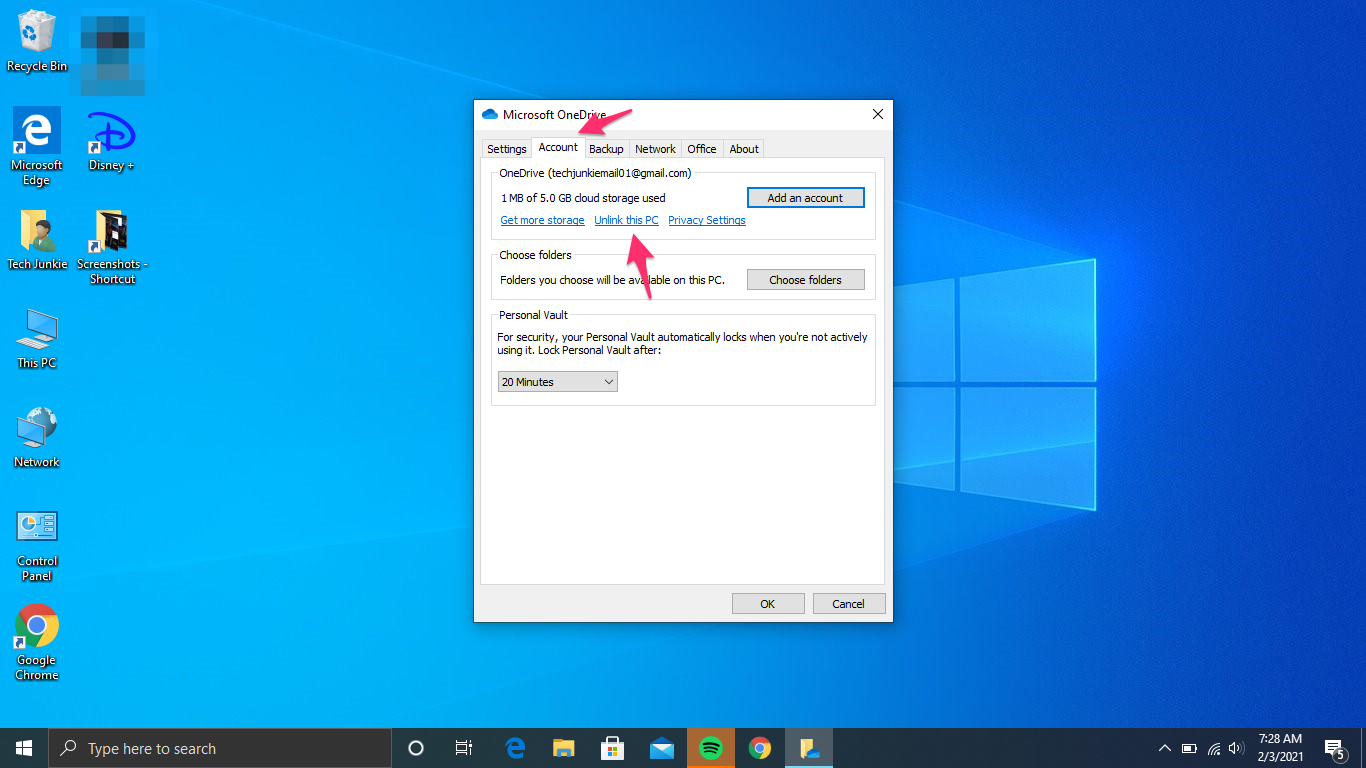
- From the Account tab (it should open by default), choose Unlink OneDrive or Unlink this PC.
- When you’ve done this, restart the OneDrive app and add the new account. Choose the location for your new folder and make sure it’s different from the first folder because the folders will merge if you choose the same one. Turn on the Fetch files option again.

If you want to use the previously unlinked account again, just repeat the same steps.
How to Create a New Account on OneDrive
If you want to use two or more accounts on OneDrive, here’s how to do so. You have to have a Microsoft account in order to use OneDrive, so if you don’t already have one, you’ll need to create one. You can do this by visiting onedrive.com and signing up. You can choose the free plan, create a new address and a password and follow the instructions for completing the process. When you’re done, move on to signing in to your OneDrive Account.
- Click on the Arrow button on the taskbar and scroll to find OneDrive.
- Click to open and enter your email address to sign in.
- In the next window, type in your password and click on Sign in to complete.
- Click Next if you don’t want to change location for the OneDrive folder. It’s recommended to do it, however, if you’re creating a second account and such folder already exists. Changing location might help you avoid problems when syncing files.

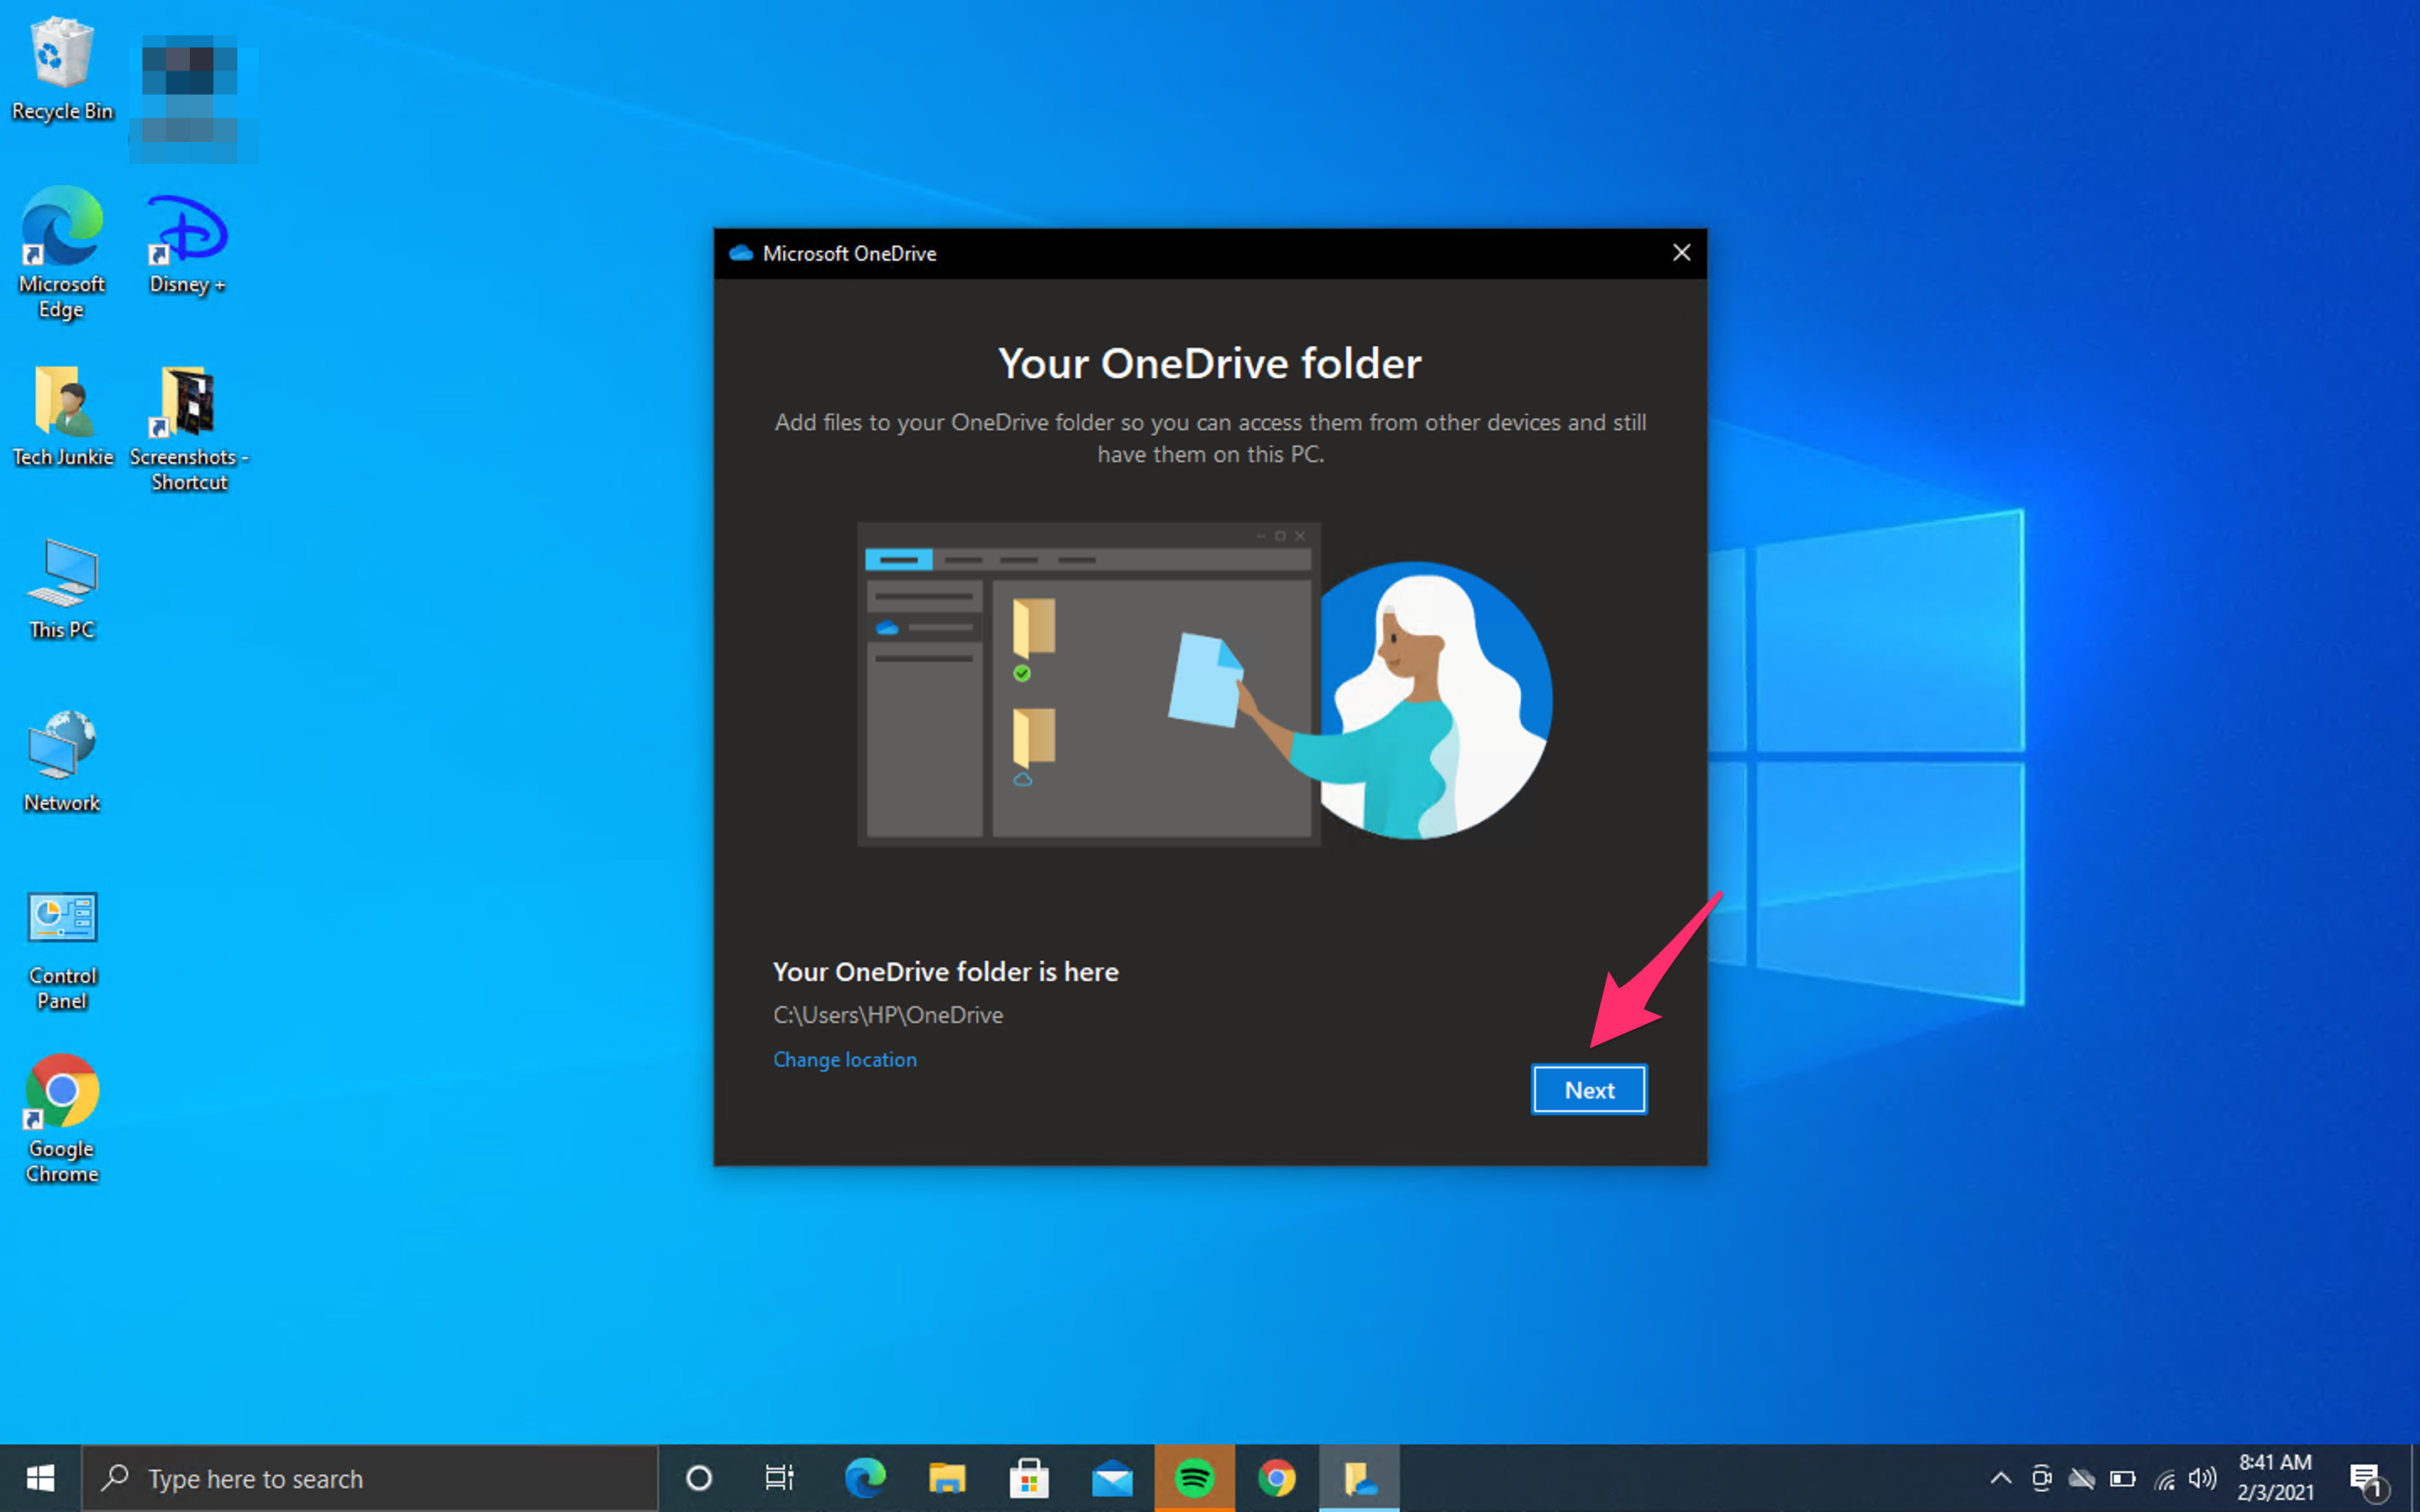
If you’re using the free plan, skip the next step by clicking on Not now.
Read welcome tips (don’t just skip them, they may turn out to be quite helpful) and select Open my OneDrive folder to finish the process – you can upload files to your online storage.
How to Upload Files to OneDrive
If you’re not sure how to upload files and keep them safe in your OneDrive storage, just follow these steps:
- Go to File Explorer and find OneDrive icon in the menu on the left. Click to open.
- Select the file you’d like to upload and simply drag it to the OneDrive folder.
- When you do this, the file will automatically be synced to your OneDrive account. If you’ve, for example, opened a new Microsoft Word document and haven’t saved it to your PC yet, you can save it in your OneDrive folder and avoid the “dragging” part.


What If Your Files Aren’t Syncing Correctly
There are plenty of reasons why your files aren’t syncing correctly and each one has a corresponding icon and a way to solve the issue. The two most common problems are running out of storage space and not having a stable internet connection.
You’re Running Low on Space
When your OneDrive account is almost full, you’ll see a little orange yellow triangle icon with an exclamation mark.
If you want to avoid having your account frozen, you can buy more storage, delete something from your OneDrive folders, or choose what you’re going to sync instead of syncing all the folders in OneDrive. You can choose specific folders by doing the following:
- Open the OneDrive menu from the taskbar.
- Select More – it’s in the bottom right corner.
- Click on Settings and choose the Account tab when a new window opens.
- Click on Choose folders.
- As a new dialogue box opens, uncheck the folders you no longer want to sync.
- Click on OK to confirm.

Your Internet Connection Is Slow
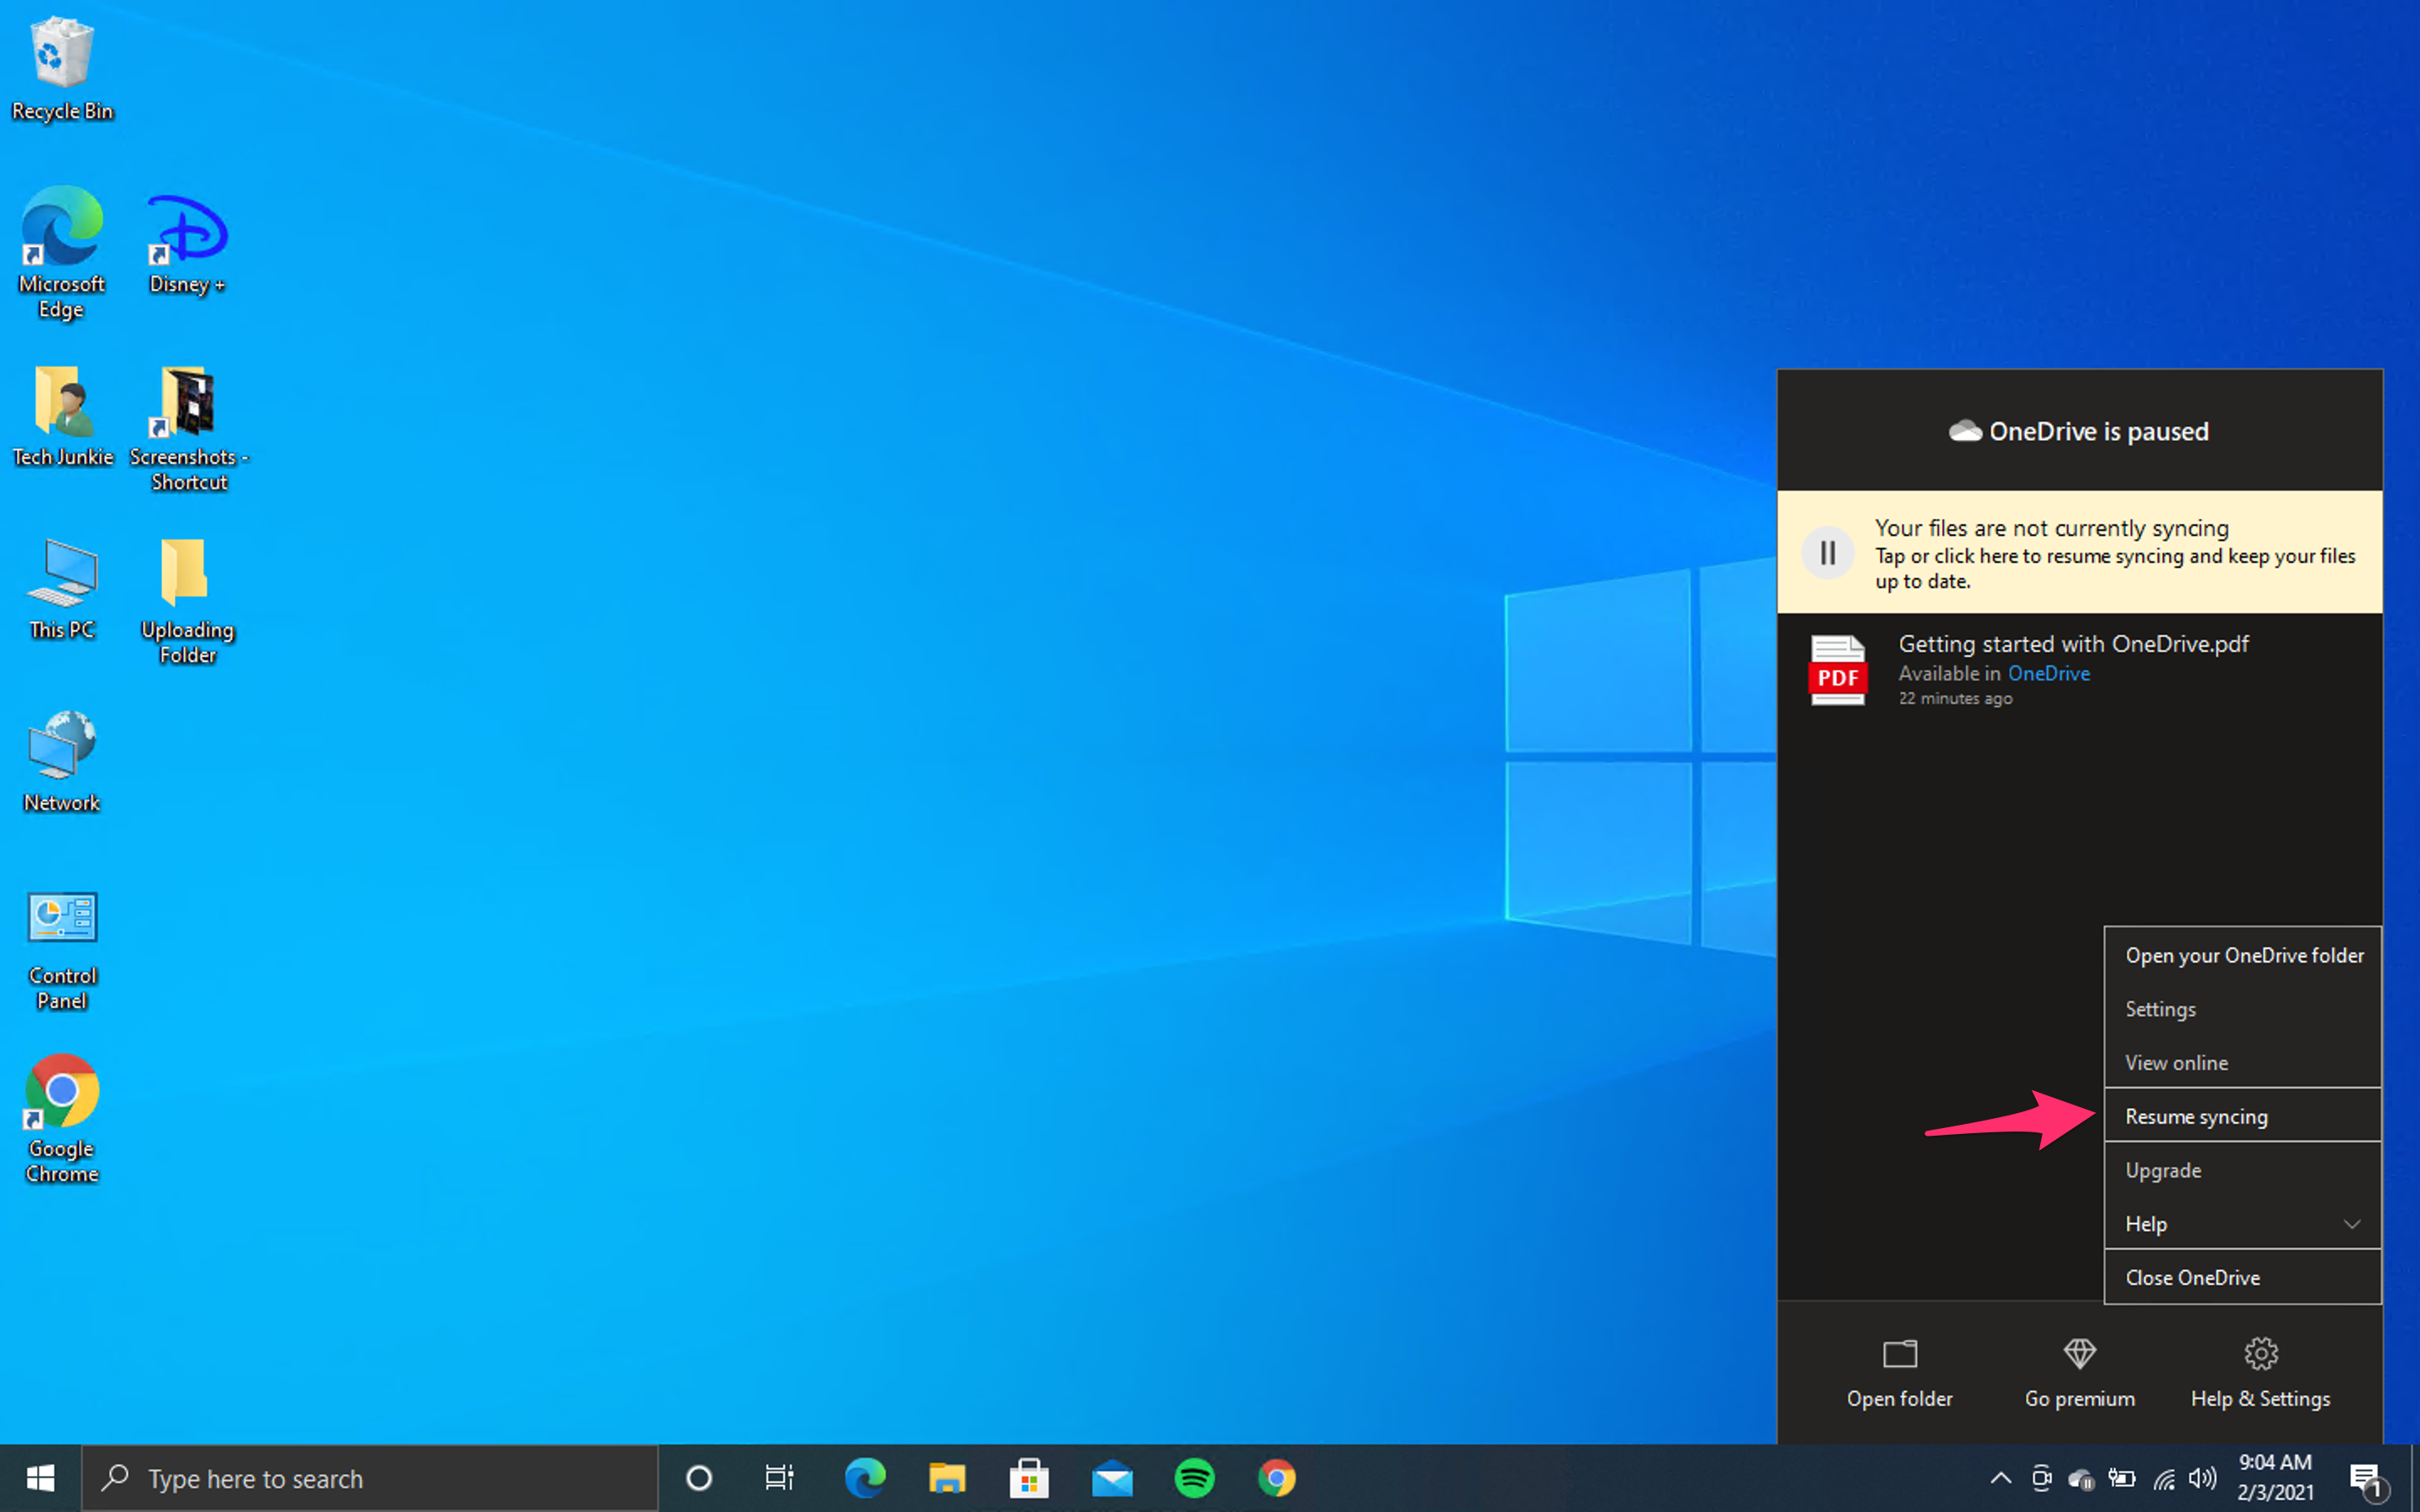
In case your internet connection is slow, the files may not be syncing correctly. Until you have a better connection, you can pause and later resume the sync.
- Click on the OneDrive icon on your taskbar.
- Click on Help & Settings when the new window opens.
- Choose Pause syncing. You can choose for how long you want the syncing to be paused – 2, 8 or 14 hours.
- When you wish to continue, click on Resume syncing, which will appear here instead.

Keep Your Files Safe and Within Reach
OneDrive is a great way to keep your files within reach – you can access them anytime you want, and you don’t have to worry about losing important folders and data if your computer crashes. Multiple accounts will give you more space and you can switch between them anytime you want.
Do you have a OneDrive account? What do you use it for? Tell us in the comments section below!
Disclaimer: Some pages on this site may include an affiliate link. This does not effect our editorial in any way.


